1. Safety Information
Please read all safety instructions carefully before using the beoka ACM-PLUS-A1 Cordless Air Compression Leg Massager. Failure to follow these instructions may result in injury or damage to the device.
- Always use the massager while seated and avoid using it while distracted or sleeping.
- Keep the massager away from water and do not submerge it.
- Always follow the charging instructions and do not overcharge the battery.
- Be cautious when using the app to control the massager and ensure it is used in a safe and secure environment.
- Consult a healthcare professional before use if you have any pre-existing medical conditions, especially those related to circulation, blood clots, or skin conditions.
- Do not use on swollen, inflamed, or injured areas of the skin.
- Keep out of reach of children.
2. Product Overview
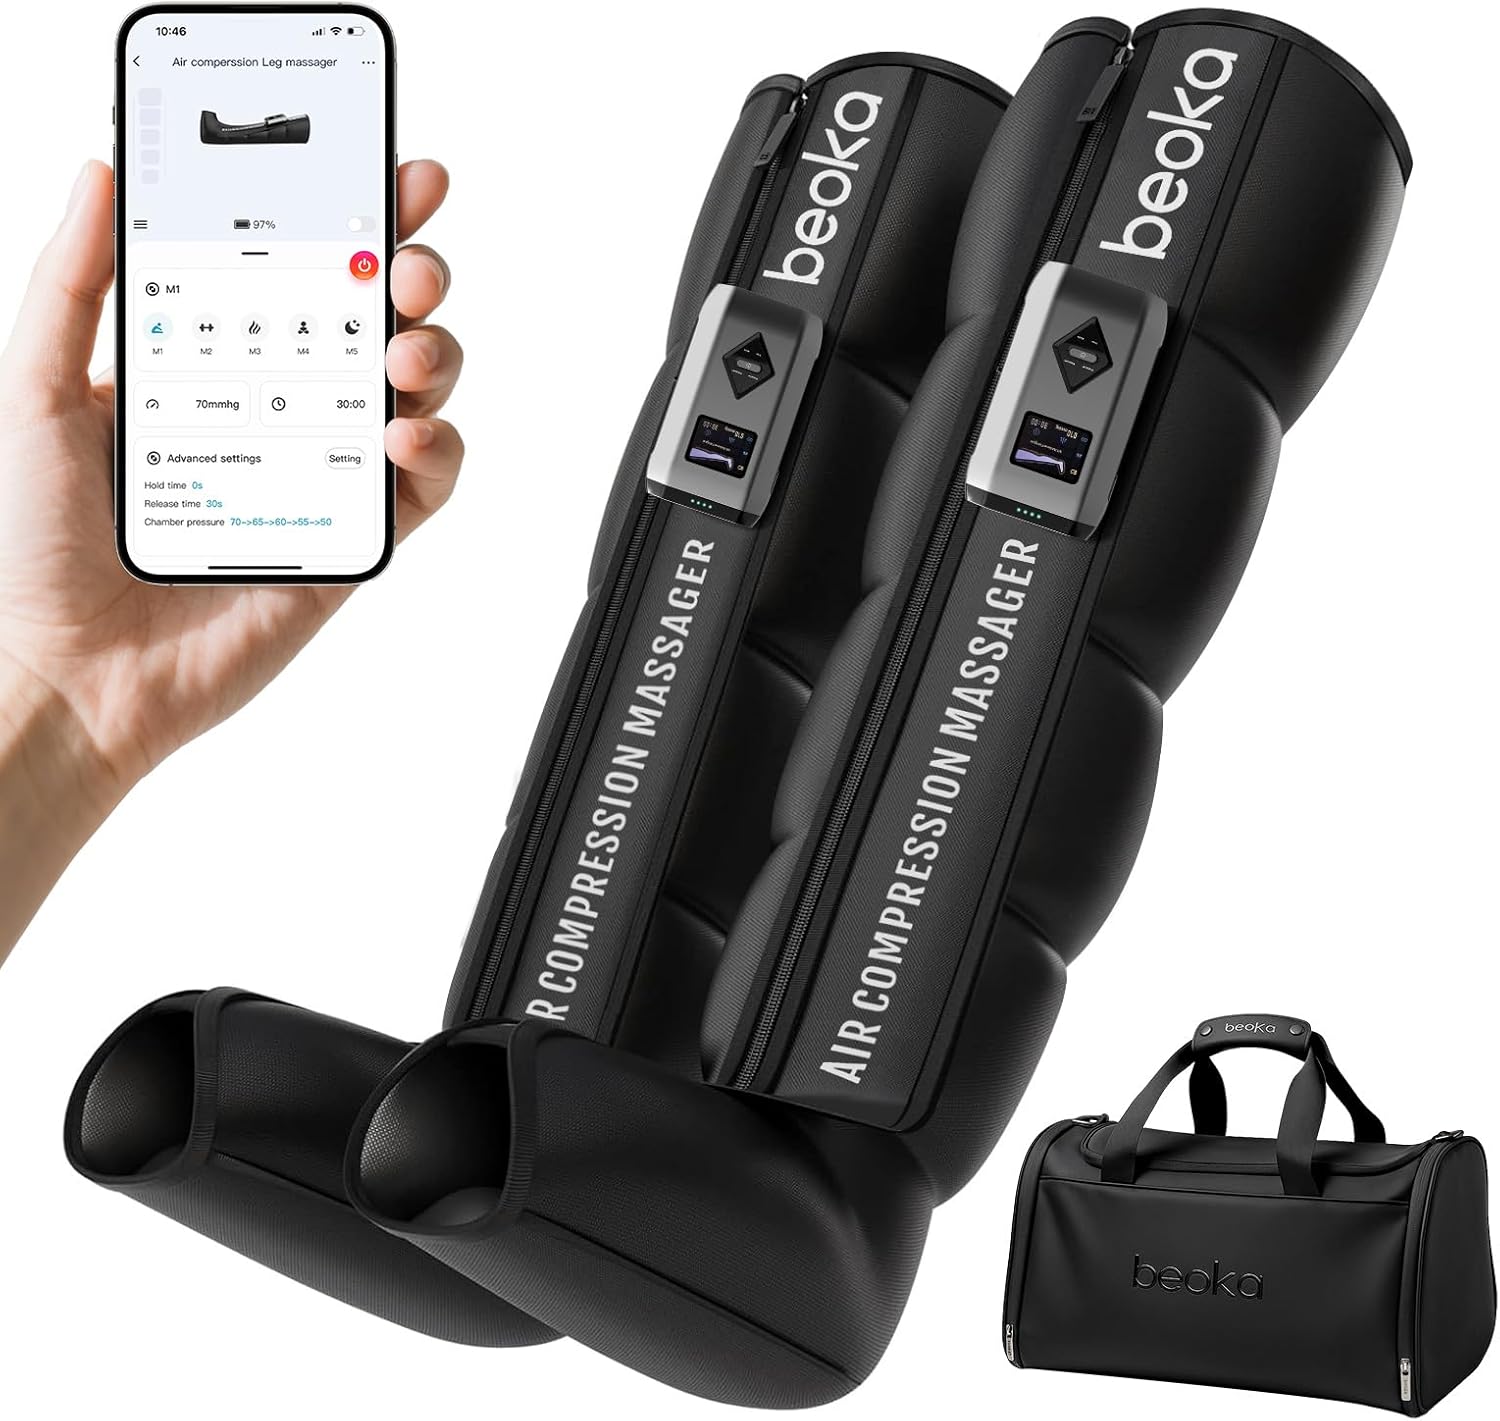
The beoka ACM-PLUS-A1 is a cordless air compression leg massager designed to promote circulation, relieve muscle fatigue, and aid in recovery. It features a tubeless design, removable battery, and smart app control for a personalized massage experience.
Key Features:
- 75 Customized Massages: 5 massage modes and 15 adjustable intensities.
- Fully Overlapping Air Chambers: Provides 360-degree compression for comprehensive massage from feet to upper thigh.
- Cordless & Removable Battery: Offers portability and up to two hours of massage on a full charge.
- LCD Display & APP Connection: Easy operation via visual mini controller or smartphone app.
- Large Capacity Battery: Upgraded 2600mAh battery for extended use.
- Easy to Clean: Made with materials that simplify maintenance.
3. Package Contents
Verify that all items are present in your package:
- 2 x beoka Air Compression Leg Massager Boots
- 2 x Removable Battery Units (2600mAh each)
- 2 x USB-A to USB-C Charging Cables
- 1 x Carrying Bag
- 1 x User Manual (this document)
4. Setup
4.1 Charging the Battery
Before first use, fully charge both battery units. The battery units can be charged separately or while attached to the boots.
- Connect the USB-C end of the charging cable to the battery unit.
- Connect the USB-A end to a compatible USB power adapter (not included).
- The battery indicator lights on the unit will illuminate to show charging progress. All lights will be solid when fully charged.

4.2 Attaching the Battery Unit to the Boot
Each leg massager boot has a designated slot for a battery unit.
- Locate the slot on the side of the leg massager boot.
- Align the battery unit with the slot, ensuring the electrical contacts match.
- Gently slide the battery unit into place until it clicks securely.

4.3 Wearing the Leg Massager Boots
Ensure the boots fit comfortably and securely for optimal compression.
- Unzip the leg massager boot completely.
- Slide your leg into the boot, ensuring your foot is positioned correctly at the bottom.
- Zip up the boot. Adjust the fit using the lacing if available, or ensure the zipper is fully closed for proper compression.
- Repeat for the other leg.

5. Operating Instructions
5.1 Powering On/Off
Press and hold the power button on the control unit (located on the battery unit) for a few seconds to turn the device on or off.
5.2 Selecting Modes and Intensity
The device offers 5 massage modes and 15 intensity levels.
- Once powered on, the LCD display will show the current mode and settings.
- Use the 'Mode' button to cycle through the 5 available massage modes (M1-M5).
- Use the 'Pressure+' and 'Pressure-' buttons to adjust the intensity (15 levels).
- Use the 'Time' button to set the massage duration (15/20/25/30/35/40/45/50/55/60 minutes).

5.3 Using the App Control
For enhanced control and personalized settings, connect the device to the dedicated smartphone app.
- Download the beoka app from your smartphone's app store.
- Ensure Bluetooth is enabled on your smartphone.
- Open the app and follow the on-screen instructions to pair with your beoka ACM-PLUS-A1 device.
- The app allows for precise control over modes, intensity, timing, and advanced settings.

5.4 Quick Release Pressure
In case of discomfort or if you need to quickly remove the boots, locate the quick release switch on the side of the control unit. Flipping this switch will immediately stop compression and release the air.
6. Maintenance
6.1 Cleaning
The leg massager boots are made of easy-to-clean materials.
- Wipe the surface of the boots with a soft, damp cloth after each use.
- Do not use abrasive cleaners or submerge the boots or control unit in water.
- Ensure the device is completely dry before storing.
6.2 Storage
Store the device in a cool, dry place away from direct sunlight.
- Detach the battery units from the boots before long-term storage.
- Use the provided carrying bag for convenient and protected storage.
- The boots are foldable for compact storage.
7. Troubleshooting
If you encounter any issues with your beoka ACM-PLUS-A1, refer to the following common problems and solutions:
| Problem | Possible Cause | Solution |
|---|---|---|
| Device does not power on. | Low battery or battery not properly attached. | Ensure battery is fully charged and securely attached. |
| No compression or weak compression. | Boots not zipped correctly, low battery, or incorrect mode/intensity setting. | Check zipper closure, charge battery, adjust mode/intensity. |
| App not connecting to device. | Bluetooth off, device not in pairing mode, or app issue. | Ensure Bluetooth is on, restart device and app, try re-pairing. |
| Uncomfortable pressure. | Intensity setting too high. | Reduce intensity using 'Pressure-' button or via the app. Use quick release if necessary. |
8. Specifications
- Model Number: ACM-PLUS-A1
- Product Dimensions: 8 x 5 x 33 inches
- Item Weight: 4.45 Pounds
- Batteries: 2 x 12V batteries required (included)
- Power Source: Battery Powered
- Material: Nylon
- Manufacturer: Sichuan QianIi-beoka Medical TechnoIogy lnc.

9. Warranty and Support
For warranty information, product support, or service inquiries, please contact the manufacturer, Sichuan QianIi-beoka Medical TechnoIogy lnc., or refer to the official beoka website. Keep your purchase receipt for warranty claims.