1. Introduction
This manual provides comprehensive instructions for the assembly, operation, and maintenance of your Generic 23x22FT Double Garage Metal Shed. Please read this manual thoroughly before beginning assembly and retain it for future reference. Proper assembly and maintenance will ensure the longevity and safe use of your shed.
This metal shed is designed to provide approximately 500 square feet of enclosed space, suitable for storing tools, machinery, farm equipment, or vehicles. Its robust 16 GA steel frame offers durability and can withstand wind speeds up to 46 mph and snow loads of 21 lb per square foot. The shed features two 8-foot wide garage door openings for easy access and a convenient side entry door.
2. Safety Information
WARNING: Failure to follow these safety instructions may result in serious injury or property damage.
- Site Preparation: Ensure the assembly site is level, firm, and free of obstructions. Proper foundation is crucial for stability.
- Two-Person Assembly: Assembly requires at least two adults. Some components are heavy and awkward to handle alone.
- Protective Gear: Wear appropriate personal protective equipment, including gloves, safety glasses, and sturdy footwear, during assembly.
- Sharp Edges: Metal components may have sharp edges. Handle with care to prevent cuts.
- Weather Conditions: Do not attempt assembly in strong winds, rain, or other adverse weather conditions.
- Anchoring: Securely anchor the shed to the ground immediately after assembly to prevent wind damage. Anchoring hardware may be sold separately.
- Electrical Safety: If installing electrical wiring, consult a qualified electrician and adhere to all local codes.
- Ventilation: Ensure adequate ventilation if storing flammable materials or operating machinery inside.
- Children and Pets: Keep children and pets away from the assembly area.
3. Setup and Assembly
This section outlines the general steps for assembling your metal shed. Refer to the detailed diagrams and part numbers provided in the included assembly guide for specific instructions. Ensure all parts are present before beginning.
3.1 Unpacking and Part Identification
Carefully unpack all components. Lay them out in an organized manner and compare them against the parts list provided in your package. Report any missing or damaged parts immediately to the manufacturer.
3.2 Foundation Preparation
A solid, level foundation is critical for the stability and longevity of your shed. Options include a concrete slab, treated timber frame, or gravel base. Ensure the foundation extends beyond the shed's footprint by at least 6 inches on all sides.
3.3 Frame Assembly
Begin by assembling the base frame according to the diagrams. Then, erect the vertical support posts and roof trusses. Ensure all bolts are finger-tightened initially, then fully tightened once the frame is square and plumb.
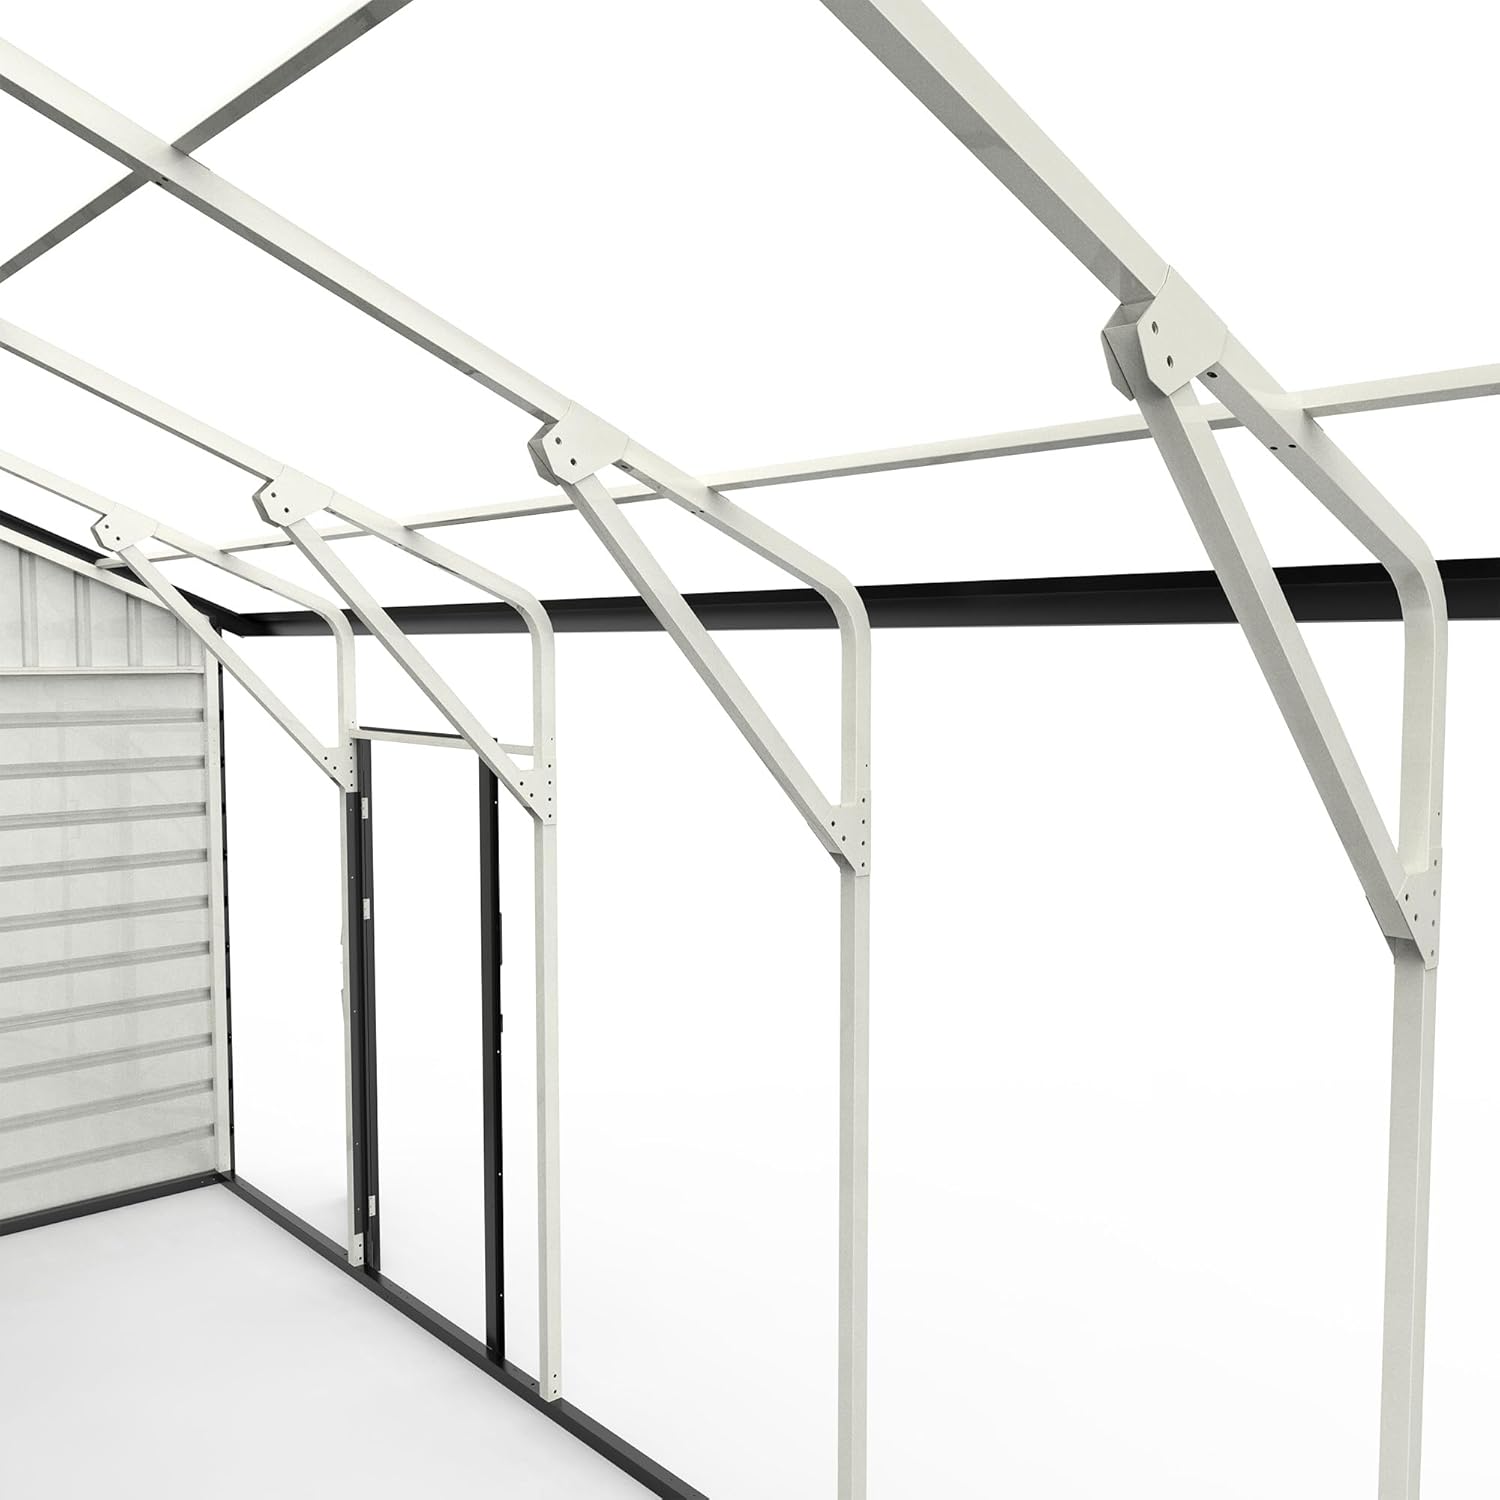
Figure 3.3.1: Interior view showing the assembled steel frame and roof trusses. This image illustrates the structural components before the exterior panels are attached.
3.4 Wall Panel Installation
Attach the wall panels to the assembled frame, starting from one corner. Overlap panels as indicated in the instructions to ensure weatherproofing. Secure panels using the provided screws and fasteners. Pay close attention to the orientation of the panels.

Figure 3.4.1: Exterior view of the shed with wall panels partially installed. This image shows the corrugated metal panels forming the side walls of the structure.
3.5 Roof Panel Installation
Install the roof panels, ensuring proper overlap and alignment for water runoff. Secure them firmly to the roof trusses. Install ridge caps and trim pieces as the final step for weather sealing.
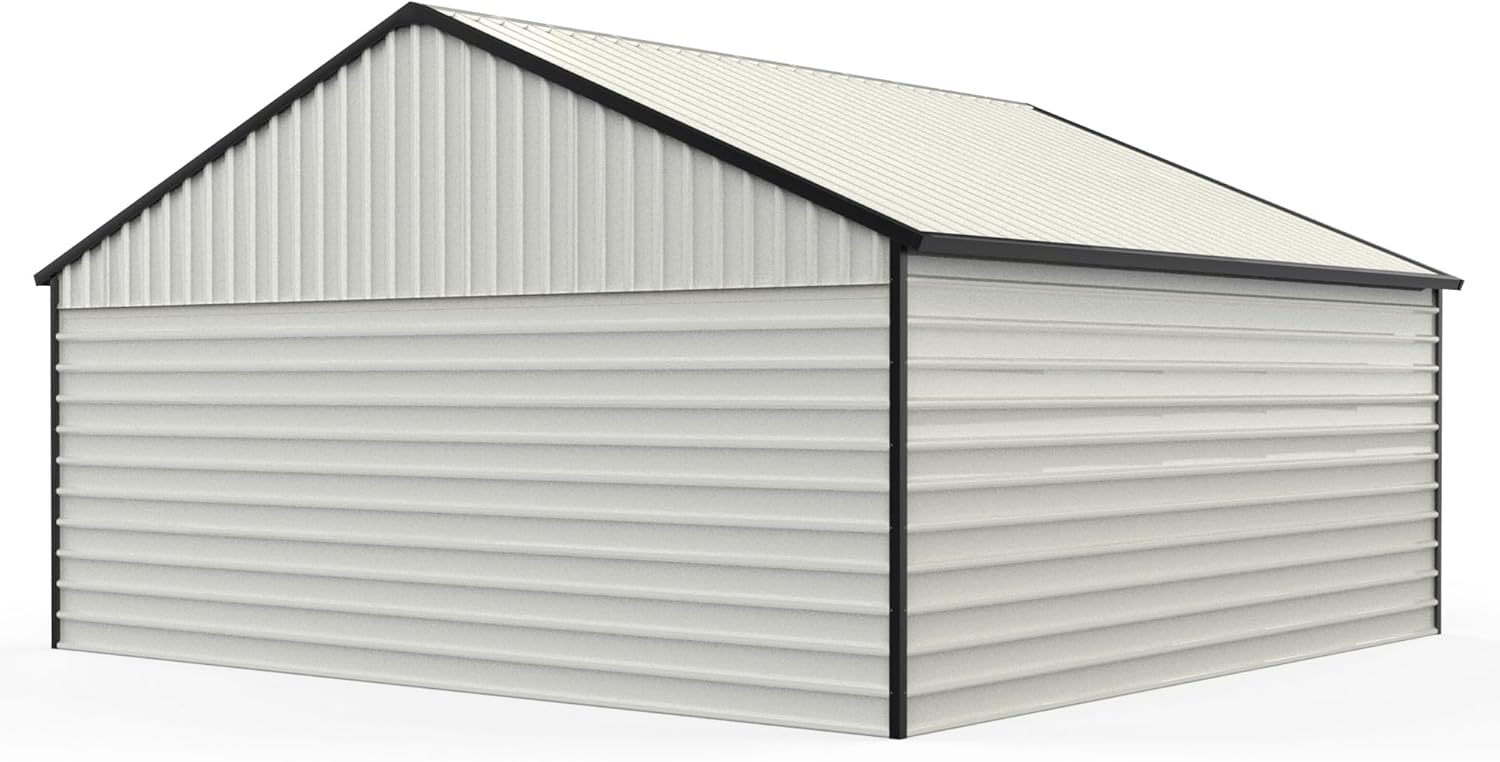
Figure 3.5.1: A complete exterior view of the metal shed, showcasing the installed roof and wall panels. The shed features a peaked roof design.
3.6 Door Installation
Install the two main garage doors and the side entry door. Ensure hinges are properly aligned and doors open and close smoothly without obstruction. Install all locking mechanisms and handles.

Figure 3.6.1: Front view of the shed with both large garage doors fully open, revealing the interior space. This demonstrates the wide access for vehicles or equipment.
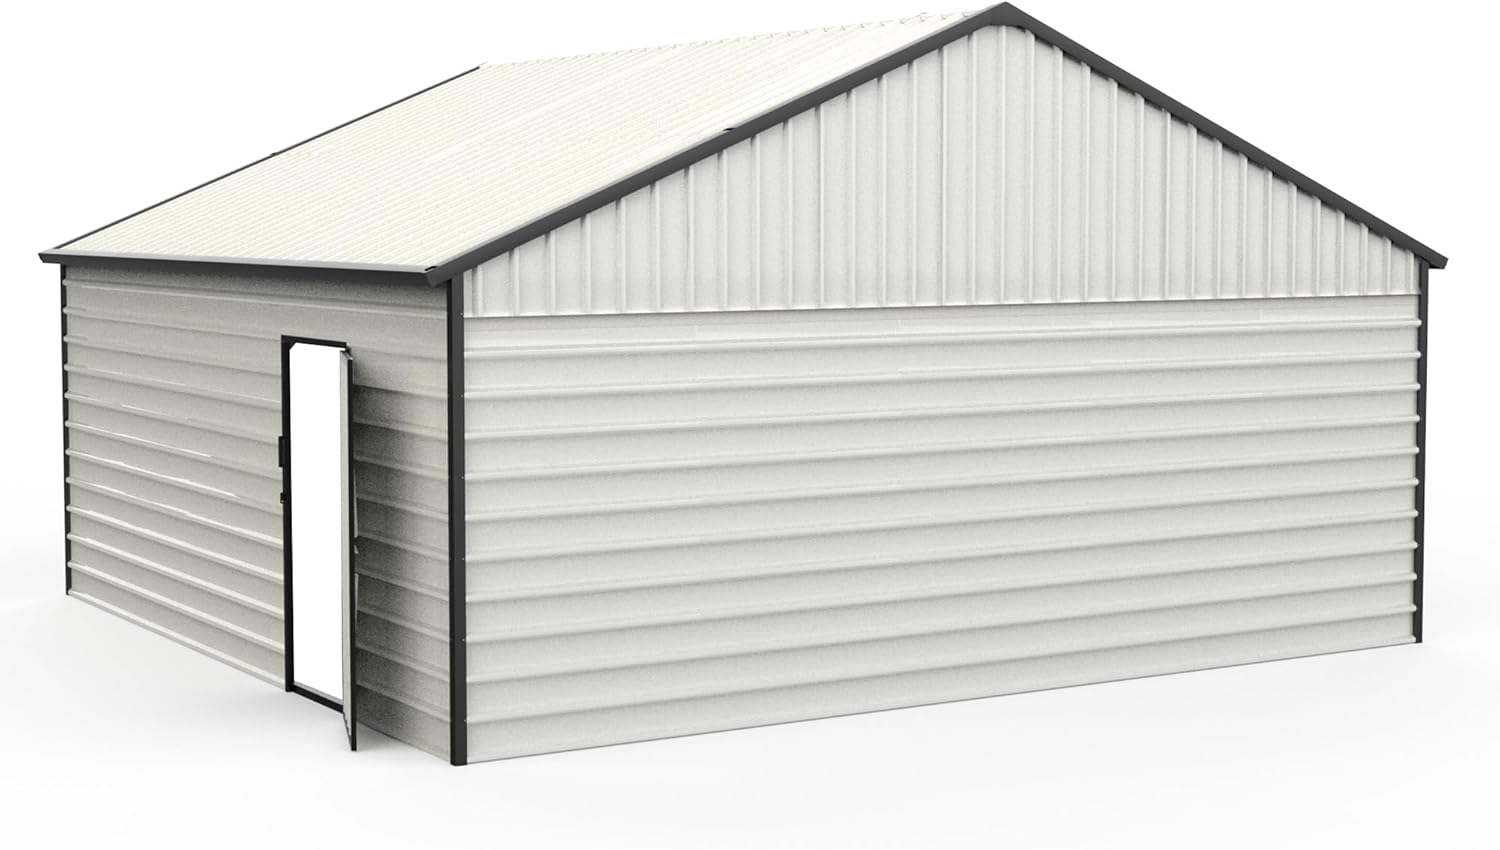
Figure 3.6.2: Side view of the shed with the smaller side entry door open. This provides an alternative access point to the shed's interior.
3.7 Final Inspection and Anchoring
After assembly, perform a thorough inspection to ensure all fasteners are tight and components are correctly aligned. Securely anchor the shed to your foundation using appropriate anchoring hardware (not always included). This step is critical for wind resistance.

Figure 3.7.1: The fully assembled metal shed situated on a concrete slab foundation in an outdoor setting. This image shows the shed ready for use.
4. Operation
Your metal shed is designed for straightforward operation. Follow these guidelines for safe and effective use.
4.1 Opening and Closing Doors
- Garage Doors: To open, disengage any latches or locks. Lift the doors smoothly until they are fully open. To close, gently pull the doors down and secure them with the latches or locks. Avoid forcing the doors.
- Side Entry Door: Use the handle to open and close. Ensure the door is fully closed and locked when not in use to prevent unauthorized access and weather intrusion.
4.2 Ventilation
If your shed includes vents, ensure they are clear of obstructions to allow for proper airflow. Good ventilation helps prevent condensation and maintains a suitable environment for stored items.
4.3 Security
Always secure all doors with appropriate locks when the shed is unattended. Regularly check the integrity of the locking mechanisms.
5. Maintenance
Regular maintenance will extend the life of your metal shed and ensure its continued functionality.
- Cleaning: Periodically clean the exterior of the shed with mild soap and water. Avoid abrasive cleaners or harsh chemicals that could damage the finish. Rinse thoroughly.
- Fastener Check: Annually inspect all bolts, screws, and fasteners. Tighten any that have become loose due to vibration or weather changes.
- Rust Prevention: While the metal is treated, inspect for any signs of rust, especially in areas where the finish might be scratched. Touch up any affected areas with rust-inhibiting paint.
- Door Mechanisms: Lubricate door hinges and tracks annually with a silicone-based lubricant to ensure smooth operation.
- Drainage: Ensure that water drains away from the shed's base to prevent pooling and potential foundation issues. Clear any debris from the roof and gutters (if installed).
- Snow Removal: In areas with heavy snowfall, regularly remove accumulated snow from the roof to prevent excessive load, especially if snow load capacity is approached.
6. Troubleshooting
This section addresses common issues you might encounter with your metal shed.
| Problem | Possible Cause | Solution |
|---|---|---|
| Doors stick or are difficult to open/close. | Misaligned hinges, bent tracks, lack of lubrication, or uneven foundation. | Check hinge alignment and track for obstructions. Lubricate hinges and tracks. Verify the shed is level on its foundation. |
| Water leakage inside the shed. | Improperly sealed panels, damaged roof/wall panels, or inadequate foundation drainage. | Inspect all panel overlaps and seams for proper sealing. Check for any damage to panels. Ensure foundation drainage is effective. Apply silicone sealant to problematic areas. |
| Shed feels unstable or shakes in wind. | Insufficient anchoring, loose fasteners, or uneven foundation. | Ensure the shed is securely anchored to the ground. Tighten all frame and panel fasteners. Verify the foundation is level. |
| Rust spots appearing on metal surfaces. | Scratches in the protective coating, prolonged exposure to moisture, or lack of maintenance. | Clean the affected area, remove loose rust, and apply a rust-inhibiting primer followed by exterior metal paint. Regularly inspect and clean the shed. |
7. Specifications
| Feature | Detail |
|---|---|
| Model | 23x22FT Double Garage Metal Shed |
| Brand | Generic |
| Product Dimensions (L x W x H) | 276 x 264 x 150 inches (approximately 23 ft x 22 ft x 12.5 ft) |
| Approximate Area | 500 sq ft |
| Material | Metal (16 GA steel frame) |
| Color | White |
| Wind Rating | Up to 46 mph |
| Snow Load Capacity | 21 lb per sq ft |
| Garage Door Openings | Two, each 8 ft wide |
| Manufacturer | QiMaieeUSA |
8. Warranty and Support
For specific warranty information, please refer to the documentation included with your purchase or contact the retailer/manufacturer directly. General warranty terms typically cover manufacturing defects for a limited period from the date of purchase.
If you require assistance with assembly, have questions about parts, or need to report an issue, please contact the manufacturer or your point of purchase. Have your model number and purchase date ready when contacting support.
Manufacturer: QiMaieeUSA
Contact information (e.g., phone number, email, website) would typically be provided here by the manufacturer.


