1. Introduction
Thank you for choosing the Yoidesu Outdoor WiFi Extender Solar 4G LTE Modem Router. This device is designed to provide reliable internet connectivity in outdoor and remote locations, leveraging solar power and a high-capacity battery. It integrates a 4G LTE modem, a WiFi extender, and a solar charging system, making it ideal for applications such as camping, RVs, and remote area installations.
This manual provides detailed instructions for the setup, operation, and maintenance of your device. Please read it thoroughly before use to ensure optimal performance and longevity.
2. Safety Information
- Ensure the device is installed in a location with adequate sunlight exposure for the solar panel.
- Do not expose the device to extreme temperatures outside its operating range.
- Avoid disassembling or modifying the device, as this may void the warranty and cause damage.
- Keep the device away from flammable materials.
- Use only the provided or recommended accessories.
- Ensure all connections are secure and waterproofed as necessary for outdoor use.
3. Package Contents
Please check the package for the following items:
- Yoidesu Outdoor WiFi Extender Solar 4G LTE Modem Router
- Mounting Bracket
- Mounting Screws and Wall Plugs
- Screwdriver
- Ethernet Cable (for LAN port connection)
- User Manual (this document)
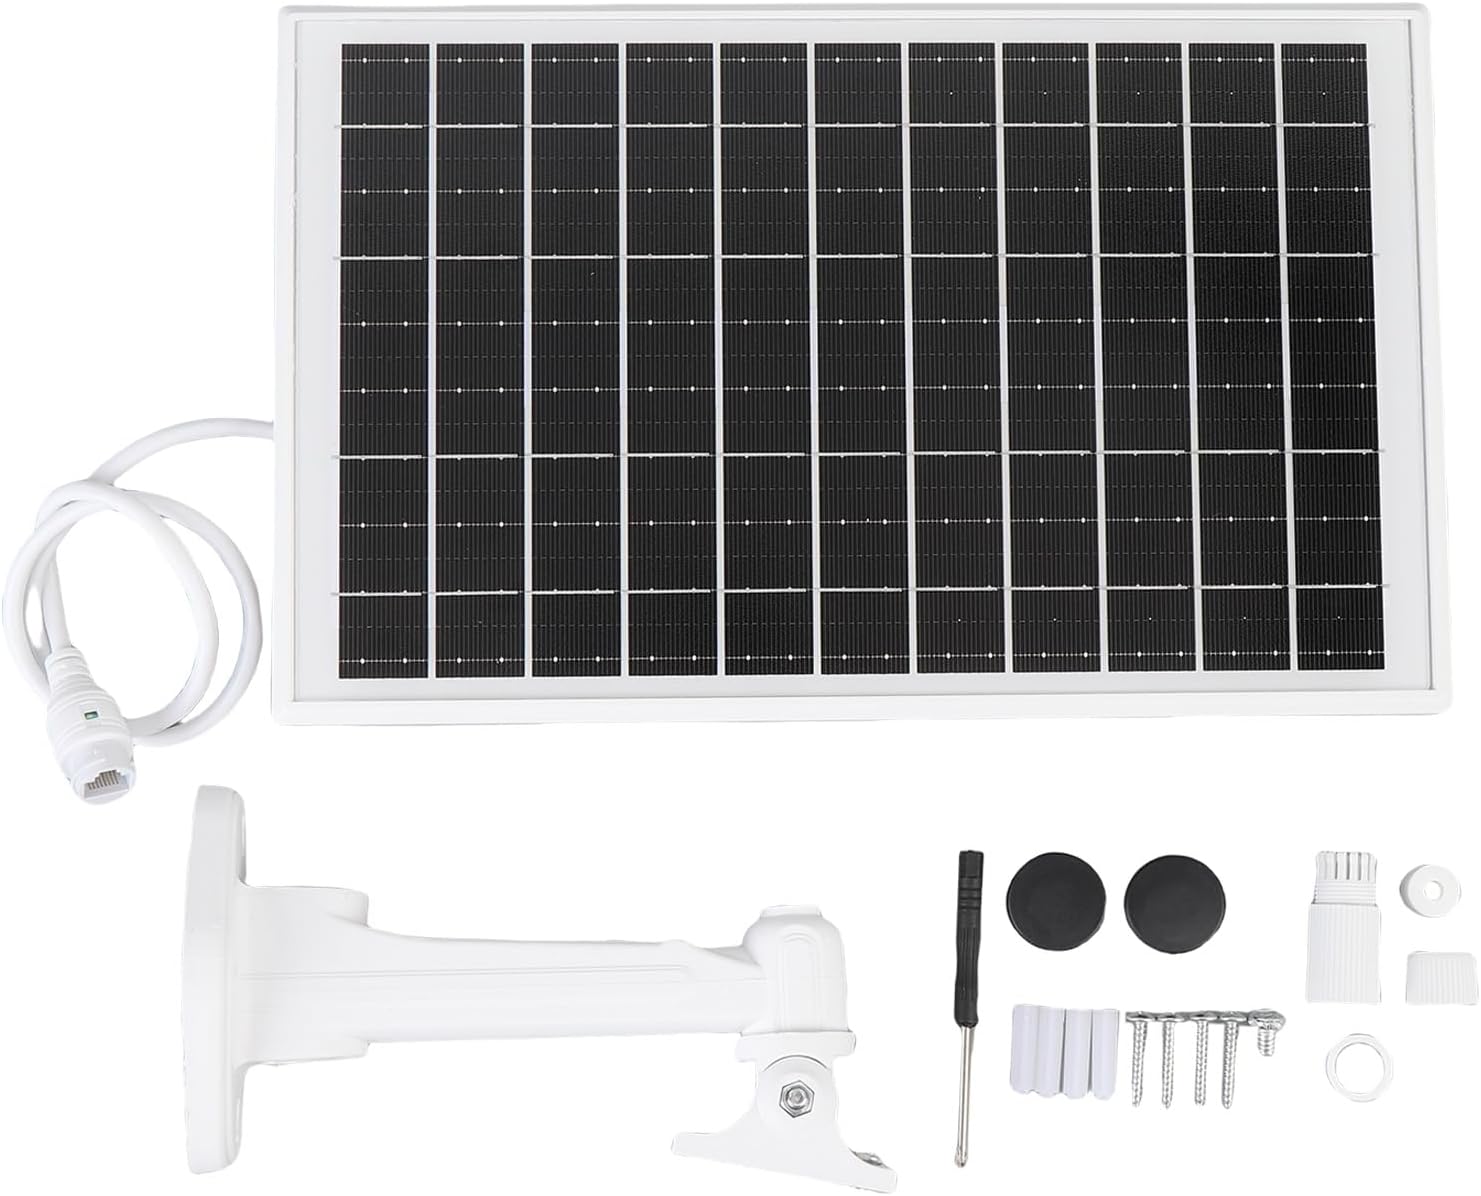
Image: All components included in the package, laid out for inspection. This includes the main solar panel unit, a mounting bracket, an Ethernet cable, a small screwdriver, and various screws and wall anchors.
4. Product Overview
4.1 Device Components

Image: Front view of the Yoidesu Outdoor WiFi Extender, showing the solar panel surface.

Image: Side view of the device, highlighting the two external antennas and the adjustable mounting arm.

Image: Close-up of the device's back panel, displaying the model number (H52 EU), "Made in China" label, RoHS compliance, and "4G+WiFi" branding. This area typically houses the SIM card slot and other ports.
- Solar Panel: 15W integrated solar panel for continuous power generation.
- Battery: Built-in 25600mAh high-capacity battery for extended operation.
- Antennas: Two external antennas for enhanced 4G LTE and WiFi signal reception and transmission.
- SIM Card Slot: Located on the back panel, for inserting a 4G LTE SIM card.
- LAN Port: Ethernet port for wired connections or repeater functionality.
- Status Indicators: LED lights (Green, Red) indicating battery charge levels and operational status.
| Indicator | Status | Description |
|---|---|---|
| Green Light | Solid | Battery power 100% |
| Green Light | Flashing | Battery power 50% - 100% |
| Red Light | Flashing | Battery power 20% - 50% |
| Red Light | Solid | Battery power 0% - 20% |
5. Setup
5.1 SIM Card Installation
- Locate the SIM card slot on the back panel of the device. You may need to remove a protective cover or screw.
- Insert a standard 4G LTE SIM card into the slot, ensuring the correct orientation. The device supports various 4G 3rd Generation bands.
- Gently push the SIM card until it clicks into place.
- Replace any protective cover or screw if removed.
5.2 Mounting the Device
The device is designed for outdoor use and comes with an IP66 waterproofing shell. Choose a mounting location that provides maximum sunlight exposure for the solar panel and optimal signal reception.
- Attach the mounting bracket to the desired surface (wall, pole, etc.) using the provided screws and wall plugs. Ensure it is securely fastened.
- Connect the main unit to the mounting bracket. The bracket allows for adjustment of the solar panel's angle to optimize sun exposure.
- Adjust the angle of the solar panel to face the sun directly for most of the day.

Image: The Yoidesu Outdoor WiFi Extender mounted on its adjustable bracket, showing the solar panel and antennas.
5.3 Powering On
Once the SIM card is installed and the device is mounted, it will begin charging via the solar panel. The device is designed to power on automatically when sufficient battery charge is available or when connected to an external power source (if applicable, though primarily solar-powered).
- Allow the device to charge for several hours in direct sunlight before initial use to ensure the internal 25600mAh battery is adequately charged.
- Observe the LED indicators to confirm charging status and battery level.
6. Operating Instructions
6.1 Connecting to WiFi
The device functions as a WiFi extender, broadcasting a 2.4G WiFi signal with speeds up to 300Mbps.
- On your WiFi-enabled device (smartphone, laptop, tablet), search for available WiFi networks.
- Locate the network name (SSID) broadcasted by the Yoidesu extender. The default SSID and password are typically found on a label on the device or in a separate quick start guide.
- Select the network and enter the password to connect.
- Once connected, your device should have internet access via the 4G LTE modem.

Image: A diagram illustrating the connectivity. A solar panel (labeled "Router 4G dengan tenaga matahari" - 4G Router with solar power) provides power and internet to a WiFi camera ("Kamera WIFI") and a smartphone, demonstrating its function as a central internet hub.
6.2 4G LTE Functionality
The integrated 4G LTE modem provides internet access using a cellular SIM card. Ensure your SIM card has an active data plan.
- The device will automatically detect and connect to the 4G LTE network once the SIM card is properly installed and the device is powered on.
- Signal strength may vary based on location. Position the device for optimal cellular reception.
6.3 LAN Port Usage
The LAN port can be used for:
- Wired Connection: Connect a device (e.g., laptop, security camera) directly via an Ethernet cable for a stable wired internet connection.
- Repeater Mode: The device can function as a wireless repeater, extending an existing WiFi network. Refer to the device's web interface or advanced settings for configuration details on repeater mode.
7. Maintenance
7.1 Cleaning
- Regularly clean the surface of the solar panel to ensure maximum efficiency. Dust, dirt, and debris can reduce power generation.
- Use a soft, damp cloth to wipe the solar panel and the device casing. Avoid abrasive cleaners or solvents.
7.2 Battery Care
- The built-in 25600mAh battery is designed for long-lasting power. To prolong battery life, ensure the solar panel receives adequate sunlight.
- Avoid fully discharging the battery frequently. The device is designed to manage charging and discharging cycles efficiently.
7.3 Solar Panel Care
- Periodically check the solar panel for any physical damage or obstructions.
- Ensure the panel's angle is optimized for the current season to maximize solar energy capture.
8. Troubleshooting
| Problem | Possible Cause | Solution |
|---|---|---|
| No Power / Device Not Turning On | Low battery charge; Insufficient sunlight; Faulty unit. | Ensure solar panel is in direct sunlight for several hours. Check LED indicators for battery status. If problem persists, contact support. |
| No Internet Connection | No active SIM card; SIM card not properly installed; No 4G LTE signal; Incorrect WiFi password. | Verify SIM card is active and correctly inserted. Check 4G LTE signal strength in your location. Re-enter WiFi password. |
| Slow WiFi Speed | Weak 4G LTE signal; Too many connected devices; Obstructions. | Relocate the device for better 4G LTE signal. Reduce the number of connected devices. Ensure line of sight for WiFi. |
| WiFi Signal Drops Frequently | Interference; Device too far from connected client; Environmental factors. | Minimize interference from other electronic devices. Move closer to the extender. Ensure stable mounting. |
9. Specifications
| Feature | Detail |
|---|---|
| Model Number | Yoidesu2gam83rbp5 |
| Solar Panel Power | 15W |
| Battery Capacity | 25600mAh |
| WiFi Standard | 2.4G, 802.11ac (compatible) |
| WiFi Speed | Up to 300Mbps |
| 4G LTE Compatibility | Various 4G 3rd Generation bands |
| Waterproofing Rating | IP66 |
| Operating Systems Compatibility | Windows Vista, 7, 8, 8.1, OS X 10.7+ |
| Coverage Extension | Up to 164 feet (50 meters) |
| Dimensions | 16.93 x 7.87 x 3.15 inches (Package) |
| Weight | 3.74 pounds (Item) |
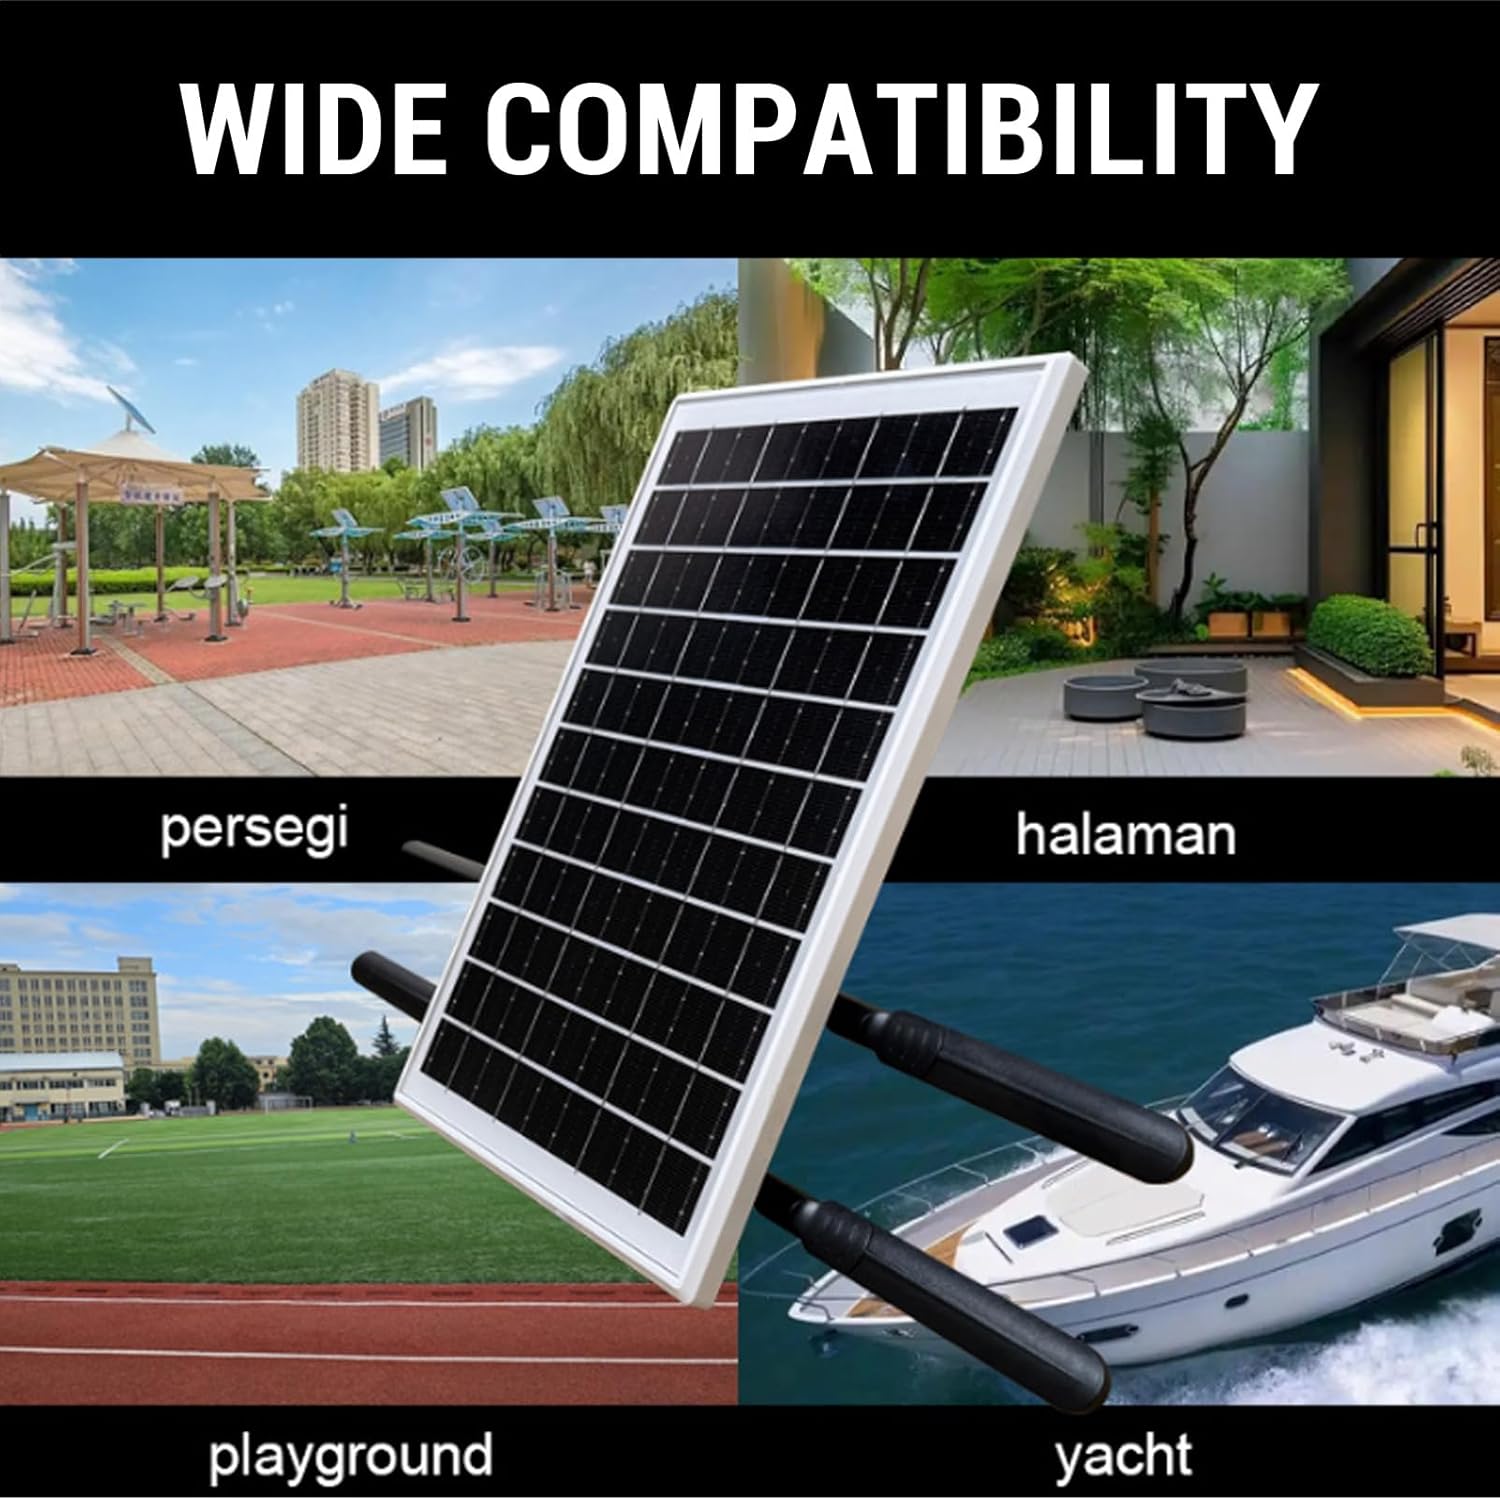
Image: The Yoidesu Outdoor WiFi Extender shown in diverse environments, including a public square, a home patio, a playground, and on a yacht, illustrating its wide compatibility for outdoor use.
10. Warranty and Support
Yoidesu products are designed for reliability and performance. For warranty information and technical support, please refer to the official Yoidesu website or contact your retailer.
- Manufacturer: Yoidesu
- Date First Available: April 15, 2025
- For assistance, please visit the Yoidesu Store on Amazon or consult your purchase documentation.