1. Introduction and Overview
This manual provides instructions for the CNSTWEI 12.3-inch CarPlay and Android Auto multimedia screen. This device replaces your vehicle's factory OEM screen, integrating advanced Android functionalities while retaining the original car radio system. It features a 1920x720 HD resolution touchscreen, enhancing your in-car entertainment and navigation experience.
Key features include:
- Qualcomm Android 14 Operating System
- 12.3-inch HD Glass+Glass Capacitive Touch Screen
- Built-in Wireless & Wired Car Auto Play (CarPlay)
- Built-in Wireless & Wired Android Auto
- Integrated DSP for High Fidelity Surround Stereo
- Accurate GPS Navigation with support for online and offline maps
- Bluetooth 5.0 for music and calls
- Dual Band WiFi (2.4G & 5G)
- Split Screen and Picture-in-Picture (PIP) functionality
- Supports original car functions including radio, CD player, amplifier, and backup camera display
2. Compatibility
This touchscreen unit is specifically designed for the following vehicle models:
- Mercedes Benz C Class W205 S205
- Years: 2015-2018
- System: Exclusively compatible with the NTG 5.0 System.
Important Note: This unit is not compatible with other NTG systems or the Mercedes Benz E Coupe Car. Before installation, ensure your car dashboard matches the product images to confirm compatibility.
3. Package Contents
Verify that all the following items are included in your package:
- 1 x Car CarPlay Screen
- 1 x Power Cable
- 1 x USB Cable
- 1 x GPS Antenna
- 1 x AUX Cable
- 1 x Plastic Base
- 1 x Installation Screw Set
- 1 x Installation Instruction (this document)

Figure 3.1: Included components for the CNSTWEI CarPlay Screen.
4. Specifications
| Brand | CNSTWEI |
| Screen Size | 12.3 inches |
| Resolution | 1920*720 HD |
| Operating System | Android 14 |
| RAM | 8GB |
| ROM | 128GB SSD |
| Connectivity | Bluetooth 5.0, Wi-Fi (2.4G/5G) |
| Special Features | Built-in Bluetooth, Touchscreen, Wireless CarPlay, Wireless Android Auto, DSP, GPS Navigation |
| Control Method | Touch |
| Audio Output Mode | Stereo |
5. Setup (Installation)
Installation of this unit requires removing parts of the car dashboard to access wiring. It is recommended that installation be performed by a qualified professional or an experienced individual. Ensure the vehicle''s power is off before beginning installation.
5.1 Pre-Installation Check
- Confirm vehicle compatibility (Mercedes Benz C Class W205 S205, 2015-2018, NTG 5.0 system).
- Verify all package contents are present.
- Gather necessary tools (not included).
5.2 Installation Steps (General Guide)
- Disconnect Battery: For safety, disconnect the vehicle's negative battery terminal.
- Remove Original Screen: Carefully remove the existing factory screen and any associated trim panels.
- Connect Wiring: Connect the provided power cable, USB cable, GPS antenna, and AUX cable to the new CarPlay screen and the vehicle's wiring harness. Ensure all connections are secure and correct. Refer to the specific wiring diagram if provided with the product.
- Mount New Screen: Secure the new 12.3-inch CarPlay screen into the dashboard using the provided plastic base and screw set.
- Reconnect Battery: Reconnect the vehicle's negative battery terminal.
- Test Functionality: Before reassembling all trim panels, power on the vehicle and test all functions of the new screen, including touch response, audio, GPS, CarPlay/Android Auto, and original car system integration.
- Reassemble Dashboard: Once all functions are confirmed, carefully reassemble any removed trim panels.

Figure 5.1: Visual comparison of the dashboard before and after installing the 12.3-inch screen.
6. Operating Instructions
The CNSTWEI CarPlay screen operates on an Android 14 system, offering a user-friendly interface and extensive features.
6.1 User Interface (UI)
The screen features a customizable UI with various themes. Navigate through applications and settings using the capacitive touchscreen. The system supports split-screen functionality, allowing two applications to run simultaneously.

Figure 6.1: Examples of the user interface and various application screens.
6.2 Wireless CarPlay & Android Auto
Connect your smartphone wirelessly or via USB to access Apple CarPlay or Android Auto. This allows seamless integration of your phone's navigation, music, messages, and other apps directly on the car screen.
- Ensure Bluetooth and Wi-Fi are enabled on your smartphone.
- On the CarPlay screen, select the CarPlay or Android Auto application.
- Follow the on-screen prompts to pair your device. For wireless connection, ensure your phone is discoverable.
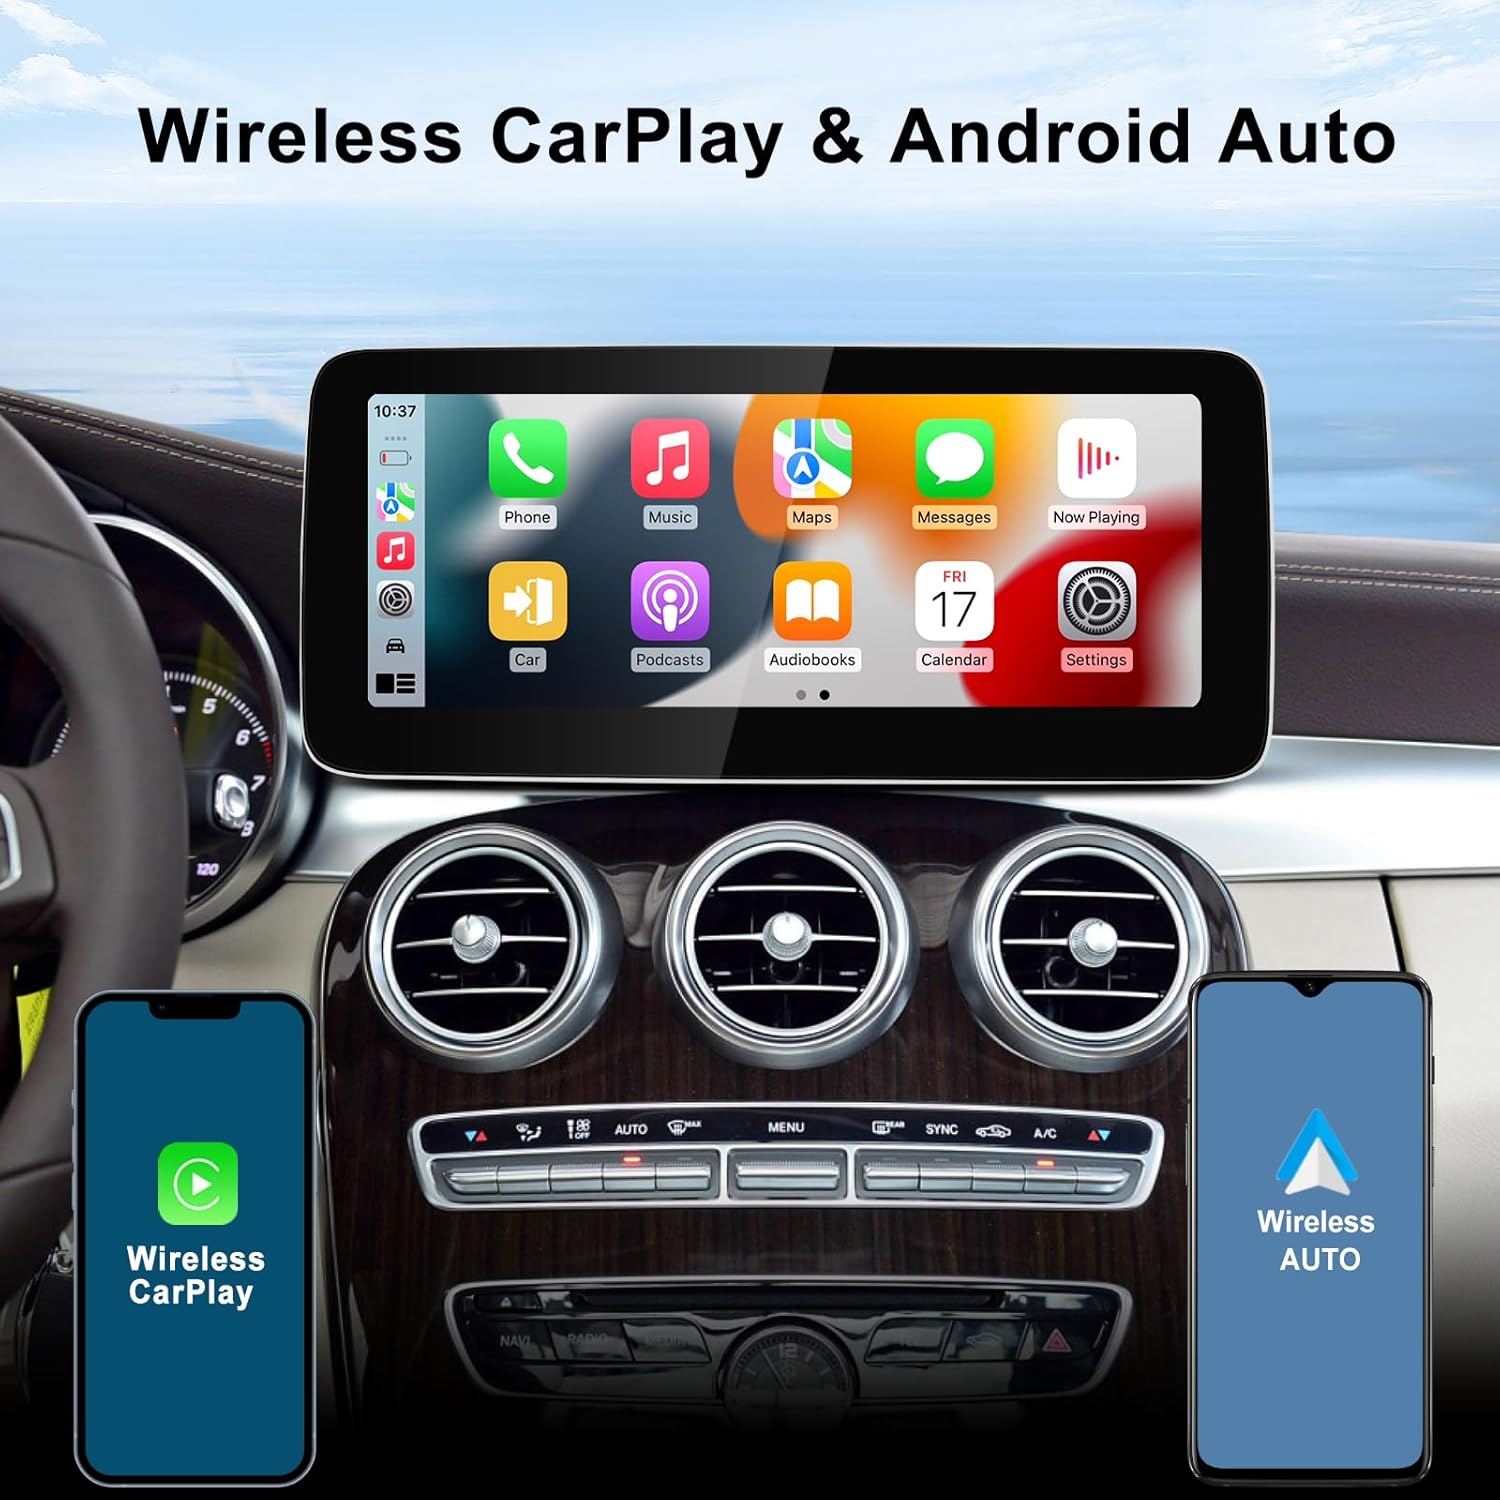
Figure 6.2: Wireless CarPlay and Android Auto functionality.
6.3 GPS Navigation
The unit includes a built-in GPS antenna for accurate navigation. You can use pre-installed navigation apps or download your preferred mapping applications from the app store. Both online and offline maps are supported.
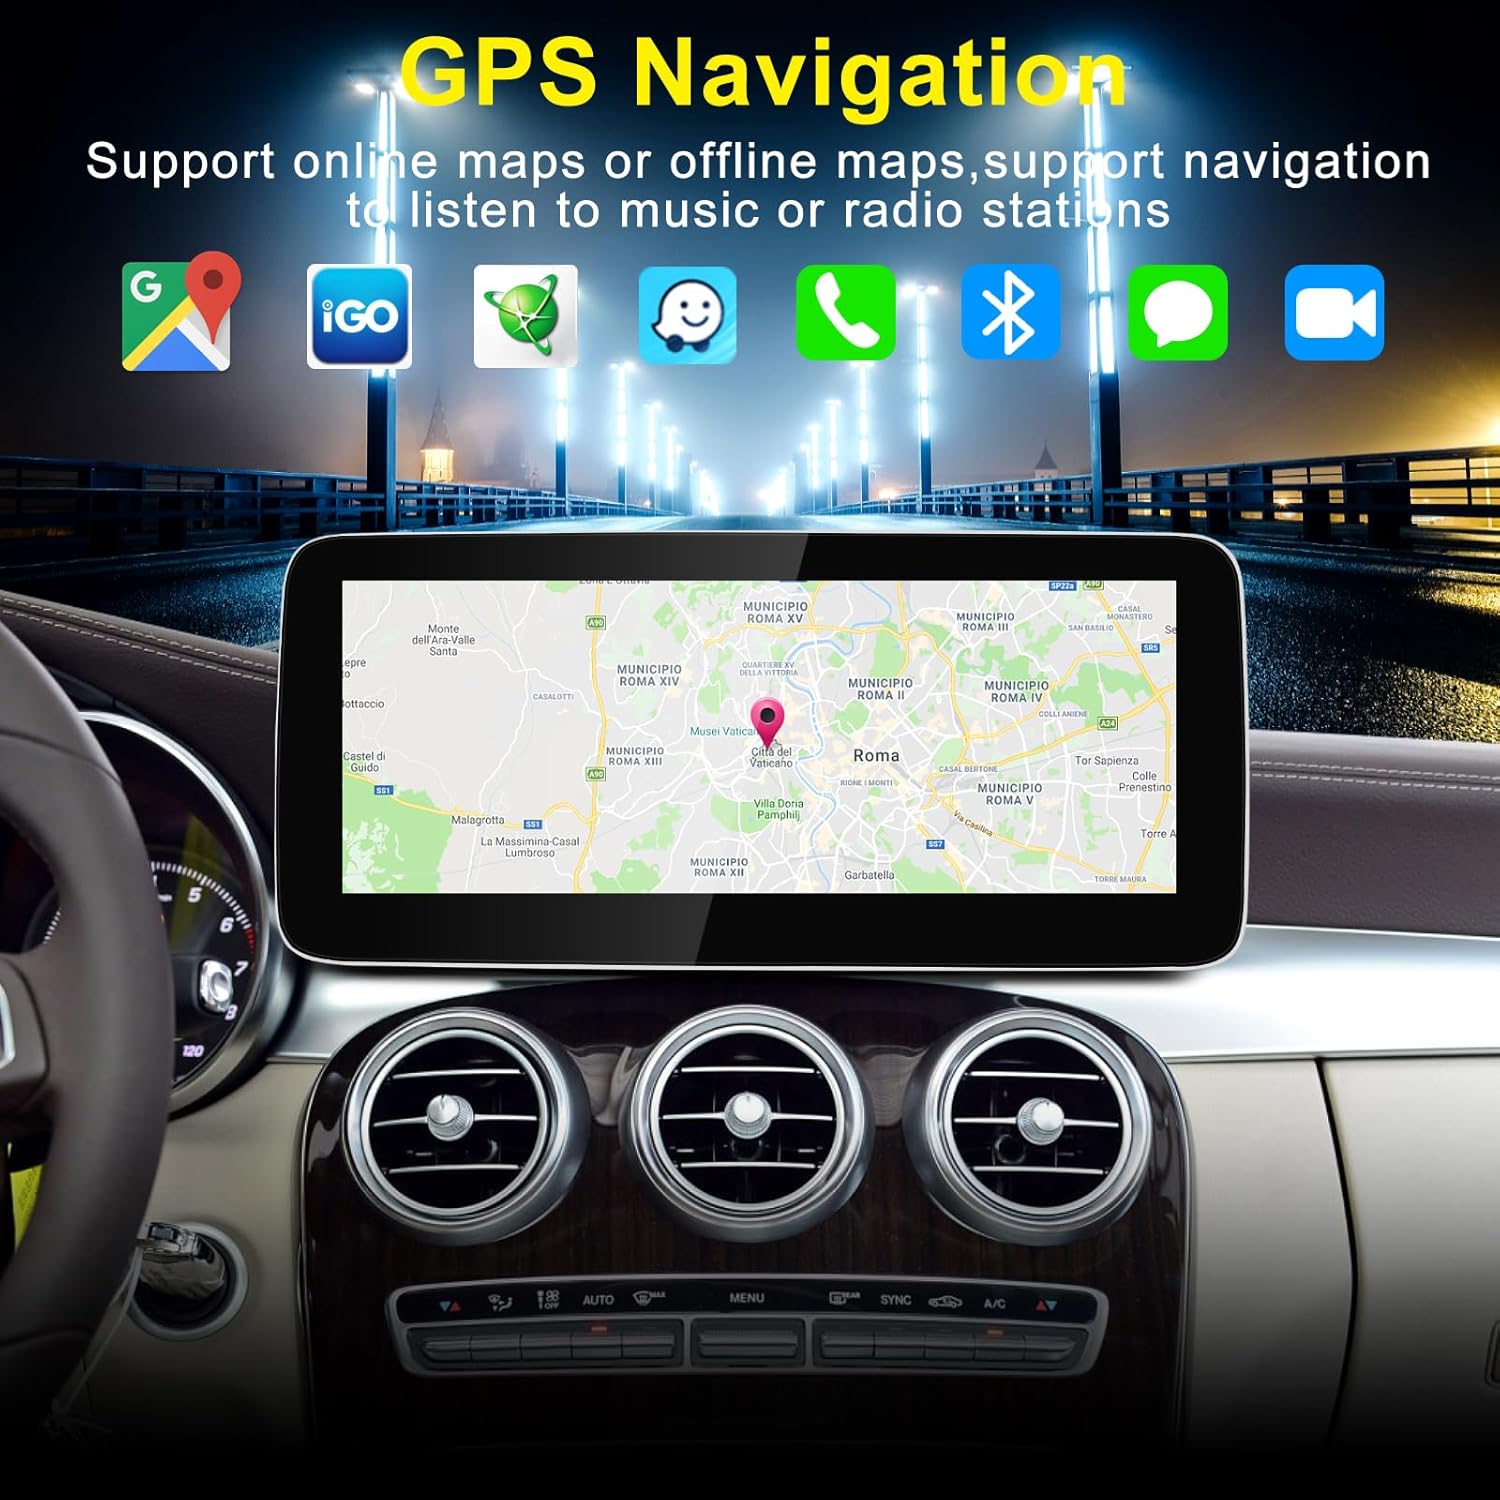
Figure 6.3: GPS Navigation interface.
6.4 Digital Sound Processor (DSP)
The integrated DSP allows for fine-tuning of audio settings to achieve high-fidelity surround stereo sound. Access the DSP settings through the audio menu to adjust equalizer bands, balance, fader, and other sound characteristics.

Figure 6.4: DSP audio settings interface.
6.5 Bluetooth Connectivity
Pair your phone via Bluetooth for hands-free calling and audio streaming. Access your phone's contacts and call history directly from the screen.
- Go to the Bluetooth settings on the CarPlay screen.
- Enable Bluetooth on your smartphone and make it discoverable.
- Select your phone from the list of available devices on the screen and confirm pairing.
7. Maintenance
Proper maintenance ensures the longevity and optimal performance of your CarPlay screen.
- Screen Cleaning: Use a soft, lint-free cloth specifically designed for electronics screens. Lightly dampen the cloth with water or a screen-cleaning solution. Avoid harsh chemicals, abrasive materials, or excessive moisture.
- Software Updates: Periodically check for software updates through the system settings. Updates can improve performance, add new features, and fix bugs. Ensure a stable internet connection during updates.
- Temperature Control: Avoid exposing the unit to extreme temperatures for extended periods.
- Cable Connections: Periodically check that all cables connected to the unit are secure and free from damage.
8. Troubleshooting
If you encounter issues with your CarPlay screen, refer to the following common troubleshooting steps:
8.1 No Power / Screen Not Turning On
- Check all power cable connections to ensure they are securely plugged in.
- Verify the vehicle's battery is charged and connected correctly.
- Ensure the vehicle's ignition is on.
8.2 No Sound / Distorted Audio
- Check the volume levels on both the CarPlay screen and your vehicle's original audio system.
- Ensure the AUX cable is properly connected.
- Verify audio settings in the DSP menu are configured correctly.
- If using Bluetooth, ensure your phone is properly paired and the volume is up.
8.3 CarPlay / Android Auto Not Connecting
- For wireless connection, ensure your phone's Bluetooth and Wi-Fi are enabled and discoverable.
- For wired connection, try a different USB cable.
- Restart both your smartphone and the CarPlay screen.
- Ensure your phone's operating system is up to date.
8.4 Touchscreen Unresponsive
- Restart the unit by turning off the vehicle and restarting it.
- Ensure the screen is clean and free of debris.
Many issues can stem from incorrect cable connections or settings. If troubleshooting steps do not resolve the issue, please contact customer support for further assistance.
9. Warranty Information
Specific warranty terms and conditions may vary. Please refer to your purchase documentation, the product listing on the retailer's website, or contact CNSTWEI customer support for detailed warranty information regarding your 12.3-inch CarPlay screen.
10. Support
For technical assistance, installation guidance, or any other inquiries, please contact CNSTWEI customer support through the platform where you purchased the product. Providing your order number and a detailed description of the issue will help expedite the support process.
We are committed to assisting you with any installation issues or operational questions you may have.