
1. Introduction
This manual provides detailed instructions for the safe installation, operation, and maintenance of your OPAXIS P8150-GF-BK-P1 Porch Light with GFCI Outlet. Please read this manual thoroughly before installation and retain it for future reference.
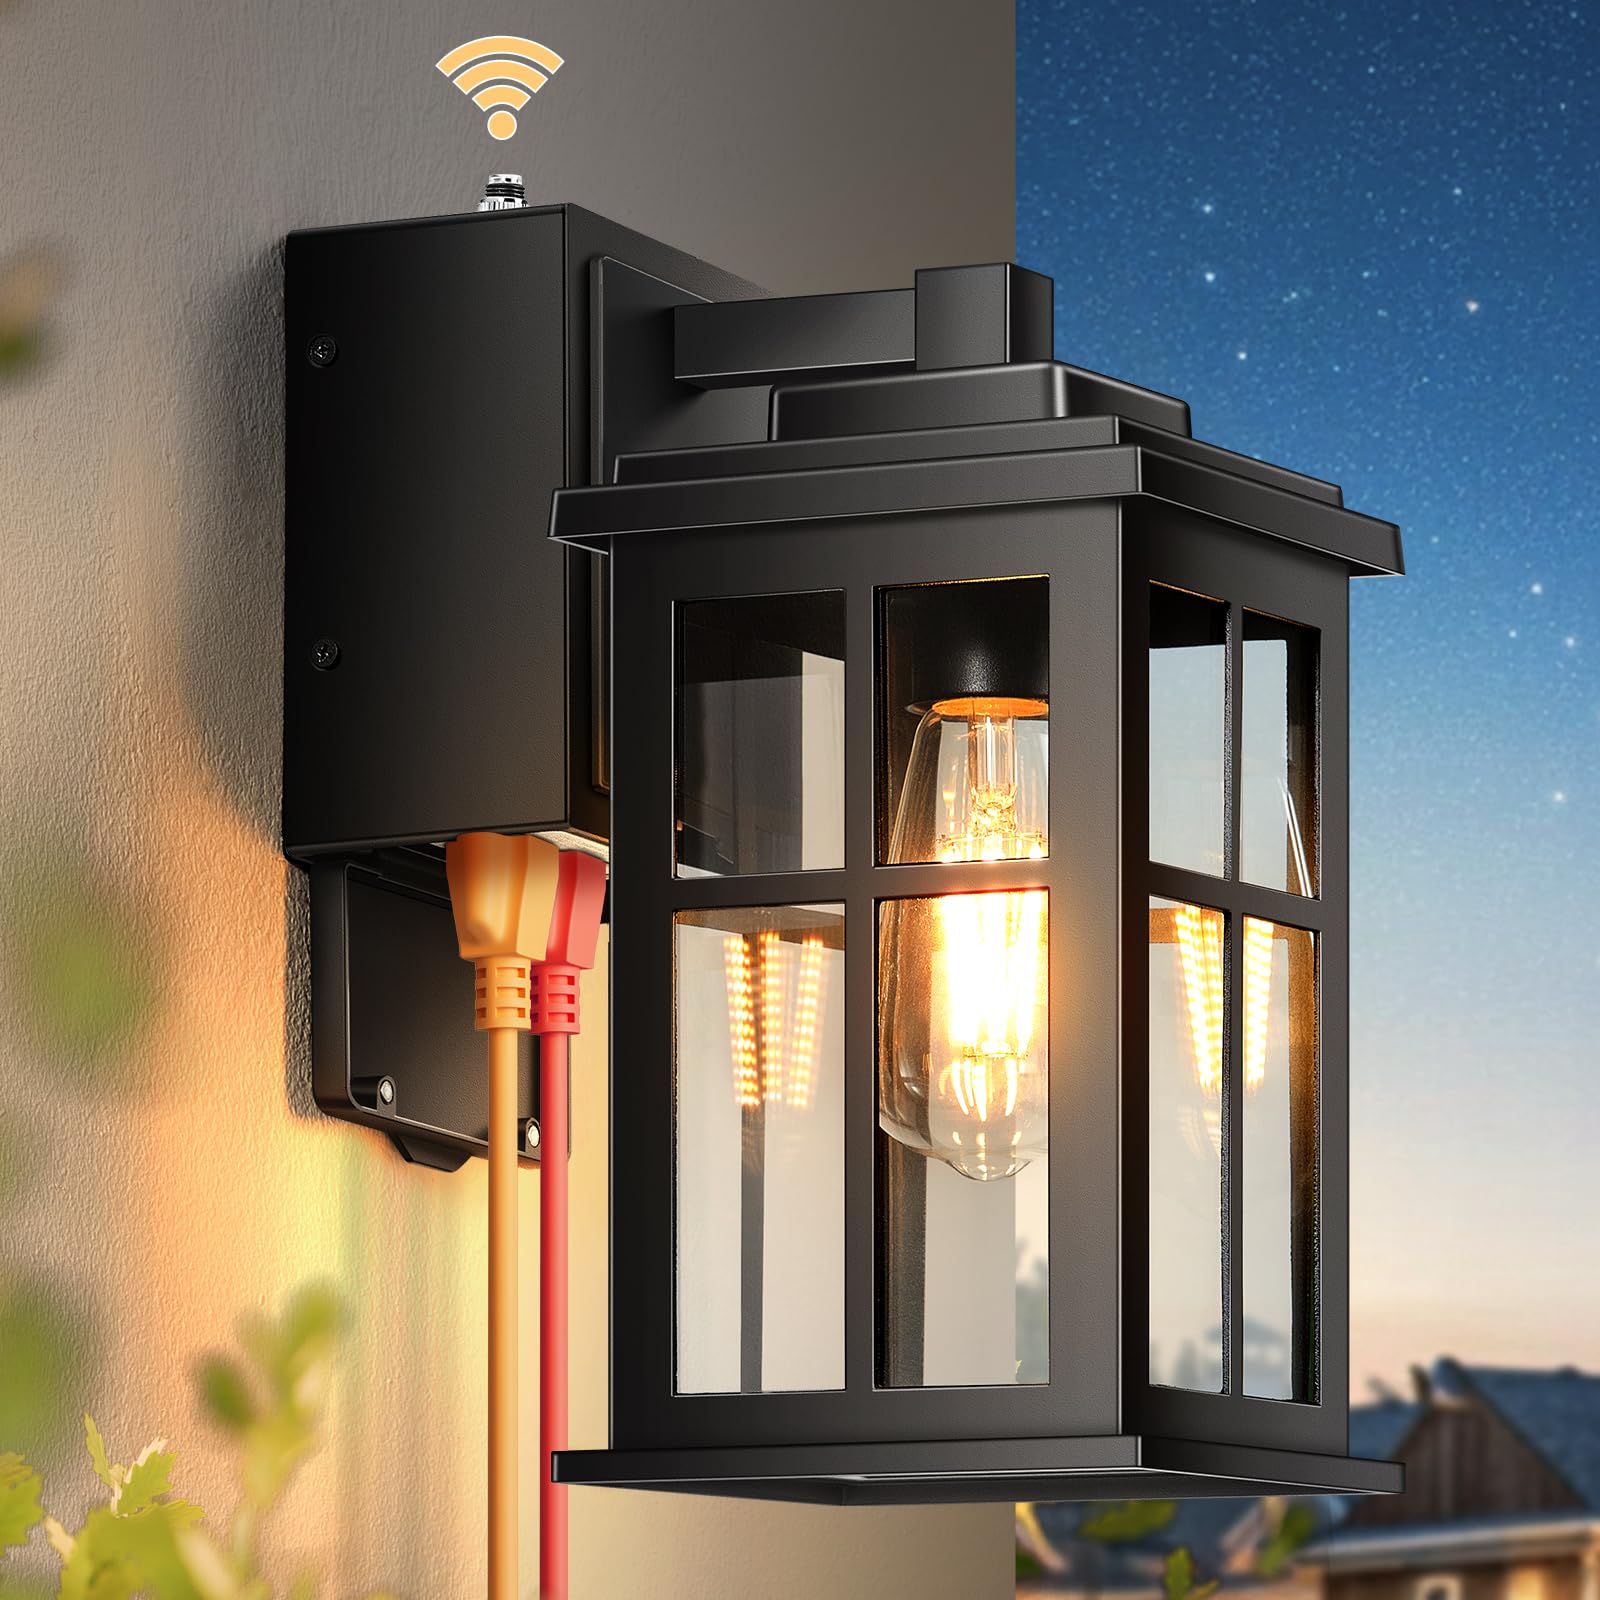
Figure 1: OPAXIS P8150-GF-BK-P1 Porch Light with GFCI Outlet. This image shows the complete black outdoor wall light fixture with its integrated GFCI outlet.
2. Safety Information
Always turn off the power at the circuit breaker before beginning installation. Ensure all wiring connections are secure and comply with local electrical codes. If you are unsure about electrical wiring, consult a qualified electrician. Do not exceed the maximum wattage for the bulb (100W). The integrated GFCI outlet provides protection against electrical shock; test it regularly as per manufacturer instructions.
3. Package Contents
- OPAXIS P8150-GF-BK-P1 Porch Light Fixture
- Mounting Hardware (screws, wire nuts)
- Instruction Manual
Note: E26 bulb is not included.
4. Specifications
| Brand | OPAXIS |
| Model Number | P8150-GF-BK-P1 |
| Color | Black |
| Material | Aluminum |
| Dimensions (L x W x H) | 5.9" x 5.9" x 12.4" |
| Power Source | Hardwired 120 VAC |
| Max Wattage | 100 Watts |
| Bulb Base | E26 |
| Switch Type | Photocell (Dusk to Dawn) |
| Water Resistance Level | Waterproof |
| Brightness | 1160 Lumen |
| Color Temperature | 3000 Kelvin (Warm White) |
5. Installation Instructions
- Turn Off Power: Before starting, ensure the power to the installation area is turned off at the circuit breaker.
- Prepare Mounting Surface: Remove your old fixture. Ensure the electrical box is securely mounted and the wiring is accessible.
- Mount Bracket: Attach the provided mounting bracket to the electrical box using the screws.
- Connect Wiring: Connect the fixture's wires to your house wiring. Match black to black (live), white to white (neutral), and green/bare copper to green/bare copper (ground). Secure connections with wire nuts.
- Secure Fixture: Carefully align the fixture with the mounting bracket and secure it with the provided screws.
- Install Bulb: Insert an E26 base bulb (max 100W, not included) into the socket. The bottom of the fixture is open for easy bulb replacement.
- Activate GFCI Outlet: After installation is complete and power is restored, press the "TEST" button on the GFCI outlet, then press the "RESET" button to activate the outlet.
Video: OPAXIS Dusk to Dawn Outdoor Porch Light with GFCI Outlet. This video demonstrates the installation process of the OPAXIS porch light, including wiring connections and mounting the fixture to a wall.

Figure 2: Product Dimensions and E26 Base. This image illustrates the physical dimensions of the light fixture and highlights the E26 bulb base for easy bulb installation.
6. Operating Instructions
6.1 Dusk to Dawn Sensor
This OPAXIS porch light features a built-in photocell sensor that automatically turns the light ON at dusk and OFF at dawn. This provides convenient, energy-saving illumination without manual intervention.

Figure 3: Dusk to Dawn Sensor Operation. This image visually explains how the built-in sensor automatically activates the light at dusk and deactivates it at dawn.
6.2 GFCI Outlet Usage
The integrated GFCI outlet provides two tamper-resistant, weather-resistant outlets. These are protected by a magnetic metal cover to prevent rain and damage. Use these outlets to power outdoor devices such as garden tools, holiday lights, or security cameras. The maximum power capacity is 15AWG.
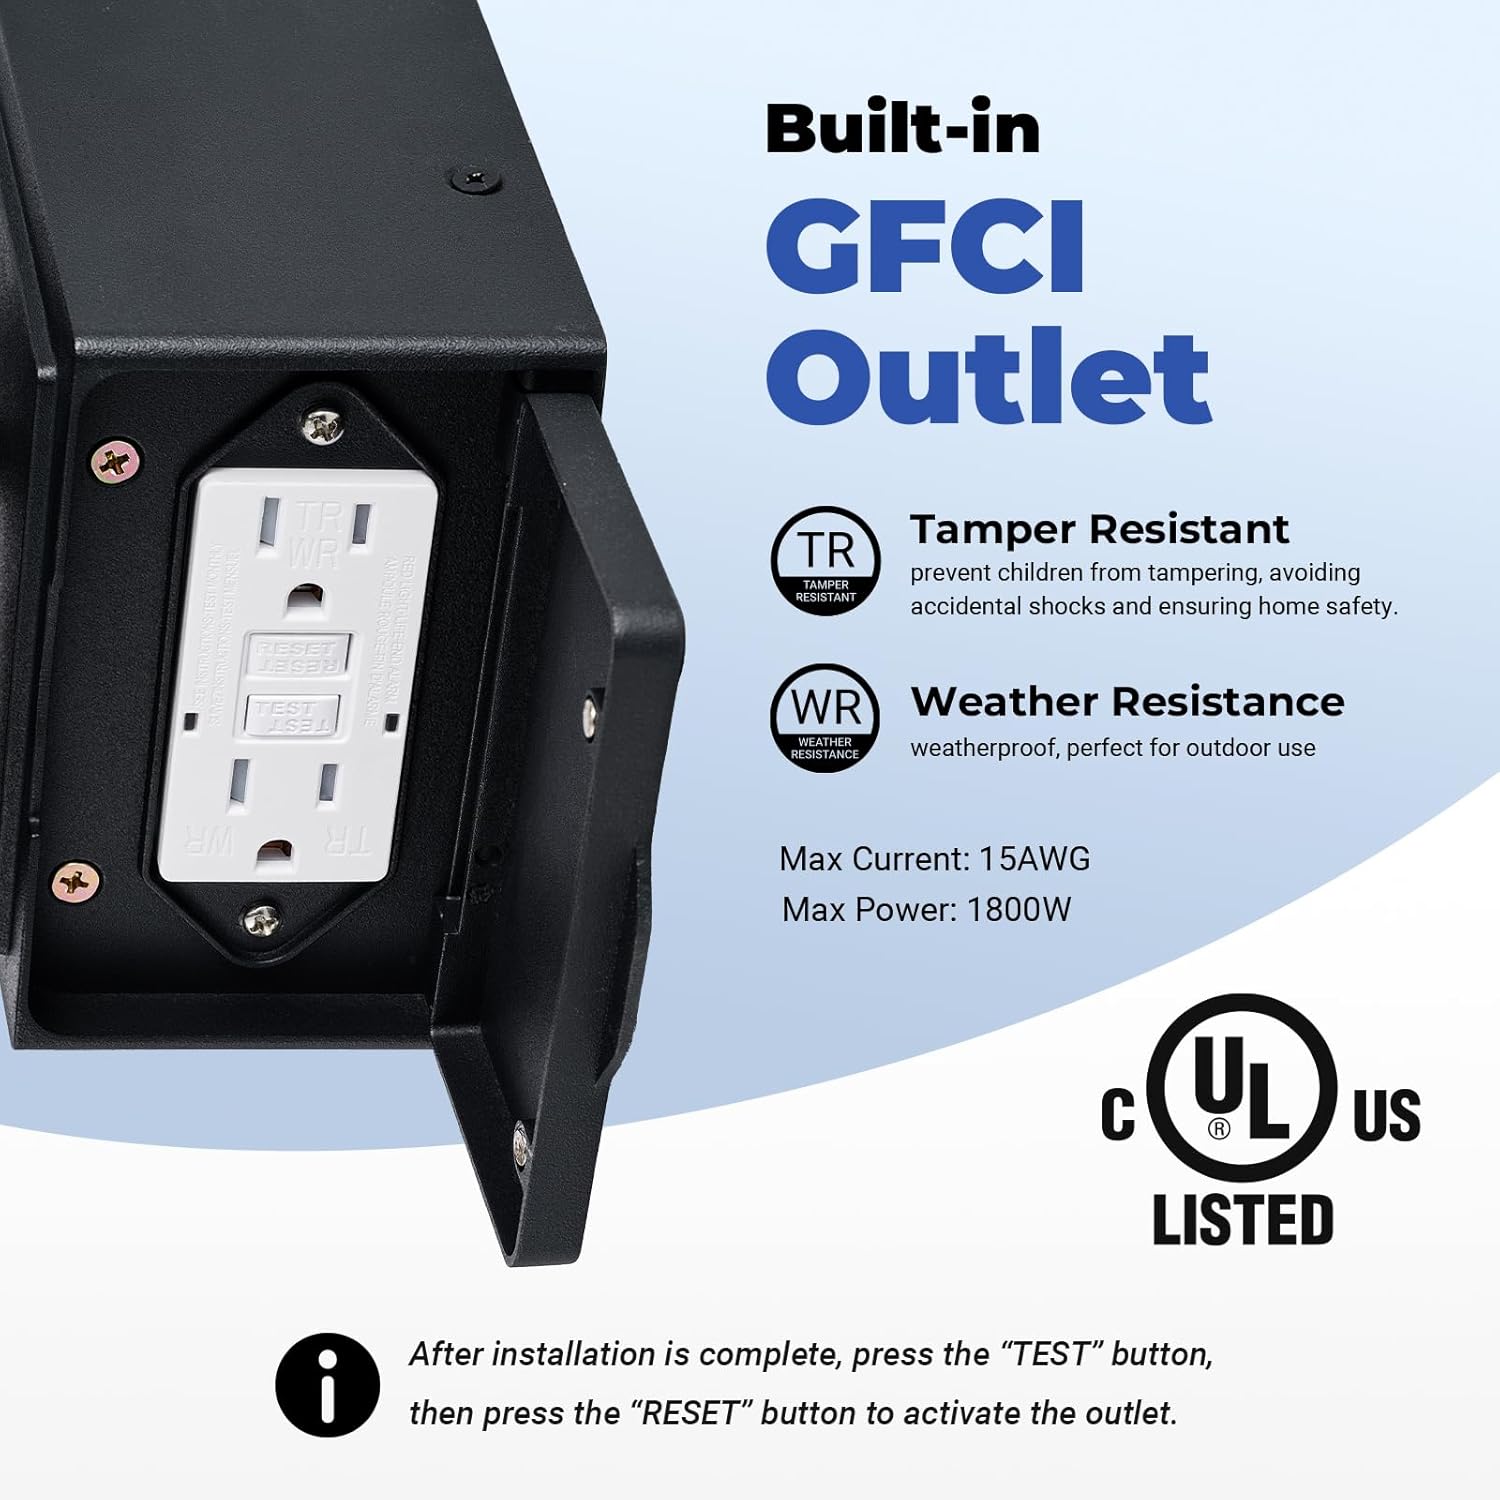
Figure 4: Built-in GFCI Outlet Details. This image provides a close-up view of the two GFCI outlets, highlighting their tamper-resistant and weather-resistant features, and the magnetic cover.

Figure 5: Light and Power in One. This image demonstrates the versatility of the light fixture, showing how it can power various outdoor devices like security cameras, electric mowers, holiday lights, and leaf blowers.
7. Maintenance
- Cleaning: To clean the fixture, ensure power is off. Wipe with a soft, damp cloth. Do not use abrasive cleaners or solvents.
- Bulb Replacement: The fixture features an open bottom design for easy bulb replacement. Ensure power is off before changing the bulb. Use only E26 base bulbs, up to a maximum of 100W.
- GFCI Testing: Regularly test the GFCI outlet by pressing the "TEST" button. The "RESET" button should pop out. Press "RESET" to restore power. If it does not reset, consult a qualified electrician.
8. Troubleshooting
- Light does not turn on:
- Check if the power is on at the circuit breaker.
- Ensure the bulb is correctly installed and not burnt out.
- Verify the photocell sensor is not obstructed by debris or excessive light during dusk.
- GFCI outlet is not working:
- Press the "RESET" button on the GFCI outlet.
- Check the circuit breaker for tripped circuits.
- Ensure the magnetic cover is properly closed to protect the outlet from moisture.
- Light stays on during the day:
- The photocell sensor may be obstructed or receiving insufficient light. Ensure it is clean and exposed to natural daylight.
- Excessive artificial light near the sensor can cause it to remain on.
9. Warranty and Support
This OPAXIS product comes with a 1-year warranty from the date of purchase. This warranty covers defects in materials and workmanship under normal use. For warranty claims or technical support, please contact OPAXIS customer service through the retailer where the product was purchased or visit the official OPAXIS website.