1. Introduction
Thank you for choosing the GFAZXDS Mini 7-Egg Incubator. This device is designed to provide a controlled environment for hatching various types of poultry eggs, including chicken, duck, goose, quail, and turkey. This manual provides essential information for the safe and effective operation of your incubator. Please read it thoroughly before use and retain it for future reference.

Image 1.1: The GFAZXDS Mini 7-Egg Incubator shown with eggs inside and several newly hatched chicks around it, illustrating its primary function.
2. Safety Instructions
- Always place the incubator on a stable, level surface away from direct sunlight, drafts, or extreme temperature fluctuations.
- Ensure the power supply matches the voltage requirements specified on the product label (AC 110V or AC 230V, 50/60Hz).
- Do not immerse the incubator or its electrical components in water or any other liquid.
- Unplug the incubator from the power outlet before cleaning or performing any maintenance.
- Keep the incubator out of reach of children and pets.
- Do not block the ventilation holes on the incubator.
- Use only the provided power adapter.
3. Product Components
The GFAZXDS Mini 7-Egg Incubator consists of the following main parts:
- Incubator Base: The yellow base housing the heating element, fan, and control panel.
- Transparent Cover: A clear dome that allows observation of the incubation process.
- Egg Tray: A removable tray designed to hold up to 7 eggs.
- Control Panel: Features an LED digital display for temperature, 'Work' and 'Set' indicators, and 'Set', '+', '-' buttons for operation.
- Power Adapter: For connecting the incubator to an electrical outlet.
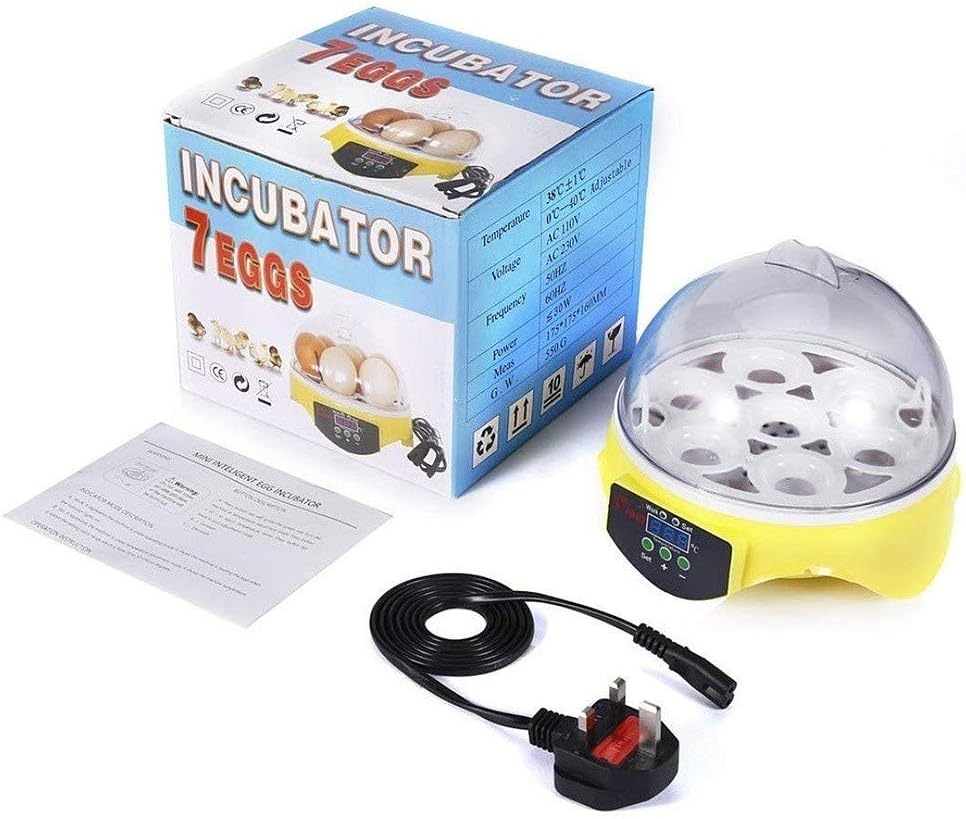
Image 3.1: The GFAZXDS Mini 7-Egg Incubator box, the incubator unit, the power adapter, and a small instruction leaflet, showing the items included in the package.

Image 3.2: A collage of detailed views of the incubator, including the digital control panel with 'Work', 'Set', 'Temperature', '+', and '-' buttons, the ventilation grid on the bottom, and the power input port.
4. Setup
- Unpack: Carefully remove all components from the packaging. Inspect for any damage.
- Placement: Place the incubator on a flat, stable surface in a room with a consistent ambient temperature (ideally between 20-25°C / 68-77°F). Avoid areas with drafts or direct sunlight.
- Add Water: Locate the water channels at the bottom of the incubator base. Carefully add a small amount of warm water (around 30-35°C / 86-95°F) into the channels to establish initial humidity. Do not overfill.
- Connect Power: Connect the power adapter to the incubator's power input port, then plug it into a suitable electrical outlet. The LED display will light up, showing the current temperature.
- Pre-heat: Allow the incubator to pre-heat for at least 20-30 minutes to stabilize the internal temperature before placing eggs inside.
- Egg Placement: Once the temperature is stable, carefully place the fertilized eggs into the egg tray. Ensure they are clean and free from cracks.
5. Operating Instructions
5.1. Setting the Temperature
- Press the 'Set' button once. The temperature display will start flashing.
- Use the '+' and '-' buttons to adjust the desired incubation temperature. The recommended temperature for most chicken eggs is 37.5-38°C (99.5-100.4°F). Refer to Section 5.4 for specific egg types.
- Press the 'Set' button again to confirm the new temperature. The display will stop flashing and return to showing the current internal temperature.
5.2. Monitoring Temperature and Humidity
- The LED display continuously shows the current internal temperature.
- The 'Work' indicator light will illuminate when the heating element is active.
- Humidity is maintained by adding water to the channels. Monitor humidity levels using a separate hygrometer (not included) if precise control is required. Generally, humidity should be around 50-60% for the first 18 days and 65-75% for the last 3 days (lockdown).
5.3. Adding Water for Humidity
Check the water channels daily. If they are dry, carefully add warm water (as described in Setup) to maintain humidity. Avoid splashing water onto the eggs or electrical components.
5.4. Egg Turning
This incubator requires manual egg turning. Gently turn the eggs at least 2-3 times a day (e.g., morning, noon, evening) from day 2 until day 18. This prevents the embryo from sticking to the shell membrane. Do not turn eggs during the last 3 days of incubation (lockdown period).
5.5. Hatching Times for Various Animal Eggs
The incubation period varies depending on the type of egg. The following table provides general guidelines:
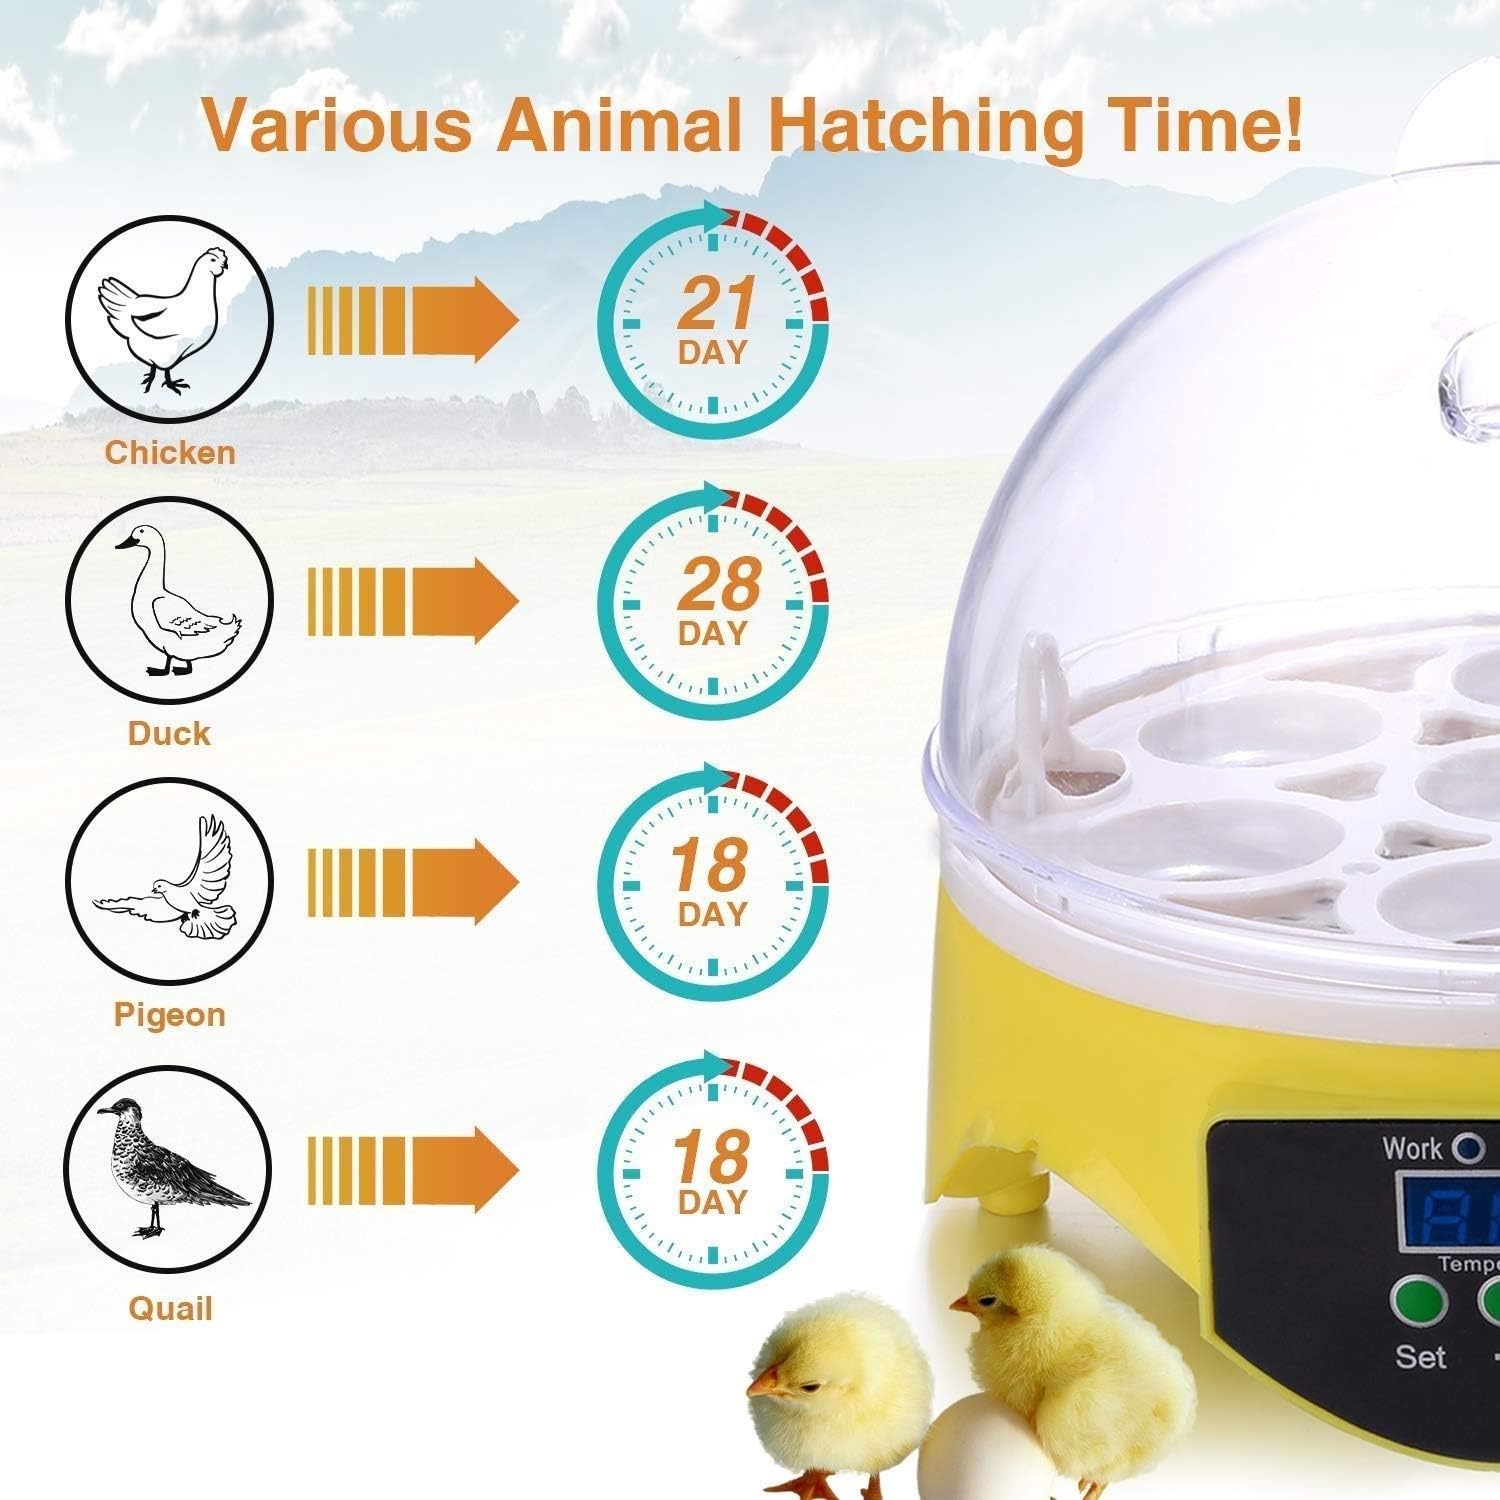
Image 5.1: A visual guide illustrating the typical hatching times for different poultry eggs: Chicken (21 days), Duck (28 days), Pigeon (18 days), and Quail (18 days).
| Egg Type | Incubation Period | Recommended Temperature |
|---|---|---|
| Chicken | 21 Days | 37.5-38°C (99.5-100.4°F) |
| Duck | 28 Days | 37.2-37.5°C (98.9-99.5°F) |
| Goose | 28-32 Days | 37.2-37.5°C (98.9-99.5°F) |
| Quail | 17-18 Days | 37.5-37.8°C (99.5-100°F) |
| Turkey | 28 Days | 37.2-37.5°C (98.9-99.5°F) |
Note: These are general guidelines. Specific breeds may have slightly different requirements.
6. Maintenance
6.1. Cleaning
- After each hatch, unplug the incubator and allow it to cool down completely.
- Remove the egg tray and transparent cover.
- Wipe all surfaces with a damp cloth and a mild disinfectant solution. Ensure no liquid enters the electrical components.
- Clean the egg tray thoroughly.
- Allow all parts to air dry completely before reassembling or storing.
6.2. Storage
Store the clean and dry incubator in its original packaging or a protective container in a cool, dry place, away from direct sunlight and extreme temperatures.
7. Troubleshooting
| Problem | Possible Cause | Solution |
|---|---|---|
| Incubator not powering on | No power supply; faulty adapter; loose connection | Check power outlet; ensure adapter is securely connected; try a different outlet. |
| Temperature too low/high | Incorrect temperature setting; ambient room temperature too low/high; ventilation blocked | Adjust temperature setting; move incubator to a more stable environment; ensure ventilation holes are clear. |
| Low hatch rate | Incorrect temperature/humidity; infrequent egg turning; infertile eggs; poor egg quality | Verify temperature and humidity settings; ensure eggs are turned regularly; use fresh, fertile eggs from a reliable source. |
| Humidity too low | Insufficient water in channels; dry ambient air | Add warm water to the channels; consider placing a damp sponge inside (away from fan/heater) if needed. |
8. Specifications

Image 8.1: A diagram illustrating the physical dimensions of the incubator, with a diameter of 17.5cm (6.8 inches) and a height of 16cm (6.2 inches).
- Model: Mini 7-Egg Incubator
- Capacity: 7 Standard Chicken Eggs
- Material: Environmental Protection Plastic
- Temperature Range: 0°C - 40°C (Adjustable), typically set to 37.5-38°C
- Temperature Accuracy: ±0.01°C
- Voltage: AC 110V / AC 230V
- Frequency: 50Hz / 60Hz
- Power: 15W
- Dimensions (Approx.): 17.5cm (6.8 inches) Diameter x 16cm (6.2 inches) Height
- ASIN: B0F4R45FFT
9. Warranty and Support
For warranty information or technical support, please refer to the contact details provided with your purchase or contact the retailer. Keep your proof of purchase for any warranty claims.