
RETROSUN Wall Mount Ceiling Fan Remote Control and Receiver Kit
Model: TW341
1. Introduction
This manual provides detailed instructions for the installation, operation, and maintenance of your RETROSUN Wall Mount Ceiling Fan Remote Control and Receiver Kit. This kit is designed to provide convenient control over your ceiling fan's speed and lighting functions. Please read this manual thoroughly before installation and use to ensure proper function and safety.
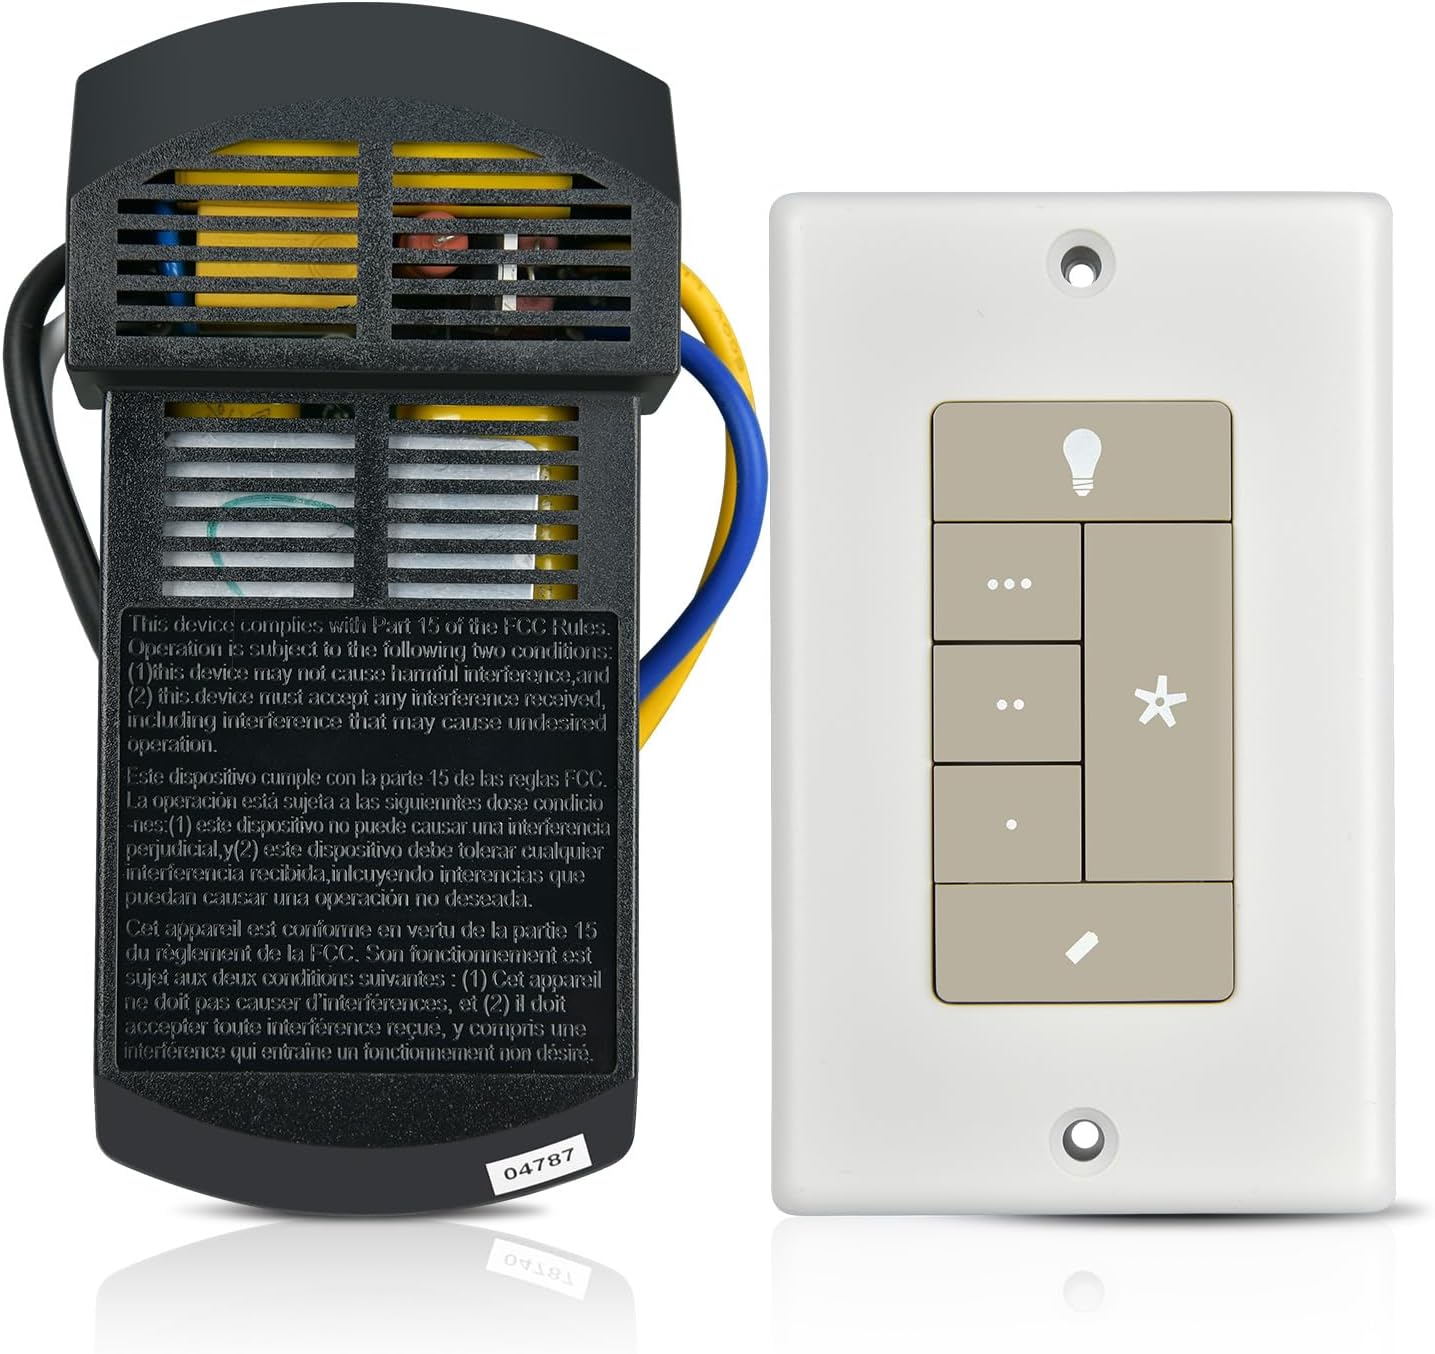
Image 1.1: The RETROSUN Wall Mount Ceiling Fan Remote Control and Receiver Kit. The image displays the wall-mounted remote control on the right and the receiver unit on the left, showing its internal components and wiring connections.
2. Safety Information
- Always disconnect power at the circuit breaker before installing or servicing the receiver or remote control.
- Installation should be performed by a qualified electrician or a person with electrical knowledge.
- Ensure all wiring connections are secure and comply with local electrical codes.
- Do not use this product with solid-state speed controls.
- This device is intended for indoor use only.
- Keep batteries out of reach of children.
3. Package Contents
Verify that all components are present in your package:
- 1 x Wall Mount Ceiling Fan Remote Control
- 1 x Receiver Kit
4. Setup and Installation
4.1 Universal Compatibility
This remote control and receiver kit is universally compatible with various ceiling fan brands, including Hunter, Casablanca, Westinghouse, Harbor Breeze, and General Electric ceiling fans.

Image 4.1: Universal Compatibility. This graphic illustrates the remote control's compatibility with major ceiling fan brands like Hunter, Casablanca, Westinghouse, Harbor Breeze, and General Electric, showing a ceiling fan and the remote.
4.2 Wiring Instructions
Follow these steps for wiring the receiver to your ceiling fan and power supply. Ensure power is OFF at the circuit breaker before proceeding.
- Connect the AC supply wires to the receiver: AC IN N (Neutral) and AC IN L (Live).
- Connect the receiver's output wires to the ceiling fan: BLUE wire for Light load, BLACK wire for Fan load, and WHITE wire for Neutral to Fan.
- Connect the wall control to the AC supply (AC IN L) and ensure proper grounding.

Image 4.2: Wiring Diagram. This diagram shows the connections from the AC supply to the wall control and the receiver, and from the receiver to the ceiling fan's motor and light. Color-coded wires (blue, black, white) are indicated for light, fan, and neutral connections respectively.

Image 4.3: Simplified Wiring Setup. This image provides a close-up view of the wire connections using wire nuts (D), showing how wires from the receiver, fan, and ceiling are joined for both light and fan motor circuits.
5. Pairing Instructions
After installation, the remote control must be paired with the receiver for the fan to operate. Follow these steps:
- Restore power to the ceiling fan at the circuit breaker.
- Within 3 minutes of restoring power, press and hold both the [Fan Off] button and the [High] fan speed button on the wall control simultaneously for at least 4 seconds.
- The fan will turn at the lowest speed, signifying that the remote pairing process is complete.
- If you are using the transmitter with multiple fans, repeat this pairing process for each fan individually.
NOTE: The remote must be paired before the fan will operate.
6. Operating Instructions
The wall mount remote control provides intuitive control over your ceiling fan and light.
6.1 Fan Speed Control
The remote offers three fan speeds:
- High: For maximum airflow.
- Medium: For moderate airflow.
- Low: For gentle airflow.
Press the corresponding speed button on the remote to select your desired fan speed. The [Fan Off] button will turn the fan off.
6.2 Lighting Control and Dimming
The remote allows you to turn the light on/off and adjust its brightness.
- Press the [Light] button to turn the light on or off.
- To dim the light, press and hold the [Light] button. Release when the desired brightness is achieved.

Image 6.1: Light Dimmer Functionality. This image demonstrates the adjustable brightness feature of the ceiling fan light, showing a room with the light at full brightness, medium brightness, and off, controlled by the remote.
7. Maintenance
7.1 Battery Replacement
The wall control requires a CR2032 button cell battery. Replace the battery when the remote's performance diminishes or it stops responding.
- Locate the battery door on the wall control.
- Using a Phillips head screwdriver, remove the screw securing the battery door.
- Gently remove the battery holder.
- Replace the used CR2032 battery with a new one, ensuring the positive (+) side is facing downward.
- Reinsert the battery holder and secure the battery door with the screw.

Image 7.1: Easy Battery Replacement. This diagram illustrates the steps to replace the CR2032 battery in the wall mount remote control, showing how to open the battery compartment and insert the new battery with the correct orientation.
8. Troubleshooting
If you encounter issues with your RETROSUN remote control kit, refer to the following common problems and solutions:
| Problem | Possible Cause | Solution |
|---|---|---|
| Fan/Light does not respond to remote. | 1. Remote not paired. 2. Dead battery in remote. 3. Power not supplied to receiver. 4. Receiver antenna obstructed. | 1. Perform pairing procedure (Section 5). 2. Replace battery (Section 7.1). 3. Check circuit breaker and wiring connections. 4. Ensure the receiver's antenna wire extends at least an inch or two outside the fan housing. |
| Fan operates, but light does not. | 1. Light bulb faulty. 2. Wiring issue to light. 3. Light dimmer setting too low. | 1. Replace light bulb. 2. Check light wiring connections. 3. Increase light brightness using the remote. |
| Fan operates at only one speed. | Incorrect wiring or receiver malfunction. | Review wiring connections. If problem persists, contact customer support. |
9. Specifications
- Brand: RETROSUN
- Model Name: Hunter Universal Wall Mount Remote Ceiling Fan Control #99111 349 896
- Item Model Number: TW341
- Color: Black
- Power Source: Battery Powered (Remote), AC Powered (Receiver)
- Battery Type (Remote): CR2032 (Button Cell)
- Number of Fan Speeds: 3
- Special Feature: Universal Compatibility, Lighting Dimming Control
- Included Components: Remote, Receiver
- Indoor/Outdoor Usage: Indoor
- Item Weight: 2.82 ounces
- Package Dimensions: 7.09 x 1.38 x 0.59 inches
10. Warranty and Support
For warranty information or technical support, please refer to the product packaging or contact RETROSUN customer service through the retailer where the product was purchased. Please have your model number (TW341) and purchase date available when contacting support.