1. Introduction
This manual provides detailed instructions for the safe and proper installation and operation of your FORGING MOUNT HY9112-B Corner Full Motion TV Wall Mount. This mount is designed to securely hold televisions ranging from 26 to 65 inches, with a maximum weight capacity of 77 lbs (35 kg). It supports VESA mounting patterns up to 400x400mm and offers full motion capabilities including swivel, tilt, and 90-degree rotation for both landscape and portrait viewing.
Please read all instructions carefully before beginning installation to ensure safety and optimal performance. If you have any questions, contact FORGING MOUNT customer support.
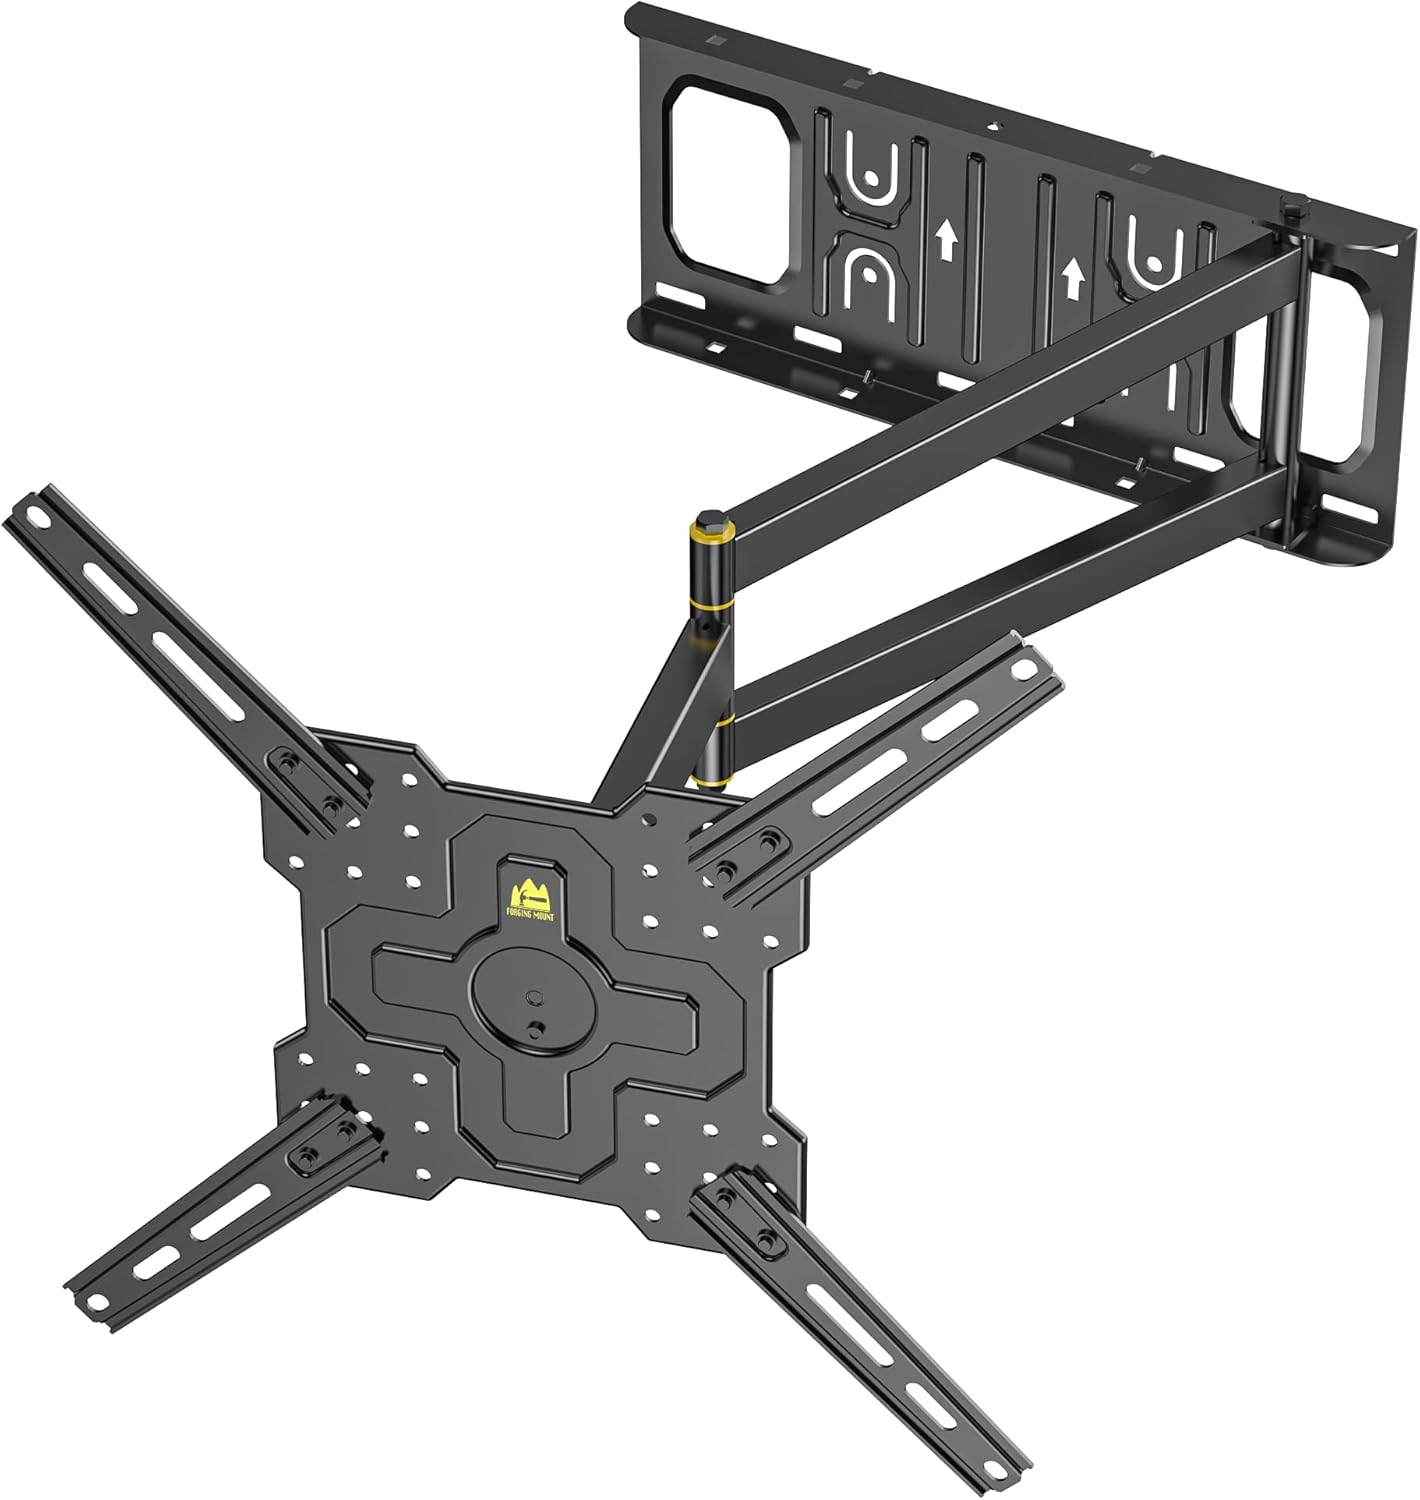
Figure 1: Overview of the FORGING MOUNT HY9112-B Full Motion TV Wall Mount.
2. Safety Information
- Weight Capacity: Do not exceed the maximum weight capacity of 77 lbs (35 kg).
- Screen Size: This mount is compatible with TVs from 26 to 65 inches.
- VESA Compatibility: Ensure your TV's VESA pattern is between 100x100mm and 400x400mm.
- Wall Type: Install only on 16-inch wood stud walls or solid concrete/brick walls. DO NOT INSTALL ON DRYWALL ALONE.
- Professional Installation: If you are unsure about the installation process, consult a qualified professional.
- Tools: Use appropriate tools and wear safety gear during installation.
3. Package Contents
Verify that all components are present and undamaged before installation. If any parts are missing or defective, contact FORGING MOUNT customer service.
- TV Wall Mount Assembly (Main Unit)
- TV Brackets (x2)
- Wall Plate Template
- Mounting Hardware Kit (various screws, washers, spacers for TV and wall mounting)
- Bubble Level
- Cable Ties
- Instruction Manual
4. Specifications
| Feature | Specification |
|---|---|
| Model Number | HY9112-B |
| Screen Size Compatibility | 26 - 65 inches |
| Weight Capacity | 77 lbs (35 kg) |
| VESA Compatibility | 100x100mm to 400x400mm |
| Extension Arm Length | 2.5 inches (retracted) to 25.6 inches (extended) |
| Swivel Range | +/- 90 degrees |
| Tilt Range | +5 degrees / -12 degrees |
| Level Adjustment | +/- 3 degrees (after installation) |
| Material | Alloy Steel |
| Color | Black |

Figure 2: TV compatibility details including screen size, weight capacity, and VESA patterns.

Figure 3: Detailed VESA mounting pattern ranges. Note: Extension arms are not needed for VESA patterns below 200x200mm.
5. Installation Guide
This section outlines the steps for mounting your TV. Ensure you have all necessary tools and understand each step before proceeding. This mount is suitable for 16-inch wood stud walls and solid concrete/brick walls. Do not install on drywall alone.
5.1 Pre-Installation Checks
- Verify your TV's weight and VESA pattern against the specifications.
- Locate suitable mounting points on your wall (wood studs or solid concrete/brick).
- Gather necessary tools: drill, stud finder, level, pencil, measuring tape, screwdriver.
5.2 Attaching TV Brackets to Your TV
- Carefully place your TV face down on a soft, clean surface to prevent screen damage.
- Identify the VESA mounting holes on the back of your TV.
- Select the correct screws, washers, and spacers from the hardware kit that fit your TV's mounting holes. If your TV's VESA pattern is below 200x200mm, the extension arms on the TV brackets are not required.
- Attach the two TV brackets to the back of your TV using the selected hardware. Ensure they are securely fastened and level.

Figure 4: Illustration of attaching the TV brackets to the television.
5.3 Mounting the Wall Plate
- Determine the desired height and position for your TV. For corner installations, consider the full range of motion.
- Use a stud finder to locate the center of two adjacent wood studs (for wood stud installation) or mark drill points for concrete/brick.
- Position the wall plate template at the desired location and mark the drill holes. Use the included bubble level to ensure it is perfectly horizontal.
- Drill pilot holes according to the template and wall type.
- Securely fasten the wall plate of the mount to the wall using the appropriate lag bolts and washers. Ensure it is firmly attached.

Figure 5: Illustration of securing the wall plate to the wall.
5.4 Hanging the TV
- With assistance, carefully lift the TV (with brackets attached) and hook the TV brackets onto the wall plate.
- Ensure the TV is securely seated on the mount.
- Tighten any safety screws or locking mechanisms on the TV brackets to prevent accidental dislodgement.

Figure 6: Illustration of hanging the television onto the mounted wall plate.
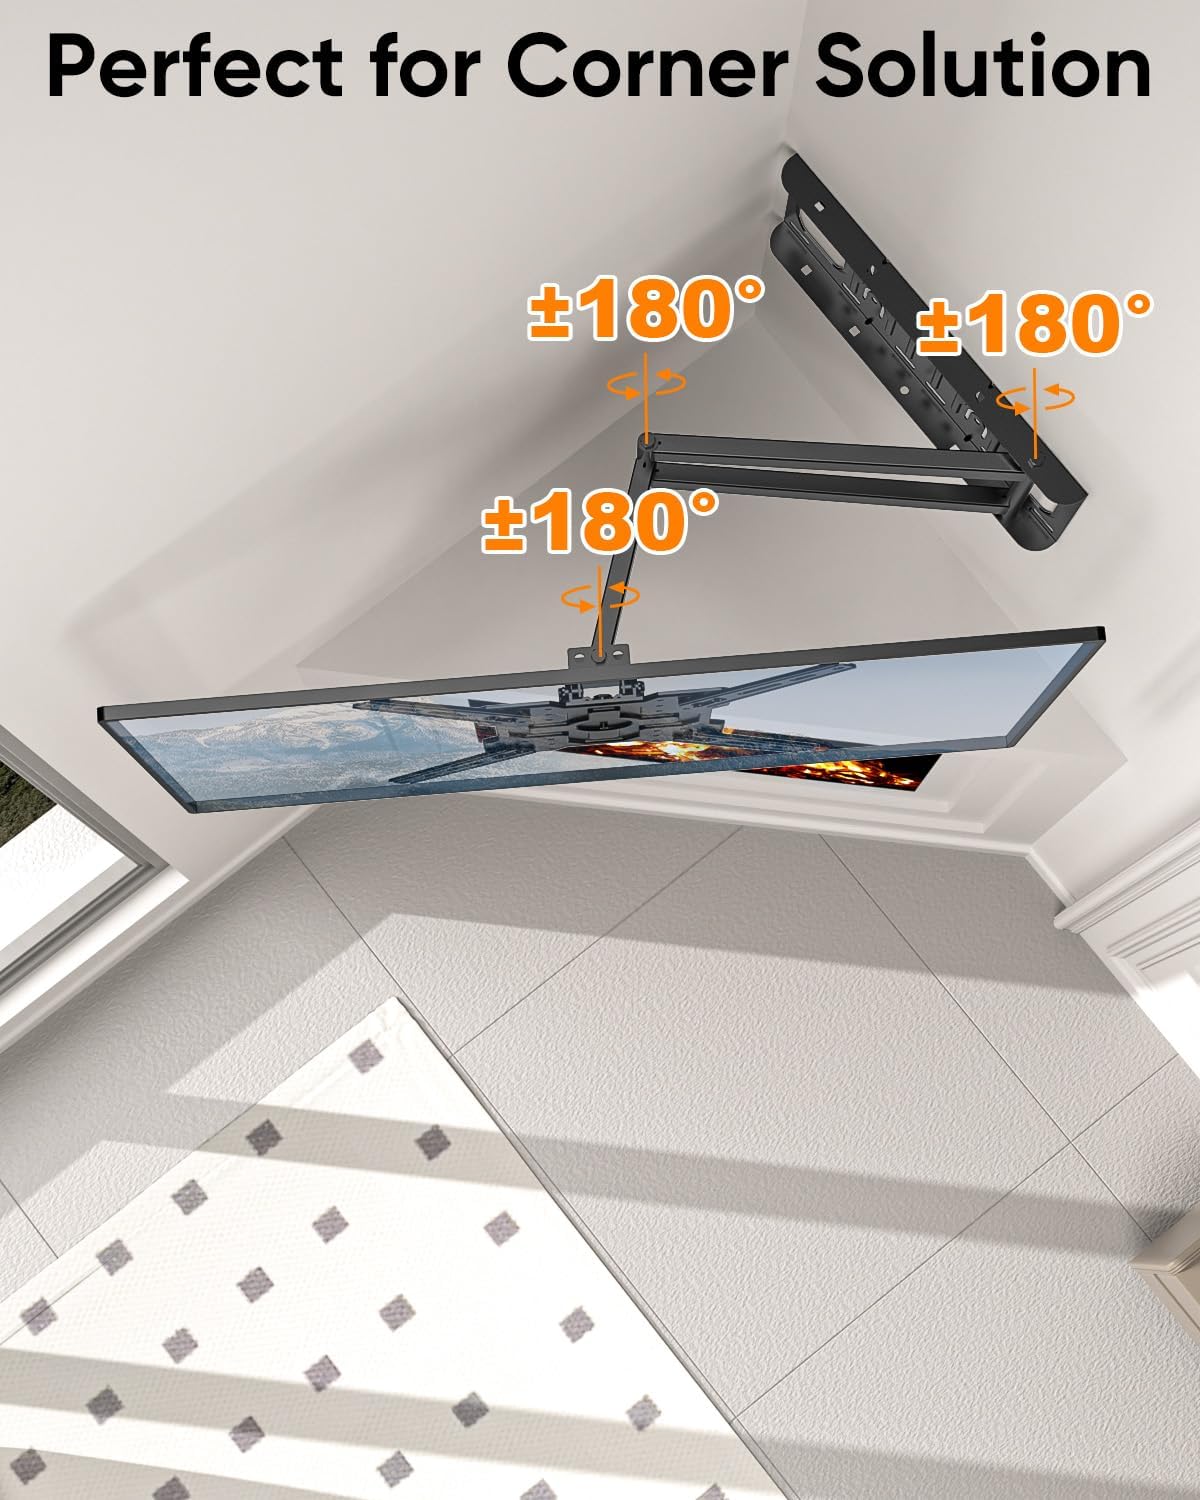
Figure 7: The mount's design allows for effective corner installation, providing flexible viewing angles.
6. Operating Instructions
Your FORGING MOUNT HY9112-B offers versatile adjustments for optimal viewing.
6.1 Swivel Adjustment
The mount allows for a +/- 90-degree swivel. Gently push or pull the TV to the desired left or right angle. The full motion arm extends up to 25.6 inches, providing ample range for various viewing positions, including corner applications.

Figure 8: Demonstrates the mount's extension, retraction, and swivel capabilities.
6.2 Tilt Adjustment
Adjust the vertical tilt of your TV from +5 degrees (upward) to -12 degrees (downward) to reduce glare and optimize viewing comfort. This adjustment is tool-free.

Figure 9: Illustrates the tilt function for ergonomic viewing.
6.3 Landscape to Portrait Rotation
This mount features a 90-degree rotation capability, allowing you to switch your TV between landscape (horizontal) and portrait (vertical) orientations. Gently rotate the screen by hand after installation to achieve the desired display mode.

Figure 10: Shows the TV rotating from landscape to portrait mode.
6.4 Level Adjustment
After installation, you can make minor level adjustments of +/- 3 degrees to ensure your TV is perfectly horizontal.
7. Maintenance
- Cleaning: Wipe the mount with a soft, dry cloth. Avoid abrasive cleaners or solvents.
- Inspection: Periodically check all screws and connections to ensure they remain tight and secure.
- Movement: If the mount's movement becomes stiff, apply a small amount of silicone-based lubricant to the articulating joints.
8. Troubleshooting
- TV is not level: Use the post-installation level adjustment feature (+/- 3 degrees) to fine-tune the horizontal position. Recheck wall plate installation if significant tilt persists.
- Mount feels loose: Ensure all wall mounting bolts and TV bracket screws are securely tightened. Do not overtighten.
- Difficulty moving the TV: Check for any obstructions. If joints are stiff, apply a small amount of silicone lubricant. Ensure the TV weight is within the specified limit.
- Missing parts or damaged components: Do not proceed with installation. Contact FORGING MOUNT customer support immediately.
9. Warranty and Support
FORGING MOUNT is committed to providing high-quality products. For any questions, concerns, or support needs regarding your HY9112-B TV wall mount, please contact FORGING MOUNT customer service. Refer to your product packaging or the FORGING MOUNT website for specific warranty details and contact information.
Manufacturer: FORGING MOUNT