1. Introduction
This manual provides detailed instructions for the installation, operation, and maintenance of your DAWDFC Motorbike Digital Tachometer, model MT0068-3. This universal 12V digital dashboard is designed to provide essential riding information including speed, RPM, odometer, trip meter, fuel level, and water temperature. Please read this manual thoroughly before installation and use to ensure proper function and safety.

Figure 1: DAWDFC MT0068-3 Digital Tachometer main unit.
2. Product Features
- Digital Display: Provides clear and accurate readings for various parameters.
- 12V Compatibility: Designed for use with 12V motorcycle electrical systems.
- Universal Design: Compatible with a wide range of motorcycles.
- Adjustable Display: Allows customization of display settings.
- Comprehensive Data: Displays speed, RPM, odometer, trip meter, fuel gauge, water temperature, and time.
- Dual Mileage Units: Supports both kilometers per hour (km/h) and miles per hour (mph).
- Enhanced Visibility: Clear screen for wider viewing angles, day or night.
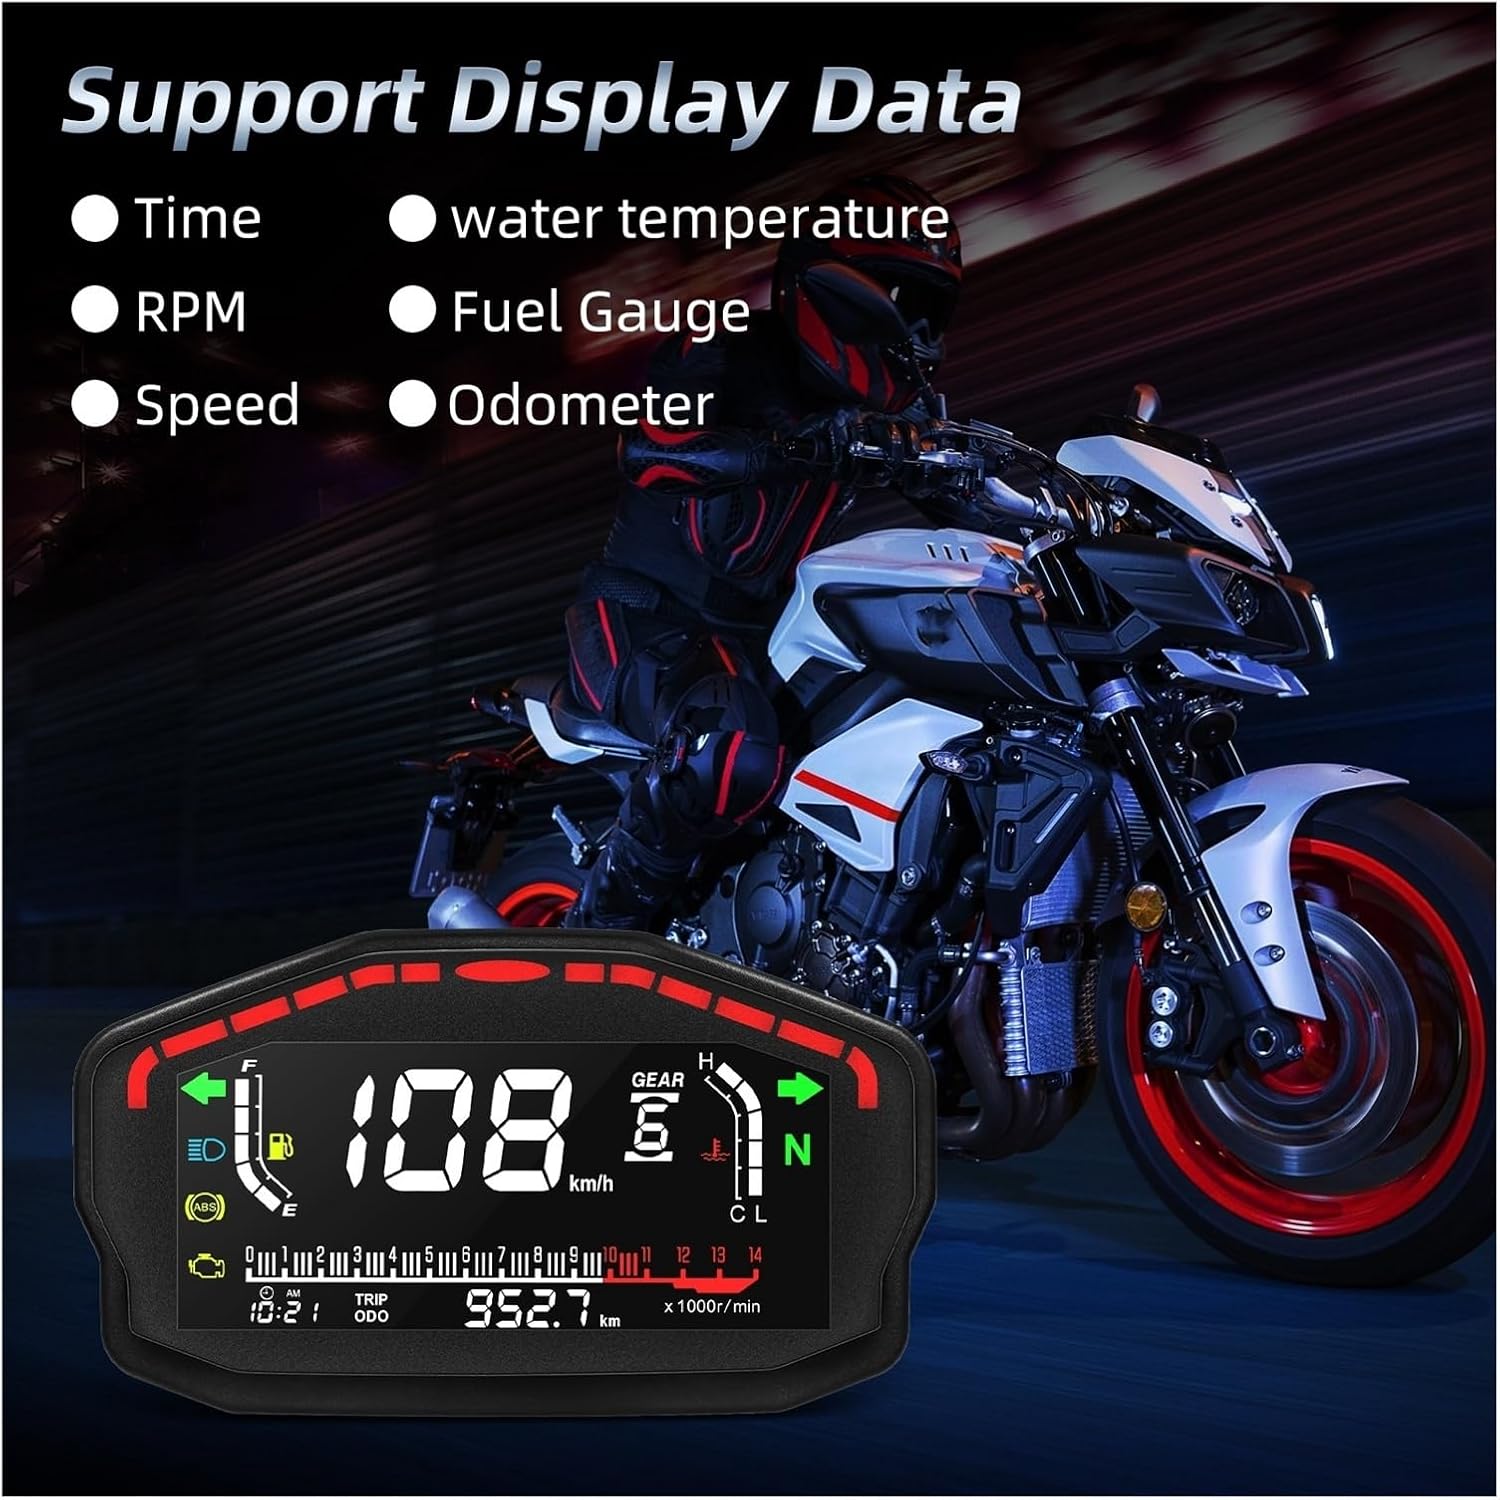
Figure 2: The digital display supports various data points including time, water temperature, RPM, fuel gauge, speed, and odometer.
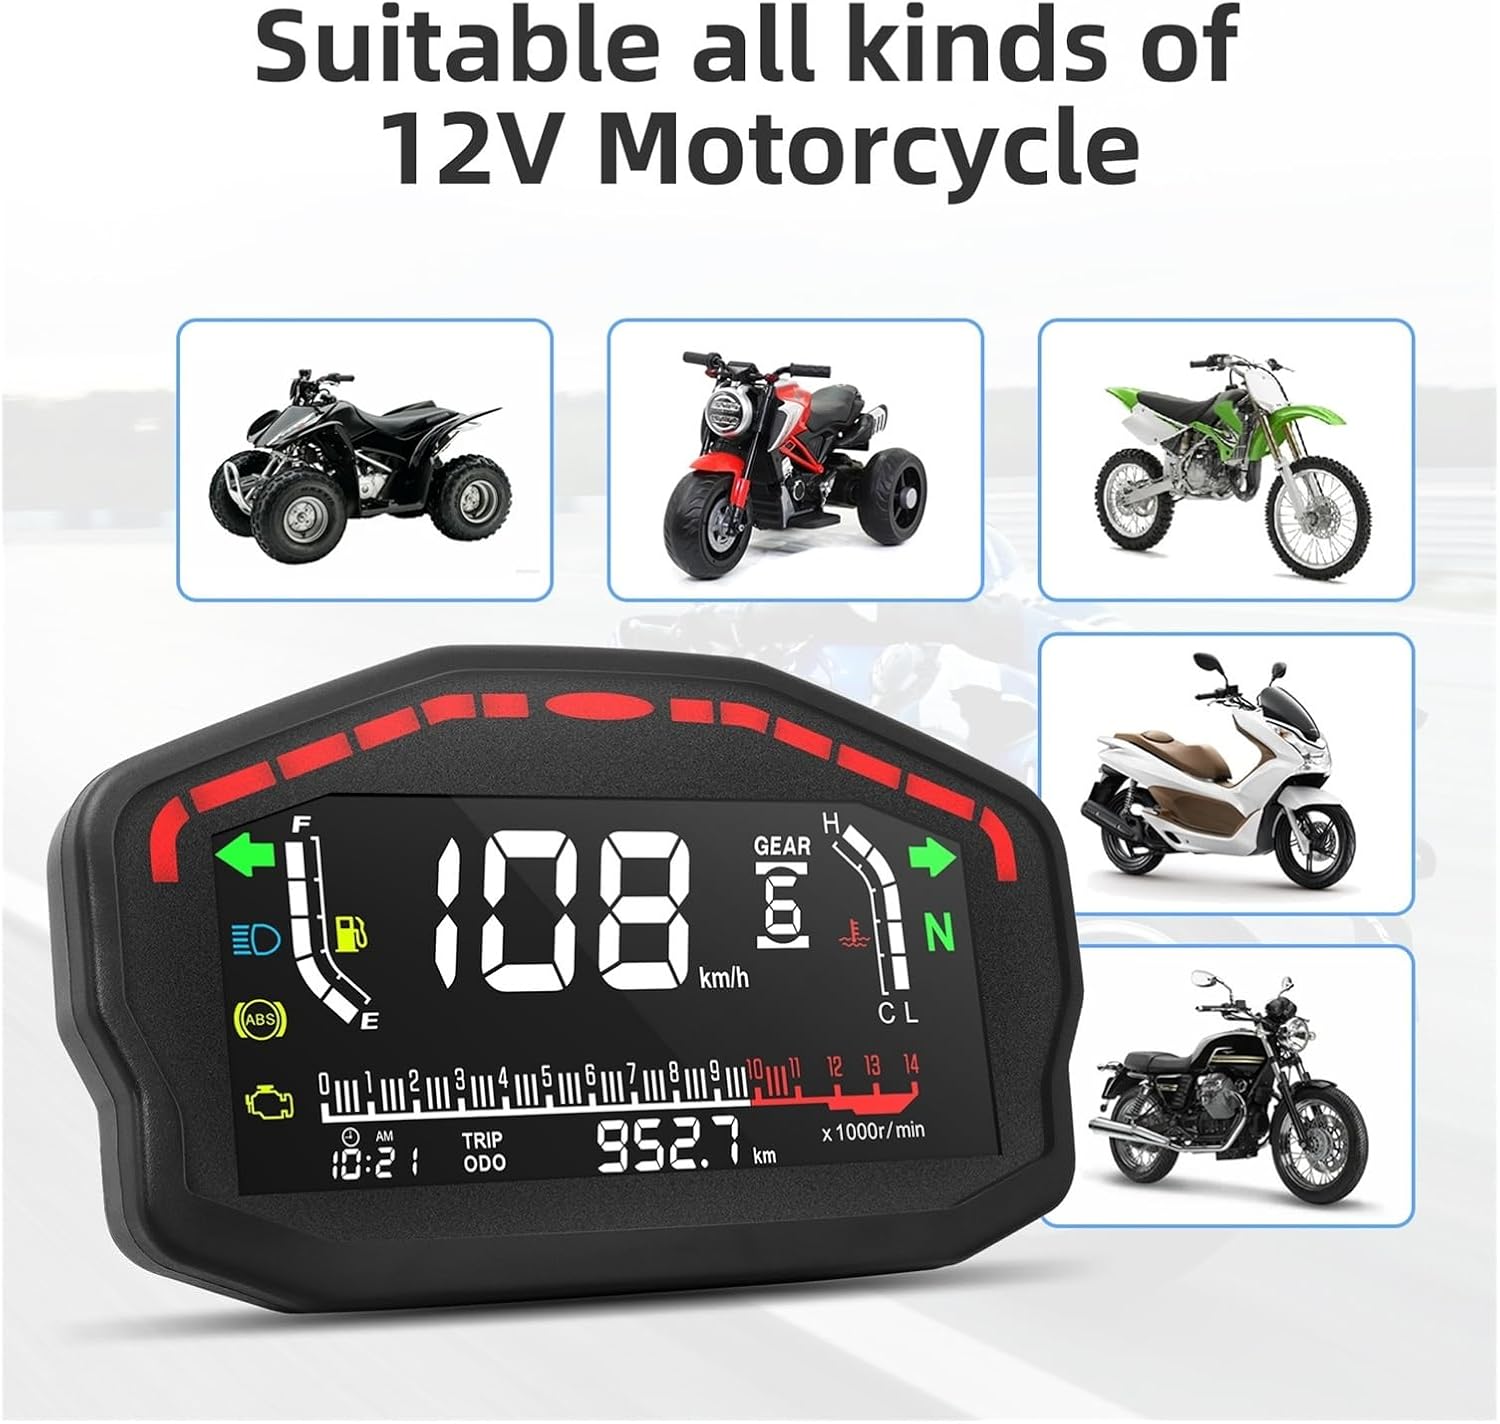
Figure 3: The universal design ensures compatibility with various types of 12V motorcycles, including ATVs, dirt bikes, and street bikes.
3. Setup and Installation
Proper installation is crucial for the correct functioning of the digital tachometer. It is recommended that installation be performed by a qualified technician if you are unfamiliar with motorcycle electrical systems.
3.1 Mounting
- Choose a suitable location on your motorcycle's dashboard or handlebar area that provides clear visibility and does not obstruct your view of the road.
- Securely mount the tachometer using appropriate brackets and fasteners (not included, typically). Ensure it is stable and resistant to vibrations.
3.2 Wiring Connections
The tachometer requires a 12V DC power supply. Refer to the wiring diagram below and your motorcycle's service manual for specific wiring points.
- Red Wire: Connect to 12V positive (+) power supply (e.g., ignition switch output).
- Black Wire: Connect to ground (-).
- Green Wire: Connect to RPM signal input (e.g., ignition coil negative terminal or ECU tachometer output).
- Yellow Wire: Connect to speed sensor input.
- Blue Wire: Connect to headlight/illumination power for backlight control.
- Other Wires: Connect according to specific functions such as fuel level sensor, water temperature sensor, turn signals, high beam indicator, etc.
Ensure all connections are secure and insulated to prevent short circuits and water damage.

Figure 4: Product dimensions and wiring harness details. Refer to this diagram for correct wire identification and connection points.
4. Operating Instructions
4.1 Power On/Off
The unit powers on automatically when the motorcycle's ignition is switched on and powers off when the ignition is turned off.
4.2 Display Information
The digital display provides real-time information:
- Speed: Current riding speed (km/h or mph).
- RPM: Engine revolutions per minute.
- Odometer (ODO): Total distance traveled.
- Trip Meter (TRIP): Resettable distance for a single journey.
- Fuel Gauge: Indicates current fuel level.
- Water Temperature: Engine coolant temperature.
- Time: Current time (12H format).
- Gear Indicator: Displays current gear (if connected).
- Indicator Lights: Turn signals, high beam, neutral, ABS, engine check.
4.3 Switching Mileage Units (km/h and mph)
To switch between kilometers per hour (km/h) and miles per hour (mph):
- Ensure the unit is in ODO (Odometer) mode.
- Long press the button located on the side of the unit.
- The speed display will toggle between km/h and mph. Release the button once your desired unit is displayed.
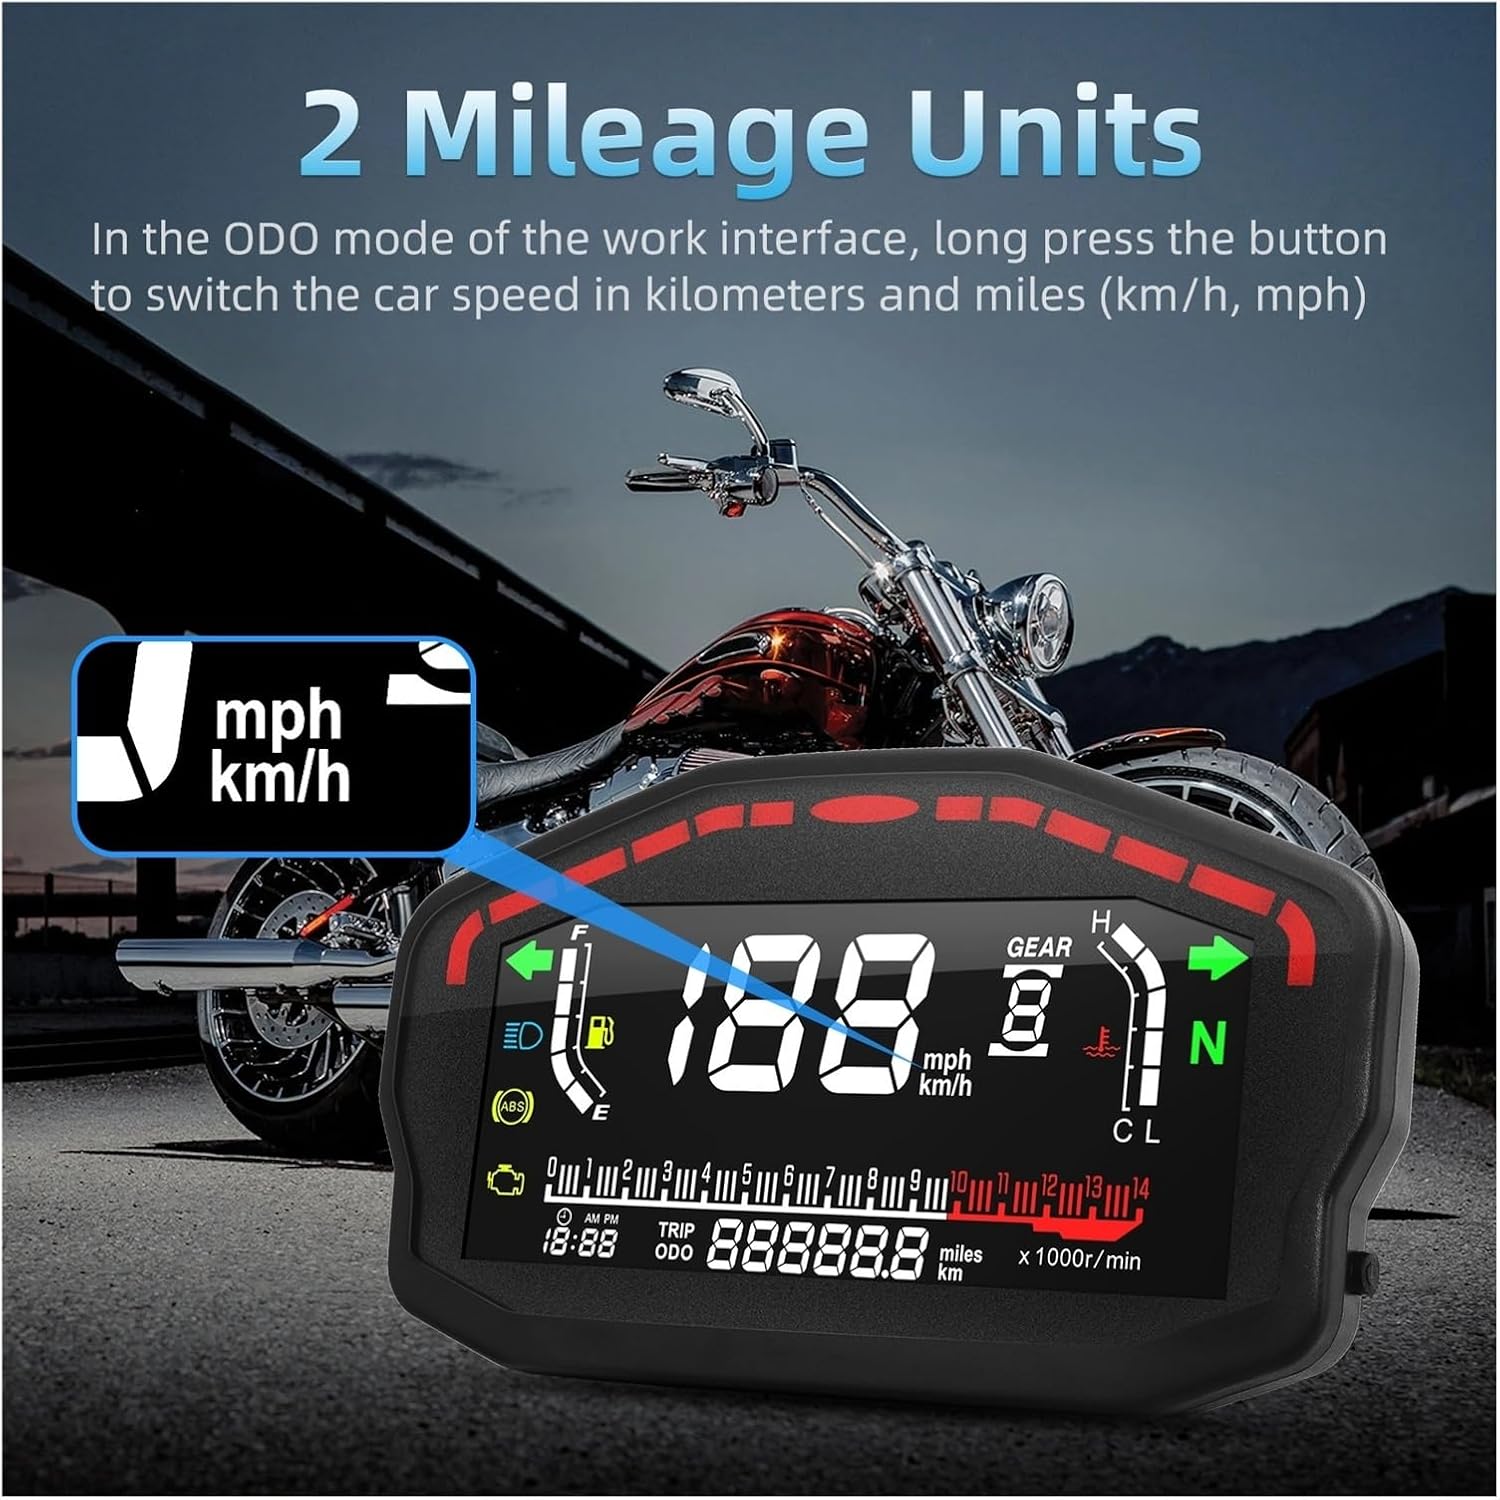
Figure 5: Long press the button in ODO mode to switch between km/h and mph.
4.4 Trip Meter Reset
To reset the trip meter, navigate to TRIP mode and short press the button. The trip distance will reset to zero.
5. Maintenance
To ensure the longevity and optimal performance of your digital tachometer, follow these maintenance guidelines:
- Cleaning: Wipe the display screen and casing with a soft, damp cloth. Avoid using abrasive cleaners or solvents, which can damage the plastic and screen coating.
- Water Exposure: While the unit is designed to be weather-resistant, avoid direct high-pressure water jets during washing. Ensure all wiring connections are properly sealed to prevent water ingress.
- Wiring Inspection: Periodically check all wiring connections for looseness, corrosion, or damage. Secure any loose connections and repair damaged insulation.
- Environmental Conditions: Avoid exposing the unit to extreme temperatures for prolonged periods.
6. Troubleshooting
If you encounter issues with your digital tachometer, refer to the following common problems and solutions:
- No Power/Display Off:
- Check the 12V power connection (red wire) and ground connection (black wire).
- Verify the motorcycle's battery voltage.
- Check for any blown fuses in the motorcycle's electrical system.
- Incorrect Speed Reading:
- Ensure the speed sensor is correctly installed and connected (yellow wire).
- Verify the wheel circumference setting (if adjustable, refer to advanced settings).
- Incorrect RPM Reading:
- Check the RPM signal connection (green wire).
- Ensure the cylinder setting is correct (if adjustable, refer to advanced settings).
- Display Flickering/Unstable:
- Check for loose wiring connections.
- Ensure stable 12V power supply.
- Check for electromagnetic interference from other electrical components.
If these steps do not resolve the issue, please contact customer service for further assistance.
7. Specifications
| Power Voltage | DC 8-12V |
| Case Color | Black |
| Speed Display Range | 0-199 km/h (mile) |
| Odometer Display Range | 0-999999 km (mile) |
| Trip Meter Display Range | 999.9 km (mile) |
| RPM Range | 0-14000 r/min |
| Time Format | 12H |
| Item Diameter | 16.5 cm |
| Item Height | 10 cm |
| Item Width | 4.2 cm |
| Item Length | 16.5 cm |
| Material | Plastic |
| Item Weight | 464 g |
8. Support and Warranty
For any installation questions, technical support, or warranty inquiries, please feel free to consult our customer service team. Refer to your purchase documentation for specific warranty terms and contact information.