Introduction
This manual provides essential information for the safe and effective installation, operation, and maintenance of your new Generic Refrigerator Capacitor. Please read these instructions thoroughly before attempting any installation or repair to ensure proper function and to prevent potential hazards. This component is designed as a replacement part for specific Frigidaire and Electrolux refrigerator models.
Product Overview
This replacement capacitor is engineered to meet the specifications required for compatible refrigerator systems. It is a non-genuine replacement part, manufactured with high-quality materials for durability. It is compatible with Frigidaire and Electrolux models requiring part numbers AP4315853, PS2333670, and 5304464438.
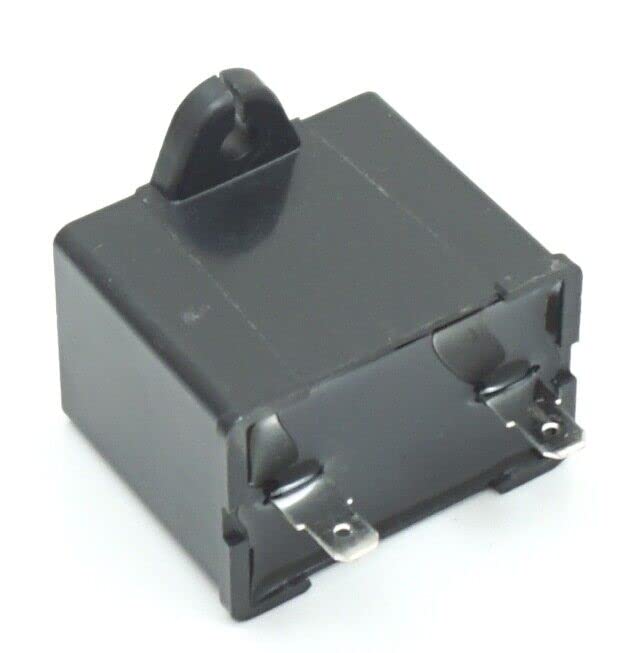
Image 1: Generic Refrigerator Capacitor. This component is a dark gray rectangular capacitor with two flat metal terminals extending from the top. Markings on the side indicate "CBB61 SH", "15µF±5%", and "250V.AC 50/60Hz 25/85/21".
Safety Information
WARNING: Electrical components can store dangerous charges even when disconnected from power. Improper handling can result in severe injury or death. Always follow these safety guidelines:
- Disconnect Power: Always unplug the refrigerator from the main power supply before beginning any repair or installation.
- Discharge Capacitors: Capacitors can hold an electrical charge. Use a properly insulated tool (e.g., a screwdriver with an insulated handle) to discharge the capacitor by shorting its terminals. Exercise extreme caution.
- Wear Protective Gear: Always wear appropriate personal protective equipment, including safety glasses and insulated gloves.
- Professional Installation Recommended: If you are not experienced with appliance repair or electrical work, it is highly recommended to seek assistance from a qualified technician.
- Verify Compatibility: Ensure this part is the correct replacement for your specific appliance model before installation. Appliance parts can look similar but have different specifications.
Installation
The following steps are general guidelines for replacing a refrigerator capacitor. Specific procedures may vary depending on your refrigerator model. Refer to your appliance's service manual for detailed instructions.
- Prepare for Installation: Ensure the refrigerator is unplugged and moved to an area with sufficient space for access.
- Locate the Old Capacitor: The capacitor is typically located near the compressor in the back or bottom of the refrigerator. You may need to remove a service panel.
- Discharge the Old Capacitor: Carefully discharge the old capacitor using an insulated screwdriver by touching both terminals simultaneously. You may hear a spark.
- Disconnect Wiring: Note the wiring configuration or take a photograph before disconnecting the wires from the old capacitor.
- Remove Old Capacitor: Detach the old capacitor from its mounting bracket.
- Install New Capacitor: Secure the new capacitor in the mounting bracket.
- Connect Wiring: Reconnect the wires to the new capacitor, ensuring they match the original configuration.
- Reassemble and Test: Replace any removed service panels. Plug the refrigerator back into the power supply and monitor its operation.
Note: It is crucial to ensure the replacement capacitor matches the specifications of the original part. While many appliance parts may appear similar, their electrical characteristics can differ significantly.
Operating Principle
A refrigerator capacitor, often a start capacitor or run capacitor, plays a critical role in the compressor's operation. A start capacitor provides an initial boost of power to help the compressor motor overcome inertia and begin running. A run capacitor helps maintain a consistent power supply to the motor once it's running, improving efficiency. This specific component is designed to fulfill one of these functions within the refrigerator's electrical system, ensuring the compressor starts and operates correctly.
Maintenance
Capacitors are generally sealed units and do not require routine maintenance. However, regular inspection of the refrigerator's electrical components, including the capacitor, is advisable during other appliance servicing. Look for signs of physical damage, bulging, or leakage, which may indicate a failing component. If any issues are observed, follow the safety precautions outlined in this manual and consider professional inspection or replacement.
Troubleshooting
A faulty capacitor can manifest in several ways. If your refrigerator exhibits any of the following symptoms, the capacitor may need to be replaced:
- Compressor Not Starting: The compressor hums but does not start, or it attempts to start and then quickly shuts off.
- Clicking Sound: A rapid clicking sound from the compressor area, often indicating the start relay (which works with the capacitor) is attempting to engage.
- Refrigerator Not Cooling: If the compressor is not running, the refrigerator will not cool effectively.
- Visible Damage: The capacitor appears swollen, bulging, or shows signs of leakage.
If you suspect a capacitor failure, always ensure the refrigerator is unplugged before inspection. Testing a capacitor requires specialized equipment and knowledge; it is recommended to consult a qualified technician for diagnosis and replacement.
Specifications
| Part Type | Refrigerator Capacitor Replacement |
| Brand | Generic |
| Model Number | qtruoq-100425-1856 |
| Compatible Part Numbers | AP4315853, PS2333670, 5304464438 |
| Manufacturer | Qtruoq_Parts |
| Capacitance | 15µF ±5% (as seen on component) |
| Voltage Rating | 250V.AC (as seen on component) |
| Frequency | 50/60Hz (as seen on component) |
| Color | Black/White |
| Item Package Quantity | 1 |
| ASIN | B0F4FL7NHK |
| Date First Available | April 10, 2025 |
Warranty and Support
Specific warranty details for this Generic replacement part are not provided in the product information. For any questions regarding product defects or performance, please contact the seller directly through your purchase platform. Always ensure you have your purchase details readily available when seeking support.


