1. Important Safety Information
WARNING: Failure to follow these instructions could result in serious injury or death.
- Always read and follow all instructions carefully before installation and use.
- This gate is designed for children aged 6-36 months and for pets.
- NEVER install this gate at the top of stairs unless specifically designed for that purpose and securely mounted. This pressure-mounted gate is suitable for doorways and bottom of stairs.
- Ensure the gate is installed securely and adjusted to fit the opening tightly.
- Regularly check all parts for tightness and proper function. Do not use if any parts are loose or damaged.
- Do not allow children to climb on or play with the gate.
- Keep small parts away from children during assembly.
- The gap between the gate latch and the frame before installation is NOT a defect. This gap will be eliminated once installed and properly tightened.

Image: Warning label on the gate emphasizing not to cut zip ties before installation.
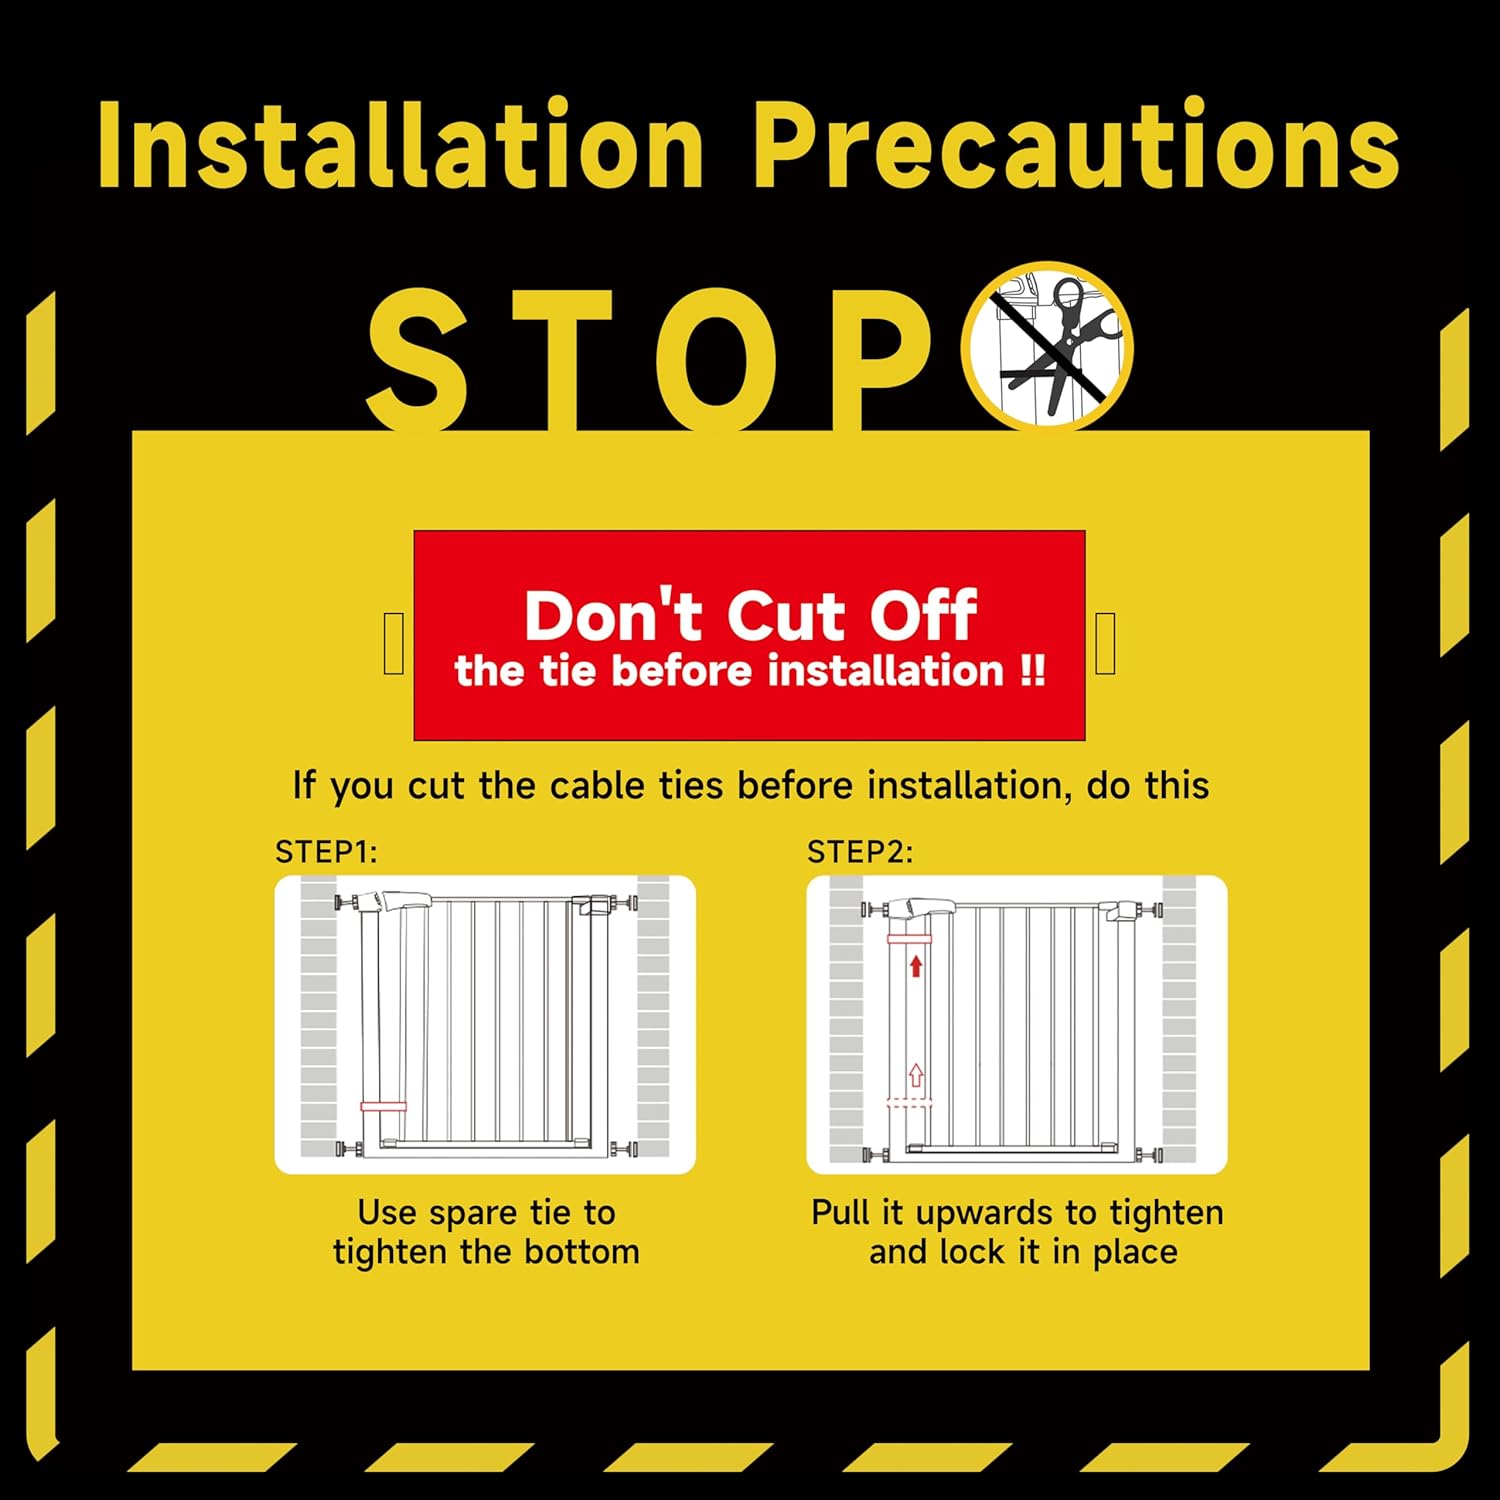
Image: Installation precautions illustrating the correct procedure if zip ties are accidentally cut before full installation.
2. Package Contents
Please verify that all components are present before beginning installation:

Image: A detailed diagram showing all parts included in the package, such as the main gate, extensions, tension bolts, wall cups, and a wrench.
- Main Gate (A) x 1
- 5.5" Extension (B1) x 1
- 2.75" Extension (B2) x 1
- Stair Tension Bolt (C) x 2 (for rounded surfaces)
- Tension Bolt (D) x 4 (standard)
- Wrench (E) x 1
- Wall Cup (F) x 4
- Stick Pad (G) x 4
- Screw / Wall Anchor (H) x 4 (optional for screw-mounted installation)
3. Product Specifications
- Material: Metal, Plastic
- Color: White
- Adjustable Width: 29.5 inches to 40.5 inches
- Height: 30 inches
- Bar Spacing: 2.1 inches
- Walk-Through Opening: 23.6 inches
- Mounting Type: Pressure Mounted (no drilling required for most installations)
- Features: Auto-close, Double-lock design, 180-degree door swing, Stays open at 90 degrees.
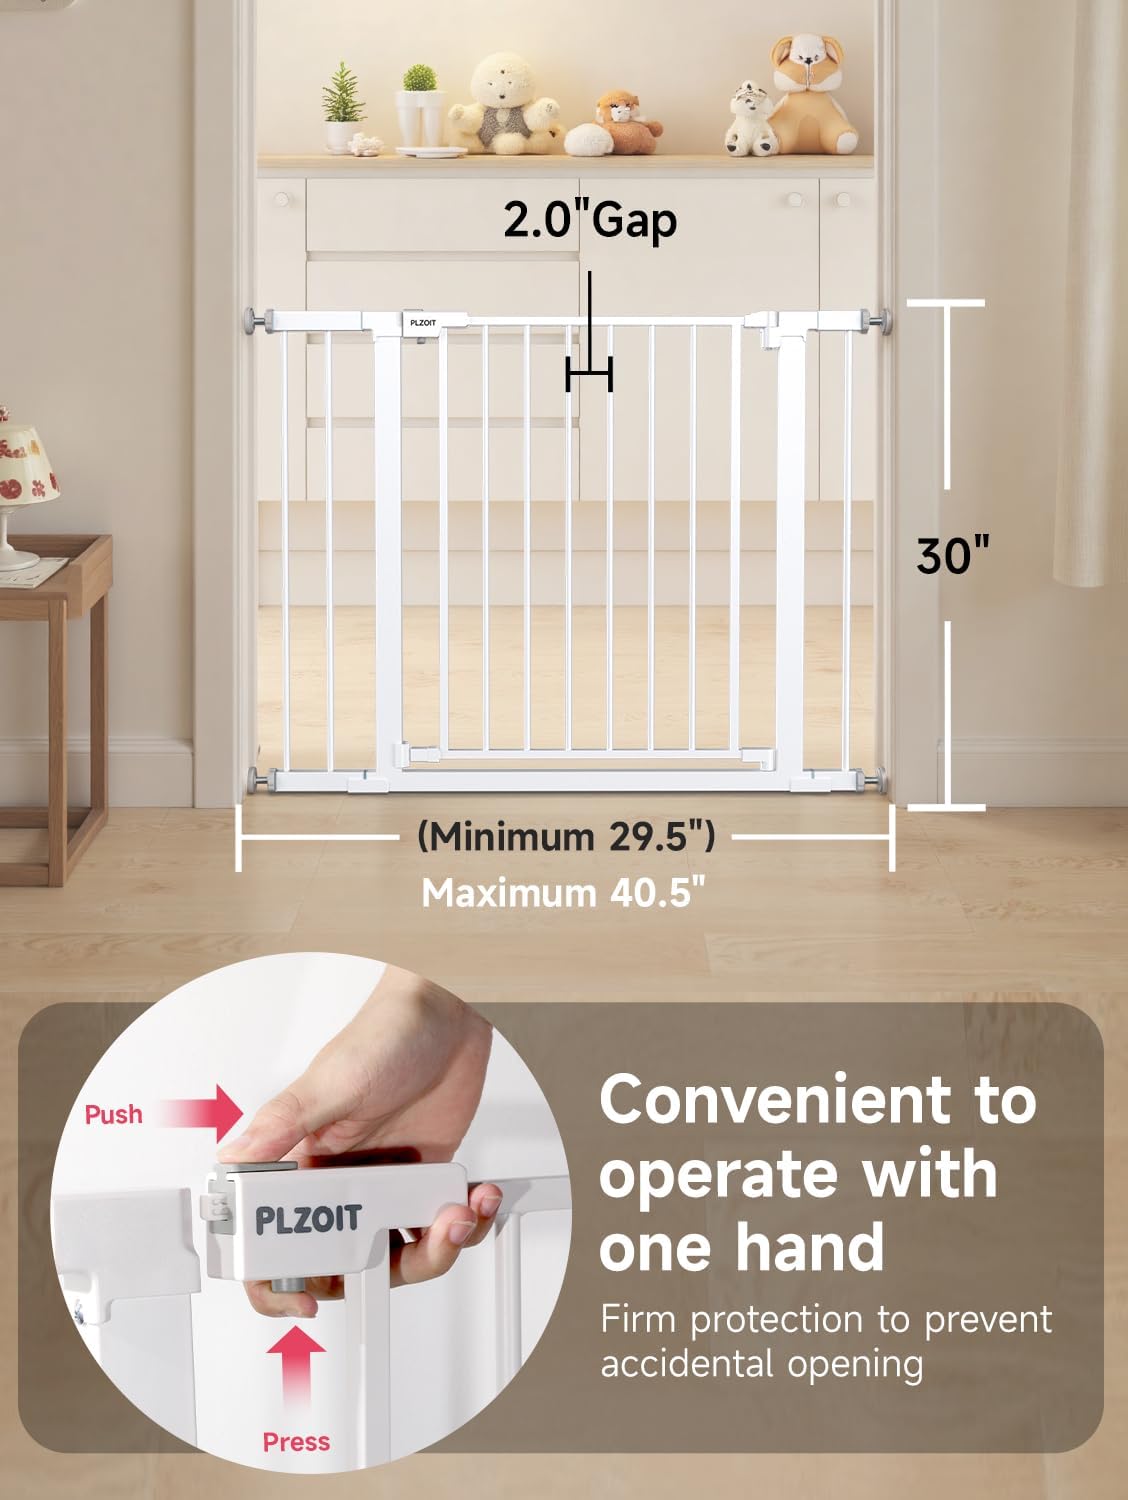
Image: A visual representation of the gate's dimensions, highlighting its adjustable width, 30-inch height, and the 2.1-inch bar spacing.
4. Installation Guide
4.1 Pre-Installation Steps
- Measure Your Opening: Ensure your doorway or stair opening is between 29.5 and 40.5 inches wide.
- DO NOT CUT ZIP TIES: The gate comes with zip ties holding the frame together. Do NOT cut these until the gate is fully installed and tightened. The initial gap is normal for pressure-mounted gates.
Video: A user demonstrating the unboxing and initial setup of the gate, including the importance of not cutting the zip ties prematurely.
4.2 Assembling Extensions (if needed)
If your opening is wider than the main gate, attach the appropriate extensions (B1 or B2) to the main gate (A) by sliding them into the designated slots. The extensions feature fixers to prevent deformation.
Video: This segment shows how to attach extensions to the main gate for wider openings.
4.3 Installing Pressure Bolts
- Insert the four tension bolts (D) into the holes at each corner of the gate frame.
- For rounded surfaces like stair banisters, use the stair tension bolts (C) which have a Y-shaped end for better grip.
- Place the wall cups (F) with stick pads (G) against the wall at the desired installation points. These protect your walls and provide extra grip.
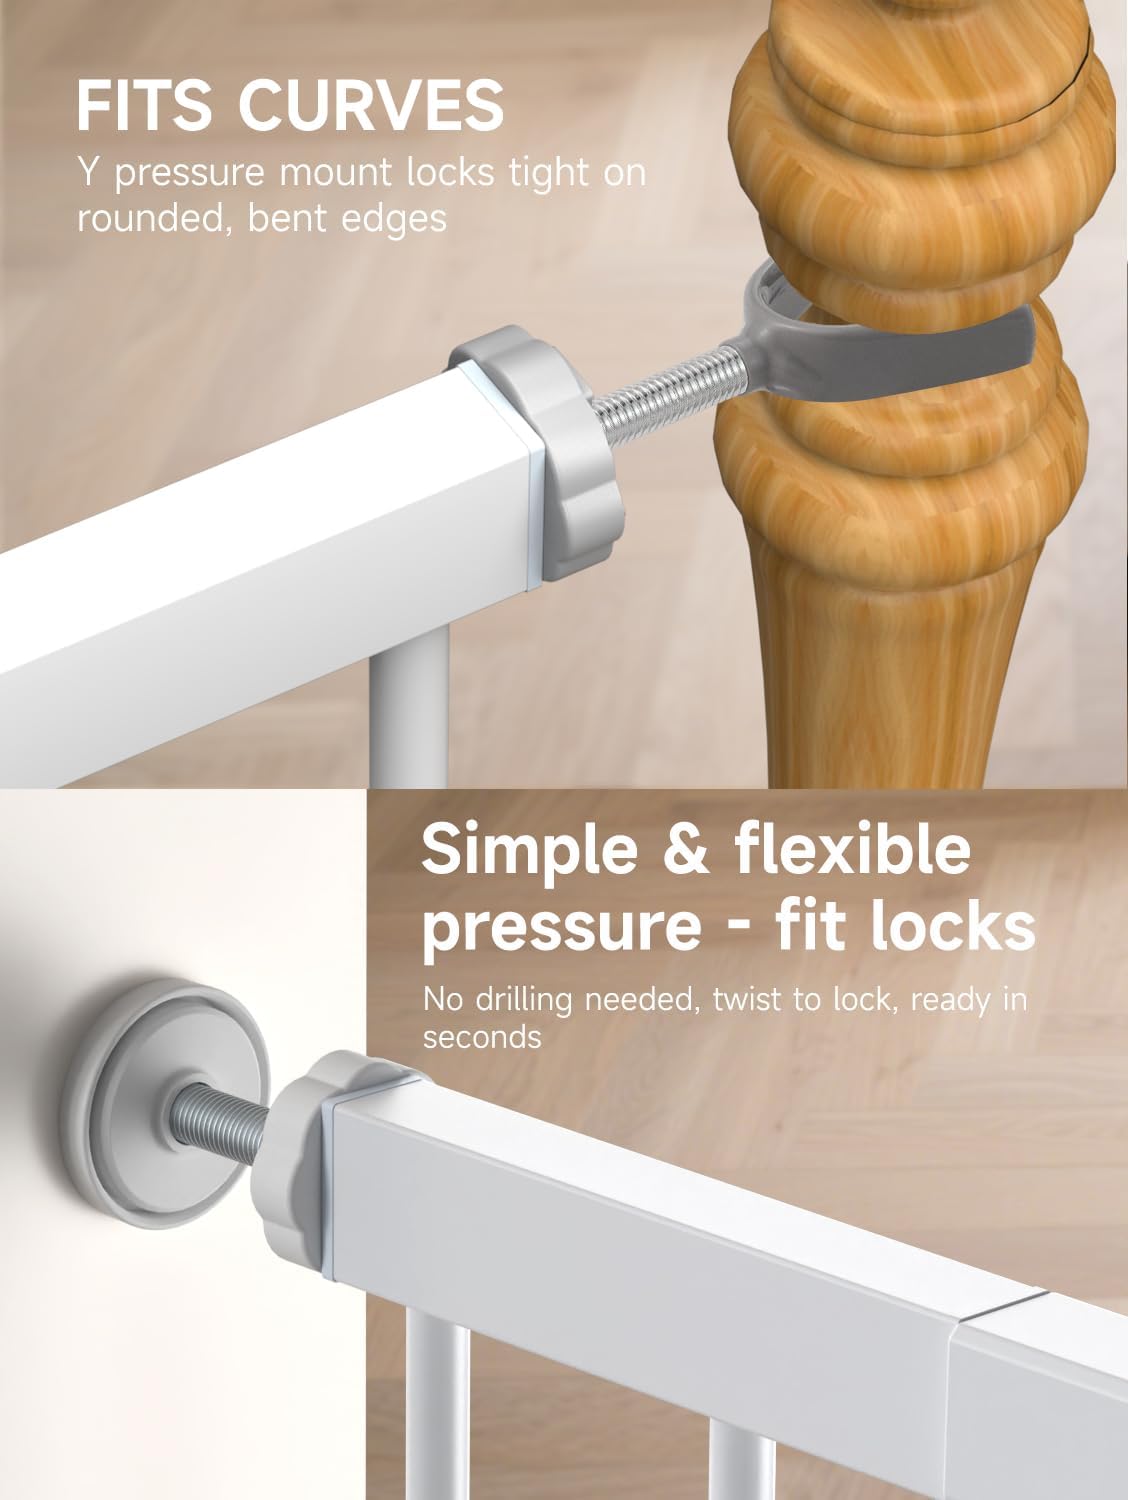
Image: Close-up view of the Y-shaped pressure mount for curved surfaces and the standard pressure-fit lock mechanism.

Image: Visual guide on how to install the gate using pressure mounting, emphasizing no drilling is needed.
4.4 Securing the Gate
- Position the gate in the opening. Turn the adjustment wheels on the tension bolts to extend them until they make firm contact with the wall cups.
- Use the provided wrench (E) to tighten the pressure bolts further. Continue tightening until the gap between the gate latch and the frame is reduced to approximately 0.078 inches (2mm). This indicates sufficient pressure for a secure fit.
- Once the gate is securely installed and the gap is minimal, you may cut the zip ties.
Video: This segment illustrates the process of tightening the pressure bolts and reducing the gap for a secure installation.
5. Operating Instructions
5.1 Opening the Gate
The gate features a double-lock design for enhanced safety. To open:
- Push the button on the top of the handle.
- Simultaneously press the lower part of the handle.
- Lift the gate door to disengage the lock and swing it open. This can typically be done with one hand.

Image: A close-up view of the dual lock mechanism, showing the two points of engagement for secure closure.
Video: This segment demonstrates the one-hand operation of the double-lock system for opening the gate.
5.2 Auto-Close Feature
The gate is equipped with an auto-close function. If the door is opened less than 90 degrees, it will automatically swing shut and lock securely. This reduces the risk of forgetting to close the gate.
5.3 Stay-Open Feature
If the gate door is opened to 90 degrees or more, it will remain open, allowing for easy passage when not needing to be closed immediately.

Image: A visual explanation of the gate's auto-close mechanism (for openings less than 90°) and its ability to stay open when swung past 90°.
Video: This segment demonstrates the auto-close and stay-open features of the gate.
6. Maintenance
To ensure the longevity and proper function of your PLZOIT Baby Gate:
- Cleaning: Wipe the gate regularly with a damp cloth and mild soap. Avoid abrasive cleaners or harsh chemicals that could damage the finish.
- Inspection: Periodically check all connections, bolts, and the locking mechanism to ensure they are secure and functioning correctly.
- Lubrication: If the hinge or locking mechanism becomes stiff, apply a small amount of silicone-based lubricant.
7. Troubleshooting
7.1 Gate Appears Bent or Has a Large Gap Before Installation
This is a common characteristic of pressure-mounted gates and is NOT a defect. The gate frame is designed to have a gap before installation. This gap will be eliminated once the gate is properly installed and the pressure bolts are tightened sufficiently against the walls.
7.2 Gate Does Not Close Automatically or Latch Securely
Ensure that the pressure bolts are tightened enough to reduce the gap between the gate latch and the frame to approximately 0.078 inches (2mm). If the gap is too wide, the auto-close and locking mechanisms may not engage correctly. Re-tighten all four pressure bolts evenly.
8. Warranty and Support
For warranty information, technical support, or to purchase replacement parts, please contact PLZOIT customer service through the retailer where you purchased the product or visit the official PLZOIT website.