
1. Introduction
Thank you for choosing the PLZOIT Baby Gate. This pressure-mounted safety gate is designed to provide a secure barrier for children and pets in various areas of your home, including doorways, hallways, and stairs. Constructed from durable metal, it offers a chew-proof, lead-free, and non-toxic solution for household safety. Please read this manual thoroughly before installation and use to ensure proper setup and safe operation.

Image: The PLZOIT Pressure Mounted Auto-Close Safety Gate in a home setting, securing a baby and a dog.
2. Safety Information
- WARNING: Never install this gate at the top of stairs unless specifically designed for that purpose and secured with hardware mounts. This pressure-mounted gate is primarily for doorways and bottom of stairs.
- IMPORTANT: DO NOT CUT OFF THE ZIP TIES BEFORE INSTALLATION. The gap between the gate latch and the frame is normal before installation and will be eliminated once the gate is properly mounted and tightened. Cutting the zip ties prematurely can make installation difficult.
- Ensure the gate is securely installed and regularly check the tension bolts to maintain a tight fit.
- This gate is suitable for children aged 6-36 months and for pets.
- Always supervise children and pets near the gate.
- Do not use the gate if any components are damaged or missing.
- Keep small parts away from children during assembly.
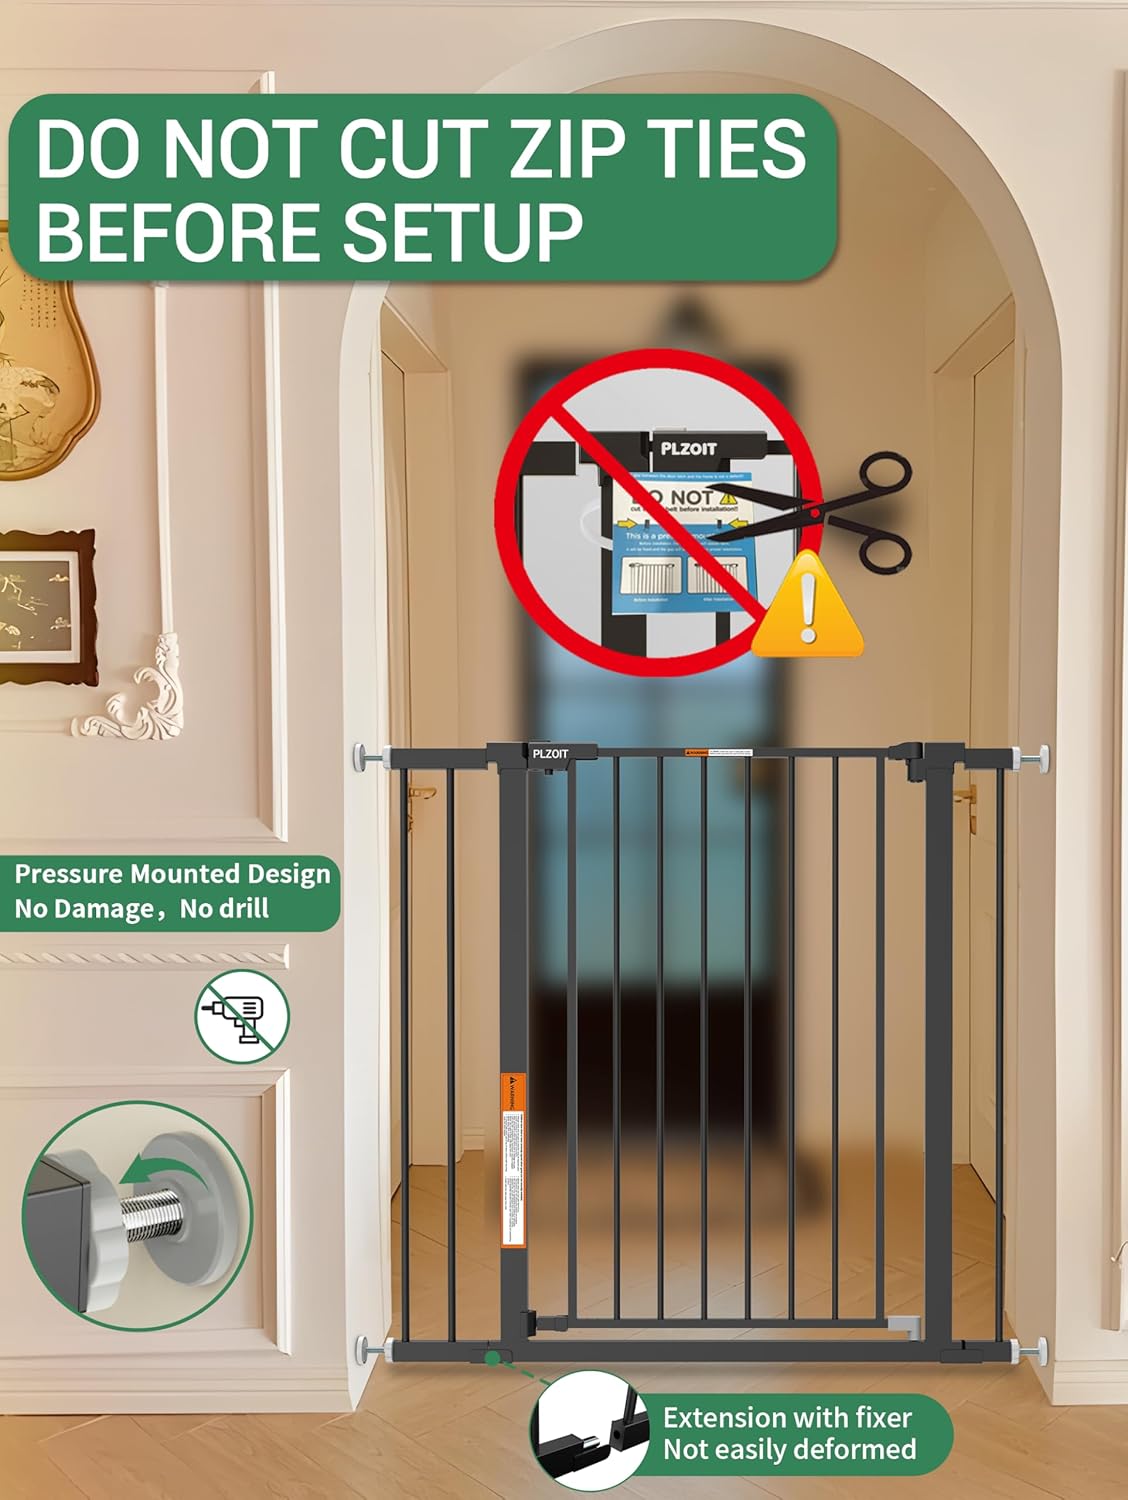
Image: Visual warning indicating not to cut the zip ties before installation.
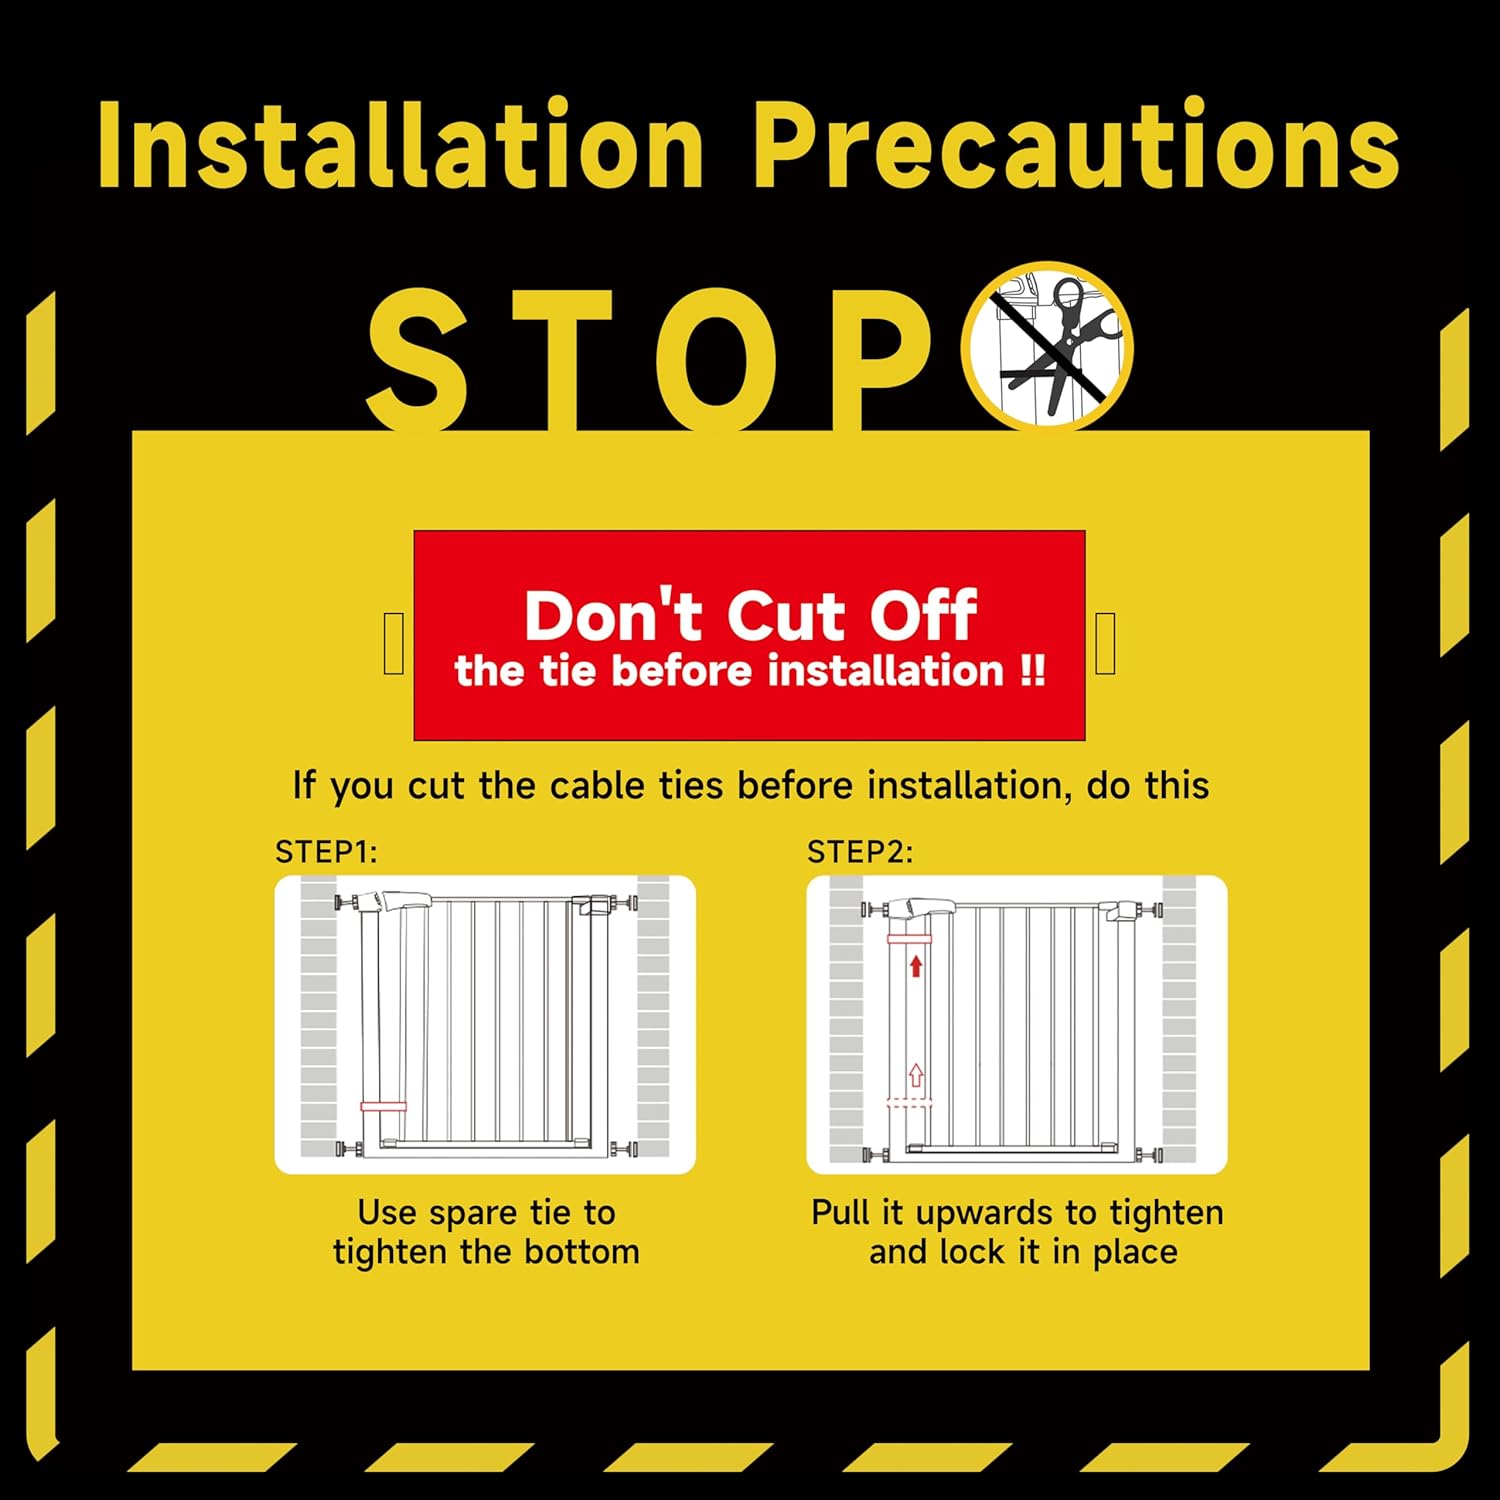
Image: Detailed instructions on what to do if cable ties are cut prematurely, showing how to use a spare tie to tighten the bottom.
3. Package Contents & Parts List
Before beginning installation, please ensure all parts are present and undamaged. The package includes the following components:
- A: Main Gate *1
- B1: 5.5'' Extension *1 (for wider openings)
- B2: 2.75'' Extension *1 (for wider openings)
- C: Stair Tension Bolt *2 (for specific stair installation)
- D: Tension Bolt *4 (for pressure mounting)
- E: Wrench *1
- F: Wall Cup *4 (for wall protection and stability)
- G: Stick Pad *4 (for wall cups)
- H: Screw / Wall Anchor *4 (for optional hardware installation)

Image: Exploded diagram showing all components of the PLZOIT baby gate and its extensions, with labels for each part.

Image: A white PLZOIT baby gate with callouts pointing to its key features: Dual Lock Safety Latch, Auto-Close Hinge, Metal Frame, and Adjustable Tension Bolts.
4. Setup & Installation
4.1. Measure Your Opening
Before purchasing and installing, measure the width of your desired opening. This gate fits openings between 29.5 inches and 40.5 inches. Use the appropriate extensions (5.5'' and 2.75'') as needed to fit your space.

Image: A person measuring a doorway, accompanied by diagrams illustrating various gate configurations and their corresponding widths.
4.2. Pressure Mounted Installation (No Drilling Required)
- Do Not Cut Zip Ties: Ensure the zip ties holding the gate frame are intact. The gate will appear bent or have a gap at the latch; this is normal for pressure-mounted gates before installation.
- Insert Tension Bolts: Insert the four tension bolts (D) into the holes at each corner of the gate frame.
- Attach Wall Cups: Place the wall cups (F) with stick pads (G) on the wall at the desired installation height.
- Position the Gate: Place the gate in the opening. Adjust the tension bolts by rotating them until they make contact with the wall cups.
- Tighten Bolts: Use the provided wrench (E) to tighten the tension bolts evenly. Tighten until the gap at the latch mechanism is reduced to approximately 0.078 inches (2mm) and the gate feels secure.
- Remove Zip Ties: Once the gate is firmly in place and secure, you can cut and remove the zip ties.
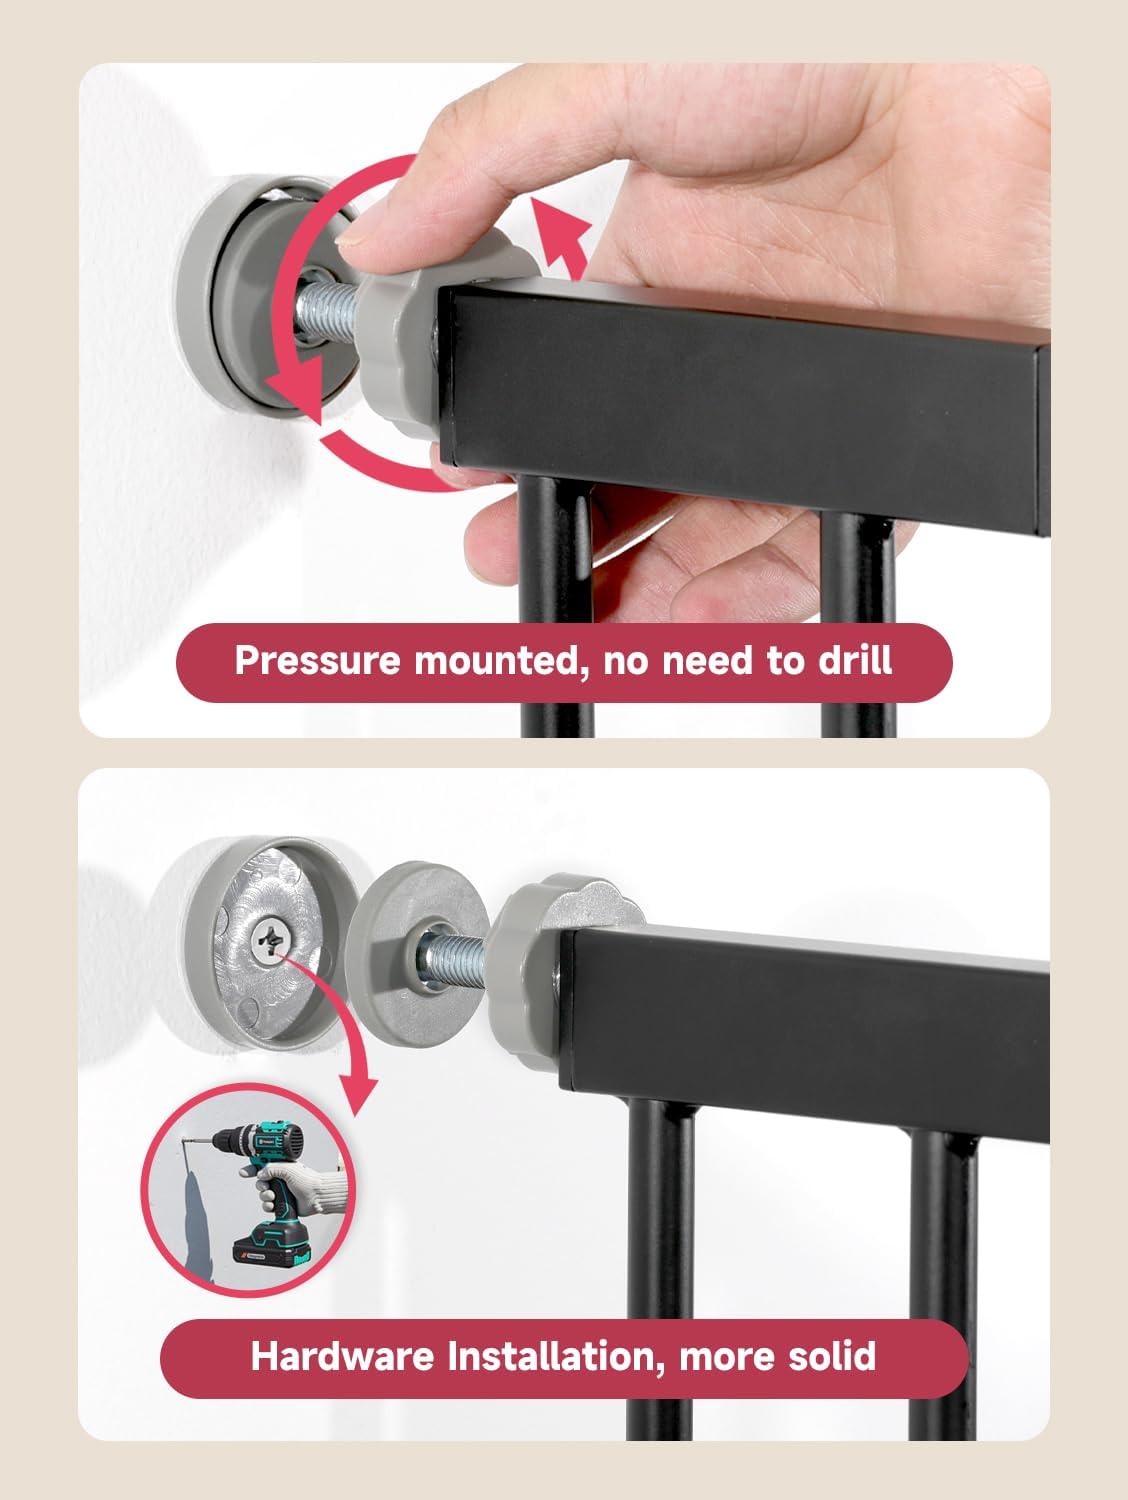
Image: Illustrates the difference between pressure-mounted installation (no drilling) and optional hardware installation for increased solidity.

Image: Step-by-step visual guide for installing the gate, including inserting pressure bolts, rotating to tighten, adjusting gaps, and cutting cable ties after installation.

Image: A side-by-side comparison showing the gate with cable ties in place before installation and the gate after installation with ties removed, demonstrating the pressure-mounted design.
4.3. Optional Hardware Installation (for added solidity)
For permanent installation or use at the top of stairs (using Stair Tension Bolts C), hardware mounting is recommended. Use the provided screws and wall anchors (H) to secure the wall cups (F) to the wall before inserting and tightening the tension bolts.
4.4. Installation Videos
Video: A detailed guide on how to install the PLZOIT baby gate and how its pressure-mounted mechanism functions.
Video: Instructions on how to install the baby gate, demonstrating the steps for secure placement.
5. Operating Instructions
5.1. Opening the Gate
The gate features a double-lock design for enhanced safety. To open, slide the button back and lift the gate handle simultaneously. This two-step action makes it difficult for toddlers to open.
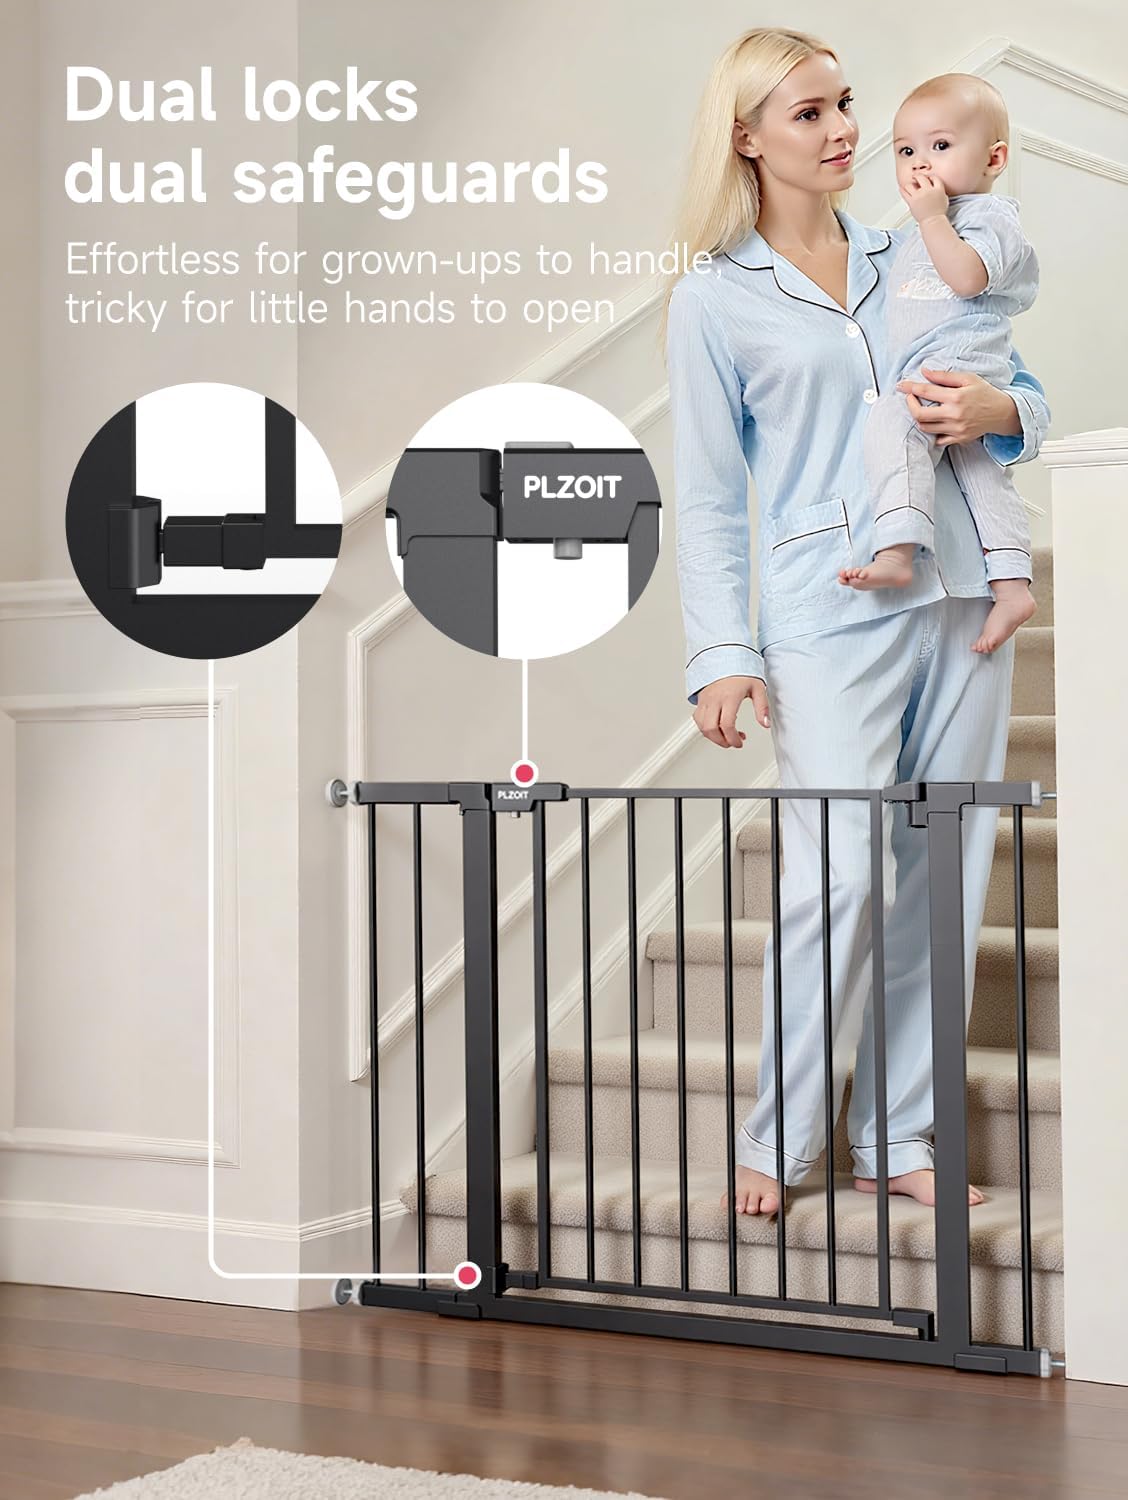
Image: Close-up of the gate's dual lock mechanism, illustrating the 'slide back' and 'press' actions required to open, ensuring child safety.

Image: Shows the gate's dimensions (29.5"-40.5" W x 30" H) and a hand demonstrating the one-hand operation for opening the gate.
5.2. Auto-Close Function
The gate is equipped with an auto-close function. If opened less than 90 degrees, the door will automatically swing shut and lock, reducing the risk of it being left open accidentally.
5.3. 90-Degree Hold-Open Feature
When the gate is opened to 90 degrees or more, it will remain open, allowing for free passage. Pushing it slightly past 90 degrees will engage the hold-open feature. To close, simply push it back from the 90-degree position.

Image: An overhead view of the gate illustrating its 180-degree door swing, auto-close function when opened less than 90 degrees, and the stay-open feature at 90 degrees.
5.4. Dual Direction Opening
The gate door can swing open in both directions, providing convenience for various household layouts.
6. Maintenance
- Cleaning: Wipe the gate with a soft, damp cloth and mild soap. Avoid abrasive cleaners or harsh chemicals that could damage the finish.
- Regular Checks: Periodically check all connections and tension bolts to ensure they remain tight and secure. Re-tighten if necessary.
- Storage: If removing the gate for storage, ensure it is clean and dry. Store in a cool, dry place away from direct sunlight.
7. Troubleshooting
| Problem | Solution |
|---|---|
| Gate appears bent or has a gap at the latch before installation. | This is normal for pressure-mounted gates. The gap will close as the tension bolts are tightened during installation. Do not cut the zip ties until the gate is fully installed and secure. |
| Gate is not secure after installation. | Ensure all four tension bolts are tightened evenly and firmly against the wall cups. The gap at the latch should be approximately 0.078 inches (2mm). If using extensions, ensure they are properly connected. |
| Gate is difficult to open or close. | Check if the tension bolts are overtightened. Slightly loosen them until the gate operates smoothly while remaining secure. Ensure the double-lock mechanism is being operated correctly (slide back and lift). |
| Gate does not auto-close. | Verify that the gate is installed level and plumb. Ensure there are no obstructions preventing the gate from swinging freely. The auto-close feature engages when the gate is opened less than 90 degrees. |
8. Specifications
- Brand: PLZOIT
- Model Number: CB-M-H20
- Material: Metal, Plastic
- Color: Black
- Product Dimensions: 29.5-40.5"W x 30"H (Adjustable width with extensions)
- Item Weight: 5.47 kg
- Mounting Type: Pressure Mount (Optional Hardware Mount)
- Target Species: Baby, Dog
- Age Range Description: Baby (6-36 months)
- Bar Spacing: 2.1 inches (prevents squeezing through)
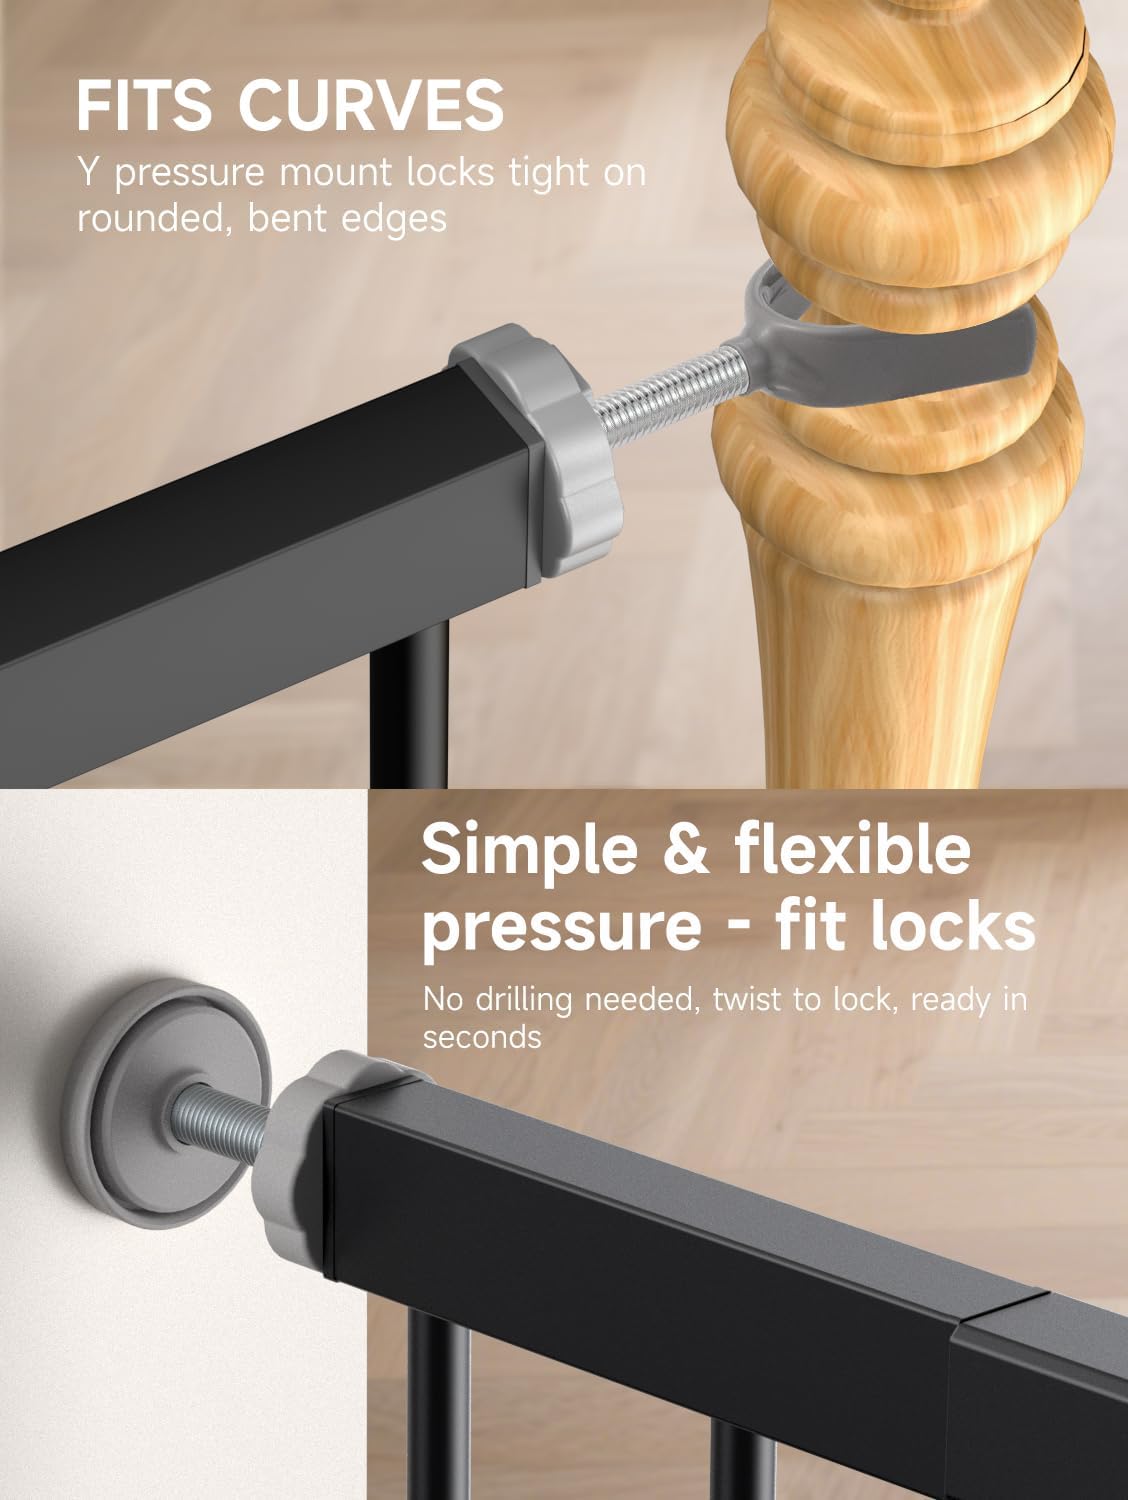
Image: Close-up views of the pressure mount system, showing its adaptability to both curved (e.g., banisters) and flat wall surfaces without drilling.
9. Warranty and Support
For any questions, concerns, or support needs regarding your PLZOIT Baby Gate, please contact our customer service. Refer to your purchase documentation for specific warranty details and contact information.
You can also visit the PLZOIT Store on Amazon for more product information and support resources.