1. Introduction
This manual provides essential information for the safe and efficient operation of your Hipicute 8000 BTUs Portable Air Conditioner. This 3-in-1 unit offers cooling, dehumidification, and fan functions, designed for rooms up to 350 sq. ft. Please read this manual thoroughly before use and retain it for future reference.

Figure 1.1: The Hipicute 8000 BTUs Portable Air Conditioner, a compact and versatile unit.
2. Safety Information
Always follow basic safety precautions when using electrical appliances to reduce the risk of fire, electric shock, and injury. Ensure the unit is placed on a stable, level surface. Do not block air vents. Keep children and pets away from the unit during operation. Unplug the unit before cleaning or maintenance.
3. Product Overview
3.1 Components
- Portable Air Conditioner Unit
- Remote Control
- Window Kits (adjustable panels, exhaust hose adapter)
- Drain Pipe
3.2 Key Features
- 3-in-1 Functionality: Cooling, Dehumidifier, Fan modes.
- 8000 BTUs Cooling Power: Effective for areas up to 350 sq. ft.
- Quiet Operation: Noise level as low as 50dB.
- 24-Hour Timer: Programmable operation.
- Sleep Mode: Energy-efficient setting for nighttime use.
- Portable Design: Integrated wheels and handle for easy movement.
- Washable Air Filter: For easy maintenance and improved air quality.

Figure 3.1: The unit offers Cooling, Fan, and Dehumidifier modes for versatile climate control.
4. Setup and Installation
Proper installation is crucial for optimal performance. This unit requires an exhaust hose to vent hot air outside.
4.1 Unpacking
Carefully remove all packaging materials. Inspect the unit for any damage. Keep the original packaging for storage or if servicing is required.

Figure 4.1: All components included in the package, such as the portable AC unit, remote control, window kits, and drain pipe.
4.2 Window Kit Installation
- Connect the hose connector to one end of the exhaust hose.
- Connect the window kit adapter to the other end of the exhaust hose.
- Attach the hose connector to the exhaust air outlet on the back of the AC unit.
- Extend the adjustable window kits to fit your window opening and tighten the nuts to secure.
- Install the window partitions into the window frame (suitable for horizontal or vertical slide windows).
- Insert the exhaust hose adapter into the window kit, ensuring a secure fit to prevent air leakage.

Figure 4.2: Visual guide for connecting the exhaust hose and installing the window kit for proper ventilation.
4.3 Video Guide: Installation and Operation
Video 4.1: An official video demonstrating the setup and basic operation of the 8000 BTUs Portable Air Conditioner.
5. Operating Instructions
Your portable air conditioner can be operated using the control panel on the unit or the included remote control.
5.1 Control Panel and Remote Control
The control panel features an LED display and touch buttons for various functions. The remote control provides convenient access to all settings from a distance.

Figure 5.1: The unit's intuitive control panel and the included remote control for easy adjustments.
5.2 Operating Modes
- Cool Mode: Provides powerful cooling for your room. Adjust the temperature using the up/down arrows.
- Fan Mode: Circulates air without cooling. Select from multiple fan speeds (High/Low).
- Dehumidifier Mode: Removes excess moisture from the air.
- Sleep Mode: Gradually increases the set temperature and operates quietly for comfortable sleep.
5.3 Setting the Timer
The 24-hour timer allows you to program the unit to turn on or off automatically. Press the 'Timer' button and use the up/down arrows to set the desired duration.

Figure 5.2: The unit operating in a bedroom, highlighting the quiet Sleep Mode and the convenience of the 24-hour timer.
5.4 Video Guide: Control Panel Functions
Video 5.1: An official video demonstrating how to use the control panel to adjust settings and modes on the portable air conditioner.
6. Maintenance
Regular maintenance ensures optimal performance and extends the lifespan of your air conditioner.
6.1 Cleaning the Air Filter
The unit features a detachable and washable air filter. It is recommended to clean the filter every two weeks or more frequently depending on usage and air quality.
- Unplug the air conditioner from the power outlet.
- Locate the air filter cover on the side or back of the unit.
- Gently pull to remove the filter cover and the air filter.
- Wash the filter under running water (warm water with mild detergent if heavily soiled).
- Allow the filter to air dry completely before reinserting. Do not expose to direct sunlight.
- Reattach the filter and cover securely.
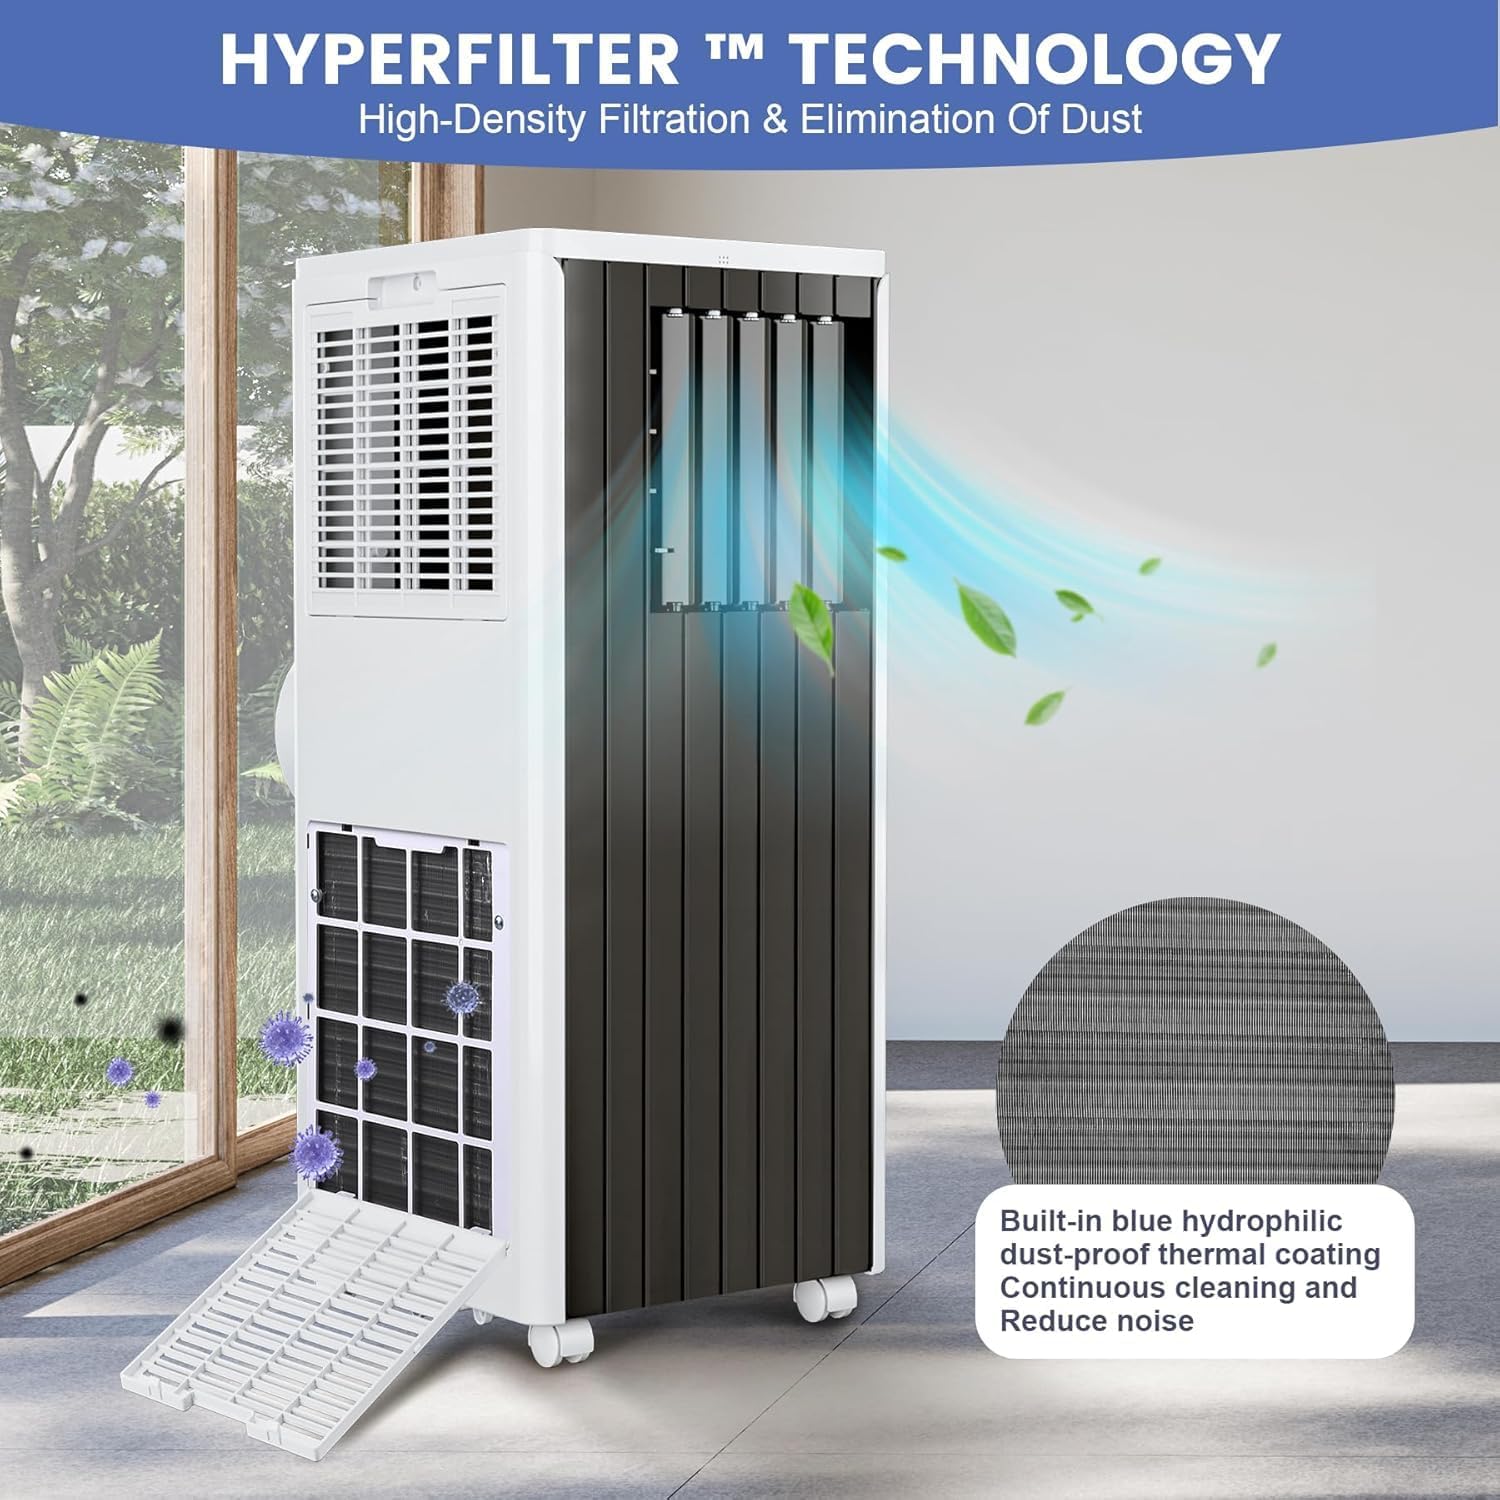
Figure 6.1: Illustration of removing the air filter for cleaning, which helps maintain air quality and unit efficiency.
6.2 Drainage
During dehumidification or prolonged cooling, water may accumulate in the internal reservoir. The unit has a self-evaporating system, but in high humidity, manual drainage may be necessary. Connect the drain pipe to the drainage outlet and place the other end into a suitable container or floor drain.
7. Troubleshooting
If you encounter issues with your air conditioner, refer to the table below for common problems and solutions.
| Problem | Possible Cause | Solution |
|---|---|---|
| Unit does not turn on | No power supply; Power cord unplugged; Circuit breaker tripped | Check power outlet; Plug in securely; Reset circuit breaker |
| Insufficient cooling | Air filter dirty; Room too large; Doors/windows open; Exhaust hose not properly installed | Clean air filter; Ensure room size is within limits; Close doors/windows; Check exhaust hose connection |
| Unit is noisy | Unit not on a level surface; Obstruction in fan/air outlet | Place on a flat surface; Remove any obstructions |
| Water leakage | Drain plug loose; Drainage hose blocked; Water tank full (if applicable) | Secure drain plug; Clear drainage hose; Empty water tank |
8. Specifications
| Feature | Detail |
|---|---|
| Brand | Hipicute |
| Model Number | JHS-A029A-05KR-D3 |
| Cooling Power | 8000 British Thermal Units |
| Coverage Area | Up to 350 sq. ft. |
| Capacity (Dehumidifier) | 45 Pints |
| Product Dimensions (D x W x H) | 13.15"D x 13.11"W x 34.65"H |
| Voltage | 115V |
| Wattage | 699W |
| Noise Level | 52 Decibels |
| Controller Type | Touch Control |
| Installation Type | Packaged |
| Annual Energy Consumption | 538 Kilowatt Hours |
| UPC | 199108390448 |
9. Warranty and Support
9.1 Warranty Information
This product comes with a two-year warranty. Please retain your proof of purchase for warranty claims. The warranty covers manufacturing defects and malfunctions under normal use.
9.2 Customer Support
For technical assistance, troubleshooting, or warranty inquiries, please contact Hipicute customer support. Refer to the product packaging or the official Hipicute website for contact details.