
1. Introduction
Thank you for choosing the RL LIVE YOUR LIGHT RANDERS R64412131 Ceiling Fan with LED Light. This product combines a classic fan design with a central, integrated LED light source, offering both elegance and comfort. Designed for harmonious integration into any home, it is suitable for various rooms, including living rooms and bedrooms, providing a pleasant atmosphere throughout the year.
This manual provides essential information for the safe installation, operation, and maintenance of your new ceiling fan. Please read it thoroughly before installation and keep it for future reference.

Image 1.1: The RANDERS R64412131 ceiling fan with its integrated LED light, shown installed on a ceiling.
2. Safety Instructions
To ensure safe operation and prevent damage, please observe the following safety precautions:
- Electrical Safety: Installation must be performed by a qualified electrician in accordance with all local and national electrical codes. Ensure the power supply is disconnected at the main circuit breaker before installation, maintenance, or cleaning.
- Mounting: The mounting structure must be capable of supporting the weight of the fan (approximately 2.1 kg) and the dynamic forces generated during operation.
- Blade Clearance: Ensure there is adequate clearance between the fan blades and any obstacles (walls, furniture, etc.) to prevent injury or damage.
- Ventilation: Do not operate the fan in areas with high humidity or where it may come into contact with water.
- Children and Pets: Keep children and pets away from the fan during operation and installation.
- Cleaning: Always disconnect power before cleaning. Use a soft, damp cloth; do not use abrasive cleaners or solvents.
3. Package Contents
Carefully unpack the box and ensure all items are present and undamaged. If any parts are missing or damaged, contact your retailer immediately.
- Ceiling Fan Unit (Motor Housing with integrated LED light)
- Fan Blades (3 pieces)
- Remote Control
- AAA Batteries (2 pieces for remote control)
- Mounting Hardware (screws, anchors, brackets, etc.)
- Instruction Manual
4. Setup and Installation
Important: Installation should only be carried out by a qualified electrician. Ensure the main power supply is switched off before beginning any installation work.
4.1 Pre-Installation Checks
- Verify that the installation location can support the fan's weight and operation.
- Ensure sufficient clearance from walls and other objects for the fan blades (76 cm diameter).
- Confirm that the electrical wiring at the installation point is compatible with the fan's requirements (230 Volts).
4.2 Mounting the Fan
- Disconnect Power: Turn off the power at the circuit breaker to avoid electrical shock.
- Install Mounting Bracket: Securely attach the mounting bracket to the ceiling joist or a suitable support structure using the provided mounting hardware. Ensure it is firmly fixed.
- Wire Connections: Carefully connect the electrical wires from the ceiling to the fan's wiring according to the wiring diagram provided in the separate installation guide (if applicable) or by a qualified electrician. Ensure all connections are secure and insulated.
- Attach Fan Body: Lift the fan body and attach it to the mounting bracket. Ensure it is securely seated and locked into place.
- Install Fan Blades: Attach the three fan blades to the motor housing using the provided screws. Ensure they are tightened securely.
- Install Light Module: If the LED light module is separate, connect its wiring and secure it to the fan body.

Image 4.1: Dimensional drawing of the RANDERS R64412131 ceiling fan, showing its height of 260mm and diameter of 760mm.

Image 4.2: Technical diagram illustrating the components and assembly of the RANDERS R64412131 ceiling fan.
5. Operating Instructions
The RANDERS R64412131 ceiling fan offers versatile functions controlled via the included remote control or a standard wall switch.
5.1 Remote Control Functions
Before use, insert the two AAA batteries into the remote control. The remote allows comprehensive control over both the fan and the integrated LED light.
- Fan Speed: Select from 6 different fan speeds to adjust airflow intensity.
- Timer Function: Set a convenient timer for automatic fan shutdown.
- Reversible Rotation (Summer/Winter Mode):
- Summer Mode (Counter-clockwise): Directs air downwards to create a refreshing breeze.
- Winter Mode (Clockwise): Redistributes warm air in the room, helping to improve heating efficiency.
- Light Control:
- Dimmable Light: Adjust the brightness progressively up to a maximum of 2700 lumens.
- Color Temperature Adjustment: Change the light color from warm white (2700 Kelvin) to cool white (6000 Kelvin).
- Night Light Mode: Activate a low-intensity light setting for ambient illumination.
- Separate Control: The fan and light functions can be controlled independently.
- Memory Function: The light retains its last selected mode after being switched off via the remote control, automatically restoring your preferred light effect upon reactivation.
5.2 Wall Switch Control
The light intensity can also be adjusted in three levels via a standard wall switch, without the need for an external dimmer.

Image 5.1: Visual representation of the fan's key features, including wall switch control, remote control, dimming, color temperature adjustment, night light, 6 speeds, timer, and reversible rotation for summer/winter.
6. Maintenance
Regular maintenance ensures optimal performance and extends the lifespan of your ceiling fan.
- Cleaning: Always disconnect power before cleaning. Use a soft, dry cloth to wipe down the fan blades and motor housing. For the light diffuser, a slightly damp cloth can be used. Avoid using harsh chemicals, abrasive cleaners, or solvents, as these can damage the finish.
- Blade Inspection: Periodically check the fan blades for any signs of damage or warping. Ensure all blade screws are tight. Loose blades can cause wobbling and noise.
- Mounting Check: Annually, inspect the mounting hardware to ensure it remains secure and tight.
- Light Source: The integrated LED light source is designed for long life and is generally not user-replaceable. If the light fails, contact customer support.
7. Troubleshooting
If you encounter issues with your RANDERS R64412131 ceiling fan, refer to the following common problems and solutions:
| Problem | Possible Cause | Solution |
|---|---|---|
| Fan does not start | No power supply Loose wiring connection Remote control batteries dead | Check circuit breaker and wall switch Verify all wiring connections (consult electrician) Replace remote control batteries |
| Light does not turn on | No power supply Loose wiring connection LED module failure | Check circuit breaker and wall switch Verify all wiring connections (consult electrician) Contact customer support for assistance |
| Fan wobbles or makes noise | Loose mounting hardware Unbalanced blades Loose blade screws | Ensure mounting bracket is secure Check for bent blades or uneven installation Tighten all blade screws |
| Remote control not working | Dead batteries Obstruction between remote and receiver Remote not paired (if applicable) | Replace AAA batteries Ensure clear line of sight Refer to remote control pairing instructions (if provided) |
If the problem persists after attempting these solutions, please contact customer support for further assistance.
8. Specifications
| Model Name | RANDERS |
| Model Number | R64412131 |
| Brand | RL LIVE YOUR LIGHT |
| Dimensions (Fan) | Height: 26 cm, Diameter: 76 cm |
| Product Dimensions (L x W x H) | 35 x 35 x 26 cm |
| Weight | 2.1 Kilograms |
| Power | 20 Watts |
| Voltage | 230 Volts |
| Light Color Temperature | 2700K (Warm White) - 6000K (Cool White) |
| Maximum Luminous Flux | 2700 Lumens |
| Energy Efficiency Class | E |
| Remote Control Batteries | 2 x AAA (included) |
| Included Components | Mounting material |
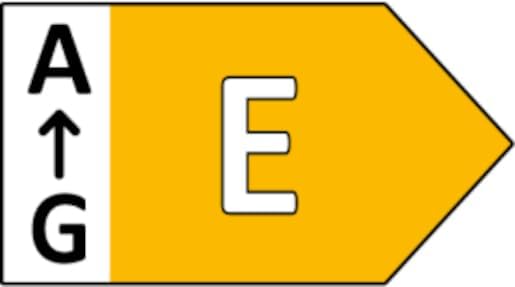
Image 8.1: Energy efficiency label indicating class E for the integrated light source.
9. Warranty and Support
For warranty information, please refer to the documentation provided with your purchase or visit the official RL LIVE YOUR LIGHT website. If you require technical support, have questions about installation, or need assistance with troubleshooting, please contact your retailer or the manufacturer's customer service department.
Please have your model number (R64412131) and proof of purchase ready when contacting support.