
1. Introduction
Thank you for purchasing the ROUASD RC ERA C032 UH-1 Huey RC Helicopter. This manual provides essential information for the safe operation, setup, maintenance, and troubleshooting of your new remote-controlled aircraft. Please read this manual thoroughly before operating the helicopter to ensure a safe and enjoyable experience. This model is designed for users aged 16 and above.

Image: The ROUASD RC ERA C032 UH-1 Huey RC Helicopter, remote control, and included accessories.
2. Safety Information
WARNING: Failure to follow these safety guidelines may result in injury, damage to the product, or property damage.
- Age Recommendation: This product is recommended for users aged 16 years and older.
- Flight Environment: Always operate the helicopter in open areas, away from people, animals, buildings, power lines, and water. Avoid flying in strong winds (above 5 mph).
- Battery Safety:
- Use only the specified charger and battery.
- Do not overcharge or over-discharge batteries.
- Do not leave charging batteries unattended.
- Keep batteries away from heat sources and direct sunlight.
- If the battery swells or shows signs of damage, discontinue use immediately.
- Propeller Safety: The propellers rotate at high speeds. Keep hands, face, and loose clothing away from rotating blades.
- Pre-Flight Check: Before each flight, ensure all parts are securely attached, the battery is fully charged, and the remote control is functioning correctly.
- Emergency Stop: Familiarize yourself with the emergency stop procedure on the remote control.
3. Package Contents
Verify that all items listed below are included in your package:
- Helicopter x 1
- Transmitter (Remote Control) x 1
- User Manual x 1
- USB Charger x 1
- Main Blades x 2 (spare)
- Tail Blade x 1 (spare)
- Lithium Battery x 1 (for helicopter)
- Screwdriver x 1
- Hex Wrench x 1
4. Product Overview
The RC ERA C032 UH-1 Huey is a 1/48 scale 6-channel remote control helicopter featuring advanced stabilization technology for a smooth flight experience. It incorporates TOF laser radar, optical flow positioning, a barometer, and a 6-axis gyroscope for precise altitude hold and stable flight.

Image: The C032 UH-1 Huey helicopter, highlighting its intelligent positioning features.
Key Features:
- Authentic Scale Design: Mimics the real UH-1 helicopter.
- Precision Flight Tech: TOF laser radar, optical flow positioning, barometer, and 6-axis gyro for stable flight.
- Upgraded Controller System: General Bearing Controller with interchangeable left/right main seat operation.
- 3D Inverted & Route Flight: Capable of advanced aerial maneuvers.
- Intelligent Anti-Stuck Protection: Automatic stall after propeller obstruction to prevent damage.
- Modular Battery: 7.4V high-efficiency battery for convenience and extended flight time.

Image: Illustration of the helicopter's advanced positioning systems, including TOF laser, air pressure, and optical flow for stable flight.

Image: The helicopter demonstrating its intelligent anti-stuck protection feature, designed to prevent propeller damage.
5. Setup
5.1 Charging the Helicopter Battery
- Connect the USB charger to a suitable USB power source (e.g., computer USB port, USB wall adapter). Ensure the power source is 5V/1A.
- Connect the helicopter's 7.4V Lithium Battery to the USB charger.
- The indicator light on the charger will show the charging status. Refer to the charger's specific instructions for light indications (usually red for charging, green for fully charged).
- Charging time is approximately 50 minutes. Do not overcharge.

Image: The 7.4V modular battery, designed for easy installation and removal.
5.2 Installing Transmitter Batteries
- Open the battery compartment on the back of the transmitter.
- Insert 4 x 1.5V AA batteries (not included), ensuring correct polarity (+/-).
- Close the battery compartment securely.
5.3 Binding the Helicopter and Transmitter
- Ensure both the helicopter battery is charged and the transmitter has fresh batteries.
- Place the helicopter on a flat, level surface.
- Turn on the helicopter's power switch. The indicator light on the helicopter will flash.
- Turn on the transmitter. The transmitter's indicator light will flash.
- Push the throttle stick (left stick) all the way up, then all the way down.
- Both the helicopter and transmitter indicator lights should become solid, indicating a successful binding.
- If binding fails, turn off both devices and repeat the process.
6. Operating Instructions
6.1 Basic Flight Controls
Familiarize yourself with the transmitter controls before attempting flight.
- Throttle Stick (Left Stick):
- Up: Ascend
- Down: Descend
- Directional Stick (Right Stick):
- Up: Forward
- Down: Backward
- Left: Left Roll/Slide
- Right: Right Roll/Slide
- Yaw Trim (Left Stick Left/Right): Adjusts rotational stability.
- Forward/Backward Trim (Right Stick Up/Down): Adjusts forward/backward drift.
- Left/Right Trim (Right Stick Left/Right): Adjusts left/right drift.

Image: Diagram illustrating the various flight directions and modes, including ascent, descent, forward, backward, and rotational movements.

Image: The helicopter performing multi-directional flight, indicating unrestricted movement.
6.2 Take-off and Landing
- Take-off: After binding, slowly push the throttle stick up. The helicopter will ascend. For one-key take-off (if available), press the designated button.
- Landing: Slowly pull the throttle stick down. The helicopter will descend. For one-key landing (if available), press the designated button.
6.3 Altitude Hold
The C032 features an advanced altitude hold function, maintaining a stable height automatically once the throttle stick is released to the center position. This allows for easier control and focus on directional flight.
6.4 3D Rolling & Inverted Flight
This model supports 3D inverted flight and rolling maneuvers. Ensure you are in an open area and have sufficient altitude before attempting these advanced stunts.
- Activating 3D Mode: Refer to your transmitter's specific button for activating 3D mode.
- Performing Rolls: Once in 3D mode, quickly push the directional stick to the left or right to perform a roll.
- Inverted Flight: After a roll, the helicopter can maintain inverted flight. Practice at a safe height.
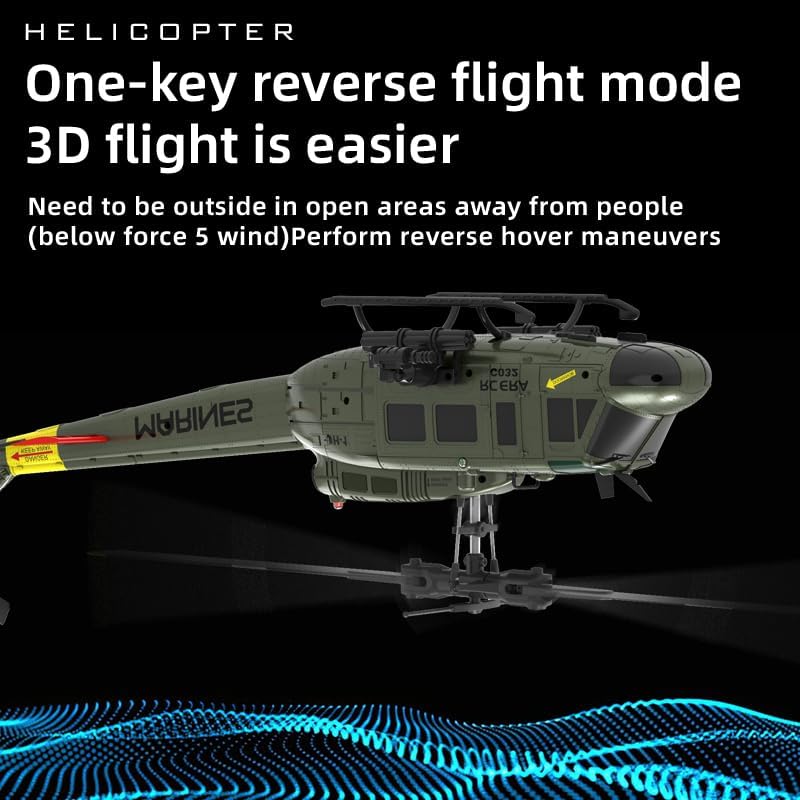
Image: The helicopter performing a reverse hover maneuver, demonstrating its 3D flight capabilities.
6.5 Route Flight Programming
The helicopter may support route flight programming. Consult the specific instructions for your transmitter model on how to program and execute custom flight paths.
7. Maintenance
- Cleaning: Use a soft, dry cloth to clean the helicopter after each flight. Avoid using water or solvents.
- Propeller Inspection: Regularly check propellers for cracks, bends, or damage. Replace damaged propellers immediately using the provided spare parts and screwdriver.
- Motor Care: Keep motors free from dust and debris. Avoid prolonged operation in sandy or dusty environments.
- Battery Storage: For long-term storage, charge the battery to approximately 50% and store it in a cool, dry place. Remove batteries from the transmitter when not in use for extended periods.
- Screw Tightness: Periodically check all screws for tightness, especially those securing the main blades. Apply a small drop of threadlocker if necessary, but be careful not to overtighten.
8. Troubleshooting
| Problem | Possible Cause | Solution |
|---|---|---|
| Helicopter does not respond to transmitter. | Not bound; low battery (helicopter or transmitter); out of range. | Re-bind the helicopter and transmitter. Charge helicopter battery. Replace transmitter batteries. Ensure within 120-150m range. |
| Helicopter drifts during hover. | Trims not adjusted; uneven surface during calibration; wind interference. | Adjust trim buttons on the transmitter. Ensure helicopter is on a flat surface for initial power-on. Avoid flying in windy conditions. |
| Propellers not spinning or making unusual noise. | Obstruction; damaged propeller; motor issue; loose gears. | Check for obstructions. Replace damaged propellers. Inspect gears for debris or damage. If noise persists, contact support. |
| Short flight time. | Battery not fully charged; old battery; aggressive flying. | Ensure battery is fully charged (approx. 50 mins). Consider replacing old batteries. Fly less aggressively. |
| Helicopter crashes easily. | Lack of experience; strong wind; damaged components. | Practice in open, calm areas. Avoid wind. Check for and replace damaged parts. |
9. Specifications
| Feature | Detail |
|---|---|
| Rotor Diameter | 315mm |
| Body Length | 297mm |
| Height | 92mm |
| Flying Weight | 115g |
| Flight Time | Approximately 13 minutes |
| Charging Time | Approximately 50 minutes |
| Remote Control Mode | 2.4G remote controller |
| Remote Control Range | 120-150 meters |
| Helicopter Battery | 7.4V Lithium Battery (included) |
| Transmitter Batteries | 4 x 1.5V AA batteries (not included) |
| Recommended Age | 16+ years |
10. Warranty and Support
ROUASD products are manufactured to high-quality standards. For warranty information, please refer to the warranty card included with your product or contact your retailer. Keep your purchase receipt as proof of purchase.
For technical support, replacement parts, or further assistance, please contact ROUASD customer service through the retailer's platform or the contact information provided on the product packaging.
Online Resources: For additional tips, video tutorials, and community support, search for "RC ERA C032 UH-1 Huey" on popular video platforms and RC forums.