
1. Introduction
This manual provides essential information for the safe operation, setup, maintenance, and troubleshooting of your RC ERA C032 UH-1 Huey RC Helicopter. Please read this manual thoroughly before operating the helicopter to ensure proper function and to prevent damage or injury. This model is a 1/48 scale replica featuring a 6-channel 2.4G remote control system, 6-axis gyro stabilization, 3D rolling capabilities, and altitude hold.
2. Safety Precautions
- Flying Environment: Always operate the helicopter in open areas, away from people, animals, buildings, and power lines. Avoid flying in strong winds (below force 5 wind recommended).
- Battery Safety: Use only the specified charger and battery. Do not overcharge or short-circuit batteries. Keep batteries away from heat sources and flammable materials. Disconnect the battery after use and during storage.
- Propeller Safety: Keep hands, face, and loose clothing away from rotating blades. The blades can cause serious injury.
- Adult Supervision: This product is recommended for ages 16 and up. Adult supervision is advised for younger users.
- Moisture: Do not expose the helicopter or remote control to moisture or rain.
- Pre-Flight Check: Before each flight, ensure all parts are securely attached, batteries are charged, and the control system is functioning correctly.
3. Package Contents
Verify that all items listed below are included in your package:
- Helicopter (1)
- Transmitter (1)
- User Manual (1)
- USB Charger (1)
- Main Blades (2)
- Tail Blade (1)
- Lithium Battery (1, 2, or 3 depending on variant)
- Screwdriver (1)
- Hex Wrench (1)

Image 3.1: Contents of the RC ERA C032 UH-1 Huey RC Helicopter package, including the helicopter, remote control, batteries, charger, and tools.
4. Product Features
The RC ERA C032 UH-1 Huey RC Helicopter is designed with advanced features for an enhanced flying experience:
- Authentic Scale UH-1 Design: With a 315mm rotor and 297mm fuselage, the C032 mimics the real UH-1 helicopter in both form and function, making it suitable for flying and collecting as a realistic aviation replica.
- Precision Flight Technology: Features TOF laser radar, optical flow positioning, a barometer, and a 6-axis gyro to ensure ultra-stable altitude hold and smooth flight for both indoor and outdoor use.
- Upgraded Controller System: An enhanced General Bearing Controller with interchangeable left/right main seat operation ensures comfortable control for pilots of all preferences and skill levels.
- 3D Inverted & Route Flight: Enjoy advanced aerial tricks like fly-upside-down stunts, flips, and route flight programming, adding dynamic and exciting elements to your flying sessions.
- Stable Power & Long Battery Life: Fly longer and more confidently with a high-efficiency battery system, durable single-prop design, and improved wind resistance for extended, reliable performance.
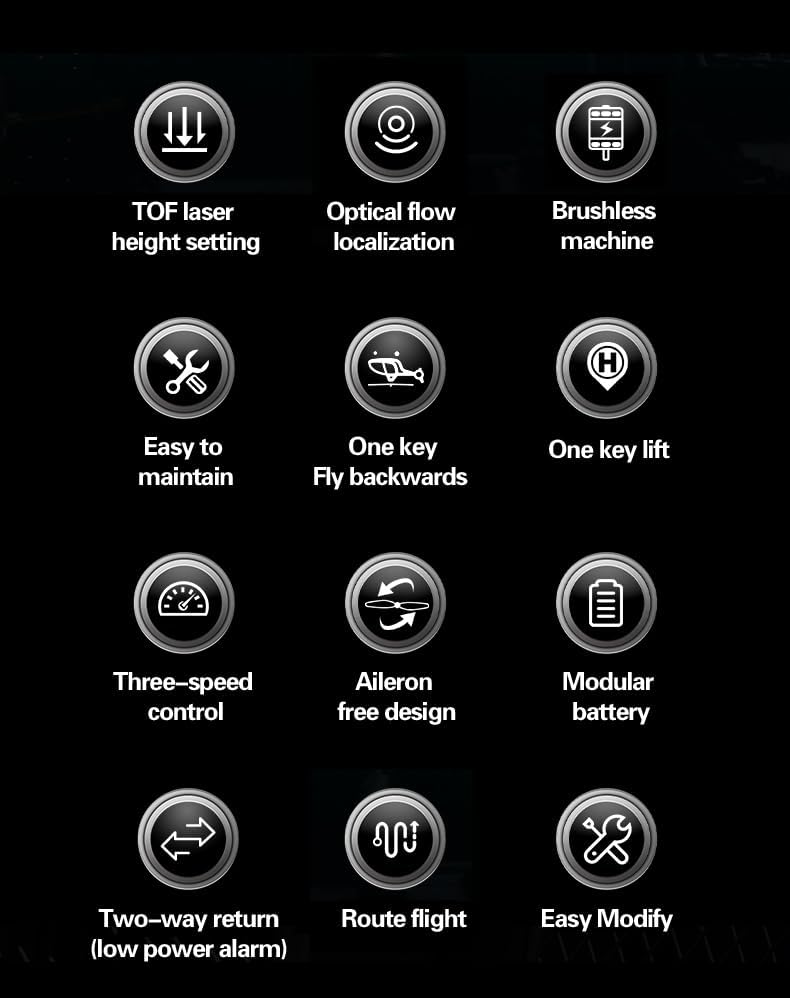
Image 4.1: Visual representation of the helicopter's features, including TOF laser height setting, optical flow localization, brushless motor, easy maintenance, one-key backward flight, one-key lift, three-speed control, aileron-free design, modular battery, two-way return (low power alarm), route flight, and easy modification.
5. Setup
5.1 Charging the Helicopter Battery
- Connect the helicopter's 7.4V lithium battery to the provided USB charger.
- Plug the USB charger into a compatible USB power source (e.g., computer USB port, USB wall adapter).
- The charging indicator light on the USB charger will show the charging status. Refer to the charger's specific instructions for light indications (typically red for charging, green for fully charged).
- Charging time is approximately 50 minutes. Do not leave the battery unattended during charging.
5.2 Installing Transmitter Batteries
- Open the battery compartment on the back of the remote controller.
- Insert 4 x 1.5V AA batteries (not included) into the compartment, ensuring correct polarity (+/-).
- Close the battery compartment securely.
5.3 Binding the Helicopter and Transmitter
- Ensure both the helicopter battery is charged and the transmitter has fresh batteries.
- Place the helicopter on a flat, level surface.
- Turn on the helicopter's power switch. The helicopter's indicator light will flash.
- Turn on the transmitter. The transmitter's indicator light will flash.
- Push the throttle stick (left stick) all the way up, then pull it all the way down.
- Both the helicopter and transmitter indicator lights should become solid, indicating successful binding.
6. Operating Instructions
6.1 Basic Controls
Familiarize yourself with the transmitter controls:
- Left Stick (Throttle/Rudder): Up/Down controls altitude (throttle). Left/Right controls yaw (rudder), rotating the helicopter left or right.
- Right Stick (Elevator/Aileron): Up/Down controls pitch (elevator), moving the helicopter forward or backward. Left/Right controls roll (aileron), moving the helicopter left or right sideways.
- Trim Buttons: Used to fine-tune the helicopter's stability if it drifts in any direction during hover.
6.2 Take-off and Landing
- Take-off: After binding, slowly push the throttle stick up. The helicopter will lift off. Gradually increase throttle until it hovers stably at your desired altitude.
- Landing: Slowly pull the throttle stick down. The helicopter will descend. Once it touches the ground, pull the throttle all the way down to stop the rotors.
6.3 Altitude Hold Function
The C032 features an altitude hold function, which automatically maintains the helicopter's height once the throttle stick is released to the center position. This allows for easier control and stable hovering.

Image 6.1: The RC ERA C032 UH-1 Huey helicopter demonstrating its ability to fly in multiple directions, indicating unrestricted movement and control.

Image 6.2: A pink variant of the RC ERA C032 UH-1 Huey helicopter hovering, highlighting its advanced positioning technologies like TOF laser fixed height and optical flow positioning for intelligent and stable flight.
6.4 3D Rolling & Inverted Flight
The helicopter supports 3D rolling and inverted flight. To perform these maneuvers, ensure you are in an open area with sufficient space and no obstacles. Consult the specific instructions in the included user manual for the exact button combinations or stick movements required to activate 3D mode and perform stunts.

Image 6.3: A green RC ERA C032 UH-1 Huey helicopter executing a one-key reverse flight maneuver, demonstrating its 3D flight capabilities. This maneuver requires an open area and calm wind conditions.
6.5 Route Flight Programming
The helicopter may feature a route flight programming function. Refer to the detailed instructions in the included user manual for how to set up and activate custom flight paths.
6.6 Anti-Stuck Protection
The helicopter is equipped with intelligent anti-stuck protection to prevent propeller damage. In case of propeller obstruction, the system will automatically stall to minimize risk and allow for safe handling.

Image 6.4: A green RC ERA C032 UH-1 Huey helicopter, illustrating its intelligent anti-stuck protection feature designed to prevent propeller damage by automatically stalling upon obstruction.
6.7 Flight Demonstration Video
Video 6.1: A demonstration of the RC ERA C032 UH-1 Huey RC Helicopter in flight, showcasing its 6-axis gyro stabilization and altitude hold capabilities. The video highlights various flight maneuvers and the helicopter's stability during operation.
7. Maintenance
- Cleaning: Use a soft, dry cloth to clean the helicopter after each use. Do not use water or solvents.
- Blade Inspection: Regularly check the main and tail blades for any signs of damage (cracks, bends, chips). Replace damaged blades immediately using the provided spare parts and tools.
- Battery Care: Store batteries in a cool, dry place. Do not store fully charged or completely depleted batteries for extended periods. Charge them to about 50% for long-term storage.
- Motor Inspection: Ensure the motors are free from debris and can spin freely.
- Storage: When not in use, store the helicopter and remote control in a safe place, away from direct sunlight and extreme temperatures.
8. Troubleshooting
| Problem | Possible Cause | Solution |
|---|---|---|
| Helicopter does not respond to transmitter. | Not bound; low battery (helicopter or transmitter); transmitter off. | Perform binding procedure; charge helicopter battery; replace transmitter batteries; turn on transmitter. |
| Helicopter flies erratically or drifts. | Uncalibrated gyro; damaged blades; strong wind. | Recalibrate gyro (refer to manual); inspect and replace damaged blades; fly in calmer conditions. |
| Short flight time. | Battery not fully charged; old/damaged battery. | Ensure battery is fully charged; consider replacing battery if performance degrades. |
| Propellers do not spin. | Obstruction; motor issue; anti-stuck protection activated. | Check for obstructions and clear them; power cycle the helicopter; if problem persists, contact support. |
9. Specifications
- Rotor Diameter: 315mm
- Body Length: 297mm
- Height: 92mm
- Flying Weight: 115g
- Flight Time: Approximately 13 minutes
- Charging Time: Approximately 50 minutes
- Remote Control Mode: 2.4G remote controller
- Remote Control Range: 120-150 meters
- Helicopter Battery: 7.4V (included)
- Transmitter Batteries: 4 x 1.5AA (not included)
- Recommended Age: 16+ years
- Item Weight: 1.68 pounds
- Model Number: TMW03P163630NK3
10. Warranty and Support
For warranty information, technical support, or replacement parts, please contact the seller or manufacturer directly through your purchase platform. Keep your proof of purchase for any warranty claims.