1. Introduction
This manual provides comprehensive instructions for using your P&C Friendship Bracelet Making Kit. Designed for creative individuals aged 6-12, this kit allows you to craft unique and personalized bracelets using a variety of beads and threads. Please read all instructions carefully before beginning.
2. Safety Information
- Small Parts: This kit contains small parts which may pose a choking hazard for children under 3 years of age. Adult supervision is recommended.
- Materials: All components are made from non-toxic, BPA-free plastic and fade-resistant cotton threads.
- Usage: Use the kit as intended. Do not ingest any components.
3. What's Included
Your P&C Friendship Bracelet Making Kit includes the following items:
- Portable Bracelet Loom
- 422+ Assorted Beads (alphabet, round, hearts, bears, wings, various shapes)
- 20 Cotton Threads (pre-cut in various colors)
- Stickers
- Instruction Guide (this manual)
- Charms

Image 3.1: Overview of the P&C Friendship Bracelet Making Kit components.
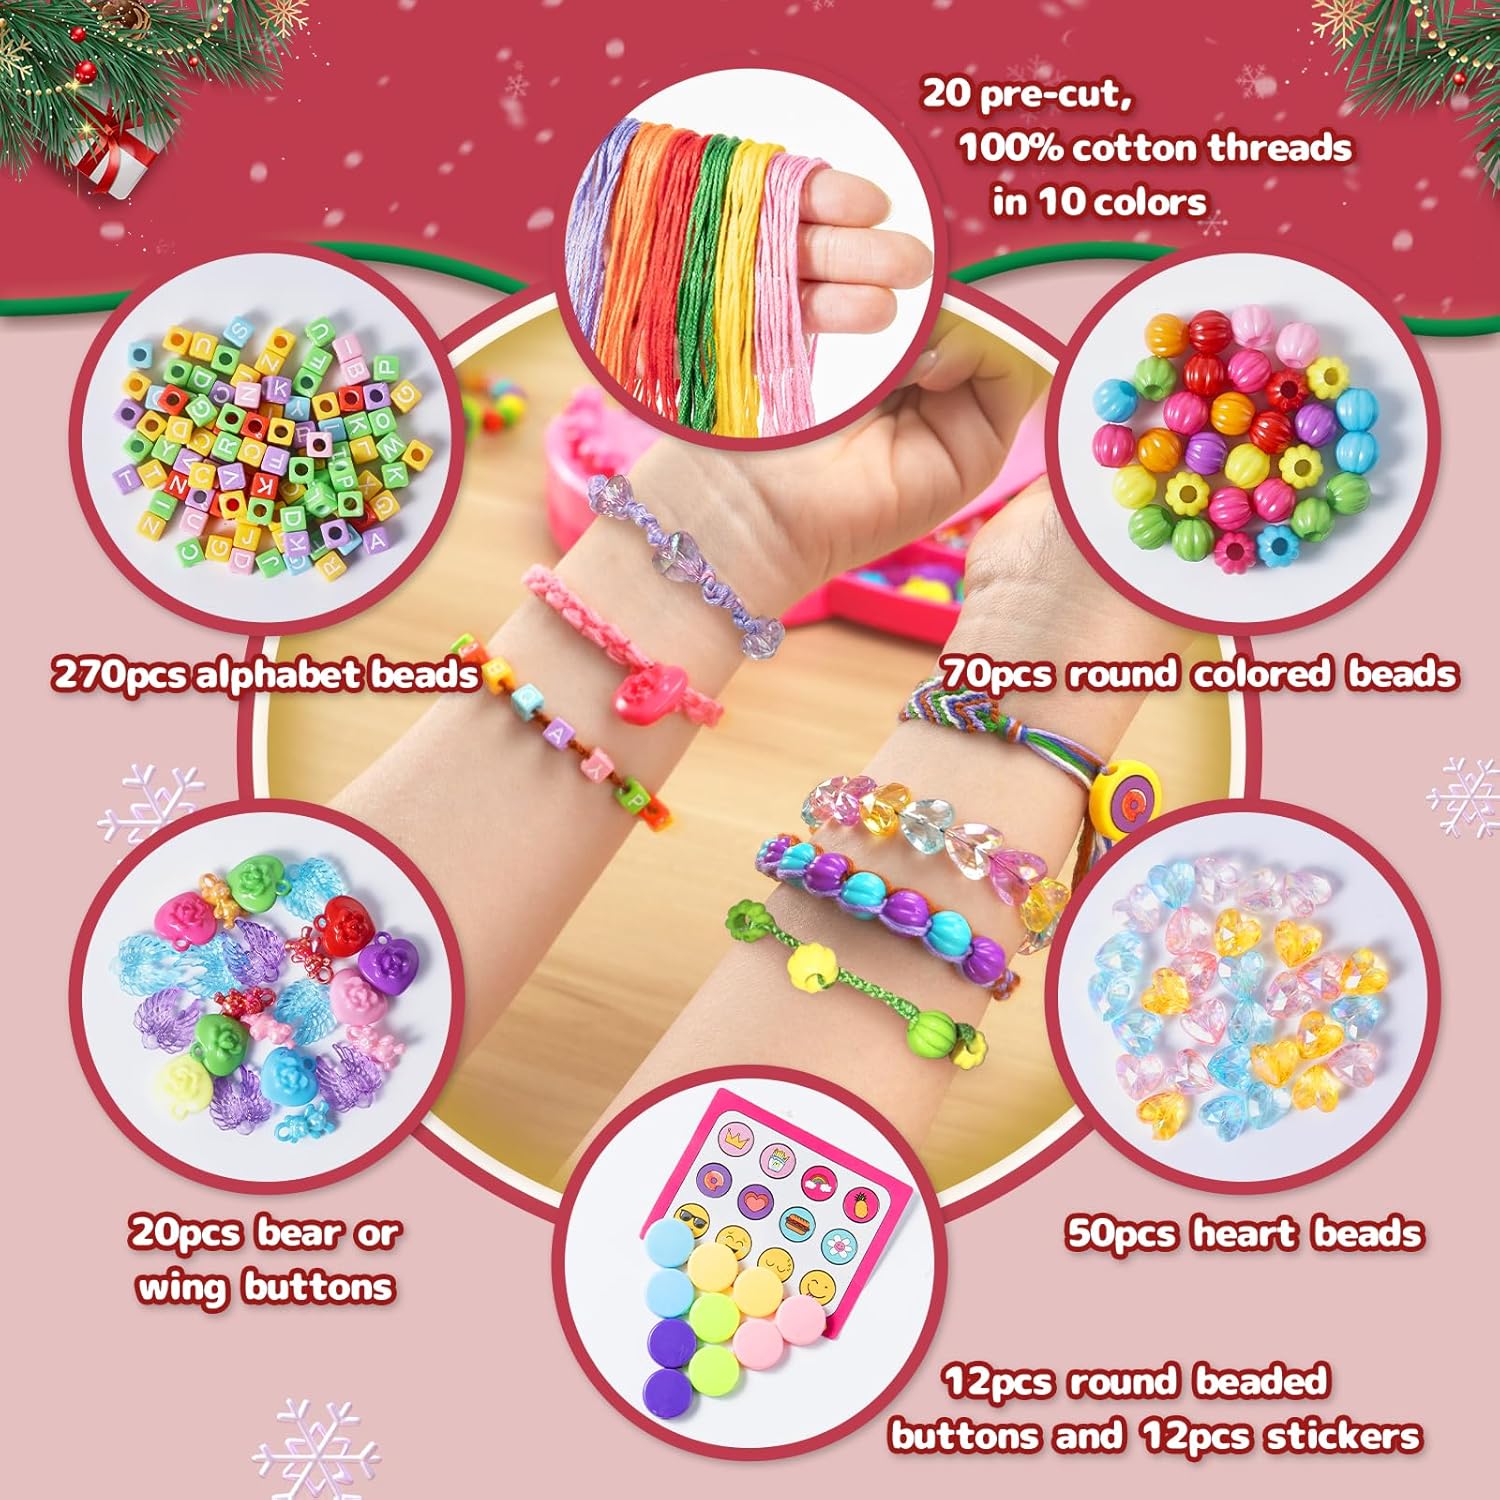
Image 3.2: Detailed view of the diverse beads and colorful threads.
4. Setup
Prepare your workspace and the bracelet loom for crafting:
- Open the portable bracelet loom. It features a clever clip-and-slot design to hold threads securely.
- Locate the hidden storage compartment within the loom. This compartment is designed to keep your beads, threads, and other small accessories organized.
- Select your desired colors of pre-cut threads. The kit includes 20 different cotton threads.
- Choose 2 to 5 threads for your bracelet. Fold the chosen threads in half and tie a knot approximately 1/2 inch from the fold to create a loop.
- Secure the knotted loop at the top clip of the bracelet maker.
- Place individual strings into the numbered slots at the bottom of the loom to keep them separated and organized.

Image 4.1: The loom's storage compartment and thread organization features.
Video 4.1: A demonstration of setting up the loom and beginning a beaded bracelet.
5. Operating Instructions
Follow these steps to create your friendship bracelets. The included guide provides full-color illustrations for various patterns.
5.1 Basic Knotting Technique (Right-Hand Double Knot)
- Identify the leftmost string (String 1) and the next string (String 2).
- Cross String 1 over String 2 to form a '4' shape.
- Bring String 1 under String 2 and pull it back through the loop created by the '4'.
- Tighten your knot by pulling String 1 back until it's snug against the top.
- Repeat steps 2-4 to create a second knot on the same string.
- Move to the next string and repeat the process.
5.2 Basic Knotting Technique (Left-Hand Double Knot)
- Identify the rightmost string (String 1) and the next string (String 2).
- Cross String 1 over String 2 to form a reversed '4' shape.
- Bring String 1 under String 2 and pull it back through the loop created by the reversed '4'.
- Tighten your knot by pulling String 1 back until it's snug against the top.
- Repeat steps 2-4 to create a second knot on the same string.
- Move to the next string and repeat the process.

Image 5.1: Visual guide for different knotting patterns including diagonal, chevron, wave, and more.
5.3 Creating a Striped Bracelet
- Choose 5 thread colors. Fold them in half and knot.
- Secure the top knot and line up the threads one by one in the loom slots.
- Using the outermost left string, tie right-hand double knots onto the next 4 strings (moving rightward).
- Using the outermost right string, tie left-hand double knots onto the next 4 strings (moving leftward).
- Continue alternating steps 3 and 4 to build rows until the bracelet reaches your desired length.

Image 5.2: Step-by-step visual instructions for creating a striped bracelet.
5.4 Adding Beads and Charms
To incorporate beads or charms into your bracelet:
- Before tying a knot, thread a bead onto the active string.
- Push the bead up close to the previous knot.
- Tie the next knot directly after the bead to secure it in place.
- Repeat this process for each bead or charm you wish to add.
Video 5.3: Demonstration of creating a bracelet with alphabet beads.
Video 5.4: Guide to making a daisy-themed braided bracelet.
Video 5.5: Instructions for creating a pink alternating bead braided bracelet.
Video 5.6: How to make a purple and yellow braided bracelet with a crown charm.
Video 5.7: Tutorial for a colorful beaded braided DIY bracelet.
5.5 Finishing Your Friendship Bracelet
- Once your bracelet is long enough to fit your wrist, unclip it from the top of the bracelet maker.
- Gather all of your strings and tie one big knot at the end of your bracelet.
- Leave about 3 to 4 inches of string and cut off any excess.
- Use the remaining string to tie your bracelet onto your wrist.
6. Maintenance and Care
- Cleaning: Wipe the plastic loom with a soft, damp cloth. Do not use harsh chemicals.
- Storage: Store all beads, threads, and accessories in the loom's integrated storage compartment to prevent loss and tangling. Keep the kit in a cool, dry place away from direct sunlight.
- Thread Care: Avoid exposing threads to excessive moisture or heat to maintain their quality and color.
7. Troubleshooting / Frequently Asked Questions
- Q: Is this kit suitable for beginners or younger children?
A: Yes, this kit is perfect for children aged 6-12. It is designed for beginners and also suitable for more advanced crafters who appreciate a simplified bracelet-making process. - Q: Are the threads and materials child-friendly?
A: All materials are child-friendly, safe, and non-toxic. The components are high-quality and durable, ensuring a worry-free crafting experience. - Q: Does this kit help develop skills?
A: Absolutely. This bracelet-making kit helps children develop fine motor skills, hand-eye coordination, color matching abilities, and creative problem-solving through threading, beading, and knotting.
8. Specifications
| Feature | Detail |
|---|---|
| Brand | P&C |
| Model Name | LM1596547 |
| Age Range | 6-12 Years |
| Color | Pink |
| Theme | DIY, Fashion, Friendship |
| Dimensions (L x W x H) | 1.8 x 6.2 x 11.4 inches |
| Material | Cotton, Plastic |
| Item Weight | 1.32 pounds (0.6 Kilograms) |
| Included Components | Beads, Charms, Instruction Guide, Stickers, String |
9. Warranty and Support
For any questions, concerns, or support regarding your P&C Friendship Bracelet Making Kit, please contact our customer service. While specific warranty details are not provided in this manual, we are committed to ensuring your satisfaction with our products.
Please retain your purchase receipt for any potential claims.