1. Introduction
This manual provides detailed instructions for the safe and efficient operation of your DOINOW T80 150 PSI Wireless Electric Portable Air Pump. Please read this manual thoroughly before first use and retain it for future reference.
1.1 Package Contents
Verify that all items listed below are included in your package:
- 1 x Wireless Air Pump
- 1 x 30 cm Air Hose
- 1 x 24 cm Air Hose
- 1 x 30 cm Power Cable (for 12V DC connection)
- 1 x Type-C Charging Cable
- 4 x Multi-function Nozzles
- 1 x Waterproof Storage Bag
2. Safety Information
Always observe the following safety precautions to prevent injury or damage to the device:
- Do not leave the pump unattended during operation.
- Keep out of reach of children.
- Do not expose the pump to rain or moisture.
- Avoid prolonged continuous operation to prevent overheating. Allow the device to cool down if it becomes hot.
- Ensure the correct pressure is set for the item being inflated to avoid over-inflation and potential damage or injury.
- Use only the provided accessories and charging cables.
3. Product Overview
Familiarize yourself with the components and features of your portable air pump.
Figure 3.1: The DOINOW T80 portable air pump and its included accessories, such as air hoses and nozzles.
3.1 Display and Controls
The pump features a dual LCD screen for clear display of real-time and preset pressure values, along with intuitive controls.

Figure 3.2: Close-up of the dual LCD display, indicating current pressure, target pressure, selected unit (PSI, BAR, KPA, kg/cm²), and battery level.
3.2 Inflation Modes
The pump offers five preset inflation modes for various items, along with a manual mode for custom pressure settings.
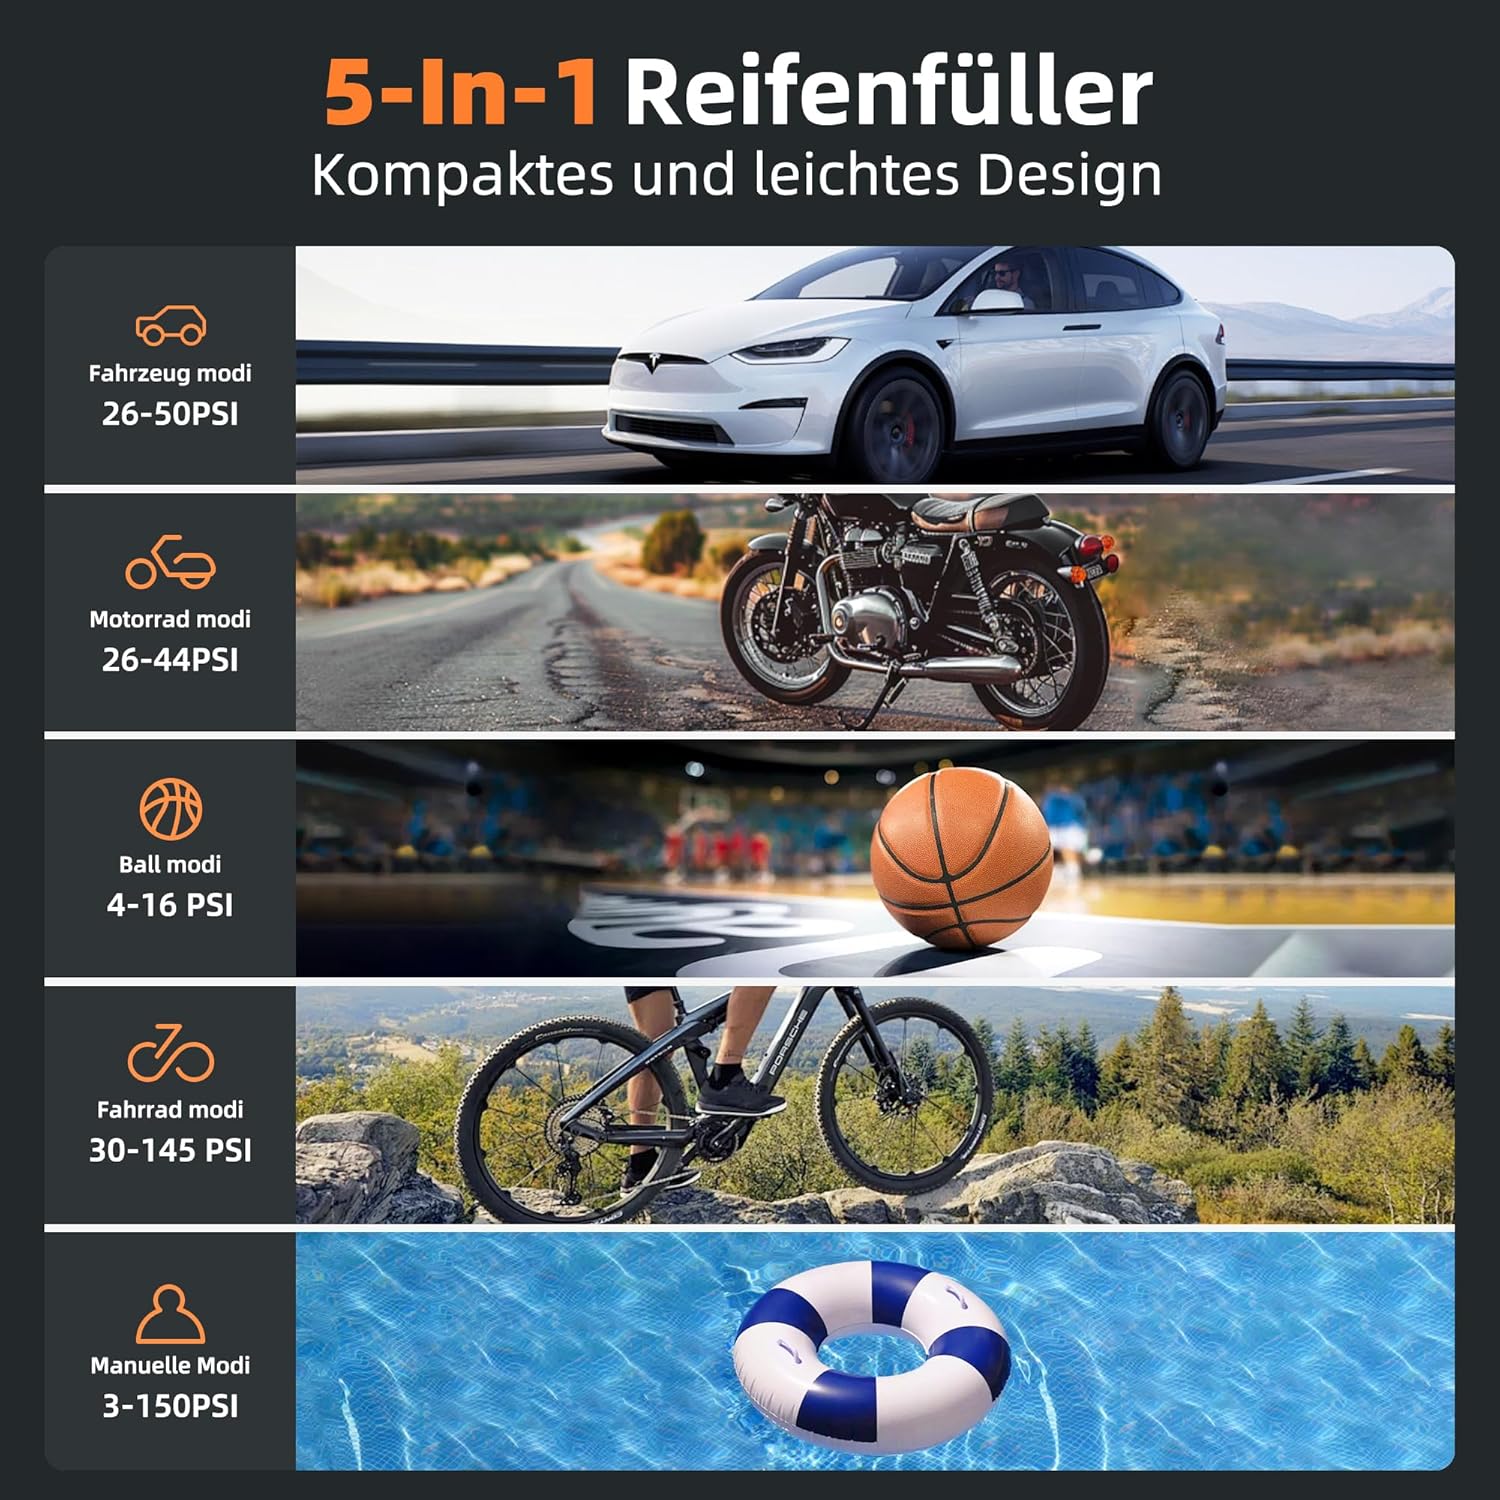
Figure 3.3: Visual representation of the five inflation modes: Car (26-50 PSI), Motorcycle (26-44 PSI), Ball (4-16 PSI), Bicycle (30-145 PSI), and Manual (3-150 PSI).
3.3 LED Lighting
The pump includes three LED light modes for visibility and emergencies.

Figure 3.4: The three LED light modes: Illumination (press once), Slow Flashing Warning (press twice), and Fast Flashing SOS (press three times).
4. Setup
4.1 Charging the Pump
Before first use, fully charge the pump using the provided Type-C charging cable. Connect the Type-C end to the pump's charging port and the USB-A end to a compatible USB power adapter (not included).
4.2 Attaching the Air Hose and Nozzle
- Screw one end of the air hose securely onto the pump's air outlet.
- Select the appropriate nozzle for your item (e.g., Presta valve adapter for bicycles, needle for balls) and screw it onto the other end of the air hose.
5. Operating Instructions
5.1 Powering On/Off
Press and hold the power button (usually the center button) to turn the pump on or off.
5.2 Selecting Pressure Units
With the pump powered on, press the unit button (often labeled 'M' or a similar icon) to cycle through available pressure units: PSI, BAR, KPA, and kg/cm².
5.3 Choosing an Inflation Mode
Press the mode selection button (often an icon representing different vehicles/items) to choose from the preset modes: Car, Bicycle, Motorcycle, or Ball. Each mode has a default pressure range. For custom pressure, select the Manual mode.
5.4 Setting Target Pressure
Once a mode is selected, use the '+' and '-' buttons to adjust the desired target pressure. The display will show both the current real-time pressure and your preset target pressure.
5.5 Starting and Stopping Inflation
- Connect the nozzle securely to the item's valve.
- Press the power/start button to begin inflation. The pump will automatically stop once the preset target pressure is reached.
- To manually stop inflation at any time, press the power/start button again.

Figure 5.1: The pump in action, demonstrating its fast inflation capability for a car tire. A car tire can be inflated from 30 PSI to 36 PSI in approximately 1 minute, or from 0 PSI to 36 PSI in about 5 minutes.
5.6 Using as a Power Bank
The pump can also function as a power bank. Connect your device (e.g., smartphone, tablet) to the pump's USB-A output port using a compatible charging cable to charge it on the go.

Figure 5.2: The pump's high-capacity battery (7800 mAh) allows for multiple inflations: approximately 6 car tires, 35 bicycle tires, 25 motorcycle tires, 90 balls, or 100 swimming rings on a single charge.
6. Maintenance
6.1 Cleaning
Wipe the exterior of the pump with a soft, damp cloth. Do not use harsh chemicals or abrasive cleaners. Ensure the pump is dry before storage.
6.2 Storage
Store the pump and its accessories in the provided waterproof storage bag in a cool, dry place, away from direct sunlight and extreme temperatures. Ensure the pump is fully charged before long-term storage to maintain battery health.
7. Troubleshooting
| Problem | Possible Cause | Solution |
|---|---|---|
| Pump does not turn on. | Low battery. | Charge the pump fully. |
| Pump inflates slowly or not at all. | Air hose or nozzle not securely attached; Leak in connection. | Ensure all connections are tight. Check for damage to the hose or nozzle. |
| Inaccurate pressure reading. | Incorrect pressure unit selected; Sensor malfunction. | Verify the correct pressure unit (PSI, BAR, KPA, kg/cm²) is selected. If issue persists, contact customer support. |
| Pump overheats and shuts off. | Prolonged continuous operation. | Allow the pump to cool down for at least 10-15 minutes before resuming operation. |
8. Specifications
| Brand: | DOINOW |
| Model: | T80 (CZK-5682) |
| Max Pressure: | 150 PSI |
| Battery Capacity: | 7800 mAh |
| Charging Port: | USB-C |
| Output Port: | USB-A (for power bank function) |
| Pressure Accuracy: | ± 0.5 PSI |
| Weight: | 870 g |
| Package Dimensions: | 20.5 x 13.5 x 6.1 cm |
9. Warranty and Support
9.1 Warranty Information
This product comes with a comprehensive 2-year warranty. Please retain your proof of purchase for warranty claims.
9.2 Customer Support
For any questions, technical assistance, or warranty support, please contact our customer service team. Our support is available 24/7 to assist you.
Contact information (e.g., email, phone number, website) would typically be provided here by the manufacturer.