Introduction
The BIGTREETECH MMB CAN V2.0 is a control board specifically designed for the Voron Enraged Rabbit Carrot Feeder (ERCF) V2 System. It provides precise control and reliable performance for multi-material feeding in Voron 2.4 and Klipper 3D printers. This manual provides essential information for the setup, operation, and maintenance of your MMB CAN V2.0 board.

Image: The MMB CAN V2.0 board shown alongside an ERCF v2 system, illustrating its intended application for multi-color printing.
Setup
The MMB CAN V2.0 board features an optimized layout for external module connectors, simplifying wiring and reducing space requirements. This design facilitates quicker installation and easier maintenance compared to previous versions.
Installation Steps:
- Power Connection: Connect the DC12V-DC60V power supply to the board's input. Ensure correct polarity.
- Motor Driver Installation: Insert EZ Drivers into the designated EZ Driver sockets (M1, M2, M3, M4). The board supports 2+2 redundant EZ driver sockets.
- Endstop Connections: Connect endstop switches to the 1+3 Endstop ports (STOP1-STOP4).
- Communication Setup: Choose between CAN or USB communication. For CAN communication, ensure Klipper firmware is running and connect using the XT30 shielded cable. Select the appropriate 120R terminal resistance if needed.
- Peripheral Connections: Connect any additional sensors or RGB strips to the I2C, RGB, or Sensor interfaces as required.
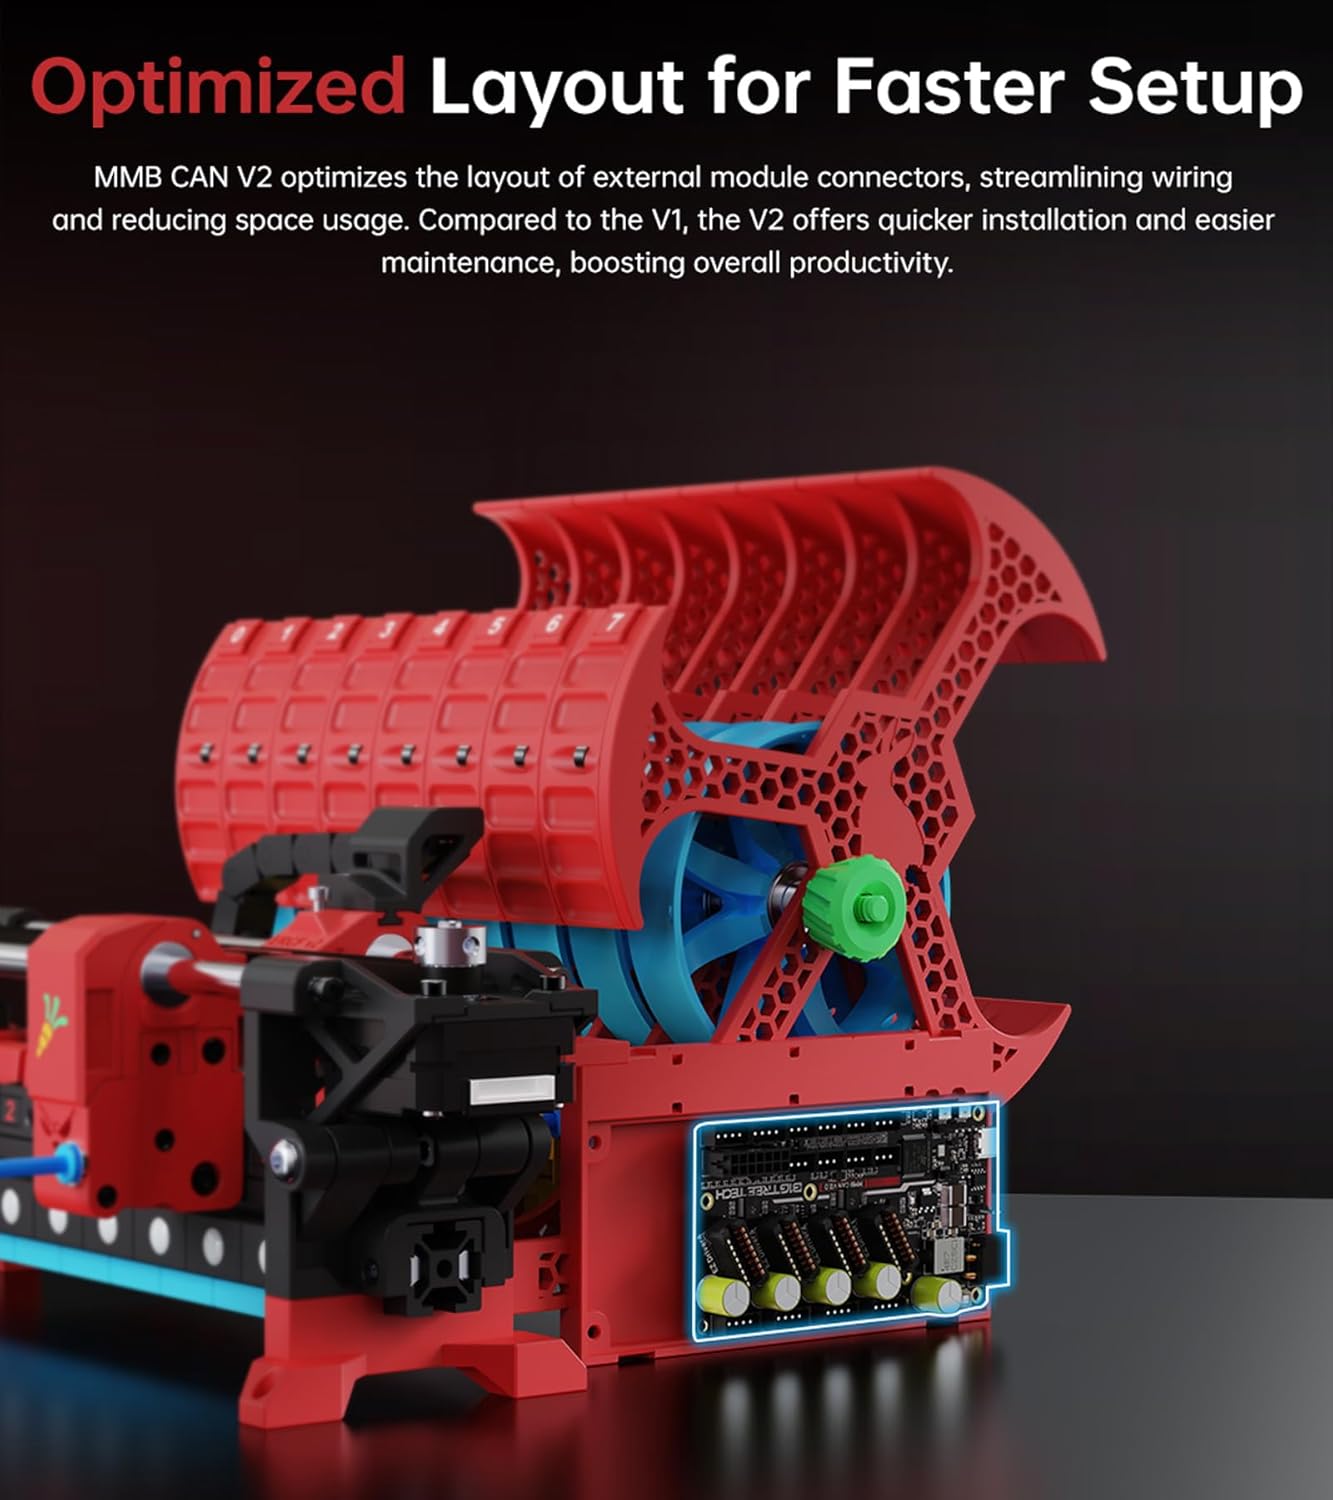
Image: The MMB CAN V2.0 board shown installed within an Enraged Rabbit Carrot Feeder V2 system, demonstrating its compact and optimized integration.
Operating
The MMB CAN V2.0 board is powered by an ARM Cortex-M0+ STM32G0B1RET6 microprocessor operating at 64MHz, ensuring stable and precise control for multi-color printing with the ERCF V2 system.
Key Features and Operation:
- Multi-Material Feeding: Designed to support multi-material feeding systems like the Voron ERCF V2, enabling complex 3D printing projects.
- CAN/USB Communication: The board supports both CAN and USB communication. CAN communication is specifically supported when running Klipper firmware, offering fast, accurate, and reliable data transfer. A high-quality XT30 shielded cable is recommended for stable CAN signal transmission.
- Flexible Connectivity:
- I2C Interfaces: Two I2C interfaces allow connection of BME680/BME280 sensors for real-time temperature and humidity data.
- Infrared Sensor Interface: Integrates TCRT5000 sensors for precise detection and automatic calibration.
- RGB Interface: Supports Neo-Pixel/WS2812 LED strips for customizable lighting effects.
- Redundant Design: Features 2+2 redundant EZ driver sockets and 1+3 Endstop ports, enhancing stability and offering expansion possibilities for custom solutions like DIY AMS.
- High Voltage Support: The board supports input voltages up to 60V, providing robust power for various projects.

Image: A detailed view of the MMB CAN V2.0 board highlighting the 2+2 EZ Driver Sockets and 1+3 Endstop Ports, demonstrating its redundant design for enhanced stability.
Maintenance
To ensure the longevity and optimal performance of your MMB CAN V2.0 board, follow these general maintenance guidelines:
- Regular Cleaning: Periodically inspect the board for dust and debris. Use compressed air or a soft brush to gently clean the components. Ensure the board is powered off and disconnected before cleaning.
- Connection Checks: Regularly verify that all cables and connectors are securely seated. Loose connections can lead to intermittent issues or component damage.
- Environmental Control: Operate the board within recommended temperature and humidity ranges. Avoid exposure to extreme conditions or moisture.
- Firmware Updates: Keep your Klipper firmware updated to benefit from the latest features, bug fixes, and performance improvements. Refer to the official Klipper documentation for update procedures.
Troubleshooting
If you encounter issues with your MMB CAN V2.0 board, consider the following troubleshooting steps:
- No Power: Check the input voltage and current. Ensure the power supply is correctly connected and providing the specified DC12V-DC60V. Verify that the board's power indicator LED is illuminated.
- Communication Issues (CAN/USB):
- For CAN communication, confirm that Klipper firmware is installed and running correctly. Verify the XT30 shielded cable is properly connected and undamaged. Check the 120R terminal resistance setting.
- For USB communication, ensure the USB Type-C cable is securely connected to both the board and your host device. Try a different USB port or cable.
- Motor Driver Malfunction: Ensure EZ Drivers are correctly inserted and configured. Check for any visible damage to the drivers or sockets.
- Sensor Malfunctions: Verify connections to I2C, Infrared, or RGB interfaces. Ensure sensors are compatible and correctly configured in your firmware.
- Signal Pin Connectivity (Microfit Connector): If experiencing issues with multiple signal triggers, note that the 14-pin Microfit connector has limited voltage and ground pins. You may need to run triggers to a separate breakout board or daisy chain them to ensure proper functionality.
- General Instability: Ensure the board is properly mounted and not subject to excessive vibration. Check for any short circuits or foreign objects on the board.
If problems persist after attempting these steps, please contact technical support.
Specifications
| Parameter | Value |
|---|---|
| Dimensions | 108.26mm x 59mm |
| Microprocessor | ARM Cortex-M0+ STM32G0B1RET6 64MHz |
| Input Voltage/Current | DC12V-DC60V, 9A |
| Logic Voltage | DC3.3V |
| Maximum Output (5V) | 5V 2A, peak 2.5A |
| DCDC 5V Output Max Current | 7A |
| Expansion Interfaces | STP1-STP11, I2C (x2), RGB, Sensor (infrared sensor interface), USB, CAN |
| Motor Driver Support | EZ Drivers |
| Driver Operating Modes | STEP/DIR, UART, SPI |
| Stepper Motor Interfaces | M1, M2, M3, M4 |
| USB Communication Interface | USB Type-C |
| Item Weight | 7 ounces |
| Included Components | BIGTREETECH MMB CAN Board |

Image: An overhead view of the BIGTREETECH MMB CAN V2.0 board, showcasing its layout and components.
Warranty
Specific warranty details for the BIGTREETECH MMB CAN V2.0 board are not provided in the product information. For warranty inquiries, please refer to the manufacturer's official website or contact your point of purchase.
Support
For further assistance, technical support, or detailed documentation, please visit the official BIGTREETECH website or contact BIQU customer service. You can often find additional resources, firmware updates, and community forums on their platforms.


