
Sucetiho Mini Projector User Manual
Model: Mini Projector
1. Introduction
Thank you for purchasing the Sucetiho Mini Projector. This manual provides essential information for the safe and efficient operation of your device. Please read it thoroughly before use and retain it for future reference.
This portable projector is designed to deliver a cinematic viewing experience, supporting 4K content and offering versatile connectivity for various devices.
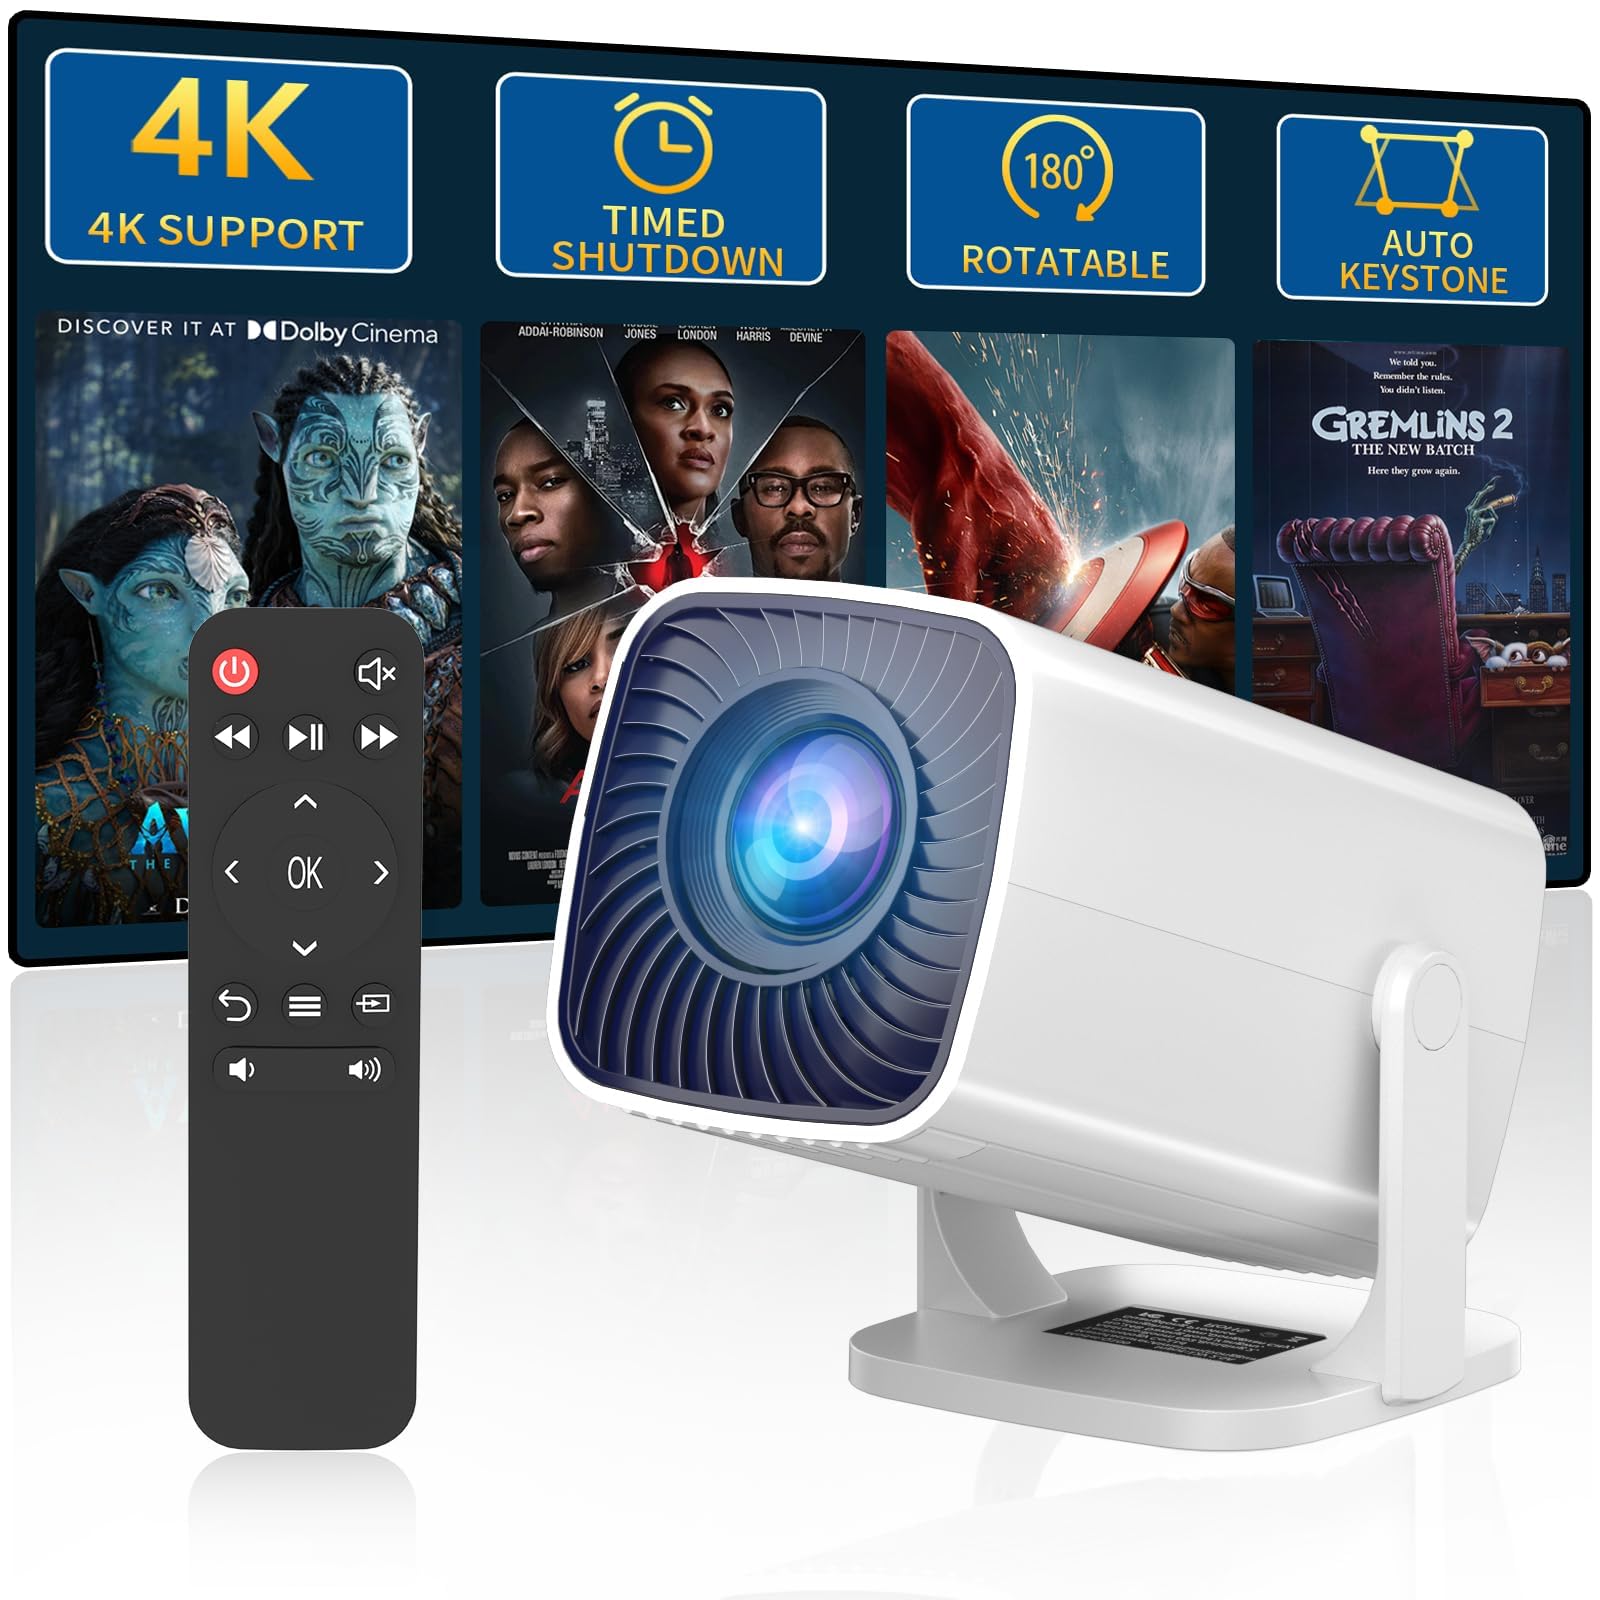
Image 1.1: The Sucetiho Mini Projector showcasing its cinematic capabilities with key features highlighted.
2. Product Overview
2.1 Key Features
- Cinematic Experience: Supports 4K content, delivering up to a 200-inch screen with short-throw projection.
- Effortless Setup: Features a 270° rotatable stand and automatic keystone correction for flexible positioning.
- Compact Design: Lightweight with a built-in speaker and a long-lasting 50,000-hour LED lamp.
- Versatile Connectivity: HDMI, USB, and AUX ports for direct wired connections to smartphones, TV sticks, laptops, and gaming consoles without requiring Wi-Fi or Bluetooth.
- High Brightness: 5000 Lumens for clear images.
2.2 Package Contents
Upon unpacking, ensure all items listed below are present:
- Sucetiho Mini Projector
- Remote Control
- AV Cable
- User Manual (this document)

Image 2.1: A detailed view of the Sucetiho Mini Projector, highlighting its design and port layout.
3. Setup
3.1 Placement
Position the projector on a stable, flat surface. The 270° rotatable stand allows for flexible projection angles, including walls, ceilings, or tables. Ensure there is adequate ventilation around the projector.

Image 3.1: The projector's flexible stand allows for projection at various angles, from 0° to 180°.
3.2 Power Connection
Connect the power adapter to the projector's power input port, then plug the adapter into a standard electrical outlet.
3.3 Initial Adjustments
- Manual Focus: Rotate the focus ring on the projector lens until the image appears sharp and clear.
- Automatic Keystone Correction: The projector features automatic keystone correction to adjust the image shape if the projector is not perfectly perpendicular to the screen.

Image 3.2: Features like auto keystone correction and manual focus simplify initial setup.
4. Operation
4.1 Powering On/Off
- Power On: Press the power button on the projector or the remote control.
- Power Off: Press the power button again. The projector will initiate a shutdown sequence.
4.2 Connecting Devices
The projector supports various wired connections:
- HDMI Port: Connect TV sticks, gaming consoles, laptops, or other HDMI-enabled devices using an HDMI cable.
- USB Port: Connect smartphones, tablets, or laptops using a compatible USB cable for direct mirroring.
- AUX Port: Use a 3.5mm audio cable to connect external speakers or headphones.
4.3 Source Selection
After connecting a device, use the remote control or the projector's control panel to select the appropriate input source (HDMI, USB).
4.4 Adjusting Projection
- Projection Size: The projector can display images from 50 to 200 inches. Adjust the distance from the projection surface to change the screen size.
- Focus: Fine-tune the focus using the manual focus ring if the image appears blurry.

Image 4.1: The projector can achieve a screen size of up to 200 inches, depending on placement distance.

Image 4.2: The projector is suitable for various environments, including outdoor, indoor, and home theater use.
5. Maintenance
5.1 Cleaning the Lens
Use a soft, lint-free cloth specifically designed for optical lenses to gently wipe the projector lens. Avoid using abrasive cleaners or excessive force.
5.2 Cleaning Air Vents
Regularly check and clean the air vents to prevent dust buildup, which can affect performance and lead to overheating. Use a soft brush or compressed air to remove dust.
5.3 Storage
When not in use, store the projector in a cool, dry place, away from direct sunlight and extreme temperatures. Use the original packaging or a protective case to prevent dust and damage.
6. Troubleshooting
6.1 No Power
- Ensure the power cable is securely connected to both the projector and the power outlet.
- Verify the power outlet is functional.
6.2 No Image
- Check that the input source selected on the projector matches the connected device (e.g., HDMI 1, USB).
- Ensure the connected device is powered on and outputting a signal.
- Verify the connection cables are securely plugged in.
6.3 Blurry Image
- Adjust the manual focus ring on the lens until the image is clear.
- Ensure the projector is placed at an appropriate distance from the screen.
6.4 No Sound
- Check the volume settings on both the projector and the connected device.
- If using external speakers, ensure they are properly connected to the AUX port and powered on.
6.5 Remote Control Not Working
- Replace the batteries in the remote control.
- Ensure there are no obstructions between the remote and the projector's IR receiver.
7. Specifications
| Feature | Specification |
|---|---|
| Brand | Sucetiho |
| Recommended Uses | Business, Education, Gaming, Home Cinema |
| Special Features | Built-In Speaker, Digital Keystone Correction, Lightweight, Portable, Short Throw |
| Connectivity Technology | HDMI, USB |
| Native Resolution | 800 x 600 Pixels |
| Maximum Display Resolution | 800 x 600 Pixels (4K Supported Input) |
| Display Type | LCD |
| Form Factor | Portable |
| Mounting Type | Tabletop Mount |
| Lumens | 5000 Lumen |
| Color | White |
| Controller Type | Remote Control |
| Compatible Devices | Gaming Console, Laptop, Smartphone, Tablet, Television |
| Contrast Ratio | 20000:1 |
| Maximum Throw Distance | 14.8 Feet |
| Light Source Operating Life | 50000 Hours |
| Hardware Connectivity | Bluetooth, HDMI, USB |
| Minimum Throw Distance | 3.7 Feet |
| Item Dimensions (L x W x H) | 13L x 10.4W x 17H Centimeters |
8. Warranty and Support
For warranty information and technical support, please refer to the contact details provided with your purchase documentation or visit the official Sucetiho website. Keep your purchase receipt as proof of purchase.