
1. Introduction
This manual provides detailed instructions for the operation and maintenance of your FCXJTU Digital Kitchen Timer, Model YS1009. This device features an extra-large LED display, multiple alarm options, memory functions, and versatile placement options, making it suitable for various timing needs.
2. Package Contents
- 1 x FCXJTU LED Digital Timer
- 1 x 2M Type-C Charging Cable
- 1 x User Manual
3. Product Overview
The FCXJTU Digital Kitchen Timer is designed for clear visibility and ease of use. It features a large LED display, multiple alarm settings, and a rechargeable battery. The timer supports both countdown and count-up functions, with a maximum timing range of 99 hours and 59 minutes.

Figure 1: Front view of the FCXJTU Digital Kitchen Timer displaying 00:59. Icons indicate custom memory, large LED display, 1-minute countdown reminder (red digits), and a maximum count range of 99 hours 59 minutes.

Figure 2: The timer displaying 30:50, highlighting its extra-large display and the availability of 6 alarms with 4 volume levels (mute, low, medium, high).
4. Setup and Charging
4.1 Initial Charging
Before first use, fully charge the timer. Connect the provided Type-C charging cable to the timer's charging port and to a 5V/1A power adapter (not included). A full charge takes approximately 3 hours and provides about 18 hours of uninterrupted use. A low power icon will appear on the display to remind you when charging is needed.
Important: Use only a 5V power plug (output voltage) for charging. Using a power outlet greater than 5V may cause damage to the battery.

Figure 3: The timer being charged via its Type-C port, illustrating the charging process.
4.2 Placement Options
The timer offers versatile placement options:
- Magnetic Attachment: Four built-in strong magnets allow direct attachment to any metal surface, such as a refrigerator.
- Hanging: A hanging hole is provided for wall mounting.
- Stand: A foldable stand allows for desktop placement.

Figure 4: Illustration of the timer's multiple placement methods: magnetic attachment to a refrigerator, hanging on a hook, and standing on a desk using its foldable stand.
5. Operating Instructions
5.1 Power On/Off and Energy Saving
To power on the timer, press the power button. The timer has an automatic energy-saving function: it will automatically turn off if not used for more than 3 minutes to conserve battery life.
Video 1: Demonstrates the timer's power on/off function, showing the display activating and deactivating.
5.2 Setting Time (Countdown/Count-up)
The timer supports two modes:
- Minutes and Seconds Mode: Maximum time is 59 minutes and 59 seconds.
- Hours and Minutes Mode: Maximum time is 99 hours and 59 minutes.
Use the separate HOUR, MIN, and SEC buttons to set your desired time. Press the START/STOP button to begin or pause the timer. To reset, use the RESET/MEMORY button.

Figure 5: Visual representation of the timer's count-up and countdown capabilities, indicating its maximum range.
5.3 Alarm Settings
The timer features 6 different alarms: 2 beep sounds and 4 musical alarms. You can also adjust the volume to one of four levels: loud (80-95dB), medium (70-85dB), soft (60-75dB), and quiet (mute). Use the SOUND button to cycle through alarm types and the VOL button to adjust volume.
Video 2: Demonstrates the different alarm sounds and volume levels available on the timer.
5.4 Memory Function
The timer includes 3 sets of independent memory times for frequently used durations. Default preset times are 5 minutes, 10 minutes, and 30 minutes. These can be customized as needed. Use the RESET/MEMORY button to access and set these memory functions.
Video 3: Shows how to use the memory function to quickly recall and set preset countdown times.
5.5 Last Minute Countdown Alert
During a countdown, when the time reaches the last minute, the display numbers will turn red, providing a clear visual alert.
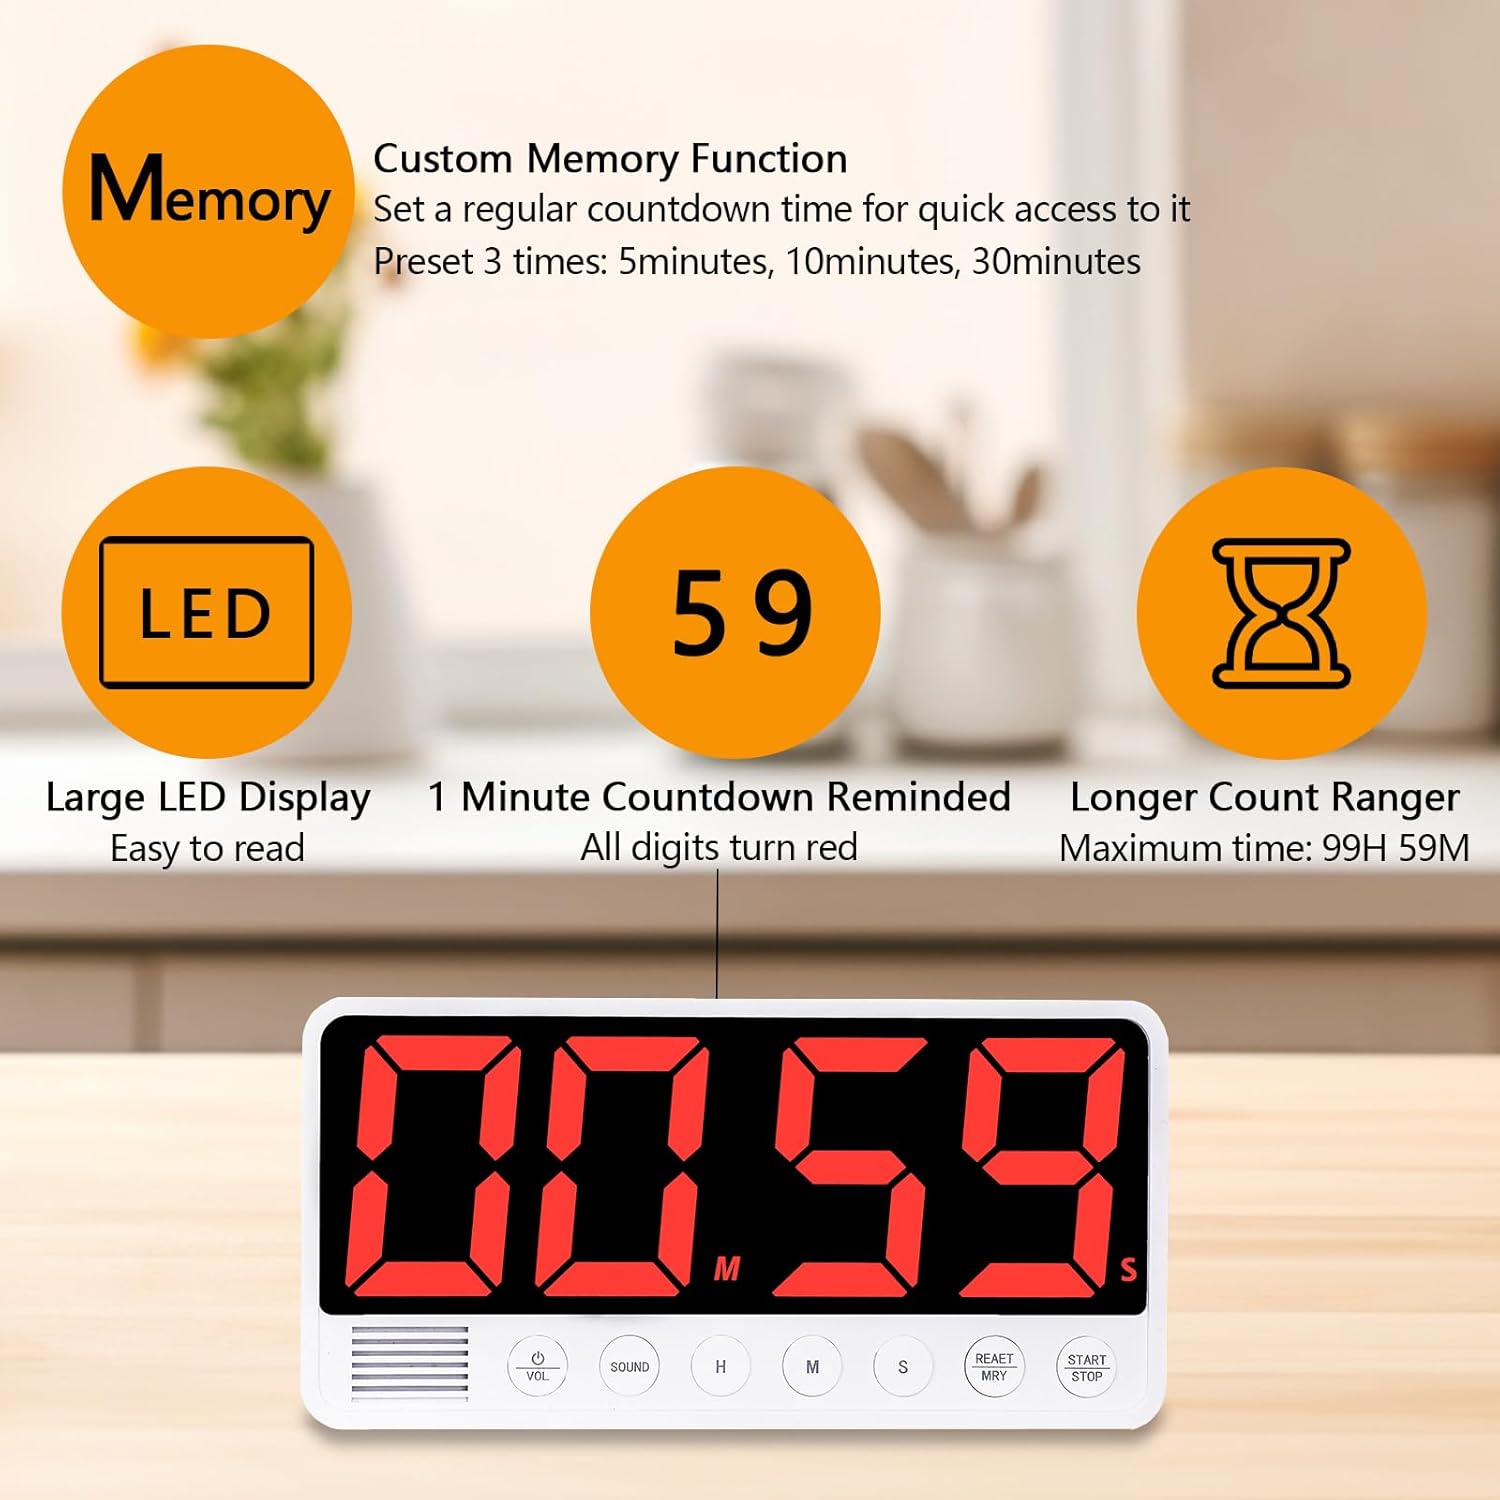
Figure 6: The timer's display showing red digits for the final minute of a countdown, a visual alert feature.
6. Maintenance
To ensure the longevity of your FCXJTU Digital Kitchen Timer:
- Wipe the timer with a soft, dry cloth. Do not use abrasive cleaners or immerse in water.
- Avoid exposing the timer to extreme temperatures or direct sunlight for extended periods.
- Store in a cool, dry place when not in use.
7. Troubleshooting
| Problem | Possible Cause | Solution |
|---|---|---|
| Timer does not turn on. | Battery is depleted. | Charge the timer using the provided Type-C cable and a 5V/1A power adapter. |
| Display is dim or flickering. | Low battery. | Recharge the timer. |
| Alarm sound is too low or off. | Volume setting is low or muted. | Press the VOL button to adjust the volume level. |
| Timer turns off unexpectedly. | Automatic energy-saving function activated. | This is normal behavior if the timer is inactive for 3 minutes. Press any button to reactivate. |
8. Specifications
- Brand: FCXJTU
- Model Number: YS1009
- Material: Plastic
- Color: Black
- Product Dimensions: 2.8D x 19W x 9.4H Centimetres
- Item Weight: 229 Grams
- Screen Size: 7.1 Inches
- Battery: Built-in 2000mAh Lithium Battery
- Charging Port: USB-C (5V/1A input recommended)
- Alarm Volume Levels: 4 (Loud, Medium, Soft, Quiet)
- Alarm Types: 6 (2 Beep, 4 Musical)
- Max Timing Range: 99 Hours 59 Minutes (or 59 Minutes 59 Seconds)
9. Warranty and Support
This product comes with a 2-year warranty. For any support inquiries, troubleshooting assistance, or warranty claims, please contact FCXJTU customer service through your purchase platform or the contact information provided with your product packaging.

