1. Introduction
This manual provides essential information for the safe and effective use of your juckeyroot Manual Trash Compactor, Style2. This robust iron garbage press is designed to reduce the volume of waste in 120-360L wheelie bins, making it suitable for both kitchen and outdoor waste management. Please read these instructions carefully before assembly and operation to ensure proper function and longevity of the product.
2. Safety Information
- Always ensure the compactor is stable and securely positioned on the bin before applying pressure.
- Keep hands and fingers clear of moving parts and the compaction area to prevent pinching or injury.
- Do not attempt to compact hazardous materials, sharp objects, or liquids that could cause damage or injury.
- Supervise children and pets to prevent them from playing with or operating the compactor.
- Wear appropriate personal protective equipment, such as gloves, when handling waste.
- Do not exceed the recommended force; excessive force can damage the compactor or the bin.
- Store the compactor in a dry, secure location when not in use.
3. Package Contents
Please verify that all components are present before beginning assembly:
- Main Handle Assembly (A)
- Vertical Support Shaft (B)
- Base Frame (C)
- Stabilizing Hooks (D) - 2 pieces
- Fasteners (E) - Screws and Nuts for assembly
- Instruction Sheet (small paper)
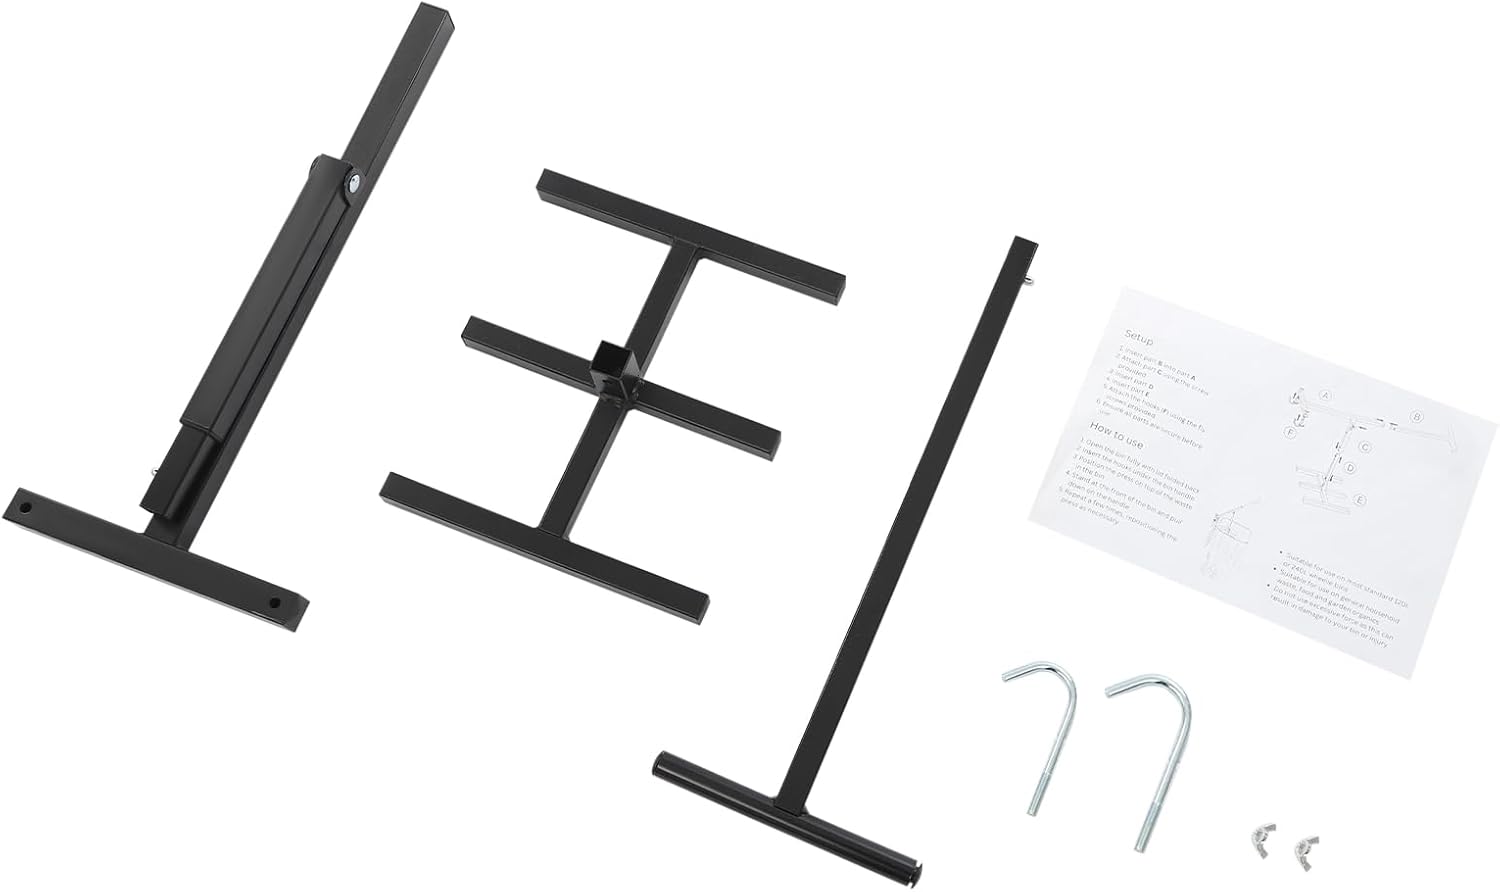
Image: All components included in the package. This image displays the main handle, vertical support shaft, base frame, two stabilizing hooks, and a small bag containing screws and nuts for assembly, alongside a printed instruction sheet.
4. Setup and Assembly
Follow these steps to assemble your trash compactor:
- Attach the Vertical Support Shaft (B) to the Base Frame (C): Align the bottom end of the Vertical Support Shaft (B) with the central opening on the Base Frame (C). Secure it using the provided fasteners (E). Ensure a tight fit.
- Connect the Main Handle Assembly (A) to the Vertical Support Shaft (B): Insert the lower end of the Main Handle Assembly (A) into the top of the Vertical Support Shaft (B). Use the remaining fasteners (E) to secure this connection. The handle should pivot freely at this joint.
- Install Stabilizing Hooks (D): Locate the designated holes on the Base Frame (C) for the Stabilizing Hooks (D). Insert the hooks and secure them with the provided nuts. These hooks will help stabilize the compactor on the rim of your wheelie bin.
- Adjust Height: The vertical support shaft is adjustable. Loosen the locking mechanism (usually a knob or pin) on the shaft, adjust the height to your preference or bin size, and then securely tighten the mechanism.

Image: Assembled vertical support shaft and base. This image shows the sturdy construction of the compactor's lower section, highlighting the connection points and the base frame.
5. Operating Instructions
To effectively compact your trash, follow these steps:
- Position the Compactor: Place the Base Frame (C) of the compactor onto the rim of your wheelie bin. Ensure the Stabilizing Hooks (D) are securely gripping the bin's edge to prevent movement during operation.
- Load the Bin: Place your trash bags or loose waste into the wheelie bin. For optimal compaction, distribute the waste somewhat evenly.
- Lower the Compactor Head: Gently lower the Main Handle Assembly (A) so that the compaction plate at the bottom of the Vertical Support Shaft (B) rests on top of the trash.
- Apply Pressure: Using the 35.4-inch handle for leverage, press down firmly and steadily. The compactor uses lever mechanics to apply significant force, reducing the volume of your waste. You may need to apply pressure multiple times, repositioning the compactor slightly, to achieve maximum compaction.
- Remove Compactor: Once the desired compaction is achieved, lift the handle to raise the compaction plate, then carefully remove the compactor from the bin.

Image: Compactor in use on a green wheelie bin. This image demonstrates the compactor positioned on a large green bin, with the user applying downward pressure to compact a trash bag.

Image: Compactor in use on a blue wheelie bin. This image shows the compactor effectively reducing the volume of loose waste inside a blue recycling or garbage bin.
6. Maintenance
- Cleaning: After each use, wipe down the compactor with a damp cloth to remove any residue. For stubborn grime, a mild detergent can be used. Ensure the compactor is thoroughly dried to prevent rust.
- Inspection: Periodically inspect all fasteners and joints to ensure they are tight. Tighten any loose screws or nuts.
- Lubrication: If the pivoting joints become stiff, apply a small amount of silicone-based lubricant to ensure smooth operation.
- Storage: When not in use, the compactor's base is retractable for compact storage. Store it in a dry place away from extreme temperatures.
7. Troubleshooting
| Problem | Possible Cause | Solution |
|---|---|---|
| Compactor not stable on bin. | Stabilizing hooks not properly engaged or loose. | Ensure hooks are securely gripping the bin rim. Tighten hook fasteners if loose. |
| Difficulty compacting waste. | Waste material is too dense or unevenly distributed. | Reposition the compactor and apply pressure in different areas. Avoid compacting overly dense or rigid items. |
| Handle feels stiff or squeaks. | Joints require lubrication. | Apply a small amount of silicone-based lubricant to the pivoting joints. |
| Compactor appears damaged. | Impact or excessive force. | Discontinue use if structural integrity is compromised. Contact customer support if within warranty. |
8. Specifications
- Brand: juckeyroot
- Model: Style2
- Material: Premium Steel with Spray-Coated Finish
- Product Dimensions (Assembled): 15.75"D x 9.84"W x 35.43"H (40cm D x 25cm W x 90cm H)
- Handle Length: Approximately 35.4 inches (90 cm)
- Adjustable Height Range: 9.8" to 15.7" (25cm to 40cm) for compaction plate
- Compaction Force: Up to 220 lbs (using lever mechanics)
- Compatible Bin Sizes: 120-360L Wheelie Bins
- UPC: 736963414256
- Manufacturer: BOJIMITOOL

Image: Dimensional diagram of the compactor. This illustration provides key measurements for the handle, base, and overall height of the assembled trash compactor.
9. Warranty and Support
This juckeyroot product is manufactured by BOJIMITOOL. For warranty information, product support, or to inquire about replacement parts, please refer to the contact information provided at the point of purchase or visit the manufacturer's official website. Please retain your proof of purchase for warranty claims.