Introduction
Thank you for choosing the Antarctic Star Countertop Ice Maker Machine. This portable and energy-efficient appliance is designed to provide you with fresh bullet ice quickly and conveniently. With its ability to produce 8 ice cubes in just 6 minutes and up to 26 pounds of ice per day, it is ideal for home use, parties, travel, camping, and bars. This manual provides essential information for the safe operation, maintenance, and troubleshooting of your ice maker.
What's in the Box
- Antarctic Star Ice Maker Machine
- Ice Basket
- Ice Scoop
- Handle (for portability)

Image: The Antarctic Star Countertop Ice Maker Machine, showcasing its compact design and included accessories like the ice basket and scoop. A refreshing blue drink with ice is also pictured, highlighting its use.
Setup
- Unpacking: Carefully remove the ice maker from its packaging. Inspect for any shipping damage. Retain the packaging for future storage or transport.
- Placement: Place the ice maker on a flat, stable surface away from direct sunlight and heat sources. Ensure there is adequate ventilation around the unit. The compact design (approximately 8.74"W x 11.47"D x 11.57"H) allows it to fit in various spaces.
- Initial Cleaning: Before first use, it is recommended to clean the interior of the ice maker. Refer to the "Self-Cleaning Care" section under Maintenance for detailed instructions.
- Adding Water: Open the water reservoir cap and fill the reservoir with clean, potable water up to the MAX fill line. Do not overfill.
- Power Connection: Plug the power cord into a grounded electrical outlet.

Image: Demonstrates the compact design of the ice maker, showing its dimensions (10.39"D x 8.66"W x 11.22"H) and how it fits on a countertop, emphasizing its portability.
Operating Instructions
- Power On: Press the "ON/OFF" button to start the ice making cycle. The indicator light will illuminate.
- Ice Production: The machine will begin producing ice. The first batch of 8 bullet-shaped ice cubes can be ready in as little as 6 minutes. Subsequent batches may take slightly longer depending on ambient temperature and water temperature. The machine can produce up to 26 pounds of ice per day.
- Select Ice Size: Your ice maker offers two adjustable ice sizes. Use the "SELECT" button to toggle between small and large ice cubes.
- Small Ice: Ideal for beverages like juice or milk tea.
- Large Ice: Recommended for general use, food cooling, or when ice is needed for longer periods as it melts slower.
- Ice Full Indicator: When the ice basket is full, the "ICE FULL" indicator light will turn on, and the machine will automatically pause ice production. Remove ice from the basket to resume operation.
- Add Water Indicator: If the water level in the reservoir is too low, the "ADD WATER" indicator light will turn on, and the machine will pause. Refill the water reservoir to continue.
- Quiet Operation: The ice maker operates at a low noise level, typically below 40dB, ensuring minimal disturbance during use.
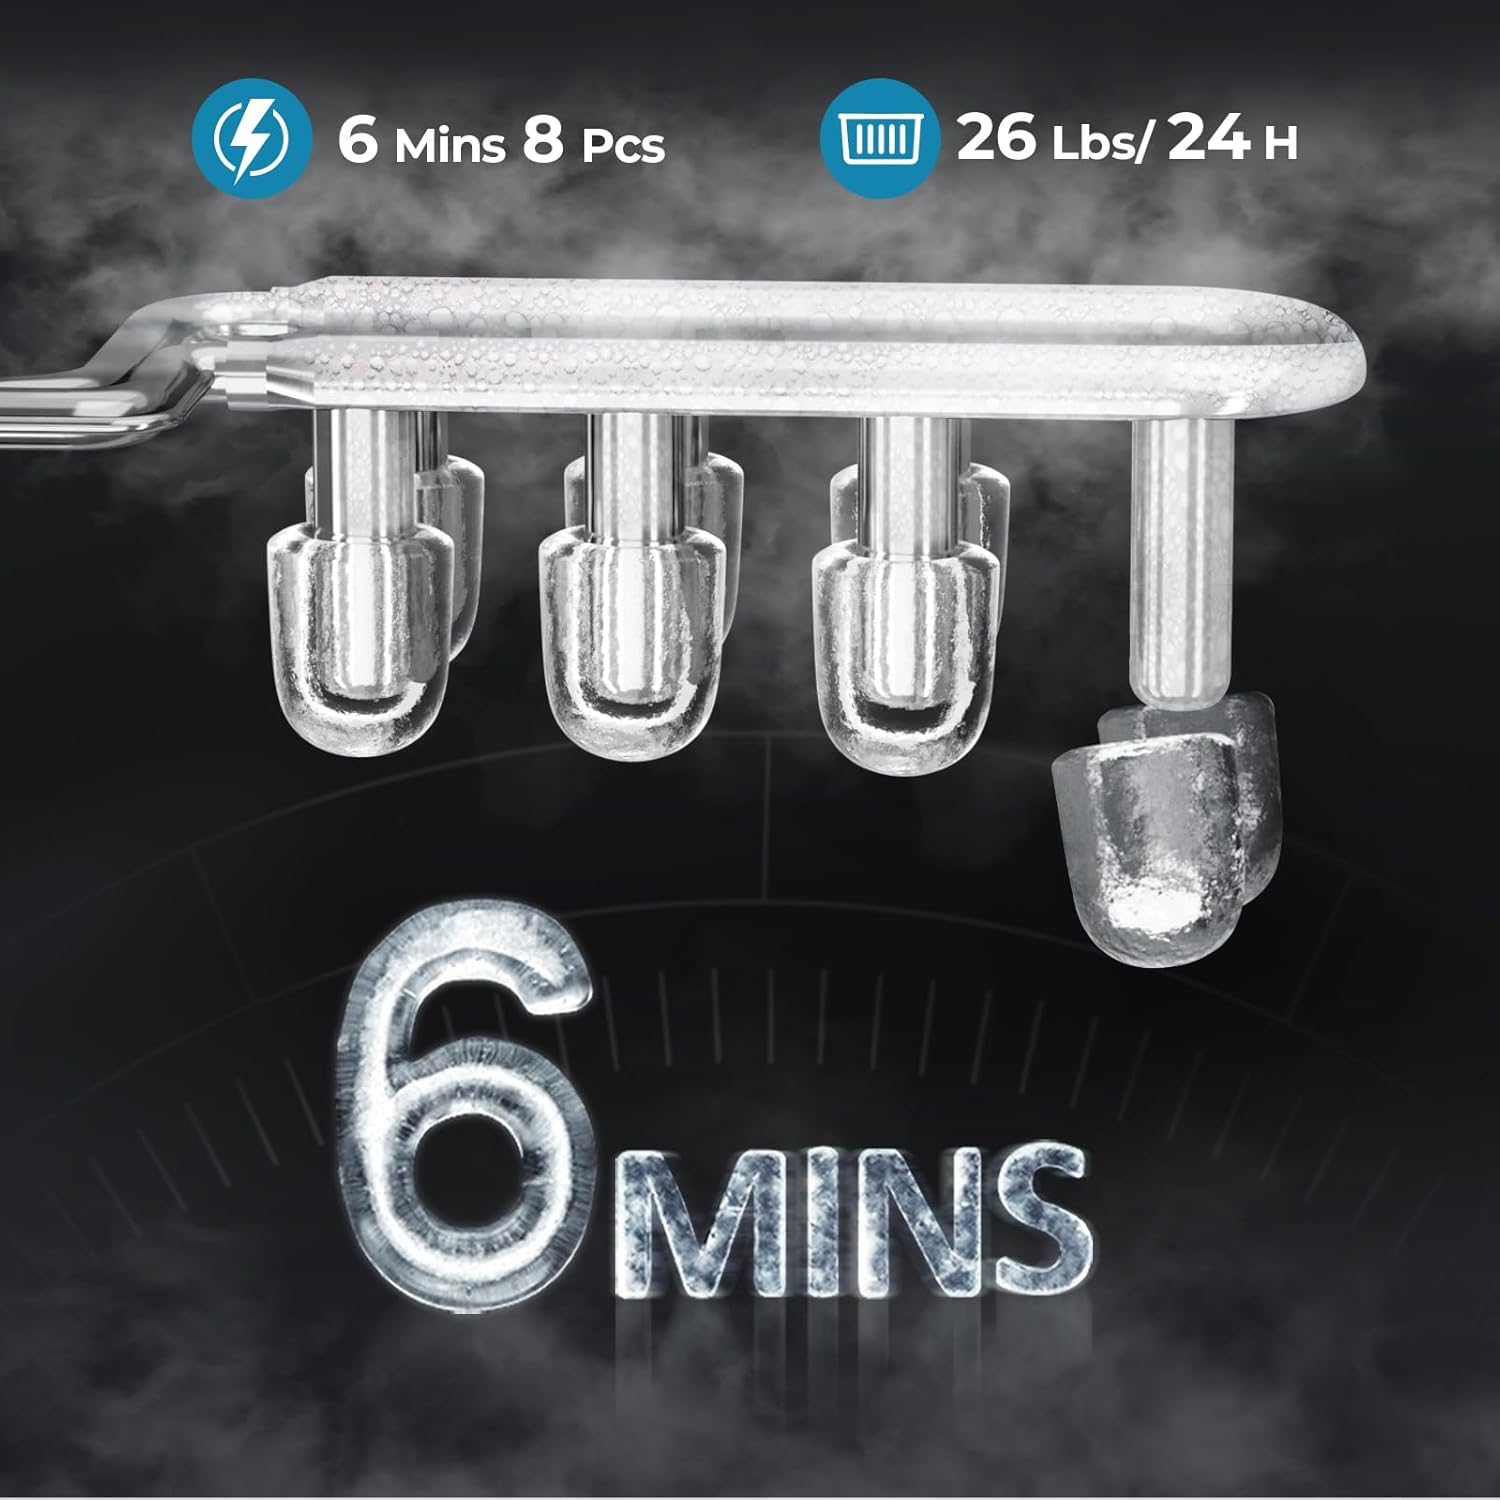
Image: Illustrates the rapid ice production capability, showing 8 ice cubes being formed in 6 minutes, and highlighting the daily capacity of 26 pounds.

Image: Shows the two adjustable ice sizes available, demonstrating their recommended uses for different types of beverages or cooling needs.
Maintenance
Regular maintenance ensures the longevity and optimal performance of your ice maker, and helps keep your ice fresh and clean.
Self-Cleaning Care
The ice maker features a convenient one-touch self-cleaning cycle to prevent odors and maintain hygiene.
- Ensure the ice basket is empty and the water reservoir is filled with clean water.
- Press and hold the "CLEAN" button (or refer to your specific model's button for self-clean) for a few seconds to activate the self-cleaning mode. The cleaning cycle typically runs for about 30 minutes.
- Once the cycle is complete, drain the water from the reservoir.
- It is recommended to activate the self-cleaning cycle weekly, or after two weeks of inactivity, to ensure crystal-clear ice.

Image: A visual representation of the self-cleaning function, illustrating how water circulates to clean the internal components, ensuring fresh-tasting ice.
Draining Water
To drain water from the unit, locate the drain plug at the bottom of the ice maker. Place a container beneath it and carefully remove the plug. Caution: Do not turn the machine over on its side to remove or replace the plug, as this could potentially impact the refrigerant system and internal components.
Regular Cleaning
- Exterior: Wipe the exterior with a soft, damp cloth.
- Interior: For thorough cleaning, use a mild detergent and water solution to wipe down the interior surfaces, then rinse thoroughly with clean water. Ensure all soap residue is removed.
- Ice Basket & Scoop: Wash the ice basket and scoop with warm, soapy water, rinse, and dry completely before reinserting.
Storage
If the ice maker will not be used for an extended period, drain all water, clean the unit thoroughly, and ensure it is completely dry before storing in a cool, dry place.
Troubleshooting
| Problem | Possible Cause | Solution |
|---|---|---|
| Ice maker not producing ice. | No water in reservoir; "ADD WATER" indicator on. | Fill the water reservoir with clean water. |
| Ice basket is full; "ICE FULL" indicator on. | Remove ice from the basket. | |
| Ice melts quickly. | Ice maker is not a freezer; ice will melt over time. | Transfer ice to a freezer for long-term storage. Consider using the large ice size setting for slower melting. |
| Unusual noise during operation. | Normal operational sounds (compressor, water pump). | This is typically normal. If the noise is excessive or unusual, ensure the unit is on a stable, level surface. |
| Ice has an odor or taste. | Unit needs cleaning. | Perform a self-cleaning cycle and thoroughly clean the interior. Use fresh, clean water. |
Specifications
| Feature | Detail |
|---|---|
| Model Name | HZB-12/Q |
| Item Model Number | 58012RIMO-NJ3-GREY |
| Product Dimensions (D x W x H) | 10.39" x 8.66" x 11.22" |
| Item Weight | 12.7 Pounds |
| Ice Production Capacity | 26 lbs/24 hours |
| First Ice Production Time | 6 minutes (for 8 cubes) |
| Ice Cube Shape | Bullet |
| Ice Cube Sizes | 2 (Small, Large) |
| Water Reservoir Capacity | 1 Liter |
| Wattage | 88 watts |
| Noise Level | <40dB |
| Manufacturer | Antarctic Star |

Image: Illustrates the internal Turbo Pro Compressor, which contributes to the ice maker's energy efficiency and quiet operation.
Warranty and Support
For warranty information or technical support, please contact Antarctic Star customer service. Details can typically be found on the product packaging or the official Antarctic Star website. Keep your purchase receipt as proof of purchase for any warranty claims.
Note: This manual does not include embedded videos as no relevant video data with "Seller" creator type was provided in the product information.