B0F3XWL918
Writing Computer Desk User Manual
Model: B0F3XWL918
Introduction
Thank you for purchasing the Generic Writing Computer Desk. This manual provides detailed instructions for assembly, operation, and maintenance of your new desk. Please read this manual thoroughly before assembly and retain it for future reference.

Figure 1: The Generic Writing Computer Desk, showcasing its compact design and handleless drawer.
Safety Information
Please observe the following safety precautions to prevent injury or damage to the product:
- Ensure all parts are present and undamaged before beginning assembly.
- Assemble the desk on a soft, clean surface to prevent scratches.
- Do not overtighten screws during assembly, as this may damage the material.
- Keep small parts away from children during assembly.
- Do not stand or sit on the desk.
- Distribute weight evenly on the desk surface.
Parts List
Before assembly, verify that all components listed below are included in your package:
| Part | Description | Quantity |
|---|---|---|
| A | Desktop Panel | 1 |
| B | Side Panel (Left) | 1 |
| C | Side Panel (Right) | 1 |
| D | Back Panel | 1 |
| E | Drawer Front | 1 |
| F | Drawer Side (Left) | 1 |
| G | Drawer Side (Right) | 1 |
| H | Drawer Back | 1 |
| I | Drawer Bottom | 1 |
| J | Drawer Slides (Set) | 1 |
| K | Hardware Pack (Screws, Dowels, Cam Locks, etc.) | 1 |
Assembly Instructions
Follow these steps carefully to assemble your desk. It is recommended to have two people for assembly.
Step 1: Attach Side Panels to Desktop
Place the Desktop Panel (A) upside down on a soft, clean surface. Attach the Left Side Panel (B) and Right Side Panel (C) to the Desktop Panel using the provided screws and dowels from the Hardware Pack (K). Ensure they are securely fastened but do not overtighten.

Figure 2: Initial assembly of desk panels.
Step 2: Install Back Panel
Align the Back Panel (D) with the grooves on the assembled side panels and desktop. Slide it into place and secure it with screws from the Hardware Pack (K).
Step 3: Assemble the Drawer
Connect the Drawer Front (E), Drawer Sides (F, G), and Drawer Back (H) using the appropriate hardware. Slide the Drawer Bottom (I) into the designated grooves. Ensure the drawer is square and stable.
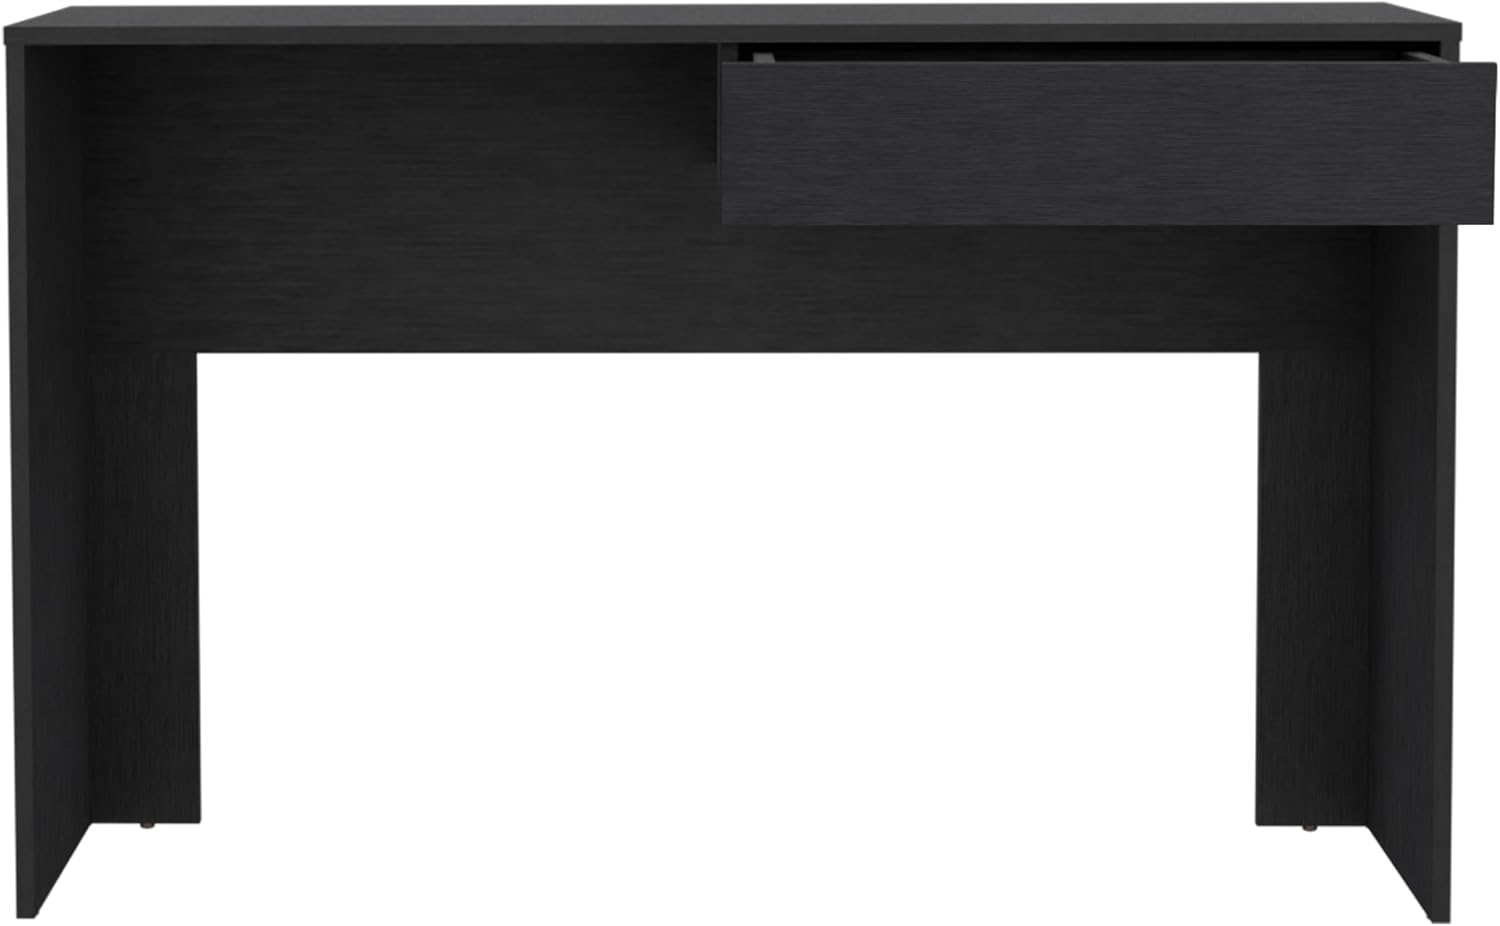
Figure 3: Assembling the handleless drawer component.
Step 4: Install Drawer Slides
Attach the Drawer Slides (J) to the inside of the desk frame and to the sides of the assembled drawer, following the instructions provided with the slides. Ensure they are level and aligned for smooth operation.
Step 5: Insert Drawer
Carefully slide the assembled drawer onto the installed drawer slides until it clicks into place. Test the drawer's movement to ensure it opens and closes smoothly.

Figure 4: The desk with the drawer partially open, demonstrating its handleless design.
Step 6: Final Check
Once assembled, gently lift and move the desk to its desired location. Verify that all screws are tightened and the desk is stable. Place a laptop or monitor on the spacious top surface to confirm stability.

Figure 5: The desk ready for use, showcasing its spacious top surface.
Operating Instructions
The Generic Writing Computer Desk is designed for straightforward use. Its primary function is to provide a stable and organized workspace.
- Using the Desktop: Place your computer, monitor, keyboard, mouse, and other work essentials directly on the spacious top surface. The desk is designed to support standard office equipment.
- Using the Drawer: The handleless drawer opens by gently pulling the bottom edge of the drawer front. It provides convenient storage for documents, stationery, and other small items, helping to keep your workspace tidy.
- Placement: Position the desk in a location that allows for comfortable seating and adequate lighting. Ensure it is on a level surface to prevent wobbling.

Figure 6: The desk in use, demonstrating its practical application.
Maintenance
Proper care will extend the life and appearance of your desk:
- Cleaning: Wipe the desk surface with a soft, damp cloth. Avoid using harsh chemicals, abrasive cleaners, or polishes that may damage the finish.
- Spills: Immediately wipe up any spills to prevent staining or damage to the engineered wood.
- Sunlight: Avoid prolonged exposure to direct sunlight, which can cause fading or discoloration.
- Heat: Do not place hot items directly on the desk surface. Use coasters or protective pads.
- Hardware: Periodically check and tighten all screws and fasteners to ensure the desk remains stable.
Troubleshooting
If you encounter any issues with your desk, refer to the following common problems and solutions:
| Problem | Possible Cause | Solution |
|---|---|---|
| Desk wobbles | Uneven floor; loose fasteners | Ensure desk is on a level surface. Check and tighten all assembly screws. |
| Drawer sticks or doesn't slide smoothly | Drawer slides misaligned; debris in tracks | Remove drawer and check alignment of slides. Clean tracks of any dust or debris. |
| Scratches on surface | Sharp objects; abrasive cleaning | Use protective mats for items. Avoid dragging objects. For minor scratches, consult a furniture repair specialist. |
Specifications
Detailed specifications for the Generic Writing Computer Desk:
| Feature | Detail |
|---|---|
| Brand | Generic |
| Model Number | B0F3XWL918 |
| Product Dimensions (D x W x H) | 43.32"D x 17.7"W x 29.5"H (17.7"x43.32"x29.5") |
| Color | Black |
| Style | Modern |
| Base Material | Engineered Wood |
| Top Material Type | Engineered Wood |
| Finish Type | Black |
| Special Feature | Spacious |
| Assembly Required | Yes |
| Manufacturer | SUTUO |
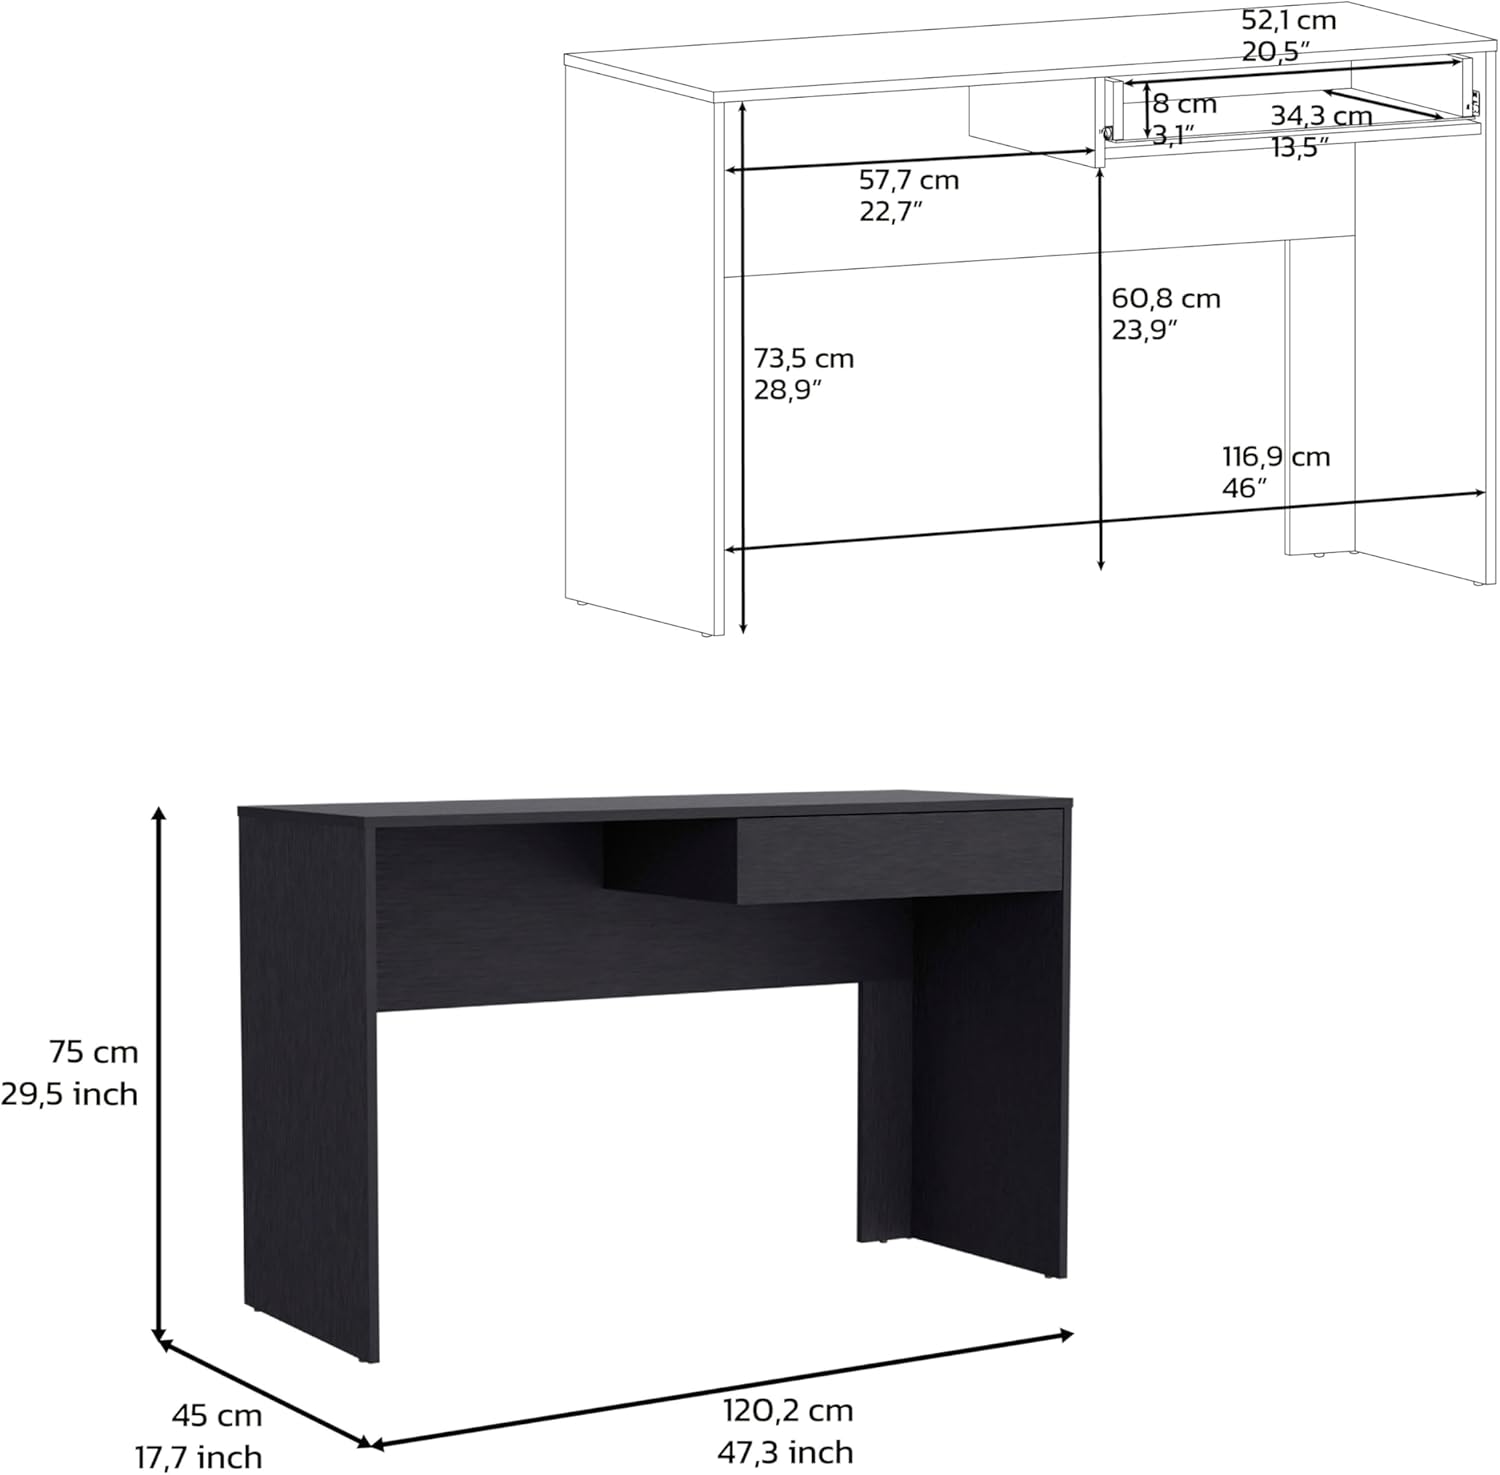
Figure 7: Detailed dimensions of the desk.
Warranty and Support
This product comes with a standard manufacturer's warranty. For specific warranty details, please refer to the documentation included with your purchase or contact the manufacturer directly.
For technical support, missing parts, or any other inquiries, please contact the manufacturer, SUTUO, or the seller, WUHANSUTUO, through the platform where the product was purchased. Please have your model number (B0F3XWL918) and purchase date ready when contacting support.