Introduction
Thank you for choosing the AZZUNO MIG Welder 135A. This versatile 3-in-1 welding machine is designed for Flux Core Gasless MIG, Lift TIG, and MMA (Stick) welding, making it suitable for a wide range of applications from home DIY projects to professional maintenance tasks. With its 135A output and user-friendly SYN control, it offers optimal performance and ease of operation. This manual provides essential information for safe operation, setup, maintenance, and troubleshooting to ensure you get the most out of your welding machine.
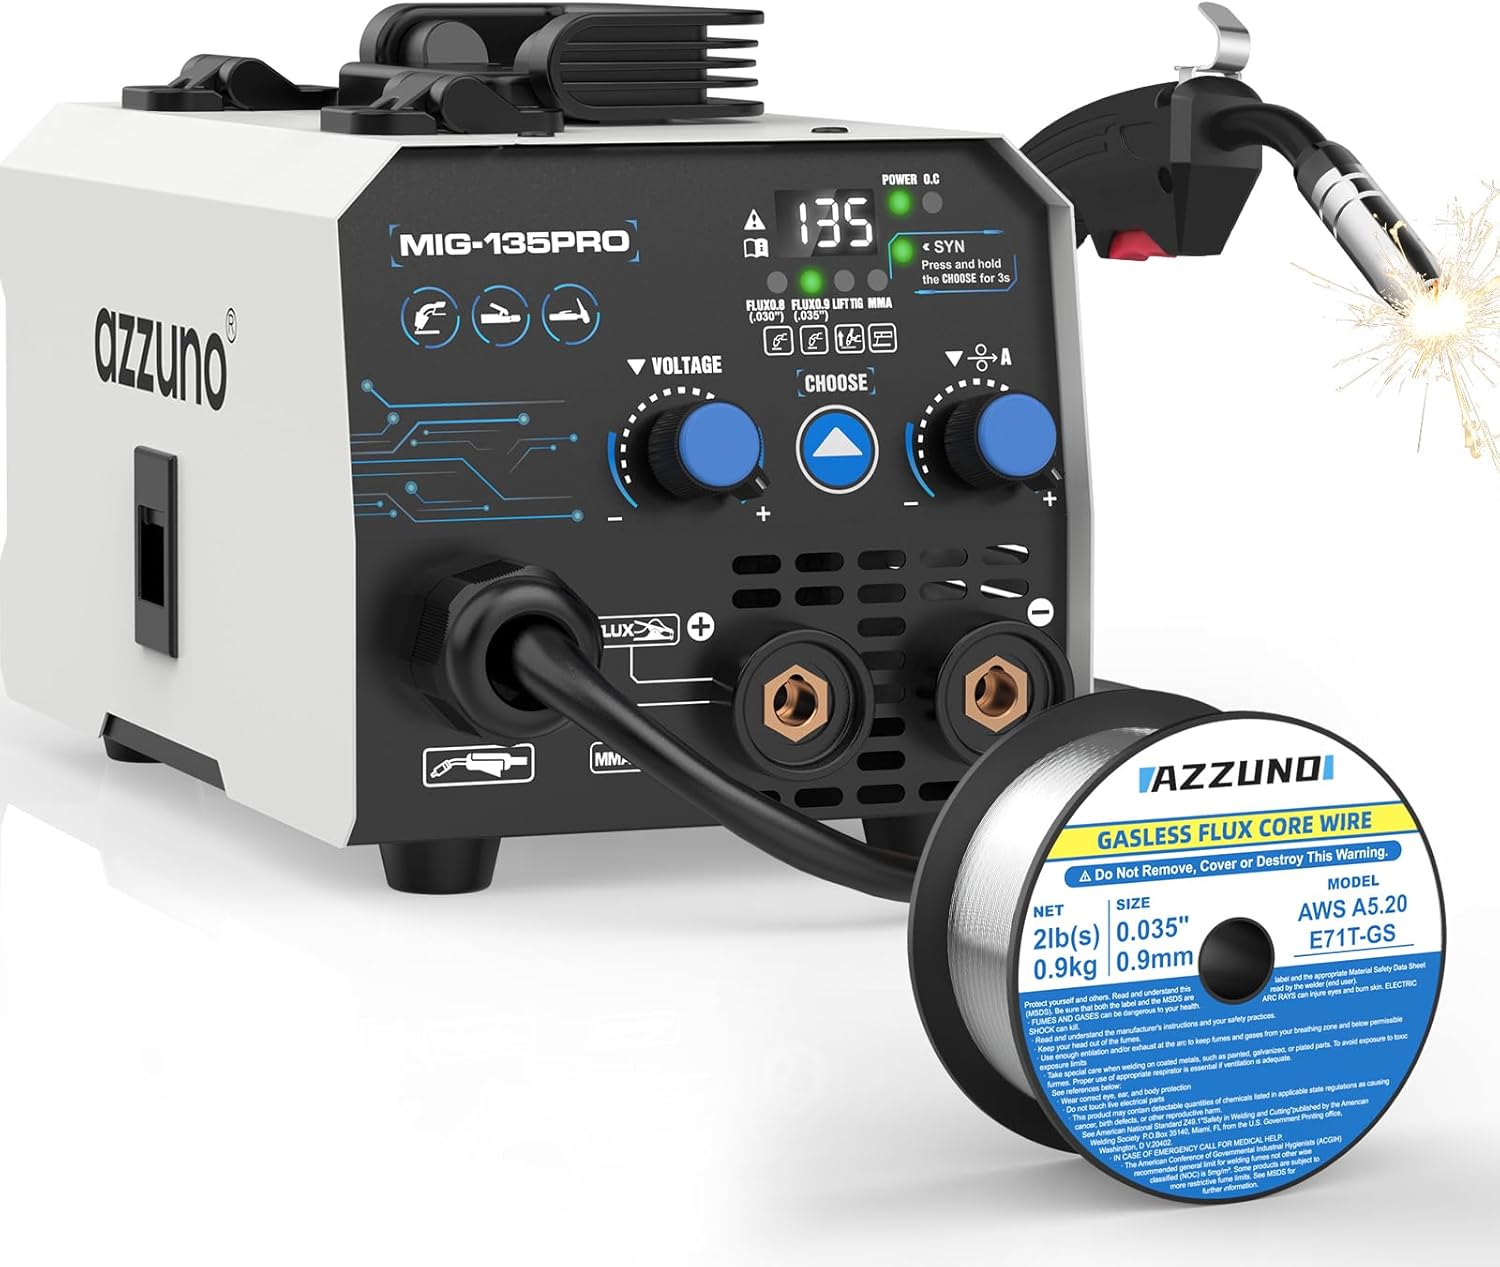
Figure 1: AZZUNO MIG Welder 135A and included flux core wire.
Safety Information
Welding can be dangerous. Always follow safety precautions to prevent injury or damage.
- Electric Shock Can Kill: Ensure proper grounding. Do not touch live electrical parts. Wear dry insulating gloves.
- Fumes and Gases Can Be Dangerous: Keep your head out of the fumes. Use ventilation or exhaust to remove fumes from the breathing zone.
- Arc Rays Can Burn Eyes and Skin: Wear a welding helmet with a proper shade filter. Wear appropriate eye protection with side shields. Wear protective clothing made from durable, flame-resistant material.
- Fire and Explosion Hazard: Remove all flammable materials from the welding area. Have a fire extinguisher readily available.
- Hot Parts Can Cause Severe Burns: Allow welded materials to cool before handling. Wear heat-resistant gloves.
- Read the Entire Manual: Before operating the machine, thoroughly read and understand all instructions and safety warnings.

Figure 2: The AZZUNO MIG Welder features multiple protection systems including Over-Current, Over-Voltage, Over-Heat, and Over-Load protection for enhanced safety and durability.
Product Overview
The AZZUNO MIG-135PRO is a versatile welding machine offering multiple welding processes and advanced features.
Key Features:
- 3-in-1 Welding Modes: Supports Flux Core Gasless MIG, Lift TIG, and MMA (Stick) welding.
- 135A Output: Capable of welding materials up to 5/32" thickness.
- SYN Control: Automatic adjustment of current and voltage based on selected wire diameter for optimal settings.
- Smooth Wire Feeding System: Ensures consistent wire delivery for stable arc performance.
- Comprehensive Protection: Includes Over-Current, Over-Voltage, Over-Heat, and Over-Load protection.

Figure 3: The AZZUNO MIG Welder supports Flux MIG (with .030" and .035" flux wire), MMA (compatible with E6013 rods), and Lift TIG (requires WP-17V TIG gun, not included).

Figure 4: The control panel features a Power Light, Over Heat Indicator, SYN Mode indicator, and Welding Modes display for easy operation.
Setup
1. Unpacking and Inspection:
- Carefully remove all components from the packaging.
- Verify that all accessories are present as listed in the product description.
- Inspect the machine for any signs of shipping damage. Do not operate if damaged.

Figure 5: Included accessories typically consist of the welding machine, MIG torch, ground clamp, electrode holder, and flux core welding wire.
2. Power Connection:
- Ensure the power switch on the machine is in the "OFF" position.
- Connect the power cord to a suitable 110V/60Hz power outlet. Ensure the circuit can handle the machine's current draw.
3. Installing Flux Core Wire (for MIG Welding):
- Open the wire feeder compartment.
- Place the 2LBS 0.035" flux core wire spool onto the spindle, ensuring it rotates freely.
- Feed the wire through the guide tube and into the drive rollers.
- Close the drive roller tension arm and adjust the tension appropriately (not too tight, not too loose).
- With the MIG torch straight, press the trigger to feed the wire through the liner and out of the contact tip.

Figure 6: The internal wire feeding system ensures smooth and consistent wire delivery for stable arc performance.
Operating Instructions
1. Selecting Welding Mode:
- Turn on the machine.
- Use the "CHOOSE" button on the control panel to cycle through the welding modes: Flux Core MIG (.030" or .035"), Lift TIG, and MMA.
2. Synergic (SYN) Control:
- When in a MIG mode, the SYN control automatically sets optimal current and voltage based on the selected wire diameter.
- Press and hold the "CHOOSE" button for 3 seconds to activate or deactivate SYN mode. When active, the "SYN" indicator will light up.
- In SYN mode, you primarily adjust the wire feed speed, and the machine will automatically adjust voltage.

Figure 7: Synergic control automatically adjusts voltage and wire feeding speed for stable arc performance. Press and hold 'CHOOSE' for 3 seconds to toggle.
3. Flux Core MIG Welding:
- Select Flux Core MIG mode (.030" or .035").
- Connect the ground clamp to the workpiece.
- Adjust the current/wire speed knob. Use SYN control for automatic settings or manual adjustment.
- Position the MIG torch and begin welding.
- The included AZZUNO AWS E71T-GS .035" Flux Core welding wire is designed for smooth feeding and low splatter.

Figure 8: Specifications for the included Flux Core Welding Wire: Model E71T-GS, Wire Diameter .035", Net Weight 2LBS, Polarity DCEN.
4. Lift TIG Welding:
- Select Lift TIG mode.
- Connect a compatible WP-17V TIG gun (10-25mm²) to the machine (TIG gun not included).
- Connect the ground clamp to the workpiece.
- Adjust the current.
- Touch the tungsten electrode to the workpiece to initiate the arc, then lift slightly to maintain it.
5. MMA (Stick) Welding:
- Select MMA mode.
- Connect the electrode holder to the machine and insert an E6013 electrode.
- Connect the ground clamp to the workpiece.
- Adjust the current.
- Strike the electrode against the workpiece to initiate the arc and begin welding.

Figure 9: The AZZUNO MIG Welder is suitable for all position welding, including Flat, Vertical, Up, and Corner welding.
Maintenance
Regular maintenance ensures the longevity and optimal performance of your welding machine.
- Clean Regularly: Use compressed air to blow out dust and debris from the machine's vents and internal components. Do this periodically, especially in dusty environments.
- Inspect Cables and Connections: Check all welding cables, power cords, and connections for wear, cuts, or loose fittings before each use. Replace damaged parts immediately.
- Check Wire Feeder: Ensure the wire drive rollers are clean and free of debris. Verify proper tension for smooth wire feeding.
- MIG Torch Maintenance: Regularly clean or replace the contact tip, gas nozzle (if applicable), and diffuser. Ensure the liner is free of kinks and blockages.
- Storage: Store the machine in a clean, dry place, away from moisture and extreme temperatures.
Troubleshooting
| Problem | Possible Cause | Solution |
|---|---|---|
| No power | Power switch off, power cord disconnected, circuit breaker tripped. | Turn on switch, check connections, reset breaker. |
| No arc | Poor ground connection, wrong welding mode, contact tip clogged (MIG), electrode not touching workpiece. | Ensure good ground, select correct mode, clean/replace tip, ensure proper contact. |
| Wire feeding issues (MIG) | Incorrect drive roller tension, clogged liner, wrong size contact tip, wire spool tangled. | Adjust tension, clean liner, use correct tip, untangle wire. |
| Overheat indicator on | Machine has exceeded duty cycle, poor ventilation. | Allow machine to cool down, ensure proper airflow around vents. |
Specifications
| Feature | Detail |
|---|---|
| Model | MIG-135PRO |
| Input Voltage | 110V/60Hz (Standard US Household) |
| Output Current | 135A (Max) |
| Welding Processes | Flux Core Gasless MIG, Lift TIG, MMA (Stick) |
| Max Welding Thickness | Up to 5/32" |
| Flux Core Wire Compatibility | .030" (0.8mm), .035" (0.9mm) |
| Stick Electrode Compatibility | E6013 (recommended) |
| TIG Gun Compatibility | WP-17V (10-25mm²) (not included) |
| Control Type | SYN Control (Synergic) |
| ASIN | B0F3XGJCM7 |
| Date First Available | April 7, 2025 |
Warranty and Support
For warranty information and technical support, please refer to the warranty card included with your product or visit the official AZZUNO website. Keep your purchase receipt as proof of purchase.
For further assistance, you may contact AZZUNO customer service through their official channels.