VenirCool N5 Max Mini Projector User Manual
Introduction
This manual provides essential instructions for the safe and efficient operation of your VenirCool N5 Max Mini Projector. Please read this manual thoroughly before using the device and retain it for future reference. This projector is designed for versatile entertainment, offering a native 720P resolution, 360° rotation, and wireless connectivity.
Product Overview
Package Contents
- VenirCool N5 Max Mini Projector
- Power Adapter
- Remote Control
- User Manual
Projector Components
Familiarize yourself with the various parts of your projector:
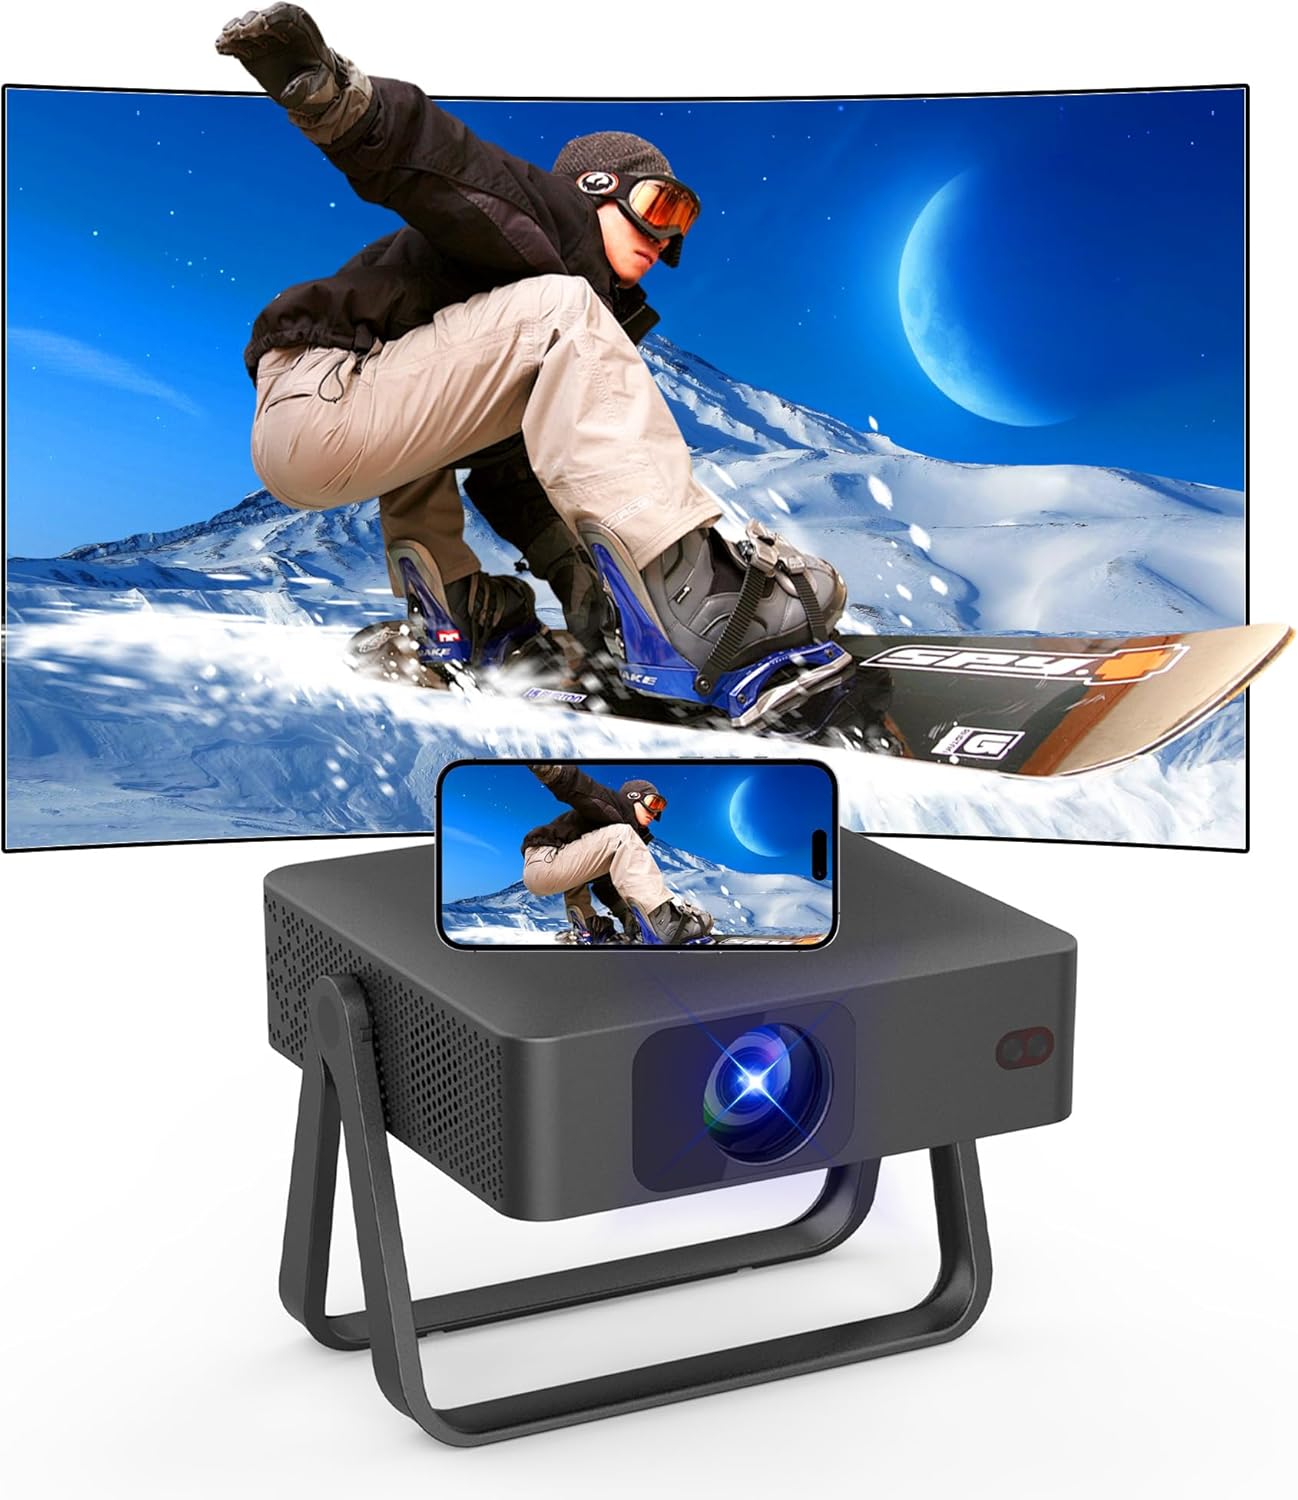
The VenirCool N5 Max Mini Projector displaying a dynamic image, showcasing its compact design and projection capabilities.
- Projection Lens: Emits the image.
- Focus Ring: Adjusts image clarity.
- Power Button: Turns the projector on/off.
- Input Ports: For connecting external devices (e.g., HDMI, USB).
- Ventilation Grilles: Ensure proper airflow to prevent overheating.
- Adjustable Stand: Allows for flexible positioning and projection angles.

The VenirCool N5 Max Mini Projector's dimensions are displayed, highlighting its sleek, light, and portable design for easy transport.
Setup
Power Connection
- Connect the power adapter to the projector's power input port.
- Plug the power adapter into a standard electrical outlet.
Placement
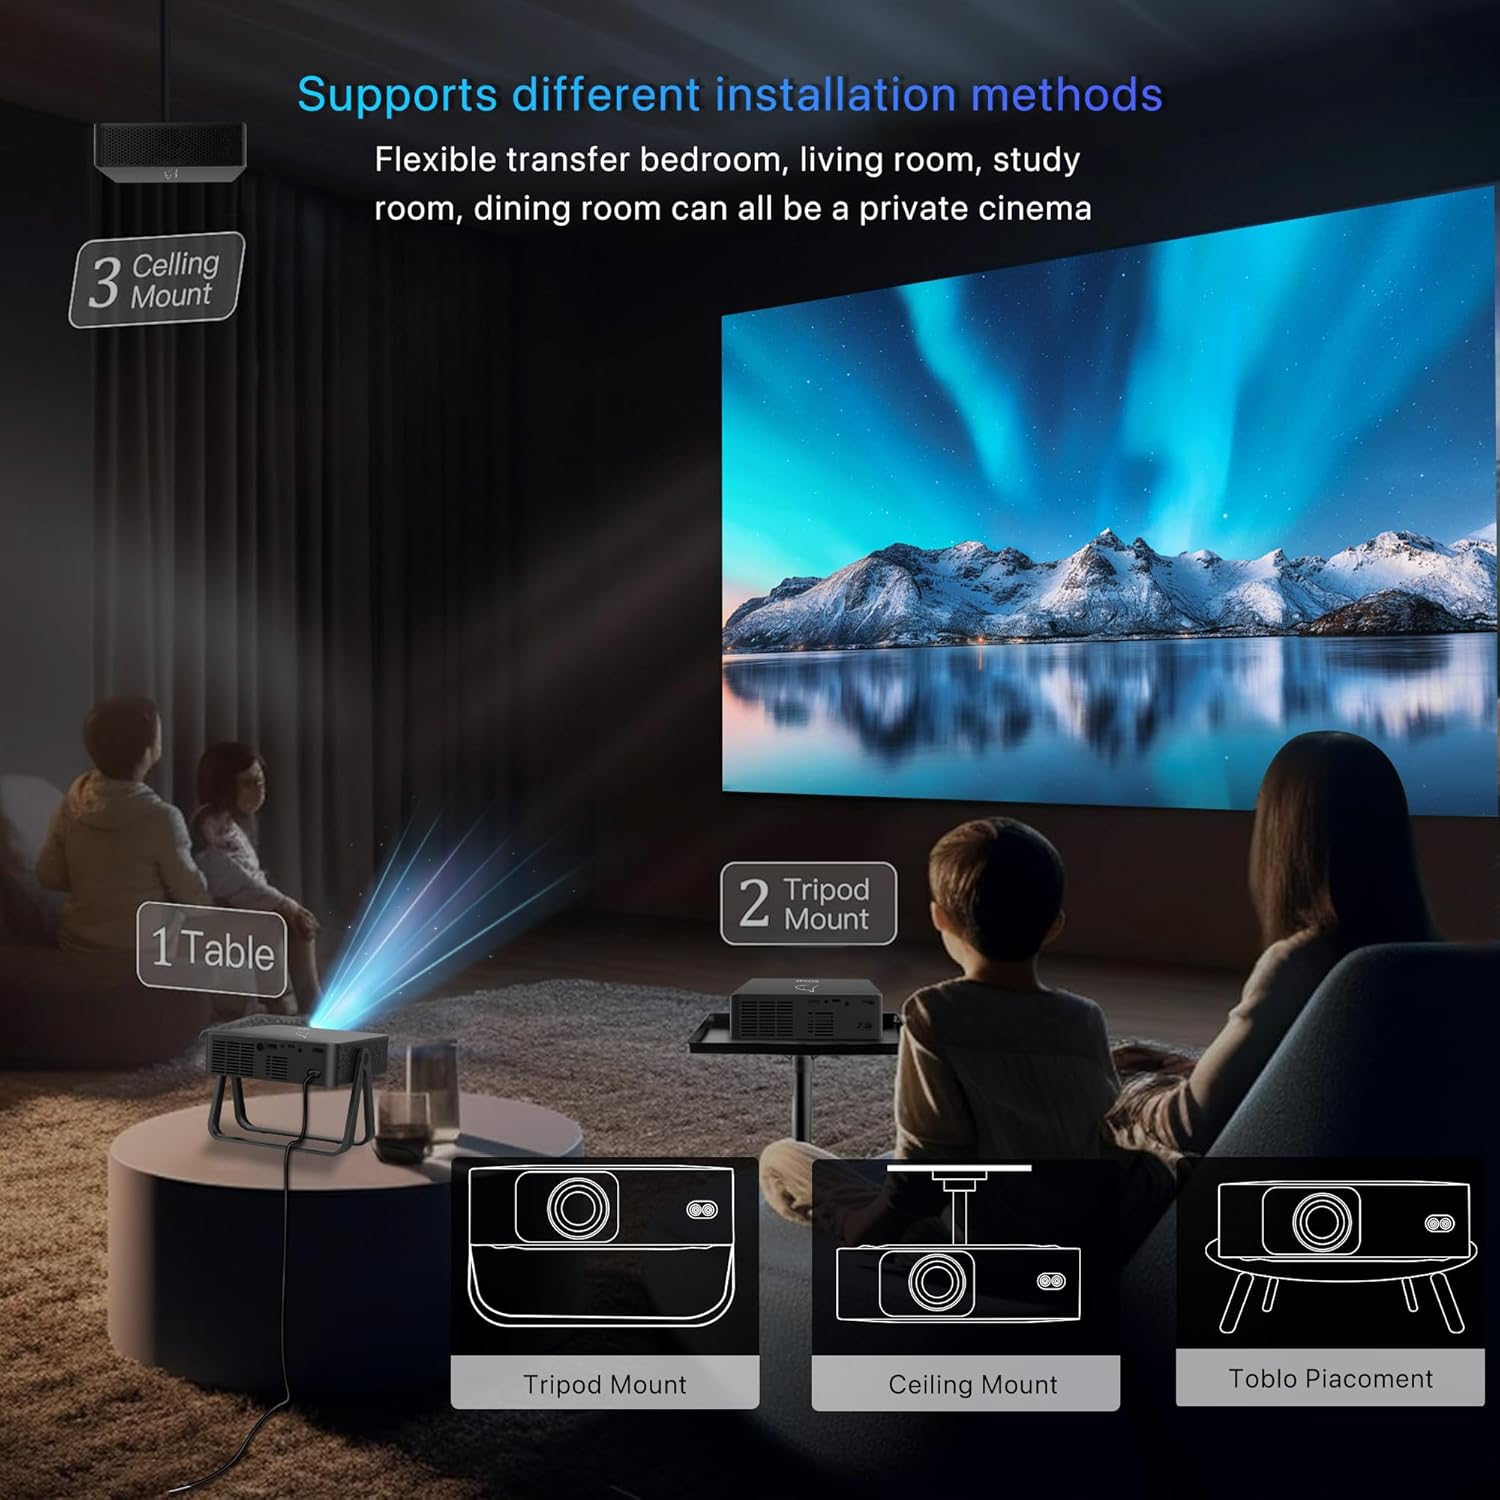
Position the projector on a stable, flat surface. Ensure adequate ventilation around the projector. The adjustable stand allows for various projection angles, including ceiling projection.

This diagram illustrates flexible installation methods for the projector, including placement on a table, tripod mount, and ceiling mount, adapting to different room setups.
Initial Power On
Press the power button on the projector or the remote control to turn on the device. The indicator light will illuminate.
Operating Instructions
Basic Navigation
Use the arrow keys and 'OK' button on the remote control or the projector's control panel to navigate through the on-screen menu. The 'Back' button returns to the previous screen.
Source Selection
To select an input source (e.g., HDMI, USB, or Wireless Display), navigate to the 'Input Source' menu and choose the desired option.
Connectivity
Wireless Screen Mirroring (WiFi)
The projector supports wireless screen mirroring for iOS and Android devices. Ensure your device and the projector are connected to the same Wi-Fi network.

This image illustrates wireless screen mirroring, showing content from a laptop and a smartphone being projected onto a large screen via the projector.
- Select 'Wireless Display' from the input source menu.
- Follow the on-screen instructions to connect your smartphone or tablet.

The image highlights the projector's WiFi 6 capabilities, indicating stable and high-speed wireless connections for streaming movies and games.
Bluetooth Connection
Connect external Bluetooth speakers or headphones for enhanced audio.
- Navigate to the 'Bluetooth Settings' in the projector's menu.
- Enable Bluetooth and search for available devices.
- Select your desired audio device to pair.
Image Adjustment
Focus Adjustment
Rotate the focus ring on the projector lens until the image appears clear and sharp.

This image illustrates the projector's ±15% keystone correction feature and the process of manual focusing to achieve a clear and precise image.
Keystone Correction
If the projected image appears trapezoidal, use the keystone correction function to adjust it into a rectangular shape. This can be done manually or automatically via the remote control.

The image highlights the projector's electric remote focus and auto keystone correction technology, simplifying image setup.
360° Rotation and Adjustable Stand
The integrated adjustable stand allows for 360° rotation, enabling projection onto walls, ceilings, or any desired surface. Adjust the stand to achieve the optimal viewing angle.

The image demonstrates the projector's 360° adjustable stand, allowing for flexible projection, such as onto a ceiling, for a convenient viewing experience.
Maintenance
Cleaning the Lens
Gently wipe the projector lens with a soft, lint-free cloth specifically designed for optical surfaces. Avoid using abrasive cleaners or excessive force.
Cleaning Ventilation Ports
Regularly check and clean the ventilation grilles to prevent dust buildup, which can impede airflow and cause overheating. Use a soft brush or compressed air.
Storage
When not in use, store the projector in a cool, dry place, away from direct sunlight and extreme temperatures. Use the original packaging or a protective case if available.
Troubleshooting
- No Power: Ensure the power adapter is securely connected to both the projector and a working electrical outlet.
- No Image: Verify the input source selection matches the connected device. Check all cable connections.
- Blurry Image: Adjust the focus ring on the projector lens. Ensure the projection distance is within the recommended range.
- No Sound: Check the volume settings on both the projector and the connected source device. If using external speakers, ensure they are properly connected and powered on.
- Wireless Connection Issues: Confirm both the projector and your device are on the same Wi-Fi network. Restart both devices and try reconnecting.
Specifications
Key technical specifications for the VenirCool N5 Max Mini Projector:
This image provides a visual comparison, highlighting the superior clarity and color of native 720P resolution with support for 4K/2K/1080P content, compared to other 720P projectors.
- Model: N5 Max
- Native Display Resolution: 1280 x 720 pixels
- Max Display Support: 4096 x 2160 pixels (4K Decoding)
- Brightness: 7500 ISO Lumens / 500 ANSI Lumens
- Connectivity Technology: Wireless (WiFi 6), Bluetooth
- Special Features: Short Throw, Built-in Speakers, 360° Rotation, Adjustable Stand, Electric Remote Focus, Auto Keystone Correction
- Item Weight: Approximately 2.64 pounds
- Product Dimensions: Approximately 7 x 10 x 10 inches
- Recommended Use: Indoor
Safety Information
- Do not look directly into the projector lens when the lamp is on.
- Ensure the projector is placed on a stable surface to prevent accidental falls.
- Do not block the ventilation openings, as this can lead to overheating.
- Use only the provided power adapter.
- Keep the projector away from water or other liquids.
- Do not attempt to disassemble or repair the projector yourself. Contact qualified service personnel.
Support Information
For further assistance, technical support, or warranty inquiries, please visit the official VenirCool store or contact customer service through the platform where the product was purchased.
Visit the VenirCool Store for more information.