1. Introduction
This manual provides essential instructions for the installation, operation, and troubleshooting of the Ghjwsxae MC-2100 REV B / MC2100-WA Treadmill Controller. This circuit board is designed as a direct replacement for compatible treadmill models, including those from ICON, PROFORM, and Nordic Track C2300. Please read this manual thoroughly before proceeding with installation or repair to ensure safe and correct usage.
2. Important Considerations
Before installing or replacing your treadmill controller, observe the following critical points:
- Model Compatibility: Different treadmill models utilize distinct controller programs. It is crucial to ensure that the replacement controller matches the specific control model of your treadmill.
- Version Specificity: Controllers with different models or programs are not compatible with each other. Verify the exact version (e.g., 'Ne Version' or 'O Version') required for your treadmill.
- Voltage Requirement: This controller is designed for 110V power systems. Confirm your treadmill's power requirements before installation.

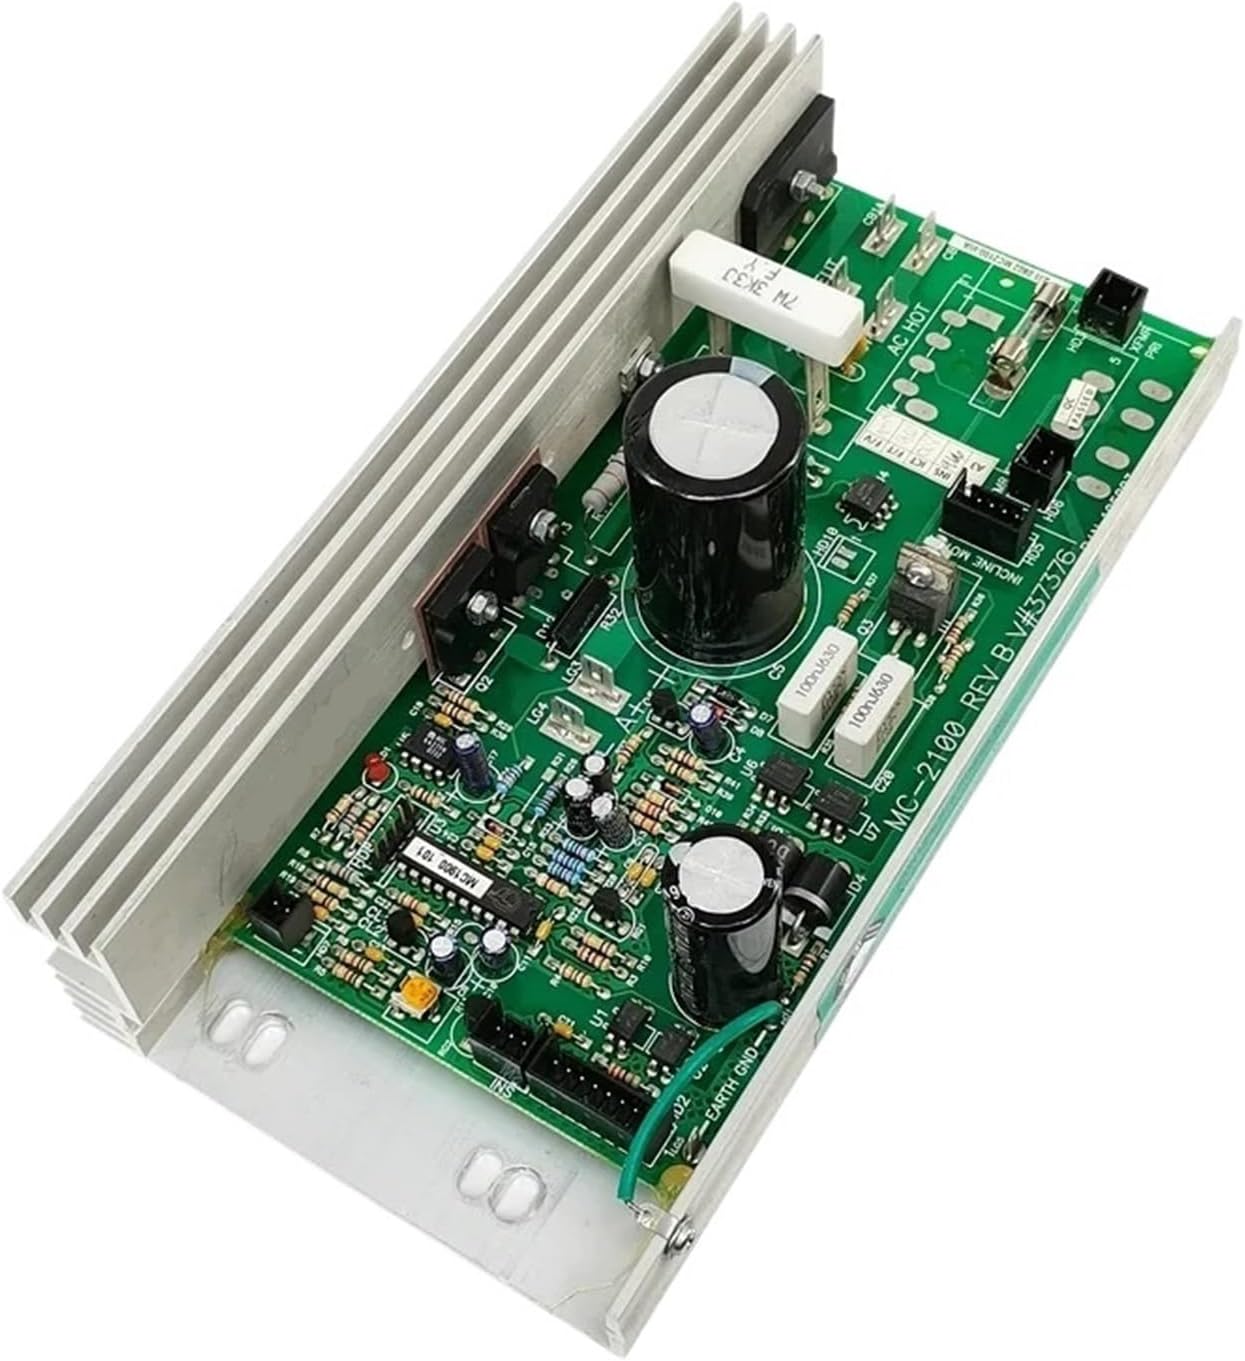
3. Product Overview
The Ghjwsxae MC-2100 REV B / MC2100-WA Treadmill Controller is a robust replacement circuit board engineered to restore functionality to your fitness equipment. It serves as the primary control unit for the treadmill's motor and speed regulation.

Key Features:
- Durable Construction: Engineered with quality components to ensure long-lasting performance and reliability in demanding fitness equipment environments.
- Direct Replacement: Designed as a precise, direct replacement for faulty MC-2100 REV B treadmill control boards, simplifying the repair process.
- Motor & Speed Control: Effectively manages motor function, facilitates precise speed adjustments, and controls overall treadmill operation for a consistent user experience.
- Safety Features: Incorporates essential circuitry for overload protection and ensures smooth, stable power delivery to the treadmill motor, enhancing user safety and equipment longevity.
4. Installation Guide
This section outlines the general steps for replacing a treadmill controller. Due to the electrical nature of this component, professional installation is highly recommended. Always disconnect power to the treadmill before beginning any repair work to prevent electrical shock or damage to the unit.
Required Tools:
- Screwdriver set (Phillips and flathead)
- Multimeter (for testing connections, if necessary)
- Wire strippers/crimpers (if new connectors are needed)
Installation Steps:
- Power Disconnection: Ensure the treadmill is completely unplugged from the wall outlet. This is a critical safety step.
- Access Panel Removal: Locate and carefully remove the motor cover or access panel on your treadmill to expose the existing treadmill controller.
- Wiring Documentation: Before disconnecting any wires, take clear photographs or create detailed diagrams of all connections to the old controller. Pay close attention to the motor, incline motor, speed sensor, and main power connections. Labeling wires can also be helpful.
- Old Controller Removal: Carefully disconnect all wires and remove any mounting screws or clips securing the old controller. Gently lift and remove the old unit from the treadmill chassis.
- New Controller Installation: Position the new Ghjwsxae MC-2100 REV B / MC2100-WA controller in the same location as the old one. Secure it with the appropriate mounting screws or clips.
- Wiring Connection: Reconnect all wires to the new controller according to your photographs or diagrams from step 3. Double-check that all connections are secure, correctly seated, and match the original configuration.
- Initial Power-Up (Caution): Before replacing the motor cover, plug in the treadmill and perform a brief test. Observe for any unusual sounds, smells, or error messages on the console. If any issues arise, immediately disconnect power and re-check all connections.
- Panel Reinstallation: Once functionality is confirmed and the treadmill operates as expected, carefully replace the motor cover or access panel.
If you are unsure about any step or encounter difficulties, consult a qualified technician or the treadmill manufacturer's service manual.
5. Operating Instructions
The MC-2100 REV B / MC2100-WA controller functions as the central processing unit for your treadmill's motor and speed control. Once correctly installed and all connections are verified, the treadmill's original console will resume control of its operation.
Basic Operation:
- Ensure all electrical connections are secure and the treadmill is plugged into a grounded 110V outlet.
- Use the treadmill's console to power on the unit, select workout programs, adjust speed, and control incline (if your treadmill model supports this feature).
- The controller will interpret these commands from the console and regulate the motor's performance accordingly, providing smooth and responsive operation.
6. Troubleshooting
This section provides guidance for common error codes that may appear on your treadmill's display. These codes can help diagnose issues related to the controller or other treadmill components.
| Error Code | Description / Potential Cause | Recommended Action |
|---|---|---|
| E01 | Communication failure between console and controller, or speed sensor failure. | Check all communication cables and speed sensor connections between the console and the controller. Ensure they are securely connected and undamaged. |
| E02 | Indicates a potential motor issue or controller failure. | First, test the treadmill motor to confirm its functionality. If the motor operates normally, the controller may need replacement. |
| E03 | Sensor fault; treadmill runs for a few seconds then displays E03. | Inspect the speed sensor and its wiring for damage or misalignment. Ensure the sensor is clean and properly positioned to detect belt movement. |
| E04 | Typically an over-current fault, often indicating burned components on the controller. | This usually suggests internal damage to the controller. The controller likely requires replacement. |
| E08 | Potential incline motor control fault. | Check the incline motor and its connections to the controller. Verify the incline sensor is functioning correctly. |
For issues not listed here or if troubleshooting steps do not resolve the problem, contact customer support or a qualified treadmill technician.
7. Specifications
- Part Model: MC2100-WA / MC2100 REV B
- Application: Treadmill repair and replacement
- Voltage Compatibility: 110V
- Package Weight: Approximately 1 KG (2.2 lbs)
- Item Weight: Approximately 1.76 ounces (0.05 kg)
- Package Dimensions: Approximately 1.18 x 0.79 x 0.39 inches (3 x 2 x 1 cm)
- Manufacturer: wuaidi
- Number of Pieces: 1
- Assembly Required: No (for the board itself; installation into treadmill required)

8. Warranty and Support
For warranty information or technical support regarding your Ghjwsxae MC-2100 REV B / MC2100-WA Treadmill Controller, please refer to the retailer's return policy or contact the manufacturer directly. It is advisable to retain your purchase receipt for any potential warranty claims or support inquiries.