Introduction
Thank you for choosing the Acctim Jaxon Digital Alarm Clock. This modern alarm clock combines functionality with aesthetic appeal, featuring a color-changing LED display, USB-C power, and a convenient USB-C charging port. This manual will guide you through the setup, operation, and maintenance of your new device to ensure optimal performance and longevity.

Image: The Acctim Jaxon Digital Alarm Clock displayed on a bedside table, showing its compact design and blue LED time display in a bedroom setting.
Safety Information
- Read all instructions before use and retain for future reference.
- Do not expose the device to water or excessive moisture.
- Avoid placing the clock near heat sources or in direct sunlight.
- Use only the provided USB-C power cable or a certified equivalent.
- Do not attempt to disassemble or repair the device yourself. Contact qualified service personnel.
- Keep out of reach of children.
Package Contents
- Acctim Jaxon Digital Alarm Clock
- USB-C Power Cable
- User Manual (this document)
Product Overview
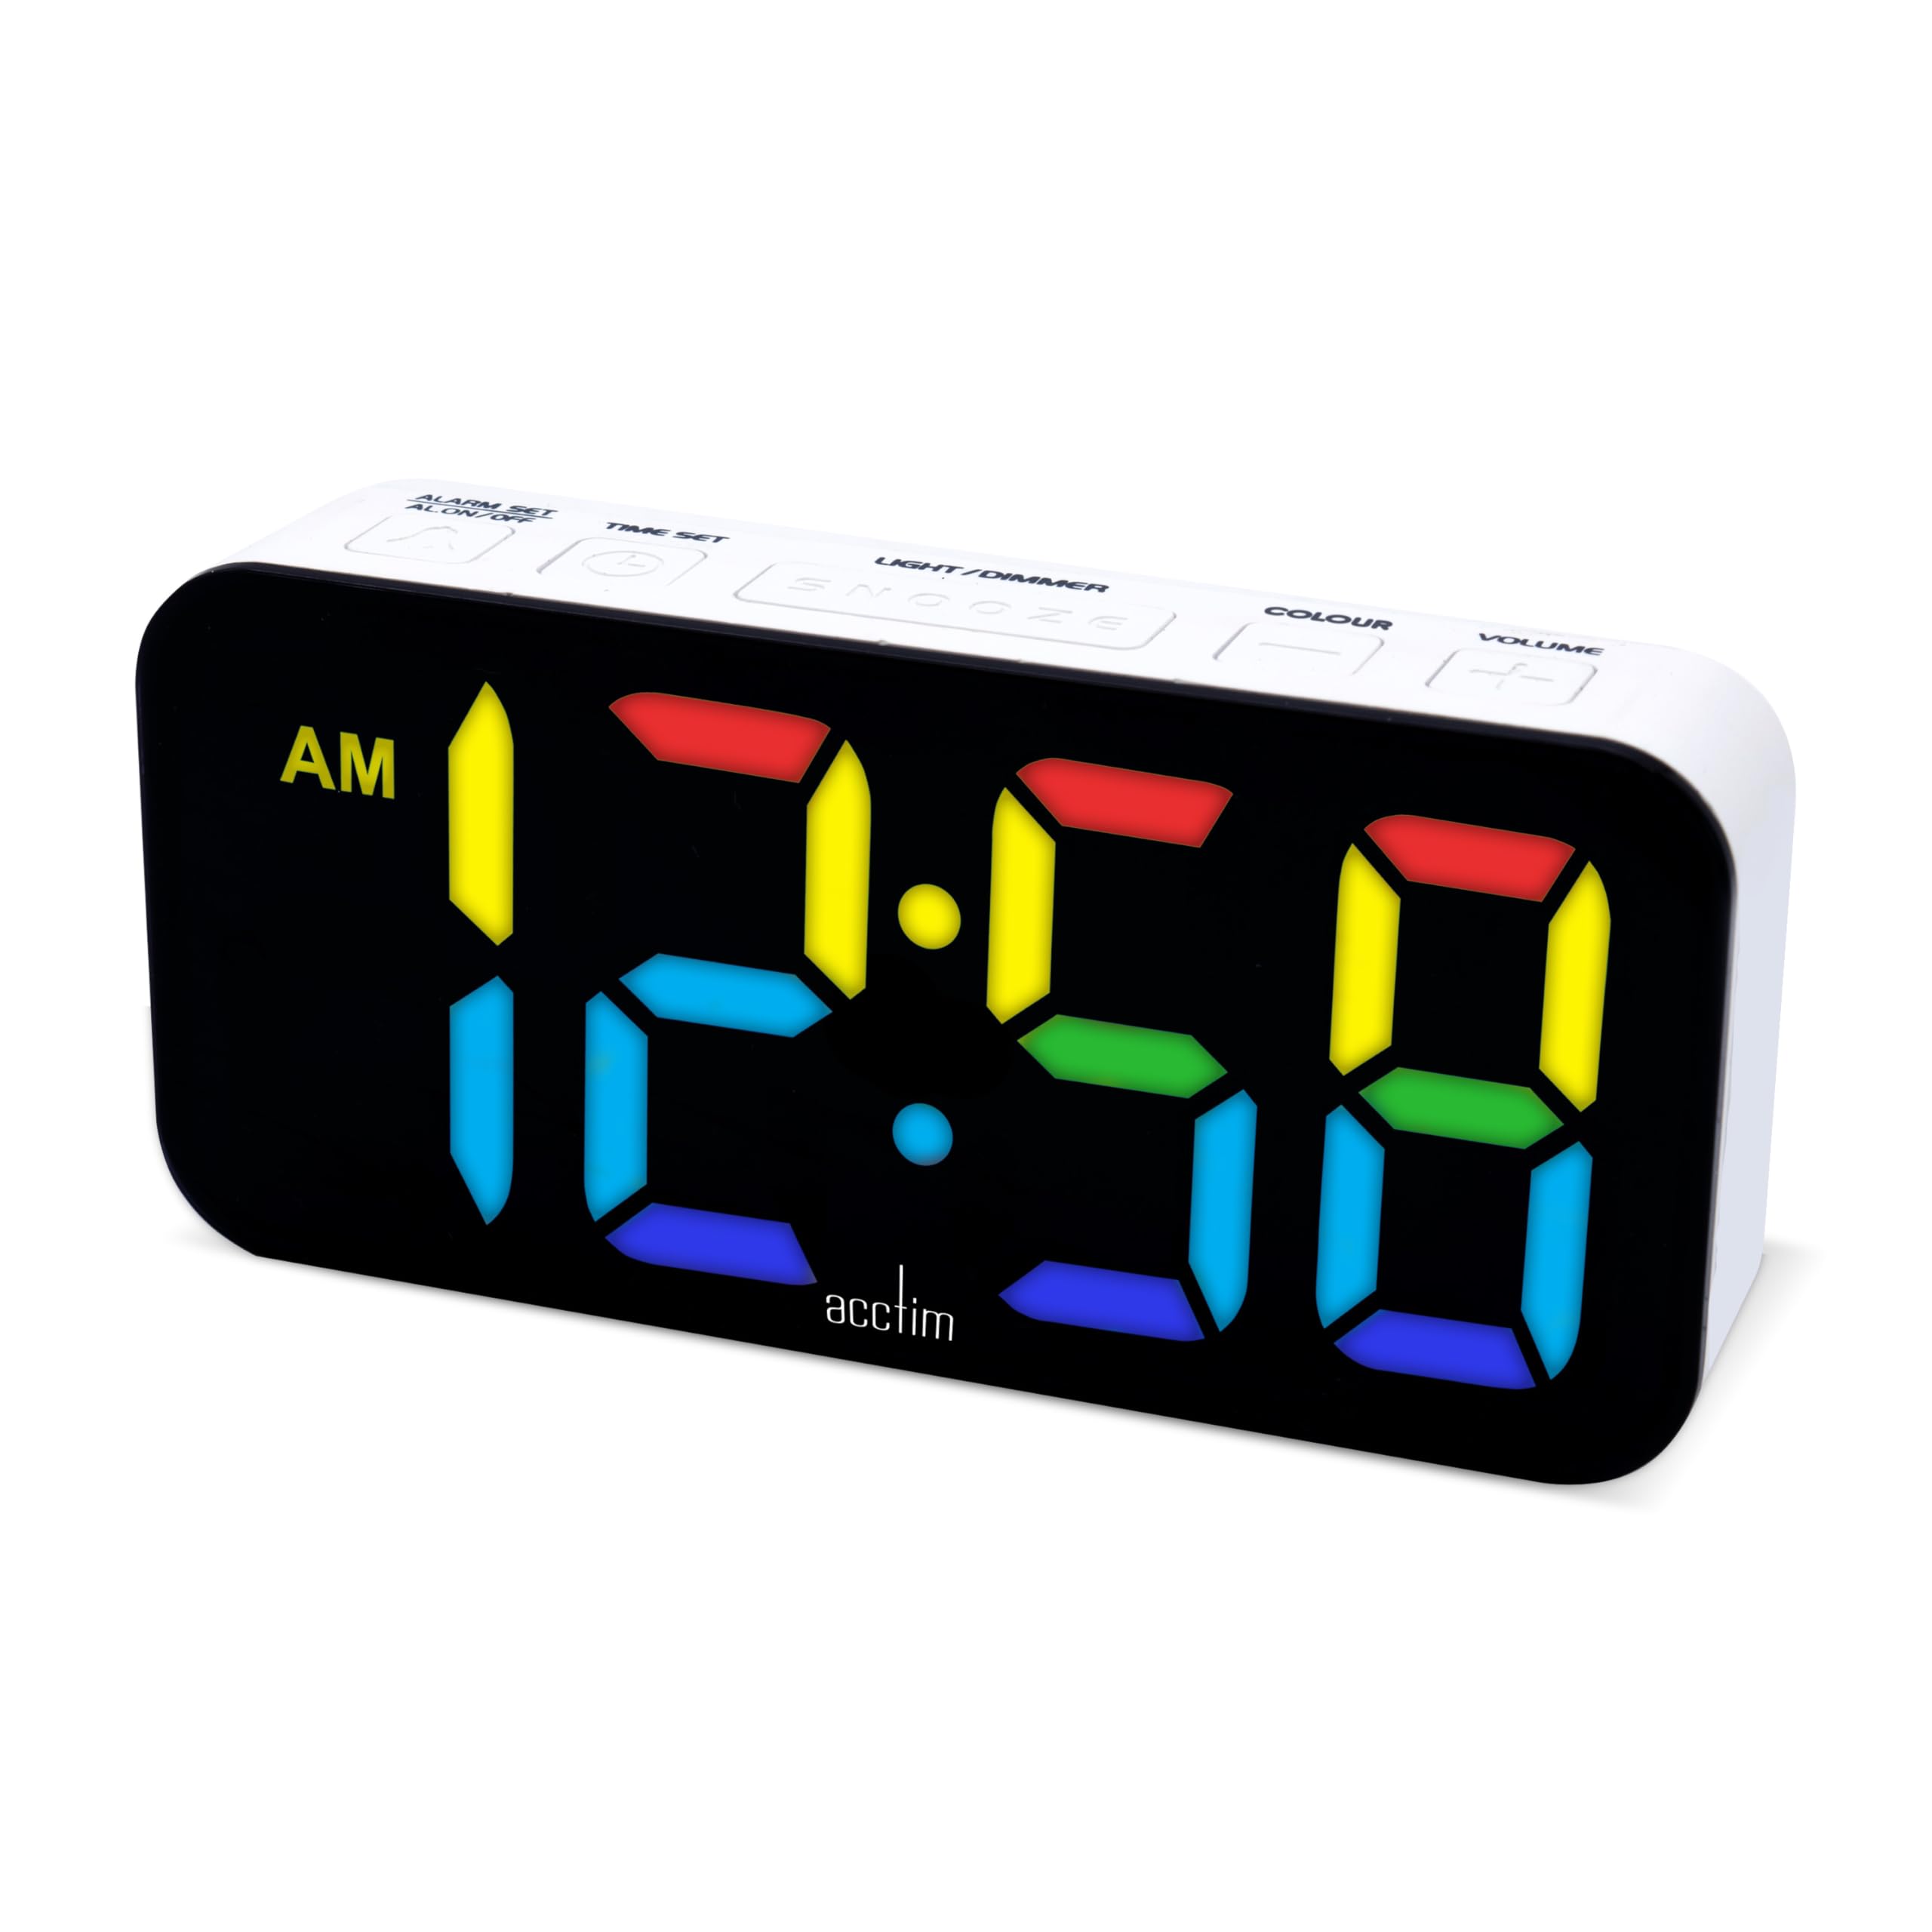
Familiarize yourself with the buttons and display of your Acctim Jaxon Digital Alarm Clock.

Image: Top view of the Acctim Jaxon Digital Alarm Clock, highlighting the control buttons for alarm, time, light/dimmer, snooze, color, and volume.
Control Buttons:
- ALARM SET / ALARM ON/OFF: Press to set the alarm time. Press briefly to activate/deactivate the alarm.
- TIME SET: Press to set the current time.
- LIGHT / DIMMER: Press to adjust display brightness.
- SNOOZE: Press to temporarily silence the alarm.
- COLOUR: Press to cycle through display color options.
- VOLUME: Press to adjust alarm volume.
Display:
- Large LED display shows time in 12 or 24-hour format.
- AM/PM indicator for 12-hour format.
- Multiple color options for the LED digits.
Setup
1. Power Connection
- Connect the provided USB-C power cable to the "DC IN" port on the back of the alarm clock.
- Plug the other end of the USB-C cable into a compatible USB power adapter (not included) and then into a wall outlet.
- The display will light up, indicating the clock is powered on.
2. Battery Backup (Optional)
For backup power during outages, install 3 AAA batteries (not included) into the battery compartment on the bottom of the clock. The batteries will retain time settings but will not power the display continuously.
Operating Instructions
Setting the Time
- Press and hold the TIME SET button until the hour digits begin to flash.
- Press the TIME SET button repeatedly to adjust the hour.
- Press the ALARM SET button to confirm the hour and move to minute adjustment.
- Press the TIME SET button repeatedly to adjust the minutes.
- Press the ALARM SET button to confirm the minutes and exit time setting mode.
- To switch between 12-hour and 24-hour format, press the TIME SET button briefly while the time is displayed (not in setting mode). The AM/PM indicator will appear for 12-hour format.
Setting the Alarm
- Press and hold the ALARM SET button until the alarm hour digits begin to flash.
- Press the ALARM SET button repeatedly to adjust the alarm hour.
- Press the TIME SET button to confirm the alarm hour and move to alarm minute adjustment.
- Press the ALARM SET button repeatedly to adjust the alarm minutes.
- Press the TIME SET button to confirm the alarm minutes and exit alarm setting mode.
Activating/Deactivating the Alarm
- Briefly press the ALARM ON/OFF button to toggle the alarm on or off. An alarm icon will appear on the display when the alarm is active.
Snooze Function
- When the alarm sounds, press the SNOOZE button to temporarily silence it. The alarm will sound again after approximately 9 minutes.
- To turn off the alarm completely, press any other button (e.g., ALARM ON/OFF).
Changing Display Color
The clock features 7 different LED display colors. Press the COLOUR button repeatedly to cycle through the available color options:
Pink Display

Blue Display

Light Blue Display

Green Display

Red Display

White Display

Yellow Display
Adjusting Display Brightness
- Press the LIGHT / DIMMER button repeatedly to cycle through different brightness levels.
Adjusting Alarm Volume
- Press the VOLUME button repeatedly to cycle through different alarm volume levels.
Using the USB-C Charging Port
- The clock features an additional USB-C port (labeled "USB OUT") that can be used to charge other devices, such as smartphones or tablets.
- Connect your device's USB-C charging cable to this port. Ensure the alarm clock is powered via its main USB-C input.
Maintenance
- Cleaning: Wipe the clock with a soft, dry cloth. Do not use abrasive cleaners or solvents.
- Storage: If storing the clock for an extended period, remove the AAA backup batteries to prevent leakage.
Troubleshooting
| Problem | Possible Cause | Solution |
|---|---|---|
| Display is off or dim. | No power, power cable loose, brightness set too low. | Ensure USB-C power cable is securely connected. Check power adapter. Press LIGHT / DIMMER button to increase brightness. |
| Alarm does not sound. | Alarm is not activated, alarm volume is too low. | Press ALARM ON/OFF to activate (check for alarm icon). Press VOLUME to increase alarm volume. |
| Time is incorrect after power outage. | No backup batteries or batteries are depleted. | Install fresh AAA batteries for backup. Reset the time manually. |
| USB-C charging port not working. | Clock not powered, cable issue, device incompatibility. | Ensure the clock is connected to main power. Try a different USB-C cable or device. |
Specifications
| Brand | Acctim |
| Model Number | 16512 (Jaxon) |
| Color | White |
| Material | Plastic |
| Product Dimensions (L x W x H) | 9.1 x 3.81 x 5.6 cm |
| Item Weight | 112 grams |
| Display Type | Digital LED (Color Changing) |
| Power Source | Electric Cord (USB-C) |
| Battery Requirement | 3 x AAA batteries (for backup, not included) |
| Special Features | Charging Port, Backlight |
Warranty and Support
Acctim products are designed for reliability and performance. Spare parts availability is indicated for 2 years from the date of purchase.
For any questions, technical support, or warranty claims, please contact your retailer or visit the official Acctim website for customer service information.