
1. Introduction
This manual provides detailed instructions for the installation and maintenance of your WHFZN Carburetor Kit. This kit is designed to replace the carburetor and associated components in compatible lawn mowers, ensuring optimal engine performance. Please read this manual thoroughly before beginning any installation or maintenance procedures.
2. Safety Information
- Always disconnect the spark plug wire before performing any service or maintenance to prevent accidental engine starting.
- Work in a well-ventilated area when handling fuel. Fuel vapors are flammable and hazardous.
- Wear appropriate personal protective equipment, including safety glasses and gloves.
- Ensure the engine is cool before working on it to avoid burns.
- Keep children and pets away from the work area.
- If you are unsure about any step, consult a qualified technician.
3. Package Contents
Verify that all items listed below are included in your package:
- 1x Carburetor
- 1x Air Filter
- 1x Air Filter Cover
- 1x Spark Plug
- 1x Fuel Filter
- 1x Fuel Shut-Off Valve

Figure 1: Overview of the WHFZN Carburetor Kit, including the carburetor, air filter, air filter cover, spark plug, fuel filter, and fuel shut-off valve.
4. Compatibility
This WHFZN Carburetor Kit (Model SL002-7) is compatible with the following models and engine types:
- Craftsman M100 Lawn Mowers: CMXGMAM201102, 11A-B0BY793
- Briggs & Stratton Carburetor Replacements: 799583, 593261, 595656, 591160, 591979
- Briggs & Stratton Engines (125cc Series OVH Vertical 4-Cycle):
- 08P502, 8P502, 09P602, 9P602, 300E, 450E, 500E
- Specific 09P602 models: 09P602-0019-F1, 09P602-0023-F1, 09P602-0039-F1, 09P602-0060-F1, 09P602-0063-F1, 09P602-0076-F1, 09P602-0077-F1, 09P602-0085-F1, 09P602-0090-F1, 09P602-0095-F1, 09P602-0096-F1, 09P602-0111-F1, 09P602-0115-F1, 09P602-0117-F1
- Specific 08P502 models: 08P502-0034-F1, 08P502-0042-F1, 08P502-0046-F1, 08P502-0047-F1, 08P502-0049-F1, 08P502-0054-F1, 08P502-0055-F1, 08P502-0063-F1, 08P502-0064-F1, 08P502-0079-F1, 08P502-0105-F1, 08P502-0109-F1, 08P502-0110-F1, 08P502-0111-F1, 08P502-0127-F1
- MTD Murray M20300 500E 140cc Engine
5. Installation Guide
This section outlines the general steps for replacing your lawn mower's carburetor and related components. Specific procedures may vary slightly depending on your exact mower model. Always refer to your mower's original service manual for detailed instructions.
5.1. Preparation
- Ensure the engine is cool and the fuel tank is empty or the fuel line is clamped.
- Disconnect the spark plug wire to prevent accidental starting.
- Gather necessary tools (wrenches, screwdrivers, pliers, etc.).
5.2. Removing the Old Carburetor
- Locate the air filter housing. Remove the air filter cover and the old air filter.
- Disconnect the fuel line from the carburetor. Be prepared for some fuel spillage.
- Carefully disconnect any linkages (throttle, choke) and springs attached to the carburetor. Note their positions for reassembly.
- Unbolt the carburetor from the engine. There are typically two bolts holding it in place.
- Remove the old carburetor and any gaskets. Inspect the intake manifold for debris.

Figure 2: Side view of the carburetor, highlighting the fuel inlet connection point.
5.3. Installing the New Carburetor Kit Components
- Install new gaskets between the carburetor and the engine.
- Mount the new carburetor (Figure 2, 3, 4) onto the engine, ensuring it is properly seated. Tighten the mounting bolts securely.
- Reconnect all linkages and springs to their correct positions. Double-check that they move freely.
- Install the new fuel filter in the fuel line, ensuring the flow direction is correct.
- Connect the fuel line to the new carburetor. If included, install the new fuel shut-off valve in an accessible location on the fuel line.
- Replace the old spark plug with the new one provided in the kit.
- Insert the new air filter (Figure 5) into the air filter housing and secure it with the new air filter cover (Figure 6, 7).
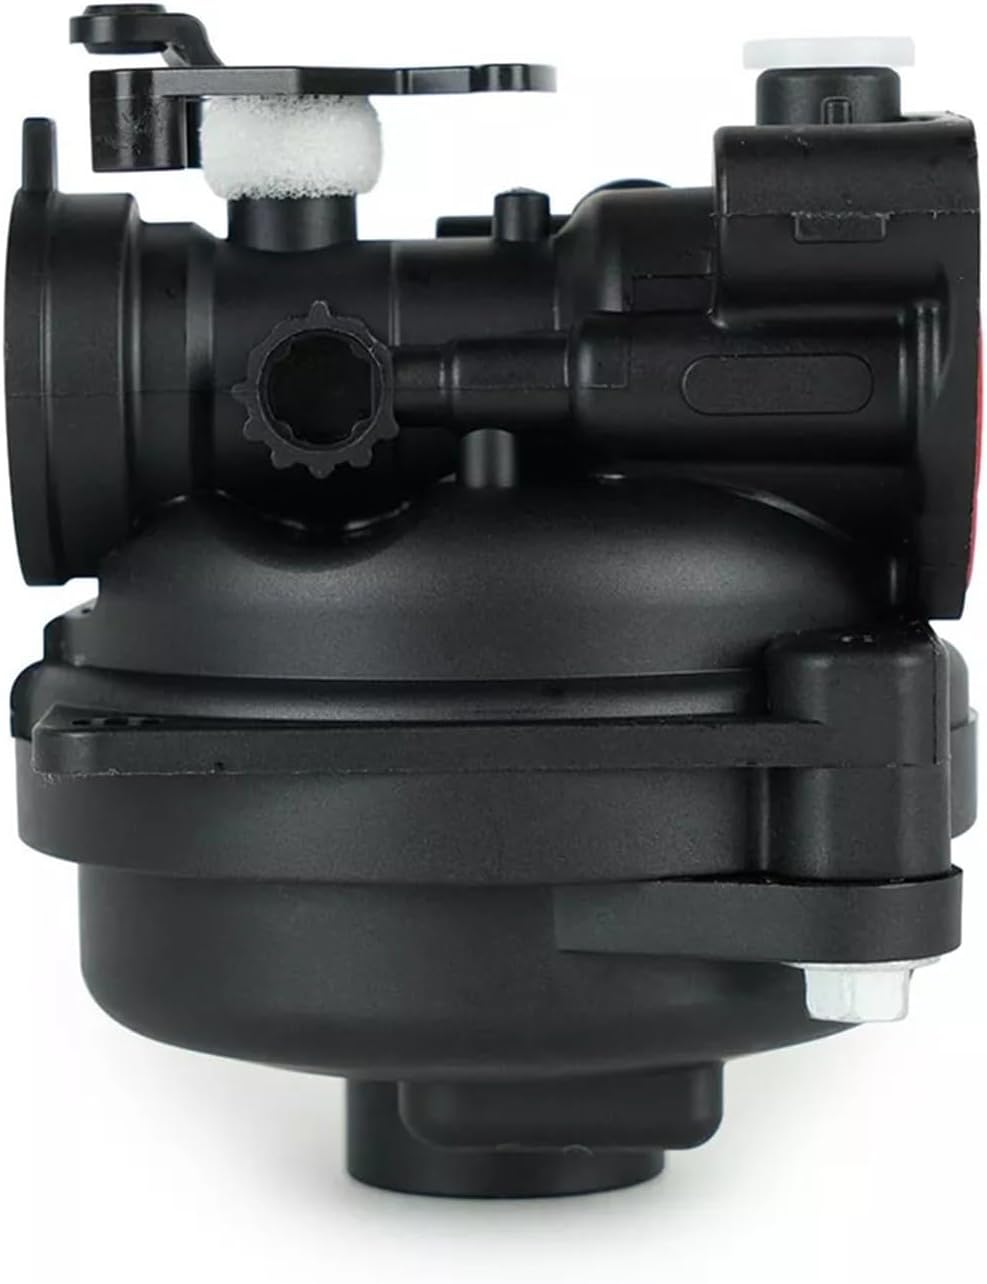
Figure 3: Carburetor showing the throttle linkage connection point.

Figure 4: Carburetor showing the choke linkage connection point.

Figure 5: The new air filter and the two parts of the air filter cover.
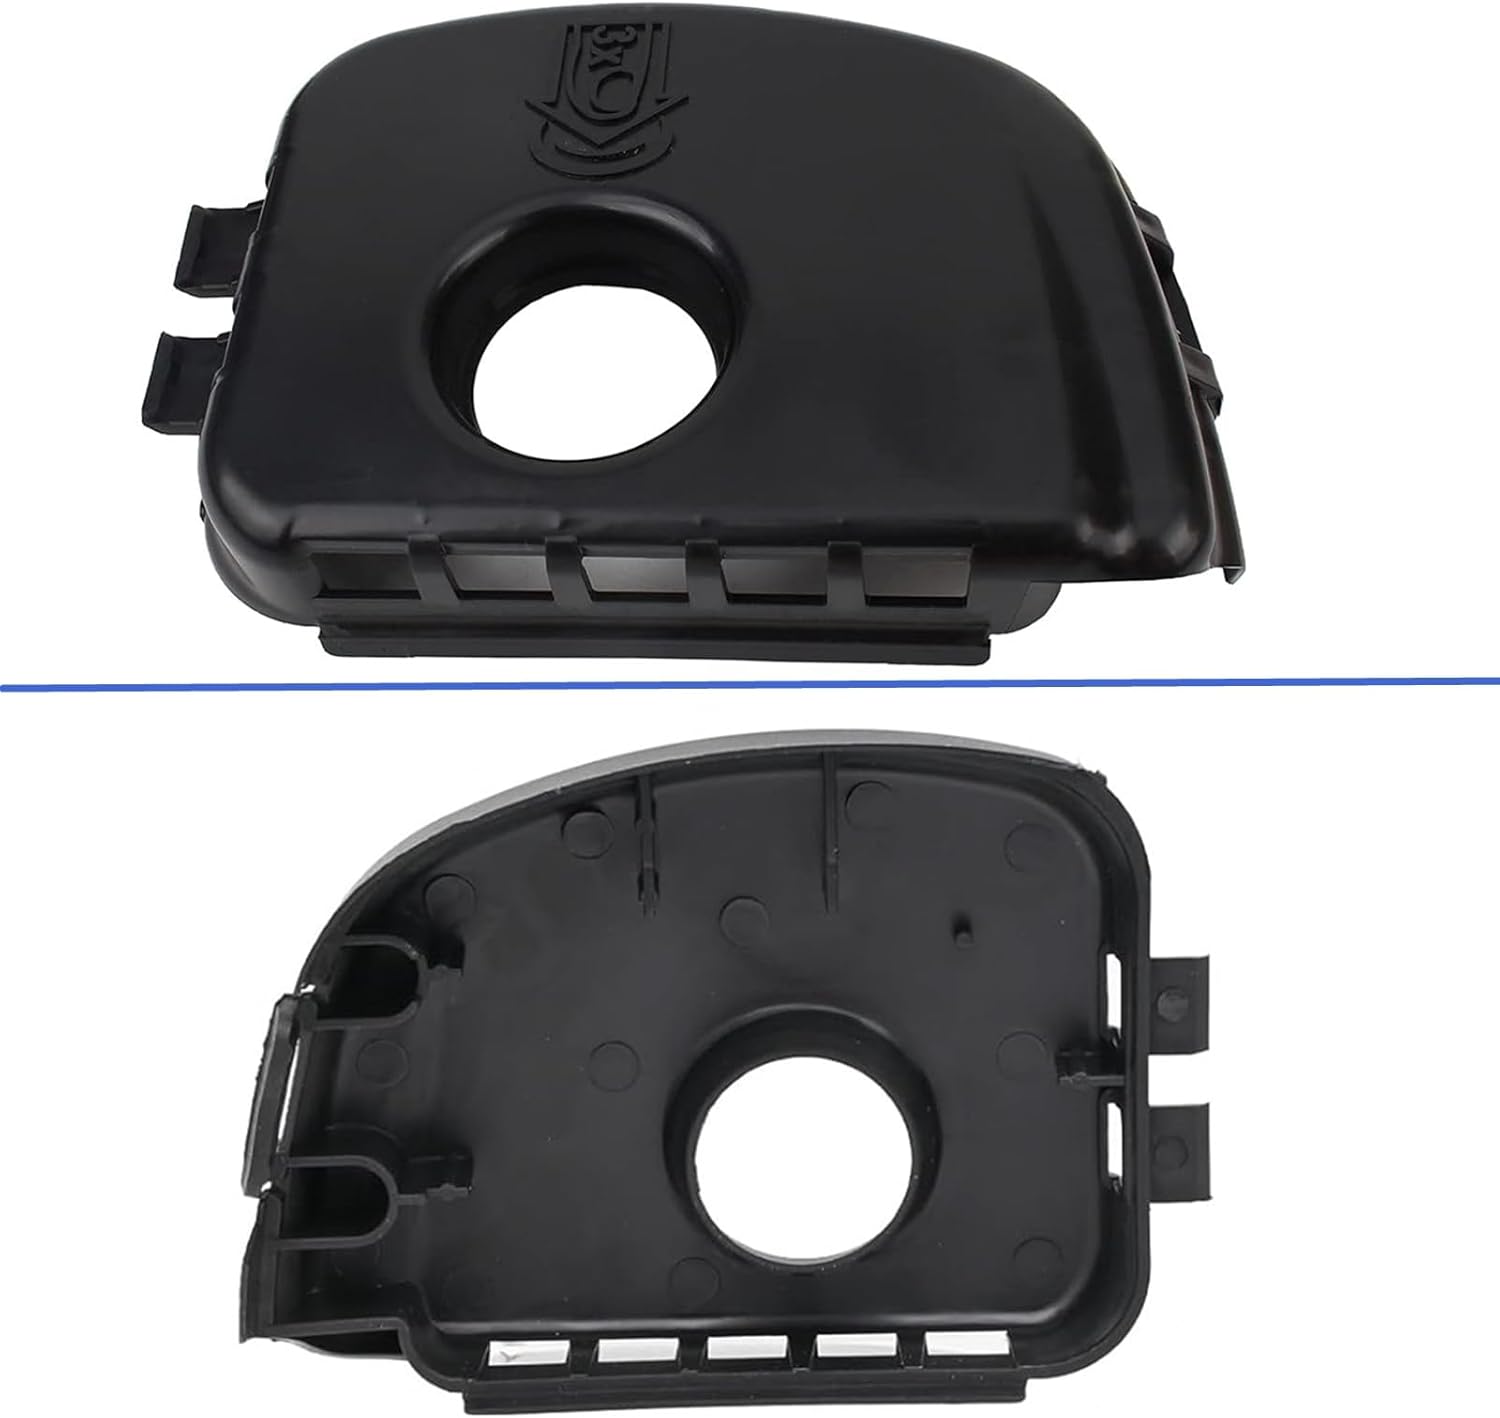
Figure 6: The assembled air filter cover.

Figure 7: Top and bottom views of the air filter cover, showing internal structure.
6. Operating Instructions (Post-Installation)
After installation, perform the following checks before starting the engine:
- Ensure all connections (fuel line, linkages, spark plug wire) are secure.
- If a fuel shut-off valve was installed, ensure it is in the "ON" position.
- Refill the fuel tank with fresh, appropriate fuel.
- Reconnect the spark plug wire.
- Start the engine according to your lawn mower's manufacturer instructions. Allow it to run for a few minutes to warm up and check for any fuel leaks or unusual noises.
7. Maintenance
Regular maintenance of your carburetor and associated components will prolong the life of your engine and ensure reliable operation.
- Air Filter: Inspect the air filter regularly (e.g., every 25 operating hours or annually). Clean or replace it if it appears dirty or clogged to ensure proper air flow to the carburetor.
- Spark Plug: Inspect the spark plug annually or every 50 operating hours. Replace if electrodes are worn or fouled. Ensure proper gap setting.
- Fuel Filter: Replace the fuel filter annually or if fuel flow appears restricted.
- Fuel System: Use fresh fuel and consider using a fuel stabilizer, especially during storage, to prevent fuel system issues.
- Carburetor Cleaning: If the engine runs poorly due to fuel contamination, the carburetor may need cleaning. This is an advanced procedure and may require professional assistance.
8. Troubleshooting
This section addresses common issues you might encounter after carburetor replacement.
| Problem | Possible Cause | Solution |
|---|---|---|
| Engine won't start | No fuel, clogged fuel filter, spark plug issue, incorrect choke setting. | Check fuel level, replace fuel filter, check spark plug connection/condition, ensure choke is set correctly for starting. |
| Engine runs rough or stalls | Air filter clogged, fuel quality, carburetor adjustment, loose connections. | Clean/replace air filter, use fresh fuel, check for loose fuel lines or vacuum leaks, consult a professional for carburetor adjustment. |
| Fuel leaks | Loose fuel line connections, damaged gaskets, cracked fuel line. | Tighten all fuel line clamps, inspect gaskets for proper seating, replace any damaged fuel lines. |
9. Specifications
- Brand: WHFZN
- Model Number: SL002-7
- Item Weight: 10.2 ounces
- Product Dimensions: 5.9 x 5.5 x 4.3 inches
- Manufacturer Part Number: m110
- Compatible Carburetor Replacements: Briggs & Stratton 799583, 593261, 595656, 591160, 591979
10. Warranty and Support
For warranty information or technical support regarding your WHFZN Carburetor Kit, please contact the manufacturer directly through their official channels. Keep your purchase receipt as proof of purchase.