1. Introduction
Thank you for choosing the Generic Replacement Ignition Coil Module. This manual provides essential information for the safe and effective installation, operation, and maintenance of your new ignition coil module. This module is designed as a replacement part for specific Poulan Pro lawn trimmer and mower models, including 961720015 and PR22WT 163cc22". Please read this manual thoroughly before attempting any installation or maintenance.
2. Safety Information
Always prioritize safety when working with power tools and engine components. Failure to follow these safety guidelines may result in personal injury or damage to equipment.
- Disconnect Power: Before beginning any work, ensure the engine is completely off and the spark plug wire is disconnected to prevent accidental starting.
- Wear Protective Gear: Always wear appropriate personal protective equipment (PPE), including safety glasses and gloves.
- Engine Cool Down: Allow the engine to cool down completely before handling any components to avoid burns.
- Proper Tools: Use only the correct tools for the job to prevent damage to fasteners and components.
- Ventilation: Work in a well-ventilated area.
- Professional Assistance: If you are unsure about any step or encounter difficulties, consult a qualified technician.
3. Product Overview
The ignition coil module is a critical component of your engine's ignition system. Its primary function is to transform the low voltage from the engine's magneto into the high voltage required to create a spark at the spark plug, initiating combustion.
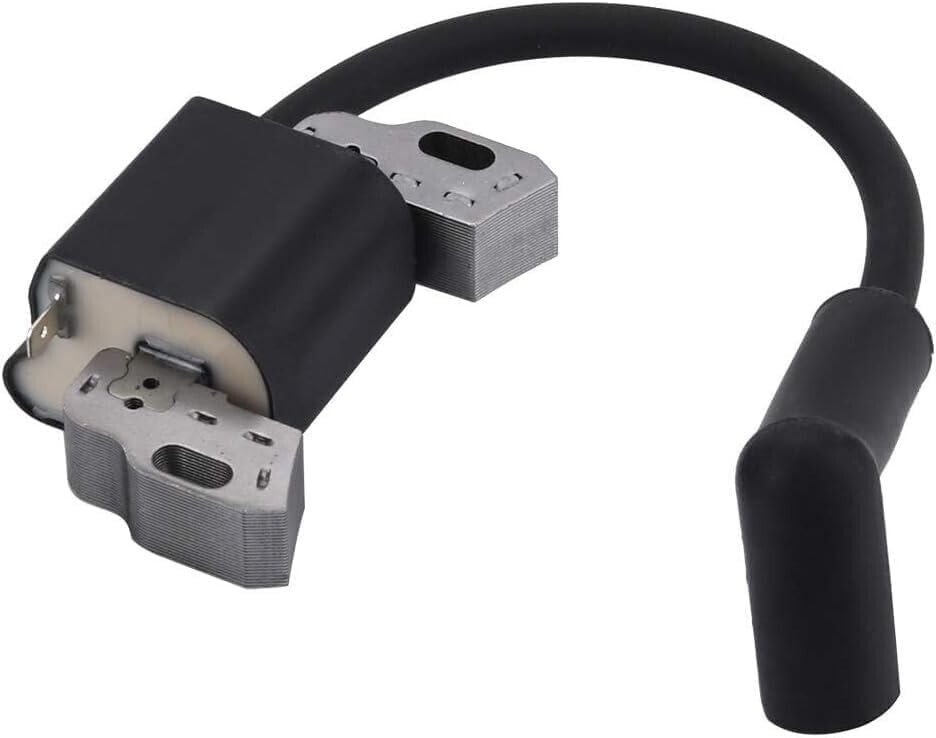
Figure 3.1: This image displays the complete ignition coil module, featuring the black coil body, metal mounting brackets, and the attached black spark plug boot and wire.
This replacement module is designed to meet the specifications for Poulan Pro models 961720015 and PR22WT 163cc22". Please verify compatibility with your specific equipment model before installation.
4. Setup and Installation
Replacing an ignition coil module requires careful attention to detail. Follow these steps for proper installation:
- Preparation: Ensure the engine is off and cool. Disconnect the spark plug wire from the spark plug.
- Access the Old Coil: Locate the existing ignition coil module on your Poulan Pro equipment. This typically involves removing engine covers or shrouds.
- Disconnect Wires: Carefully disconnect any wires attached to the old ignition coil, noting their positions for reinstallation. This usually includes a primary wire from the magneto and the spark plug wire.
- Remove Old Coil: Unscrew and remove the mounting bolts or screws holding the old ignition coil in place. Carefully remove the old coil.
- Install New Coil: Position the new Generic ignition coil module in the same location as the old one. Ensure the mounting holes align.
- Set Air Gap (Crucial): The air gap between the ignition coil's laminations and the flywheel magnets is critical for proper operation. Use a non-magnetic feeler gauge (typically 0.010" to 0.014" or as specified by your equipment's manual) to set this gap. Loosely mount the coil, insert the feeler gauge between the coil and the flywheel, then push the coil firmly against the flywheel (with the gauge in place) and tighten the mounting bolts. Remove the feeler gauge.
- Connect Wires: Reconnect all wires to the new ignition coil module, ensuring they are securely attached. Connect the spark plug wire to the spark plug.
- Reassemble: Reinstall any covers or shrouds that were removed.
- Test: Attempt to start the engine to verify proper operation.
Note: This is a general guide. Always refer to your specific Poulan Pro equipment's service manual for detailed, model-specific installation instructions and air gap specifications.
5. Operation
Once correctly installed, the Generic Ignition Coil Module operates automatically as an integral part of your engine's ignition system. It requires no user intervention during normal engine operation. Its function is to generate the high voltage necessary for the spark plug to ignite the fuel-air mixture, ensuring smooth engine performance.
6. Maintenance
The ignition coil module is generally a low-maintenance component. However, periodic inspection can help ensure its longevity and reliable performance.
- Keep Clean: Periodically inspect the coil and its connections for dirt, debris, or corrosion. Clean gently with a soft, dry cloth if necessary.
- Check Connections: Ensure all electrical connections to the coil, including the spark plug wire, are secure and free from damage.
- Inspect Spark Plug Wire: Check the spark plug wire and boot for cracks, cuts, or signs of wear. Replace if damaged.
- Avoid Impact: Protect the coil from physical impact, which can damage its internal components.
7. Troubleshooting
If your engine experiences ignition problems after installing the new coil, consider the following:
| Problem | Possible Cause | Solution |
|---|---|---|
| No Spark / Engine Won't Start | Incorrect air gap setting. Loose or corroded electrical connections. Faulty spark plug. Kill switch engaged. | Re-check and adjust the air gap. Inspect and secure all connections. Test or replace the spark plug. Ensure kill switch is in "Run" position. |
| Weak or Intermittent Spark | Incorrect air gap. Damaged spark plug wire/boot. Coil overheating. | Verify air gap. Inspect and replace wire/boot if damaged. Ensure proper engine cooling. |
| Engine Misfires | Spark plug issue. Fuel delivery problem. Incorrect air gap. | Check/replace spark plug. Verify fuel supply. Re-check air gap. |
If troubleshooting steps do not resolve the issue, it is recommended to consult a professional small engine mechanic.
8. Specifications
| Attribute | Detail |
|---|---|
| Product Type | Ignition Coil Module |
| Brand | Generic |
| Model Number | nvduq2803-12704 |
| Manufacturer Part Number | DUA-PARTS-CSP-PL-29032025-12704 |
| Compatible With | Poulan Pro 961720015 Lawn Trimmer Mower PR22WT 163cc22" |
| ASIN | B0F3JH9FPC |
| Date First Available | April 3, 2025 |
9. Warranty Information
Specific warranty terms for this replacement part are provided by the seller or manufacturer at the time of purchase. Please refer to your purchase documentation or contact the seller directly for detailed warranty information, including coverage period and claims process.
10. Customer Support
For technical assistance, questions regarding installation, or any other support needs, please contact the seller from whom you purchased this product. Provide your order details and the product's model number (nvduq2803-12704) for faster service.


