
Fleaks Funly B0F3JFN5CT
GPEESTRAC Cordless Tire Inflator Portable Air Compressor
User Manual
Model: B0F3JFN5CT
1. Introduction
Thank you for choosing the GPEESTRAC Cordless Tire Inflator. This portable air compressor is designed for quick and efficient inflation of car tires, motorcycle tires, bicycle tires, and various sports balls. This manual provides essential information for the safe and effective use, setup, operation, and maintenance of your device. Please read it thoroughly before first use and keep it for future reference.
2. Safety Instructions
Always observe the following safety precautions to prevent injury or damage to the device:
- Do not leave the inflator unattended while in operation.
- Keep out of reach of children.
- Do not operate the inflator in wet conditions or near flammable liquids or gases.
- Ensure the correct pressure setting for the item being inflated to prevent over-inflation, which can cause bursting and serious injury.
- Allow the device to cool down after extended use to prevent overheating.
- Use only the accessories and attachments provided or recommended by the manufacturer.
- Do not disassemble or attempt to repair the device yourself. Contact qualified service personnel for repairs.
3. Package Contents
Please check the box for the following items:
- GPEESTRAC Cordless Tire Inflator
- Air Hose
- Presta Valve Adapter
- Ball Needle
- Swimming Ring Nozzle
- USB Charging Cable
- 12V Car Power Cord
- Storage Bag
- User Manual
4. Product Overview
Familiarize yourself with the components of your GPEESTRAC Tire Inflator:

Figure 4.1: Main unit with various nozzles and charging cables.

Figure 4.2: Internal view highlighting the efficient motor and automatic shut-off mechanism.

Figure 4.3: Close-up of the digital display showing pressure readings and control buttons.
5. Setup
5.1 Initial Charging
Before first use, fully charge the inflator's internal battery using the provided USB charging cable. Connect the USB cable to a standard USB power adapter (not included) and the charging port on the inflator. The display will indicate charging status.
5.2 Attaching the Air Hose and Nozzles
- Screw the air hose securely onto the inflator's air outlet port.
- Select the appropriate nozzle for the item you wish to inflate (e.g., Presta valve adapter for bicycles, ball needle for sports balls).
- Attach the selected nozzle to the end of the air hose.
6. Operating Instructions
6.1 Powering On and Off
Press and hold the power button to turn the inflator on or off. The LED display will illuminate upon activation.
6.2 Selecting Inflation Mode
The inflator features four preset modes for common inflation needs:
- Car Mode: For standard car tires.
- Motorcycle Mode: For motorcycle tires.
- Bicycle Mode: For bicycle tires.
- Ball Mode: For sports balls.
Press the mode button to cycle through these options. Each mode has a default pressure setting, which can be adjusted.
6.3 Setting Target Pressure
Once a mode is selected, use the '+' and '-' buttons to adjust the desired target pressure. The display will show the current pressure and the target pressure. You can also switch between pressure units (PSI, BAR, KPA, kg/cm²) by pressing the unit button.
6.4 Starting and Stopping Inflation
Connect the air hose to the valve stem of the item to be inflated. Ensure a secure connection to prevent air leakage. Press the start/stop button to begin inflation. The inflator will automatically stop once the preset target pressure is reached.
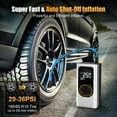
Figure 6.1: Illustration showing the inflator connected to a car tire, demonstrating fast inflation from 29-35 PSI.
6.5 Dual Power Modes
The inflator offers flexible power options:
- Cordless Mode: Utilizes the embedded 4000mAh battery for portable use.
- Wired Mode: Connects to a 12V car outlet using the included power cord for continuous operation without relying on battery charge.

Figure 6.2: Diagram illustrating the two power connection options: cordless mode using the internal battery and wired mode using the 12V car outlet.
6.6 LED Emergency Light and Power Bank Function
The inflator is equipped with an LED light for illumination in dark conditions and can also function as a power bank to charge small electronic devices via its USB output port.

Figure 6.3: The inflator unit displaying its LED flashlight function and ability to charge a mobile phone, highlighting its versatility.
7. Maintenance
Proper maintenance ensures the longevity of your inflator:
- Cleaning: Wipe the exterior of the inflator with a soft, damp cloth. Do not use harsh chemicals or abrasive cleaners.
- Storage: Store the inflator in a cool, dry place, away from direct sunlight and extreme temperatures. Use the provided storage bag for protection.
- Battery Care: For optimal battery life, charge the device at least once every three months if not used regularly. Avoid fully discharging the battery frequently.
- Hose and Nozzles: Inspect the air hose and nozzles for any signs of wear or damage before each use. Replace if necessary.
8. Troubleshooting
If you encounter issues with your inflator, refer to the following common problems and solutions:
| Problem | Possible Cause | Solution |
|---|---|---|
| Inflator does not turn on. | Battery is low or depleted. | Charge the inflator fully. |
| Inflator does not inflate. | Air hose not securely connected. | Ensure the air hose is tightly screwed onto the inflator and the valve stem. |
| Inflator stops prematurely. | Target pressure reached; Overheating. | Check if target pressure is set correctly. Allow device to cool down if used for extended periods. |
| Inaccurate pressure reading. | Loose connection; Sensor issue. | Ensure hose is tightly connected. If problem persists, contact support. |
9. Specifications
| Feature | Specification |
|---|---|
| Brand | Fleaks Funly |
| Model | B0F3JFN5CT |
| Item Weight | 1.17 pounds |
| Package Dimensions | 6.06 x 4.13 x 3.15 inches |
| Battery Capacity | 4000mAh (estimated from description) |
| Max Pressure | 150 PSI (estimated from description) |
| Power Input | USB Charging, 12V Car Outlet |
| Date First Available | April 3, 2025 |
| UPC | 635412405589 |
10. Warranty and Support
This product is manufactured by Fleaks Funly. For any questions, technical support, or warranty claims, please refer to the seller's contact information on your purchase platform or visit the official Fleaks Funly store page on Amazon. Keep your proof of purchase for warranty purposes.
Ask a question about this manual
Ask about setup, troubleshooting, compatibility, parts, safety, or missing instructions. Manuals+ will review the question and use this page’s manual context to help answer it.