Introduction
This GUAEVER Wrist Blood Pressure Monitor is designed for convenient and accurate blood pressure measurement at home or on the go. It provides precise readings with minimal effort, making it suitable for individuals managing hypertension or simply tracking their health. This manual provides essential information for the proper use, maintenance, and troubleshooting of your device.
Safety Information and Important Precautions
- Consult your physician before using this device if you have any medical conditions or are on medication.
- This device is intended for home use and should not replace professional medical advice or treatment.
- Do not self-diagnose or self-treat based on measurements from this device. Always consult a healthcare professional.
- Keep the device out of reach of children and pets.
- Avoid strong electromagnetic fields (e.g., mobile phones, microwaves) near the device during measurement.
- Do not disassemble or attempt to repair the device yourself. Contact customer support for assistance.
- Ensure the cuff size is appropriate for your wrist (5 to 7.7 inches).
Product Overview
The GUAEVER Wrist Blood Pressure Monitor features a compact design with a large LCD display and intuitive controls. It is equipped with a comfortable, adjustable wrist cuff and offers a voice broadcast function for ease of use.

Figure 1: Front view of the GUAEVER Wrist Blood Pressure Monitor, showing the large LCD screen, WHO classification indicator, and control buttons (MEM, SET, START/STOP).
Key Features:
- Accurate & Fast Readings: Clinically tested for reliable results, providing readings in approximately 30 seconds.
- Rechargeable Battery: Built-in 300mAh battery, rechargeable via Type-C cable, lasting up to 150 readings per charge.
- Comfort-Fit Cuff: Adjustable wrist cuff designed for comfort and accuracy, fitting wrists from 5 to 7.7 inches.
- Large LCD Display: Clear digital display for easy reading of blood pressure and pulse rate.
- Optional Talking Function: Voice broadcast of readings, ideal for seniors or visually impaired users.
- Memory Function: Stores 2x99 sets of readings for two users, allowing for consistent health tracking.
- Portable and Lightweight: Compact design for easy use at home or while traveling.
Setup
1. Charging the Device:
Before first use, fully charge the blood pressure monitor. Connect the provided Type-C charging cable to the device's charging port and plug the other end into a standard USB power adapter (not included) or a computer USB port. The battery indicator on the display will show charging status.
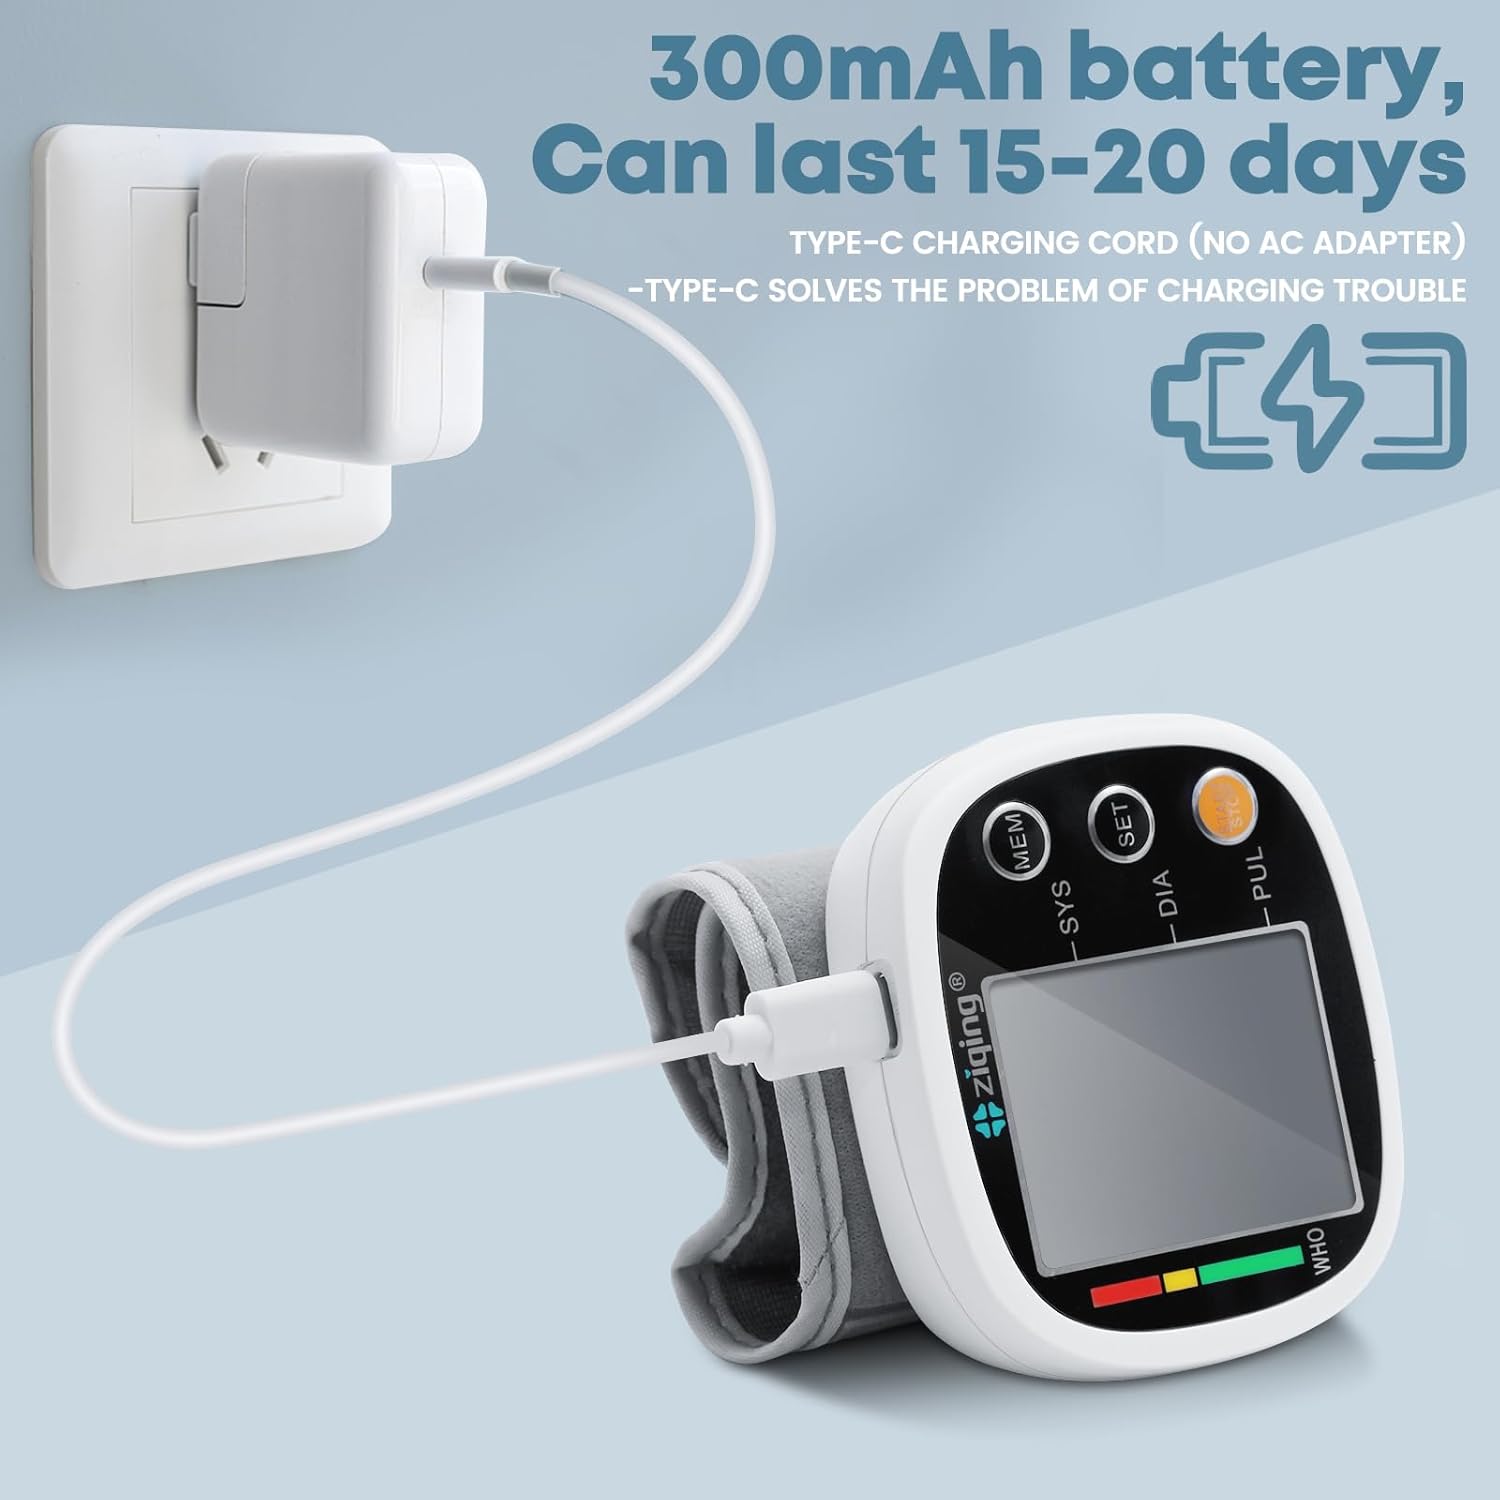
Figure 2: The monitor being charged via its Type-C port. A full charge can last for 15-20 days or up to 150 readings.
2. Initial Power On and Settings:
Press the START/STOP button to turn on the device. The display will light up. You may need to set the date, time, and user profile (User 1 or User 2) for accurate record-keeping. Refer to the detailed instructions in the included user manual for setting these parameters using the SET button.
Operating Instructions
1. Preparation for Measurement:
- Relax and rest for at least 15 minutes before taking a measurement.
- Avoid eating, drinking alcohol, smoking, exercising, or bathing for 30 minutes prior to measurement.
- Sit comfortably with your back supported and feet flat on the floor.
2. Applying the Wrist Cuff:
- Apply the wrist cuff to your left wrist. Ensure there are no sleeves or accessories on your wrist.
- Your palm and the monitor display should both face upward.
- Position the wrist cuff leaving a clearance of 0.5 to 1 inch (1 to 2 cm) between the cuff and the bottom of your palm.
- Wrap the wrist cuff firmly around your wrist, ensuring it is snug but not too tight.
- Position the monitor so it is approximately at the same level as your heart. You can support your arm with your other hand or a cushion.

Figure 3: Step-by-step guide for correctly positioning the wrist cuff and arm for an accurate blood pressure reading.
3. Taking a Measurement:
- Once the cuff is correctly applied and your arm is positioned, press the START/STOP button.
- The cuff will automatically inflate, and the measurement will begin. Remain still and silent during the measurement.
- After approximately 30 seconds, the measurement will complete, and your systolic pressure (SYS), diastolic pressure (DIA), and pulse rate (PUL) will be displayed on the LCD screen. If the voice broadcast function is enabled, the results will be announced.
4. Understanding Your Readings:
The monitor displays three key values: Systolic (SYS), Diastolic (DIA), and Pulse (PUL). It also features a WHO (World Health Organization) classification indicator on the left side of the display, which uses a color-coded bar (green, yellow, red) to visually indicate your blood pressure category.

Figure 4: The monitor provides accurate readings (±3mmHg) for convenient home measurement, reducing the need for frequent hospital visits.
5. Memory Function and Dual Users:
The device can store 99 sets of readings for two different users (User 1 and User 2). To view past readings, press the MEM button. You can switch between User 1 and User 2 memory by pressing the SET button when in memory mode.

Figure 5: The monitor supports separate history storage for two users, each with 99 memory slots, allowing for comprehensive tracking of blood pressure trends.
6. Voice Broadcast Function:
The voice broadcast feature can be toggled on or off. Refer to the specific instructions in your user manual for how to activate or deactivate this function using the SET button.
Maintenance
- Cleaning: Wipe the monitor and cuff with a soft, dry cloth. Do not use abrasive cleaners or immerse the device in water.
- Storage: Store the device in a cool, dry place, away from direct sunlight, extreme temperatures, and humidity.
- Battery Care: Recharge the device regularly, even if not in frequent use, to maintain battery health. Avoid fully depleting the battery for extended periods.
- Inspection: Periodically check the cuff and tubing for any signs of wear or damage.
Troubleshooting
If you encounter any issues with your blood pressure monitor, please refer to the following common problems and solutions. For issues not listed here, or if problems persist, contact customer support.
| Problem | Possible Cause | Solution |
|---|---|---|
| Inaccurate Readings | Incorrect cuff placement, movement during measurement, not resting before measurement, arm not at heart level. | Ensure correct cuff application (Figure 3), remain still and silent, rest for 15 minutes prior, position arm at heart level. |
| Display shows "Error" | Cuff not properly inflated, excessive movement, irregular heartbeat detected. | Re-apply cuff and try again. Remain still. If error persists, consult a healthcare professional. |
| Device does not power on | Low battery or device not charged. | Charge the device fully using the Type-C cable. |
| No voice broadcast | Voice function is turned off. | Refer to the user manual for instructions on enabling the voice broadcast function. |
Specifications
| Feature | Detail |
|---|---|
| Product Dimensions | 4"L x 3.5"W x 3.5"Th (10.16cm L x 8.89cm W x 8.89cm Th) |
| Weight | 5.61 ounces (approx. 159g) |
| Cuff Circumference | 5 to 7.7 inches (12.7 to 19.5 cm) |
| Display Type | LCD Digital Display |
| Memory Capacity | 2 users x 99 sets of readings |
| Power Source | Rechargeable 300mAh battery (Type-C charging) |
| Included Components | Blood Pressure Monitor, Type-C Cable, User Manual |
| Material | ABS |
| Manufacturer | GUAEVER |
| Model (ASIN) | B0F3HYZ1DM |
| UPC | 733437191545 |

Figure 6: Dimensions of the monitor and the adjustable cuff, suitable for most wrist sizes.
Warranty and Support
Your GUAEVER Wrist Blood Pressure Monitor comes with a standard manufacturer's warranty. Please refer to the warranty card included in your product packaging for specific terms and conditions. For technical support, troubleshooting assistance, or any inquiries regarding your device, please contact GUAEVER customer service through the retailer's platform or the contact information provided in your product documentation.
We are committed to providing reliable health monitoring devices and ensuring your satisfaction.