1. Introduction
This manual provides comprehensive instructions for the installation, operation, and maintenance of your ikasus Android 14 Car Stereo Radio. Please read this manual thoroughly before using the product to ensure proper function and safety. Keep this manual for future reference.
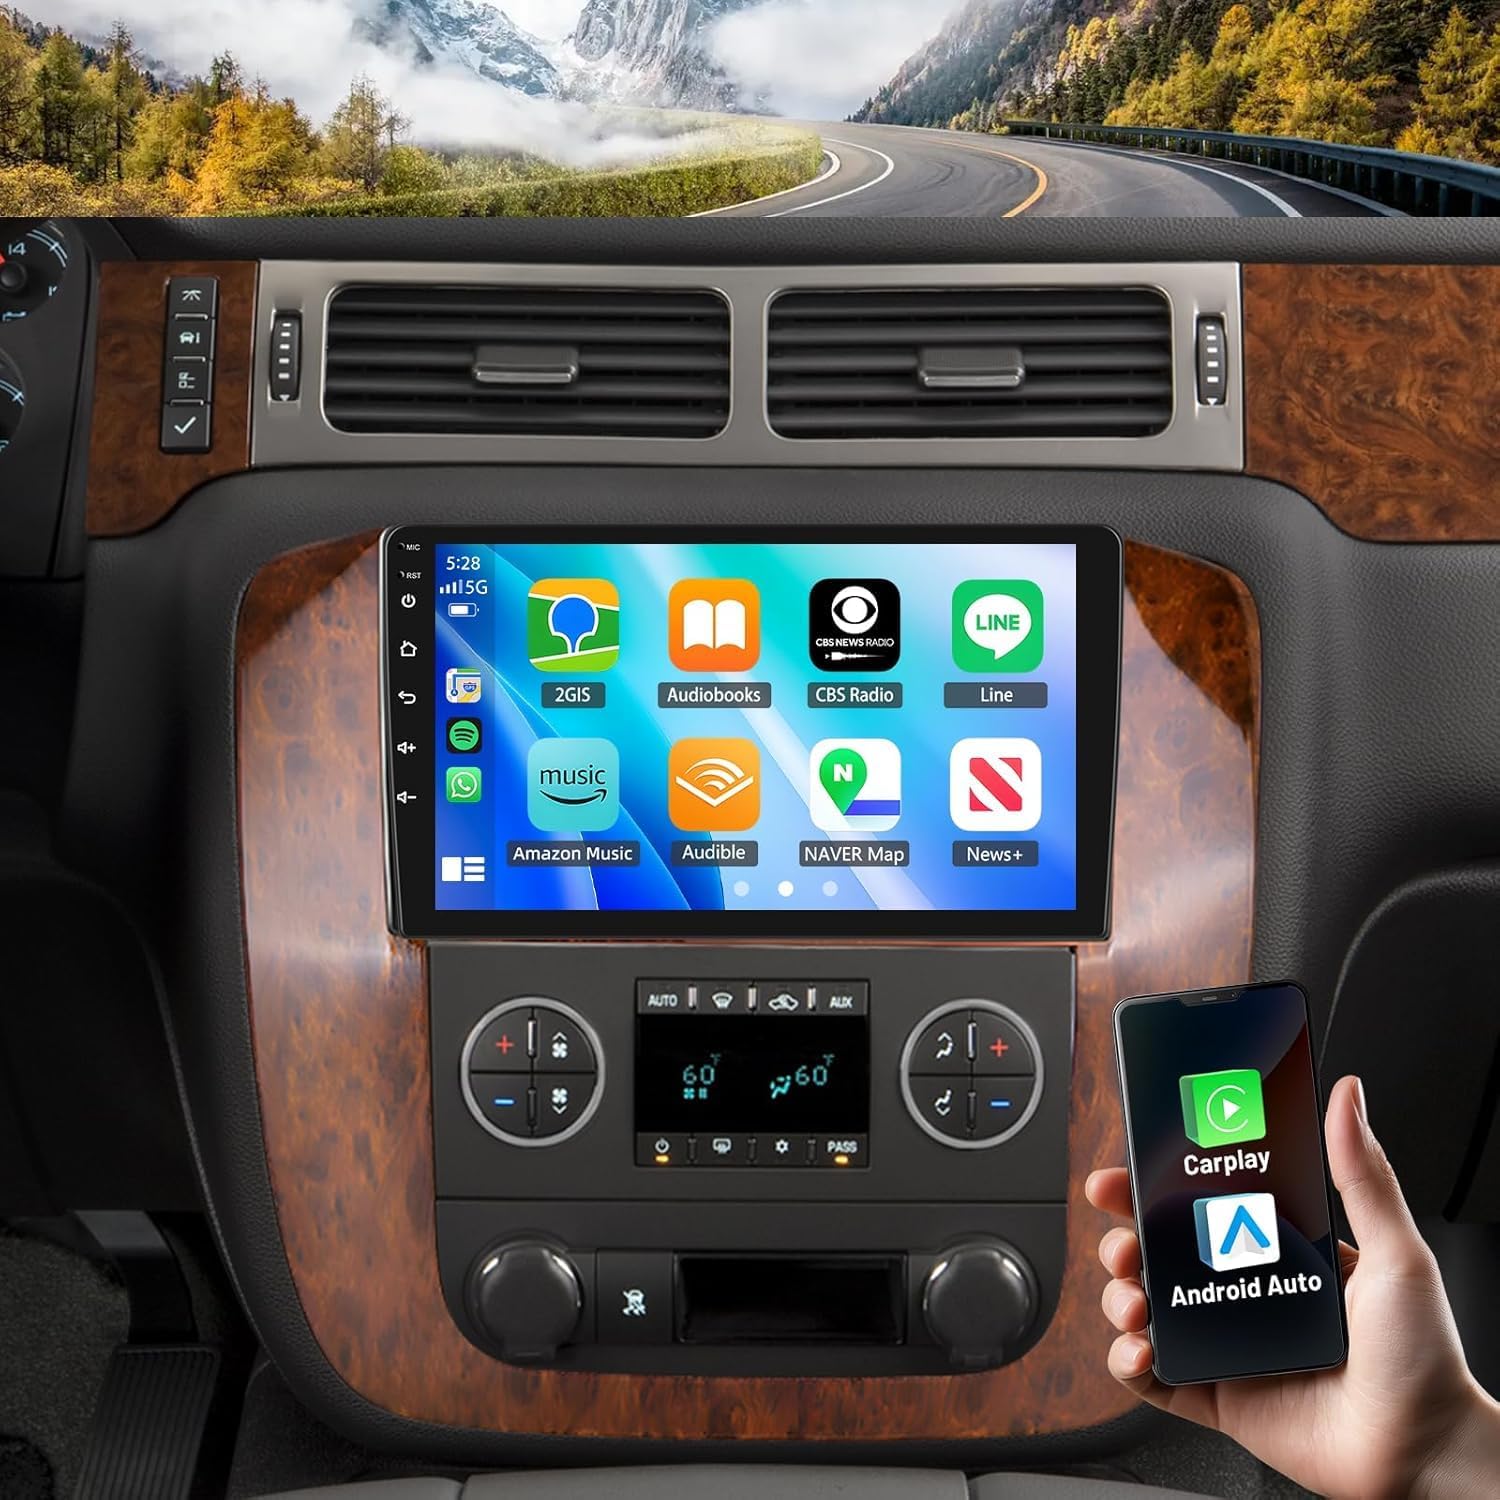
Image 1.1: The ikasus Android 14 Car Stereo Radio installed in a compatible vehicle dashboard, showcasing its 9-inch touchscreen interface with various application icons.
2. Product Features
- Operating System: Android 14.0
- Memory: 4GB RAM + 64GB ROM
- Display: 9-inch HD Capacitive Touch Screen (1280x800 resolution)
- Connectivity: Built-in Wireless CarPlay & Android Auto (wired option available)
- Navigation: Integrated GPS with support for online and offline maps
- Wireless: Wi-Fi support for internet access and hotspot sharing
- Audio: Bluetooth for hands-free calls and music streaming, RDS FM Radio
- Control: Steering Wheel Control (SWC) function support
- Camera Support: Reversing input (CVBS) for backup camera
- Audio Output: 4x45W Power Output
- USB: Double USB interface
- Multimedia: Supports various audio (APE/FLAC/WAV/MP3/WMA), video (MKV/RMVB/AVI/MP4/MDV), and picture formats (PNG/JPEG/JPG/GIF/WBMP/BNP)
- Split Screen: Functionality to display two applications simultaneously
3. Package Contents
Verify that all items listed below are included in your package:
- 1 x ikasus Car Stereo Radio Unit
- 1 x Power Cable
- 1 x RCA Input/Output Cable Set
- 2 x USB Cables
- 1 x Camera Input Cable
- 1 x Radio Adapter
- 1 x GPS Antenna
- 1 x Instruction Manual (this document)
- 1 x Sound Amplifier
- 1 x Canbus Box
- 1 x External Microphone
- 1 x Backup Camera
- 1 x Car Compass

Image 3.1: Overview of all components included in the ikasus Car Stereo Radio package, laid out for identification.
4. Compatibility
This ikasus Android 14 Car Stereo Radio is designed for specific vehicle models and years:
- Chevy Tahoe: 2007, 2008, 2009, 2010, 2011, 2012, 2013, 2014 (10th generation)
- Chevy Silverado: 2007, 2008, 2009, 2010, 2011, 2012, 2013, 2014 (10th generation / 2nd generation)
- Chevy Suburban: 2007, 2008, 2009, 2010, 2011, 2012, 2013, 2014
- GMC Yukon: 2007, 2008, 2009, 2010, 2011, 2012, 2013, 2014
- GMC Sierra: 2007, 2008, 2009, 2010, 2011, 2012, 2013 (3rd generation)
Note: This product is compatible with speaker systems that include Bose amplifiers.

Image 4.1: A visual representation of a compatible vehicle's dashboard before the installation of the ikasus car stereo, highlighting the factory unit.
5. Setup and Installation
Professional installation is recommended. Ensure the vehicle's battery is disconnected before beginning installation.
5.1 Wiring Connections
- Power Cable: Connect the main power harness to the vehicle's wiring. Ensure correct connections for constant power (B+), accessory power (ACC), and ground (GND).
- RCA Input/Output: Connect external amplifiers, subwoofers, or additional video displays using the provided RCA cables.
- USB Cables: Route the two USB cables to an accessible location for connecting USB drives or charging devices.
- Camera Input: Connect the backup camera's video output to the 'CVBS IN' port on the stereo. Connect the camera's power to the vehicle's reverse light circuit.
- Radio Adapter: Connect the vehicle's antenna to the stereo using the radio adapter.
- GPS Antenna: Mount the GPS antenna in a location with a clear view of the sky, typically on the dashboard or under the windshield, ensuring it is securely attached.
- Canbus Box: Connect the Canbus box according to the vehicle's wiring diagram to enable steering wheel controls and other vehicle data integration.
- External Microphone: Plug in the external microphone for improved call quality and voice commands. Route it to a suitable location, such as near the rearview mirror or on the A-pillar.
5.2 Backup Camera Installation
Install the backup camera at the rear of the vehicle, ensuring a clear view of the area behind the car. Connect the camera's power to the reverse light circuit so it activates automatically when the vehicle is in reverse. Connect the video cable to the stereo's CVBS input.
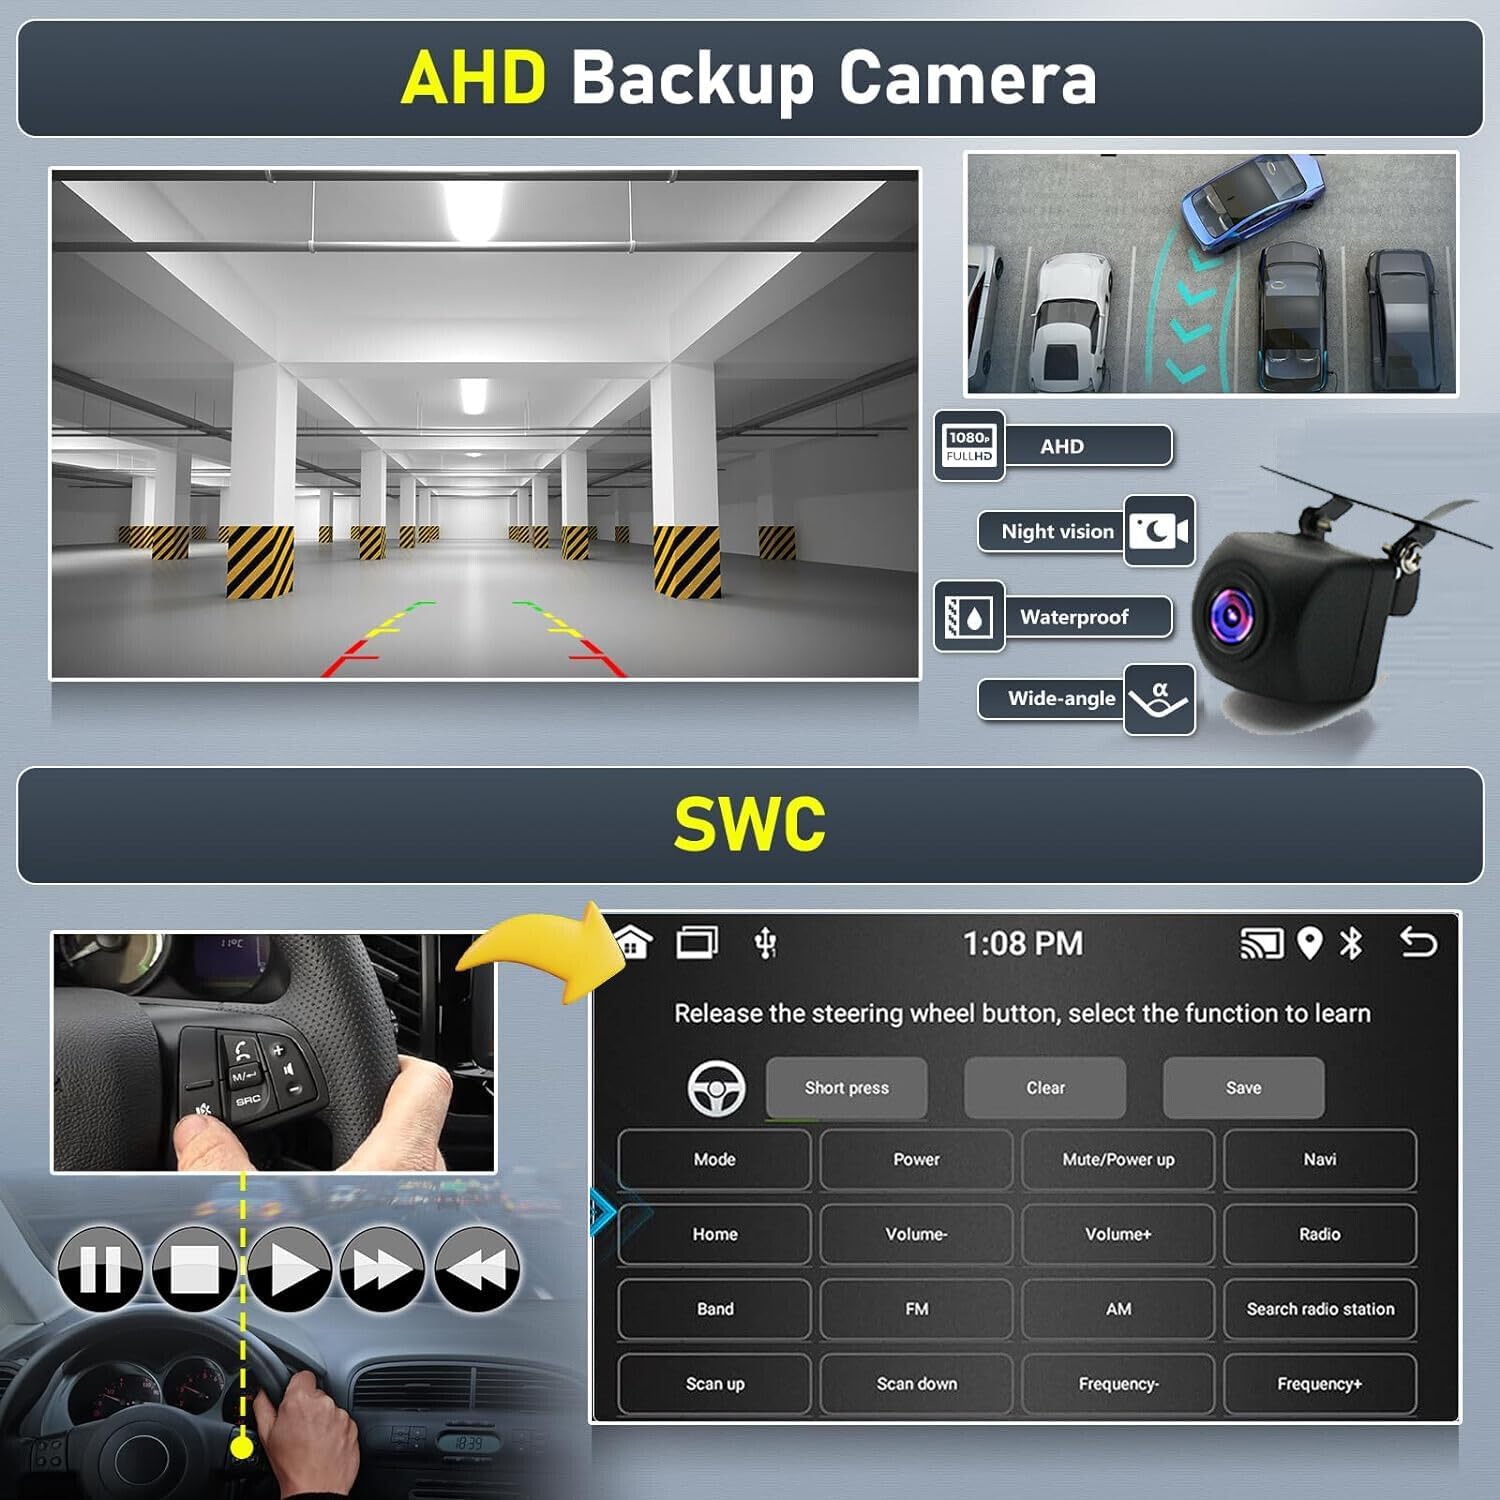
Image 5.1: Illustration of the AHD backup camera's capabilities, including its wide-angle view and night vision, and a diagram for setting up Steering Wheel Controls.
6. Operating Instructions
6.1 Power On/Off and Basic Interface
Press the power button (if available) or turn the vehicle's ignition to the ACC position to power on the unit. The 9-inch touchscreen will display the Android 14 home screen. Navigate through applications by tapping icons and swiping across the screen.
6.2 Wireless CarPlay & Android Auto
To use Wireless CarPlay or Android Auto:
- Ensure Bluetooth and Wi-Fi are enabled on your smartphone.
- On the car stereo, open the CarPlay/Android Auto application.
- Follow the on-screen prompts to pair your phone via Bluetooth. Once paired, the system will establish a Wi-Fi connection for wireless projection.
- For wired connection, simply connect your smartphone to one of the USB ports using a compatible USB cable.
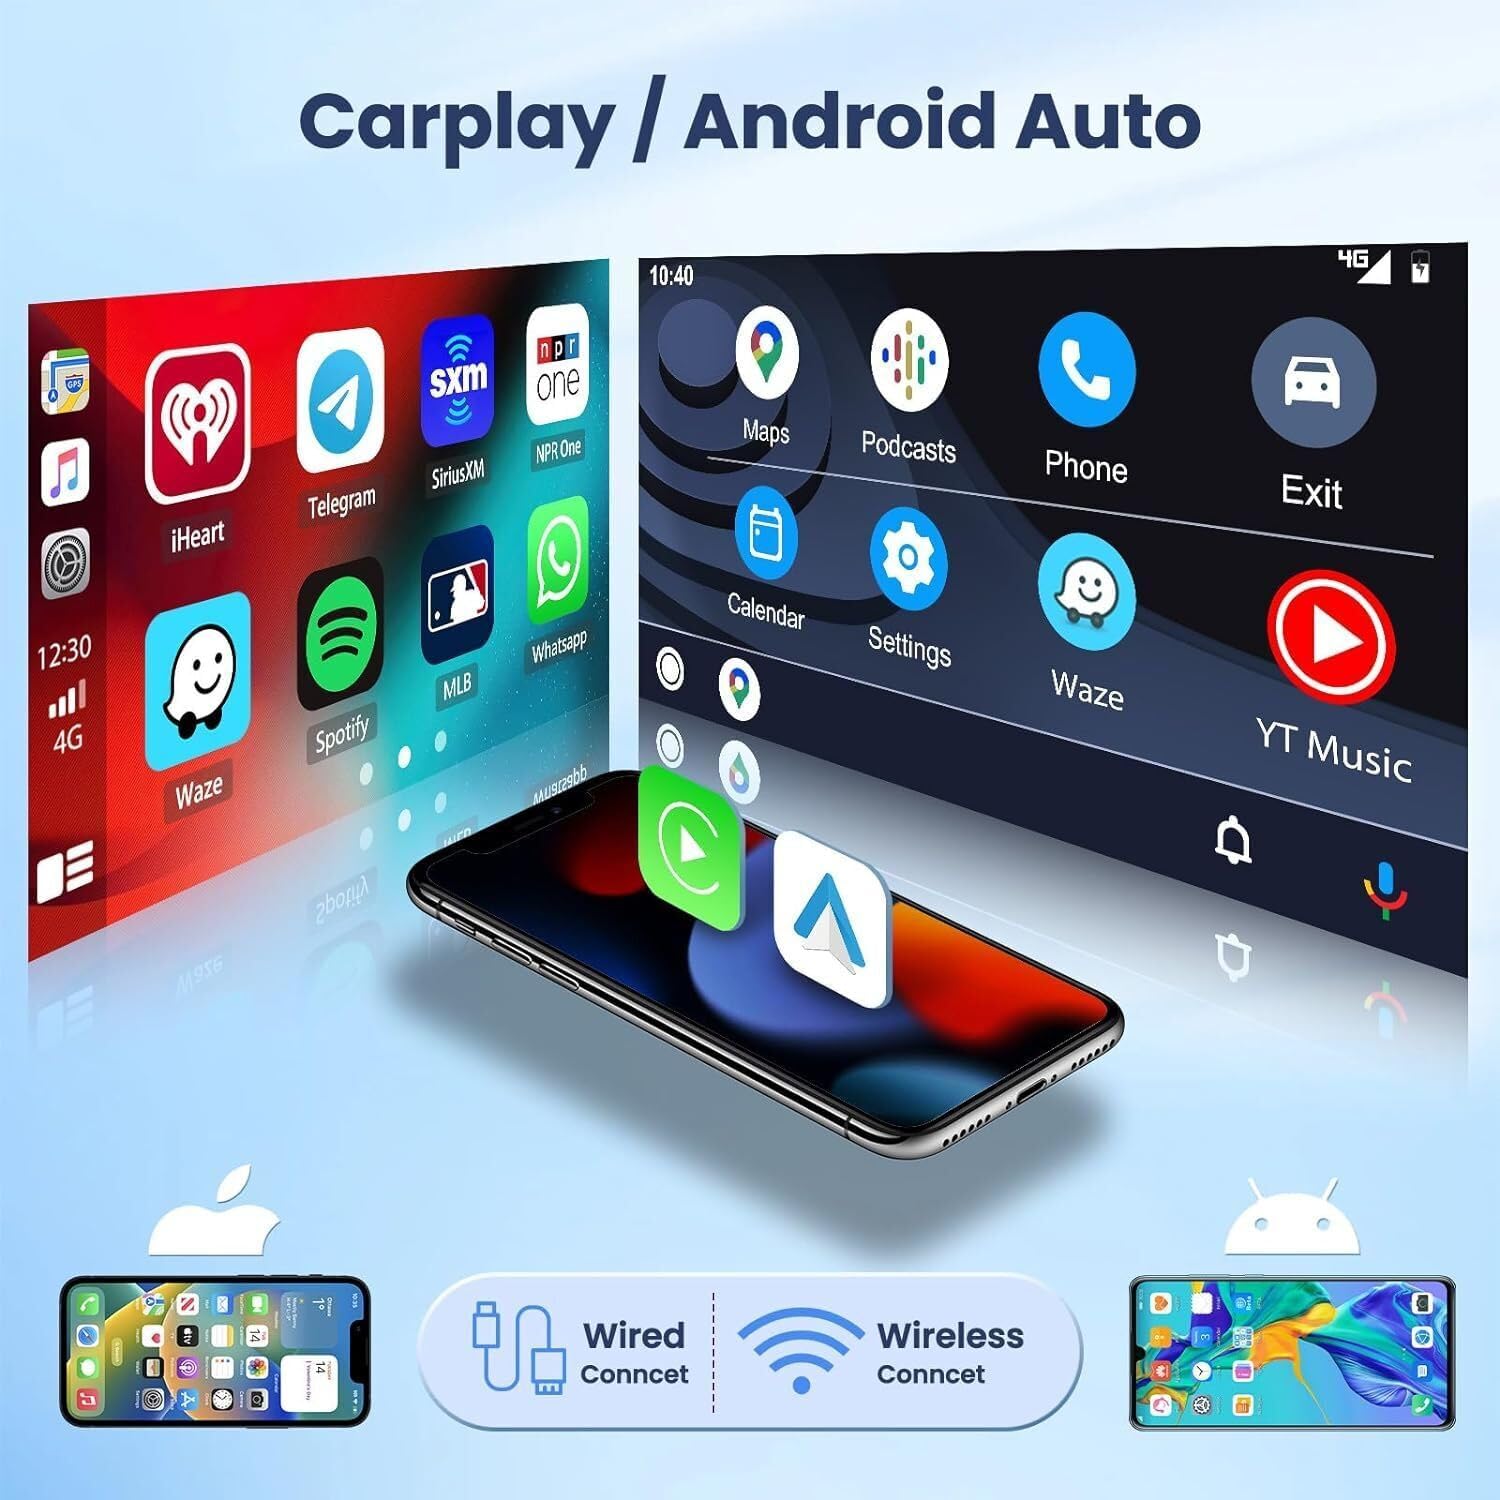
Image 6.1: Visual guide to connecting smartphones via wired or wireless CarPlay and Android Auto, displaying the interface on the car stereo.
6.3 GPS Navigation
The unit comes with built-in offline maps. For online navigation, connect the stereo to Wi-Fi (e.g., via your phone's hotspot) and use pre-installed apps like Google Maps or Waze, or download other navigation apps from the app store.
6.4 Bluetooth Functionality
To pair a Bluetooth device:
- Go to the Bluetooth settings on the car stereo.
- Enable Bluetooth on your phone and search for available devices.
- Select the car stereo's name from your phone's list and confirm the pairing code.
Once paired, you can make/receive hands-free calls and stream audio from your device.
6.5 RDS FM Radio
Access the Radio application to tune into FM stations. The RDS (Radio Data System) feature displays station information where available. Use the on-screen controls to scan for stations, save presets, and adjust frequency.
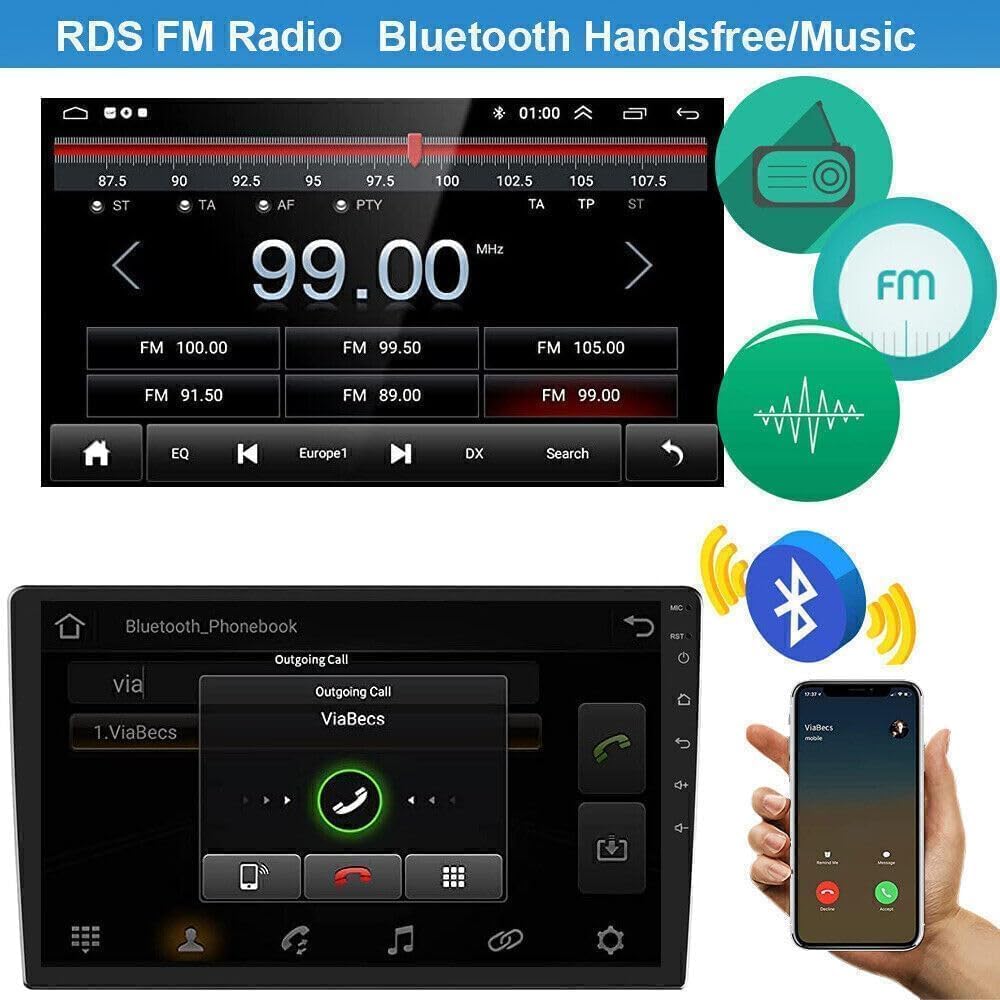
Image 6.2: Display of the RDS FM Radio interface with frequency controls and the Bluetooth interface for calls and music playback.
6.6 Steering Wheel Control (SWC)
The unit supports your vehicle's original steering wheel control functions. To configure SWC:
- Navigate to the SWC settings menu on the stereo.
- Follow the on-screen instructions to assign functions (e.g., volume up/down, track skip, mode) to your steering wheel buttons.
- Press and hold each button on your steering wheel as prompted by the stereo to learn its function.
6.7 Backup Camera Display
When the vehicle is shifted into reverse gear, the stereo will automatically switch to the backup camera view, providing a clear image of the area behind your vehicle.
7. Maintenance
- Screen Cleaning: Use a soft, lint-free cloth to gently wipe the touchscreen. For stubborn smudges, slightly dampen the cloth with water or a screen-safe cleaner. Avoid harsh chemicals.
- Software Updates: Periodically check for software updates to ensure optimal performance and access to new features. Updates can typically be found in the system settings or on the manufacturer's website.
- Temperature: Avoid exposing the unit to extreme temperatures for extended periods. The operating temperature range is -20℃ to 75℃.
8. Troubleshooting
- No Power: Check all power connections (B+, ACC, GND). Ensure the vehicle's ignition is on. Verify fuses are intact.
- No Sound: Check speaker connections. Ensure volume is not muted or set to zero. Verify amplifier connections if an external amplifier is used.
- GPS Not Working: Ensure the GPS antenna is properly connected and has a clear view of the sky. Check GPS settings in the system.
- Bluetooth Pairing Issues: Ensure Bluetooth is enabled on both the stereo and your phone. Delete previous pairings and try again. Restart both devices.
- Backup Camera Not Displaying: Check the camera's power and video connections. Ensure the camera is receiving power when the vehicle is in reverse.
- Steering Wheel Controls Not Working: Verify Canbus box connection. Re-perform the SWC learning process in the settings.
- System Slow/Unresponsive: Try restarting the unit. If issues persist, a factory reset (found in system settings, keyword: 8888 or 3368) may be necessary (note: this will erase all user data).
9. Specifications
| Feature | Specification |
|---|---|
| System | Android 14.0 |
| Chipset | 8227L-DEMO |
| Screen Size | 9 inches |
| Memory | 4GB (RAM) + 64GB (ROM) |
| Screen Resolution | 1280x800 |
| Radio Chip | MT6625 |
| Power Output | 4x45W |
| Work Temperature | -20℃ to 75℃ |
| Steering Wheel Control | Supported |
| Power Amplifier Chip | TDA7388 |
| Radio Band | FM/RDS |
| Video Output | Supported |
| Reversing Input | CVBS |
| External Microphone | Supported |
| Split Screen | Supported |
| Maps | Built-in offline maps (requires internet to download data) |
| Wi-Fi | Supported |
| USB Interface | Double USB |
| Audio Formats | APE/FLAC/WAV/MP3/WMA and more |
| Video Formats | MKV/RMVB/AVI/MP4/MDV and more |
| Picture Formats | PNG/JPEG/JPG/GIF/WBMP/BNP and more |
| Factory Setting Keyword | 8888 or 3368 |
| Languages | Multi-language support (Chinese, English, French, Italian, Korean, Japanese, Arabic, Spanish, Portuguese, Russian, Turkish, Vietnamese, Hebrew, Polish, German) |
| Item Weight | 4.14 pounds (1876 Grams) |
| Product Dimensions | 16.14 x 12.6 x 5.51 inches |
10. Warranty and Support
For warranty information and technical support, please refer to the documentation provided at the time of purchase or contact your retailer. You may also visit the ikasus official website for further assistance.


