1. Introduction
This manual provides detailed instructions for the installation, operation, and maintenance of the TK-803R 8-Port KVM USB/PS2 Rack Mount Switch. The TK-803R is designed to allow control of up to eight computers from a single console (keyboard, monitor, and mouse), optimizing space and efficiency in server rooms or data centers.
Please read this manual thoroughly before installation and operation to ensure proper use and to prevent damage to the device or connected equipment.
2. Product Overview
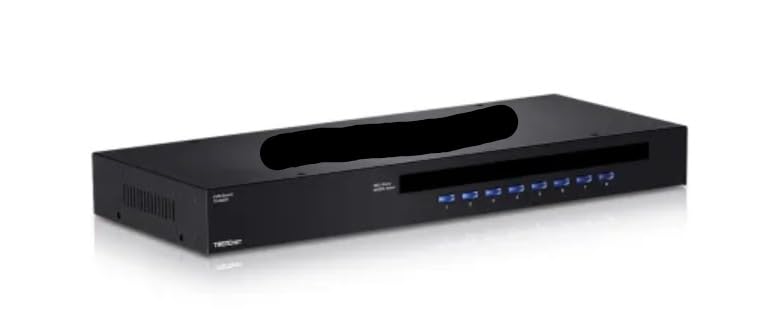
Figure 1: Front view of the TK-803R KVM Switch. This image shows the sleek, black rack-mountable unit with its front panel, featuring a series of blue LED indicators and buttons for each of the 8 ports, along with the brand logo and model number.
2.1 Key Features
- 8 x Ports: Manage up to 8 computers from a single KVM setup.
- USB/PS2 Compatibility: Supports both USB and PS2 peripherals for flexibility.
- Rack-Mountable Design: Saves space in server racks and data center environments.
- Hotkey Switching: Easily switch between connected systems via keyboard shortcuts.
- Space-Saving Solution: Ideal for multi-server management with minimal equipment.
- Sturdy and Durable: Designed for long-term use in professional environments.
3. Setup and Installation
Follow these steps to properly set up your TK-803R KVM Switch:
- Power Off All Devices: Before connecting any cables, ensure all computers and the KVM switch are powered off.
- Connect Console Peripherals:
- Connect your USB or PS/2 keyboard to the designated keyboard port on the KVM switch.
- Connect your USB or PS/2 mouse to the designated mouse port on the KVM switch.
- Connect your monitor to the VGA/HDMI/DVI (depending on model) video output port on the KVM switch.
- Connect Computers to KVM: For each computer you wish to connect:
- Connect a KVM cable (not included, typically) from the computer's video output, USB port, and PS/2 ports (if applicable) to the corresponding input ports on the KVM switch (Port 1, Port 2, etc.).
- Ensure secure connections for all video, keyboard, and mouse cables.
- Connect Power: Connect the provided power adapter to the KVM switch's power input and then to a power outlet.
- Power On Devices: First, power on the KVM switch. Then, power on all connected computers. The KVM switch should automatically detect the active computer or default to Port 1.
- Rack Mounting (Optional): If rack mounting, secure the KVM switch to a standard 19-inch rack using the included mounting brackets and screws.
4. Operating Instructions
The TK-803R KVM switch allows you to easily switch control between connected computers using front panel buttons or hotkey commands.
4.1 Switching Methods
- Front Panel Buttons: Press the corresponding port button (1-8) on the front panel of the KVM switch to switch to the desired computer. The LED indicator for the active port will illuminate.
- Hotkey Switching: Use keyboard hotkey combinations to switch between computers without needing to reach the KVM switch.
- Switch to Specific Port: Press Scroll Lock + Scroll Lock + 1 (or 2, 3, etc., up to 8) to switch directly to a specific port.
- Auto Scan Mode: Press Scroll Lock + Scroll Lock + S to activate auto scan mode, which cycles through all connected computers. Press any key to stop scanning.
- Hotkey Beep On/Off: Press Scroll Lock + Scroll Lock + B to toggle the hotkey beep sound.
Note: Hotkey combinations may vary slightly. Refer to the specific KVM model's detailed hotkey list if available.
5. Maintenance
To ensure the longevity and optimal performance of your TK-803R KVM Switch, follow these simple maintenance guidelines:
- Cleaning: Use a soft, dry cloth to clean the exterior of the KVM switch. Do not use liquid or aerosol cleaners, as they may damage the unit.
- Ventilation: Ensure adequate airflow around the KVM switch, especially if rack-mounted. Do not block ventilation openings.
- Cable Management: Keep cables organized and free from kinks or excessive bends to prevent signal degradation or damage.
- Environmental Conditions: Operate the KVM switch within its specified temperature and humidity ranges (refer to specifications). Avoid extreme temperatures or dusty environments.
6. Troubleshooting
If you encounter issues with your TK-803R KVM Switch, refer to the following common problems and solutions:
| Problem | Possible Cause | Solution |
|---|---|---|
| No video display. | Loose video cable connection; incorrect video resolution; KVM not powered on. | Check all video cable connections. Ensure the KVM switch is powered on. Try adjusting the display resolution on the connected computer. |
| Keyboard or mouse not responding. | Loose USB/PS2 cable connection; KVM not powered on; incompatible peripheral. | Verify USB/PS2 cable connections. Ensure the KVM switch is powered on. Try a different keyboard/mouse to rule out peripheral issues. |
| Cannot switch between computers. | Incorrect hotkey sequence; KVM frozen; computer not active. | Ensure correct hotkey sequence is used. Try using the front panel buttons. Power cycle the KVM switch. Ensure the target computer is powered on and active. |
| Intermittent connection. | Faulty cables; power fluctuations; KVM overheating. | Replace KVM cables if suspected faulty. Ensure stable power supply. Check for adequate ventilation around the KVM switch. |
If the problem persists after trying these solutions, please contact customer support.
7. Specifications
Below are the technical specifications for the TK-803R KVM Switch:
| Attribute | Value |
|---|---|
| Model | TK-803R |
| Number of Ports | 8 |
| Compatibility | USB, PS/2 |
| Operation Mode | Manual |
| Current Rating | 1.5 Amps |
| Operating Voltage | 5 Volts |
| Contact Type | Mechanical |
| Connector Type | USB, PS/2 |
| Contact Material | Alloy Steel |
| Manufacturer | TRENDNET |
| Date First Available | April 2, 2025 |
8. Warranty and Support
This product is manufactured by TRENDNET. For specific warranty information, please refer to the warranty card included with your product or visit the official TRENDNET website. Keep your purchase receipt as proof of purchase for warranty claims.
For technical support, troubleshooting assistance beyond this manual, or to inquire about replacement parts, please contact TRENDNET customer support through their official channels. Contact information can typically be found on the manufacturer's website or product packaging.
Online Resources: For the latest drivers, firmware updates, and additional support documentation, please visit the manufacturer's official website.