
1. Introduction
This manual provides detailed instructions for the assembly, operation, maintenance, and troubleshooting of your Reljofum 6'x9' Aluminum-Framed Polycarbonate Greenhouse. Please read this manual thoroughly before beginning assembly or use to ensure proper function and safety.

Image 1.1: Overview of the Reljofum 6'x9' Aluminum-Framed Polycarbonate Greenhouse.
2. Safety Information
Your safety is paramount. Adhere to the following guidelines during assembly and use:
- Always wear gloves when handling components, especially those with sharp edges.
- Exercise caution when lifting heavy components. It is recommended to have at least two people for assembly.
- Ensure the greenhouse is properly anchored to the ground to prevent damage or injury during high winds.
- Keep roof vents clear of debris to maintain proper ventilation and prevent structural strain.
- Avoid prolonged direct exposure to sunlight inside the greenhouse without proper protection due to UV rays.
- Follow all manufacturer's instructions for assembly, use, and maintenance.
3. Package Contents
Before beginning assembly, verify that all components are present and undamaged. Refer to the parts list provided in your packaging. Key components include:
- Aluminum frame profiles and connectors
- UV-protected polycarbonate panels
- Roof vent assembly
- Door frame and hardware
- Fasteners and sealing strips
Note: This product is typically shipped in two boxes, which may arrive at different times.
4. Setup and Assembly
Assembly of the Reljofum greenhouse is designed for efficiency, but requires careful attention to detail. It is recommended that two people perform the installation, which typically takes several hours.
4.1 Site Preparation
Choose a level, stable location for your greenhouse. Ensure adequate drainage and clear any obstructions. The overall dimensions are approximately 109.84" W x 66.54" D x 76.77" H.

Image 4.1: Greenhouse dimensions and installation requirements.
4.2 Frame Assembly
Begin by assembling the aluminum frame according to the numbered diagrams in your separate assembly guide. The frame features an upgraded design for enhanced stability.
4.3 Panel Installation (Quick-Assembly Design)
The greenhouse utilizes a quick-assembly system with slide-in polycarbonate panels. Follow these general steps:
- Step 1: Insertion Slot - Insert the panel into the designated slot on the frame.
- Step 2: Insert PC Panels - Slide the polycarbonate panel fully into place.
- Step 3: Locking - Secure the panel by performing a half-turn on the locking mechanism.

Image 4.2: Quick-assembly panel installation steps.

Image 4.3: Detail of the quick-assembly locking mechanism.
4.4 Door and Roof Vent Installation
Install the door frame and hang the door. The door size is 22.83" W x 60.63" H. Install the adjustable roof vent on any panel as desired. Ensure all moving parts operate smoothly.
5. Operation
5.1 Roof Vent Operation
The greenhouse is equipped with an adjustable roof vent to facilitate air circulation. Open the vent to release excess heat and humidity, and close it to retain warmth. Proper ventilation is crucial for plant health.

Image 5.1: Detail of the adjustable roof vent for excellent ventilation.
5.2 Door Operation
The single door features a secure lockable handle. Ensure the door is properly closed and locked to protect the interior from wind and unauthorized access.

Image 5.2: Lockable door and reinforced side support.
5.3 All-Season Use
The greenhouse is designed for all-season use, offering ventilation, waterproofing, cold protection, and UV protection for your plants.

Image 5.3: All-season gardening partner features.
6. Maintenance
Regular maintenance will extend the life and performance of your greenhouse.
- Cleaning: Periodically clean the polycarbonate panels with mild soap and water to remove dirt and algae, ensuring maximum light transmission. Avoid abrasive cleaners.
- Frame Inspection: Annually inspect the aluminum frame for any loose fasteners or signs of corrosion. Tighten as necessary.
- Ventilation: Ensure the roof vent mechanism is free of debris and operates smoothly.
- Anchoring: Regularly check that the greenhouse remains securely anchored, especially after strong winds.
- Winter Care: While designed for winter, heavy snow accumulation should be cleared from the roof to prevent structural stress.
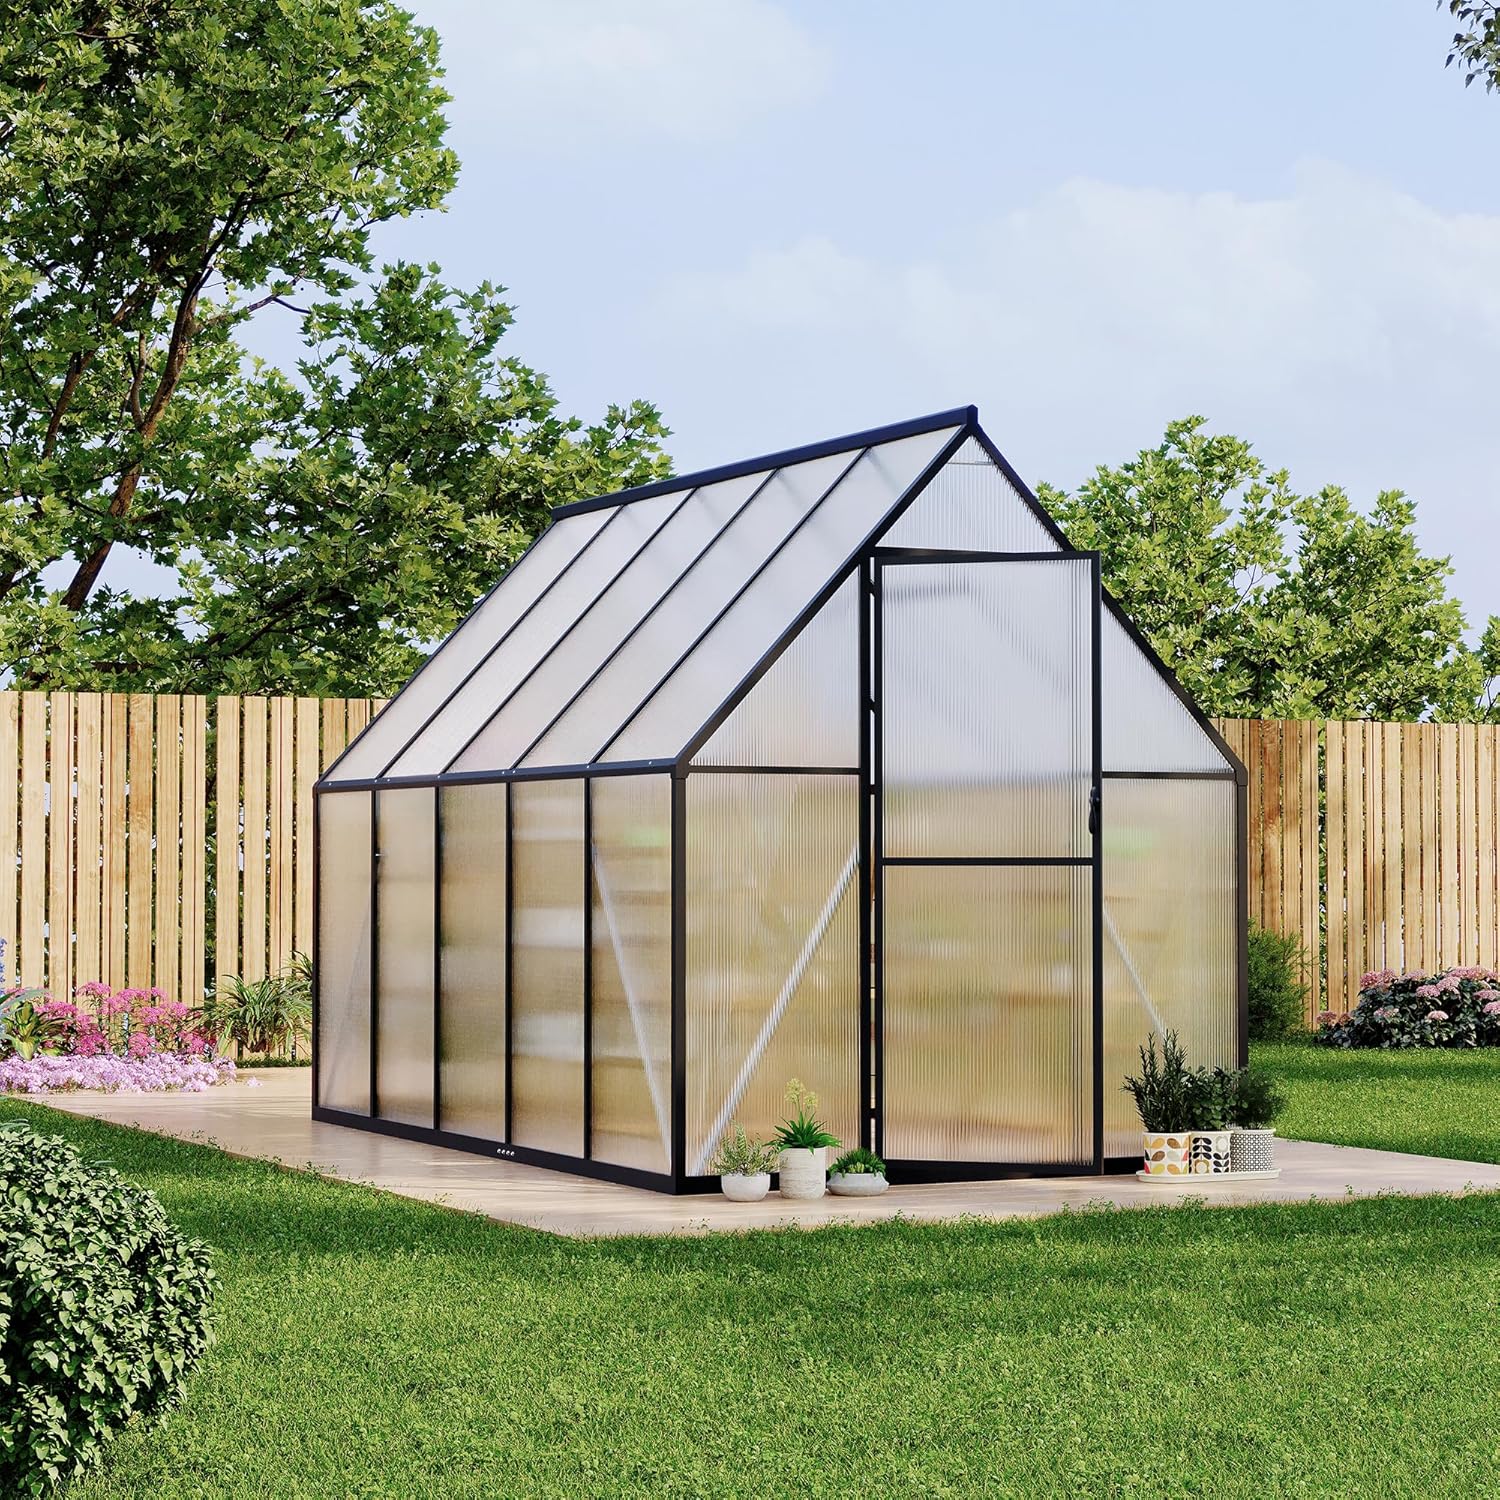
Image 6.1: Greenhouse in a winter environment.
7. Troubleshooting
This section addresses common issues you might encounter with your greenhouse.
- Panels not staying in place: Ensure all locking mechanisms are fully engaged (a half-turn is required). Check that panels are correctly seated in their insertion slots.
- Poor ventilation: Verify that the roof vent is open and clear of obstructions. Consider adding additional ventilation if plants show signs of overheating.
- Water leakage: Inspect sealing strips around panels and the door. Ensure all fasteners are tight.
- Door sticking: Check for debris in the door track or hinges. Lubricate hinges if necessary.
If you encounter issues not covered here, please contact customer support.
8. Specifications
| Feature | Specification |
|---|---|
| Brand | Reljofum |
| Model Number | SF-7HpgybErHOVUJmiJOP7rjghi8j |
| Size | 6x9 FT (Overall: 109.84" W x 66.54" D x 76.77" H) |
| Frame Material | Alloy Steel (Aluminum-Framed) |
| Cover Material | Polycarbonate (PC) |
| Number of Vents | 1 (Adjustable Roof Vent) |
| Door Size | 22.83" W x 60.63" H |
| Item Weight | 51 pounds |
| Wind Rating | 50 mph |
| Snow Load Capacity | 40 KGS/SQM |
| UPC | 199108906892 |
9. Warranty and Support
For warranty information or technical support, please refer to the documentation included with your purchase or contact Reljofum customer service. Keep your purchase receipt for warranty claims.
Customer Support is available for assistance with product inquiries or issues.