
1. Important Safety Instructions
Read all instructions carefully before operating this appliance. Failure to follow these instructions may result in electric shock, fire, and/or serious injury.
General Safety
- Always wear appropriate personal protective equipment, including safety glasses, gloves, and sturdy footwear.
- Keep children, bystanders, and pets away from the operating area.
- Do not operate the dethatcher/scarifier in wet conditions or rain.
- Inspect the work area for objects that could be thrown by the blades, such as rocks or debris, and remove them.
Electrical Safety
- Ensure the power cord is in good condition and free from damage. Do not use if the cord is frayed or cut.
- Use only an extension cord suitable for outdoor use and rated for the appliance's power requirements.
- Always disconnect the power supply before performing any maintenance, cleaning, or when the machine is unattended.
Operation Safety
- Never operate the machine without the collection bag or guard in place.
- Be aware of the rotating blades. Keep hands and feet away from openings when the machine is running.
- Do not force the machine; allow it to work at its own pace.
- Exercise caution when pulling the machine towards you.
2. Product Overview
The QSOSTNS 13-inch 2-in-1 Electric Dethatcher Scarifier is designed to improve lawn health by efficiently removing thatch and aerating the soil. It features a powerful 15 Amp motor and offers both dethatching and scarifying functions with easily interchangeable blades.
Key Features:
- 2-in-1 Functionality: Easily switch between dethatching and scarifying modes.
- Powerful Motor: 15 Amp electric motor for efficient performance.
- Adjustable Height: 4 raking height adjustments to suit various lawn conditions.
- Large Collection Bag: 58QT capacity for extended operation without frequent emptying.
- Safety Features: Double safety switch for secure operation.
Components:
Familiarize yourself with the main components of your dethatcher/scarifier:
- Upper Handle
- Lower Handle
- Motor Housing
- Wheels (4x)
- Grass Collector Bag
- Safety Switch
- Height Adjustment Lever
- Dethatcher/Scarifier Cylinder (interchangeable)

Figure 2.1: Product Components Overview. This image displays the main parts of the dethatcher/scarifier, highlighting the safety switch, grass collector bag, sturdy wheels, scarifier carry handle, and the height adjustment system for user reference.
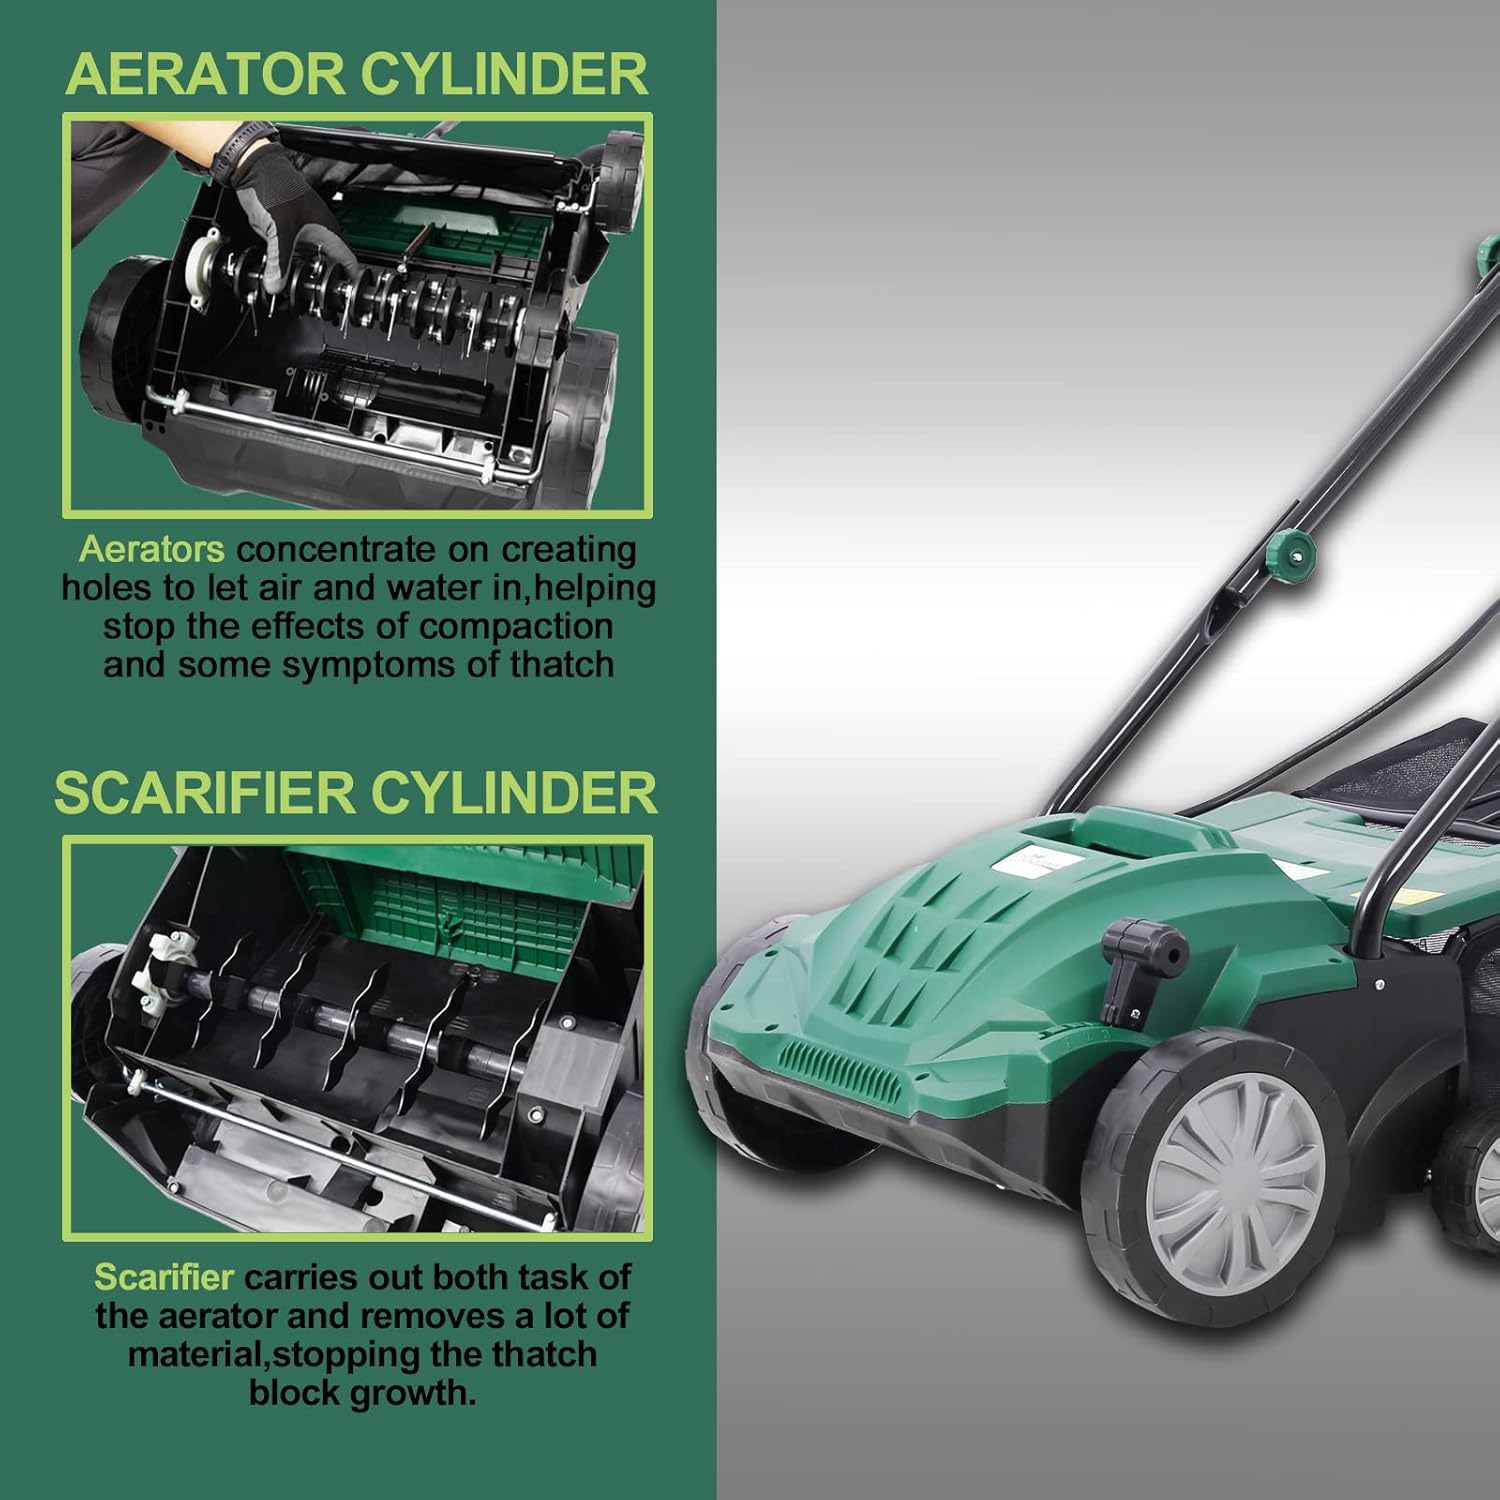
Figure 2.2: Aerator and Scarifier Cylinders. This image illustrates the two types of cylinders: the aerator cylinder designed to create holes for air and water, and the scarifier cylinder for removing thatch and dead material.
3. Assembly
Your dethatcher/scarifier requires some assembly before first use. Follow these steps carefully.
3.1 Handle Assembly
- Attach the lower handle to the main unit using the provided bolts and knobs. Ensure it is securely fastened.
- Connect the upper handle to the lower handle, aligning the holes and securing with the remaining bolts and knobs.
- Ensure all cables are routed correctly and not pinched during assembly.
3.2 Collection Bag Attachment
- Lift the rear flap of the dethatcher/scarifier.
- Hook the collection bag onto the designated attachment points under the flap. Ensure it is firmly seated to prevent debris from escaping.

Figure 3.1: Attaching the Grass Collection Bag. This image shows the process of securely attaching the collection bag to the main unit, ensuring proper fitment for effective debris collection.
3.3 Blade Cylinder Installation/Replacement
The unit comes with interchangeable cylinders for dethatching and scarifying. Always ensure the unit is unplugged before changing cylinders.
- Disconnect the power cord from the outlet.
- Turn the unit on its side to access the blade compartment.
- Locate the cylinder release mechanism (refer to the diagram in Section 2).
- Carefully remove the installed cylinder.
- Insert the desired cylinder (dethatcher or scarifier) into the compartment, ensuring it clicks securely into place.
- Close the compartment cover.
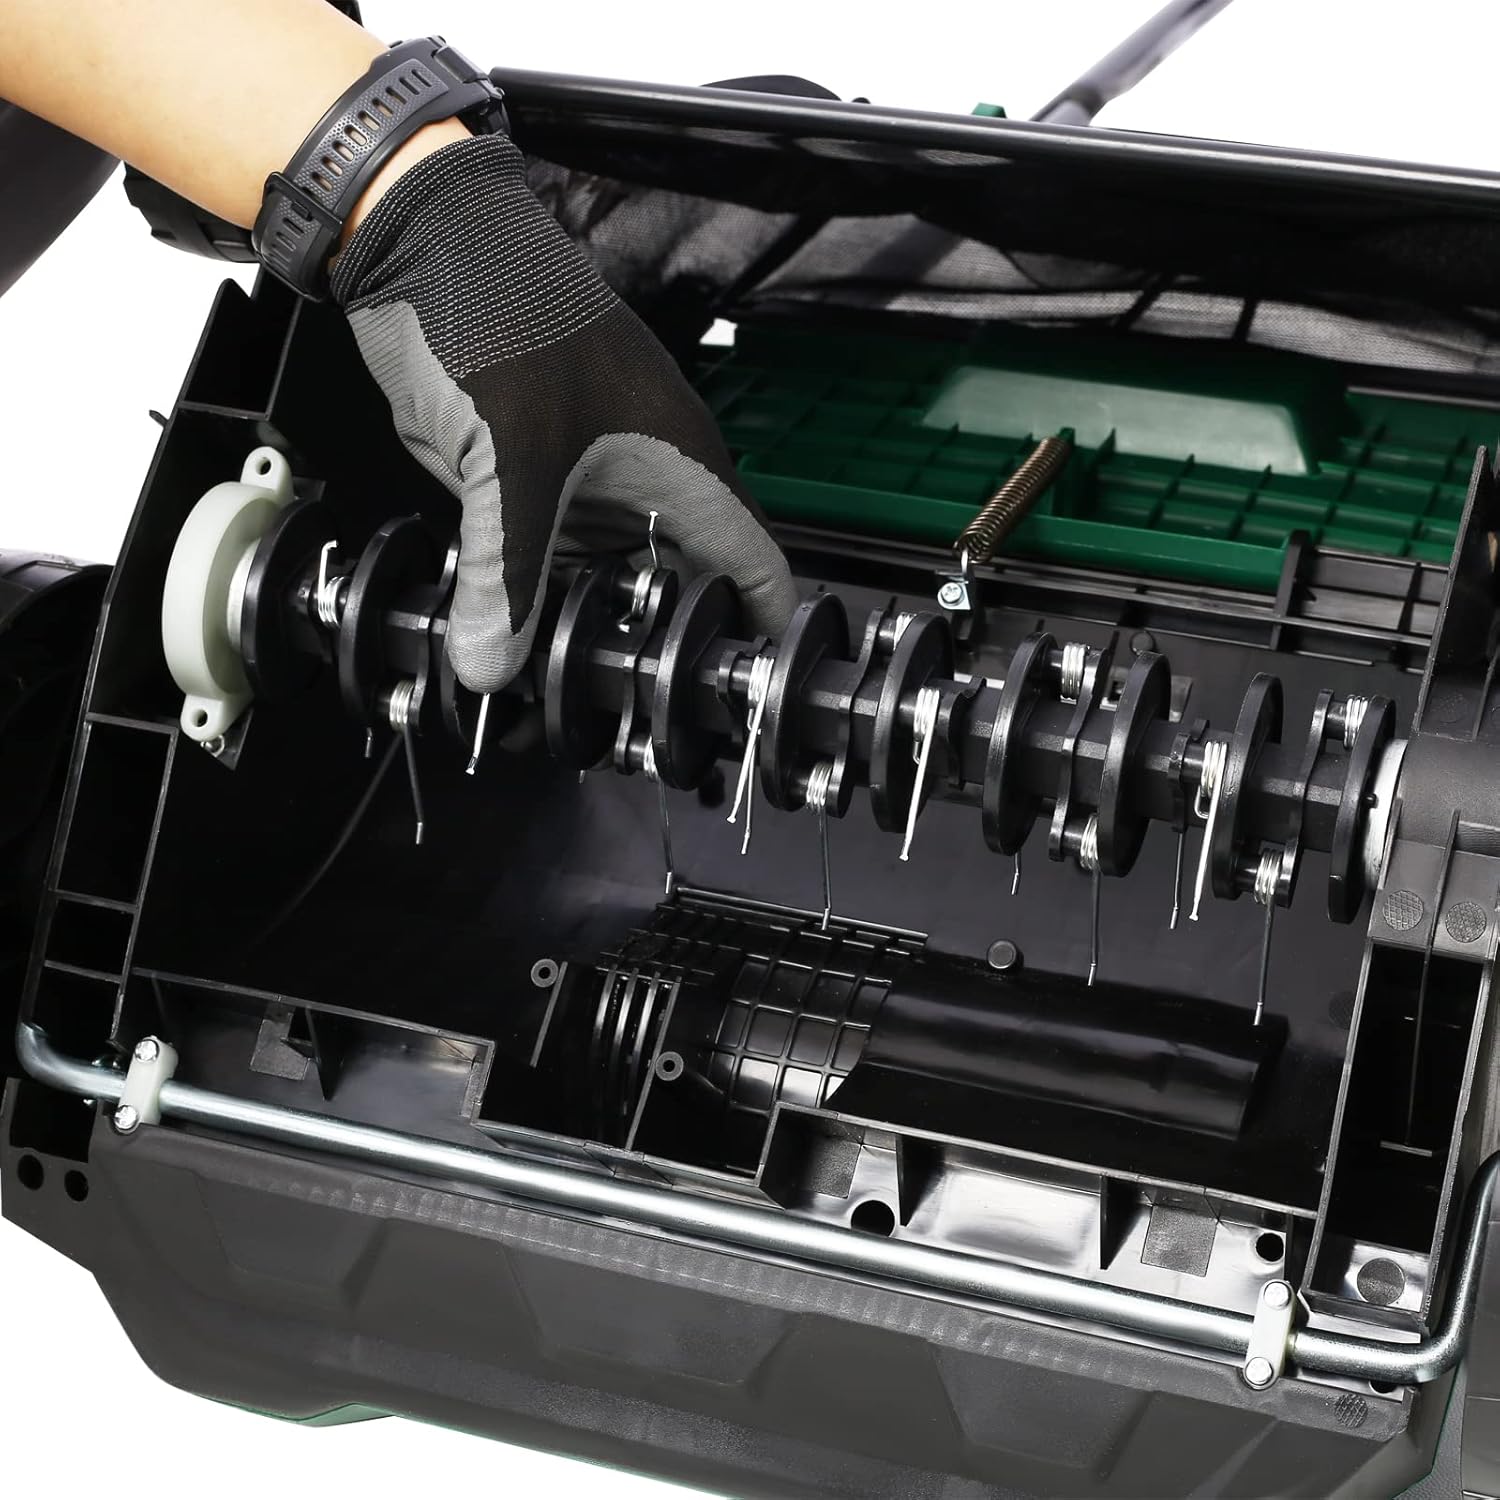
Figure 3.2: Blade Cylinder Installation. This image illustrates how to properly install or remove the blade cylinder, emphasizing the importance of secure placement for safe operation.
4. Operating Instructions
Follow these steps for safe and effective operation of your dethatcher/scarifier.
4.1 Pre-Operation Checks
- Ensure all assembly steps are complete and secure.
- Check the power cord for any damage.
- Verify the collection bag is properly attached.
- Clear the work area of any obstacles or debris.
4.2 Adjusting Working Height
The unit features 4 raking height adjustments to customize the depth of operation. Select the appropriate height based on your lawn's condition and desired outcome.
- Ensure the unit is unplugged.
- Locate the height adjustment lever on the side of the unit.
- Move the lever to select one of the four available height settings. A lower setting will result in a deeper cut.

Figure 4.1: Adjustable Cylinder Knob. This image shows the knob used to adjust the working depth, with markings for four different height settings to control how deep the tines or blades penetrate the thatch.
4.3 Starting and Stopping the Unit
The unit is equipped with a double safety switch for user protection.
- Plug the power cord into a suitable outdoor extension cord, then into a grounded electrical outlet.
- To start: Press and hold the safety button, then squeeze the operating lever. Release the safety button once the motor starts.
- To stop: Release the operating lever. The motor will shut off automatically.
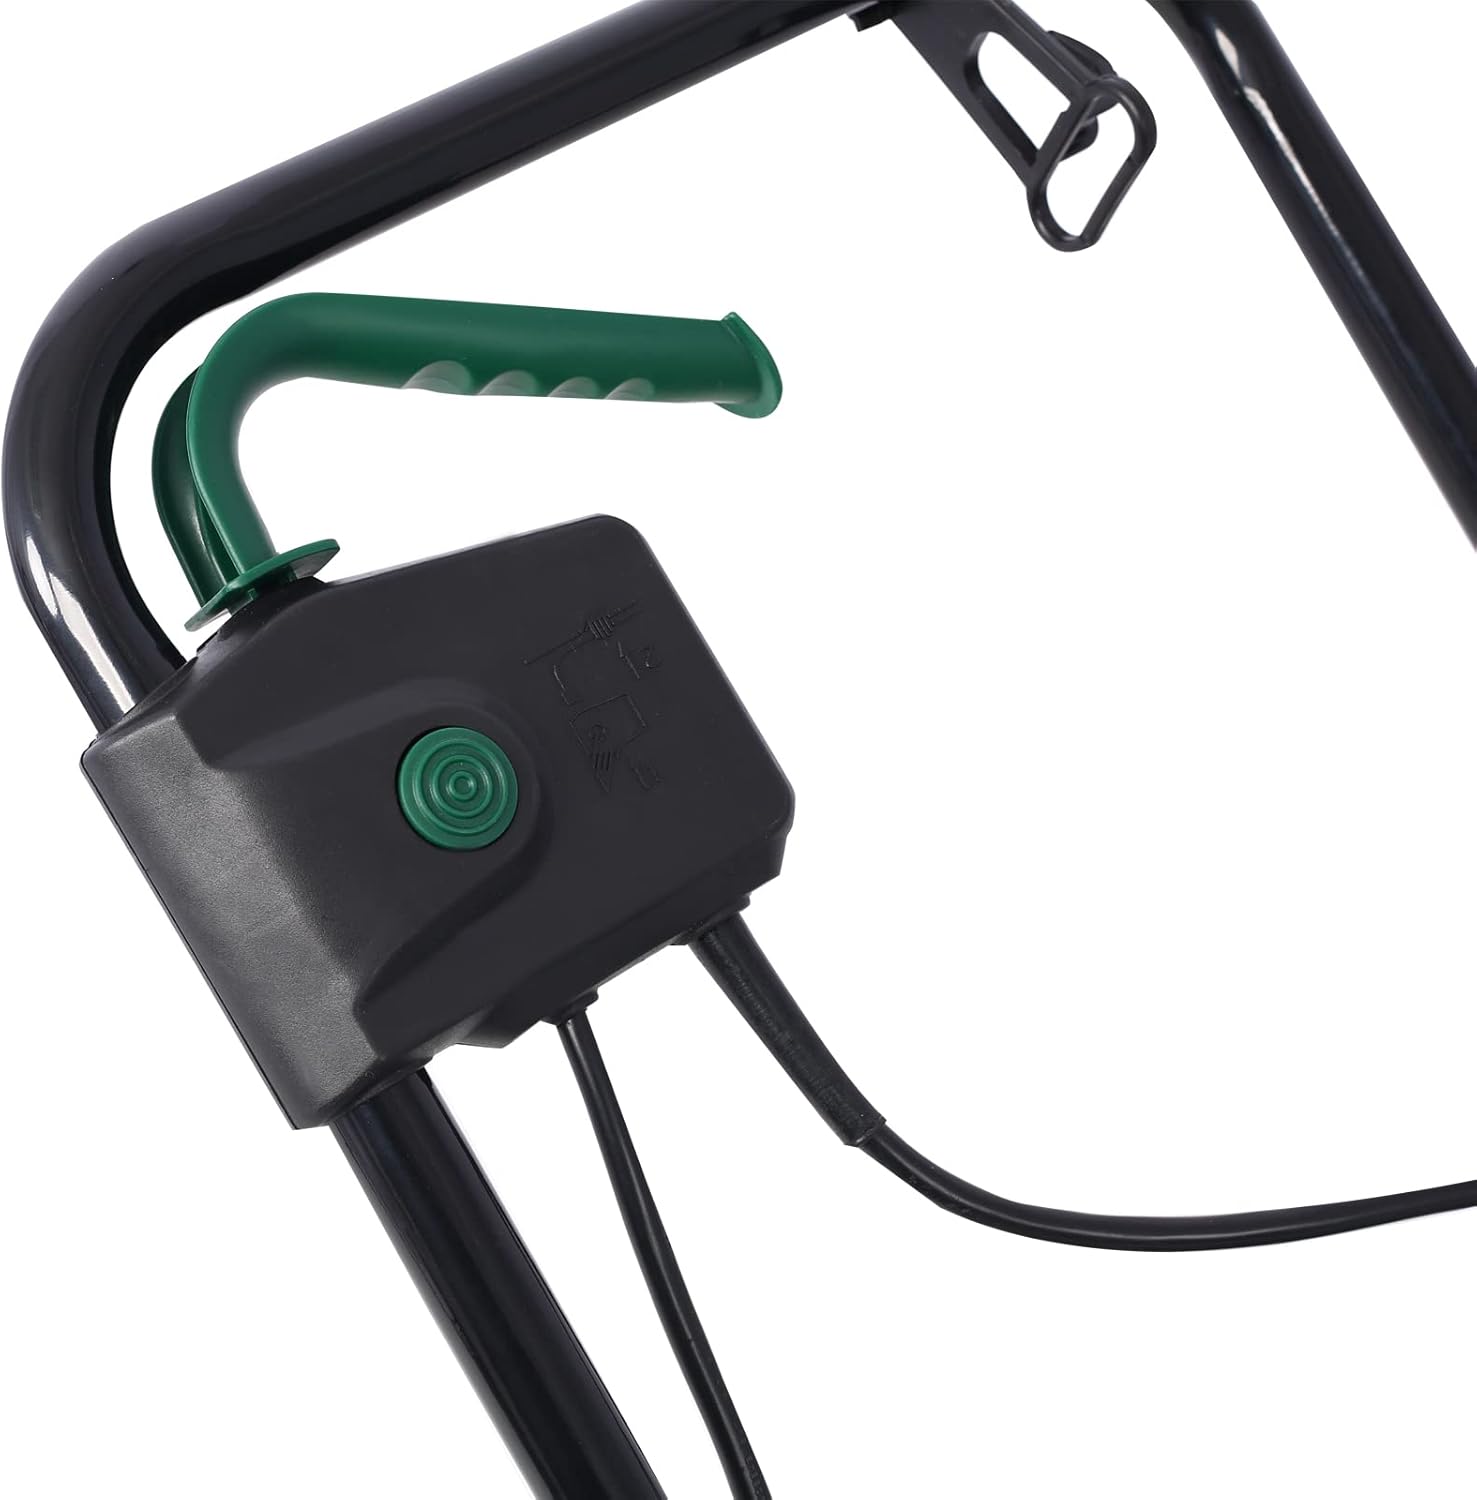
Figure 4.2: Safety Switch and Operating Lever. This image provides a detailed view of the safety button and the operating lever, demonstrating the dual-action mechanism required to start the machine.
4.4 Operating Technique
- Begin operating on a lower height setting and gradually increase if needed.
- Push the unit forward at a steady, moderate pace. Avoid rushing or stopping abruptly.
- Overlap each pass slightly to ensure complete coverage of the lawn.
- For best results, operate in a straight line, then turn and make another pass.

Figure 4.3: 13-Inch Dethatching Path. This image illustrates the effective working width of the dethatcher, showing how it clears a 13-inch path to allow air, water, and nutrients to reach the grass roots.
4.5 Emptying the Collection Bag
Monitor the collection bag during operation. Empty it regularly to maintain optimal performance and prevent clogging.
- Stop the unit and disconnect the power cord.
- Lift the rear flap and unhook the collection bag.
- Empty the collected thatch and debris into a suitable receptacle.
- Reattach the collection bag securely before resuming operation.
5. Maintenance
Regular maintenance ensures the longevity and optimal performance of your dethatcher/scarifier.
5.1 Cleaning
- Always unplug the unit before cleaning.
- Use a stiff brush or compressed air to remove debris from the motor housing and blade compartment.
- Wipe down exterior surfaces with a damp cloth. Do not use harsh chemicals or abrasive cleaners.
- Clean the collection bag after each use.
5.2 Blade Inspection and Replacement
- Regularly inspect the dethatcher tines and scarifier blades for wear or damage.
- Replace worn or damaged blades promptly to maintain effective performance. Refer to Section 3.3 for blade cylinder replacement instructions.
5.3 Storage
- Clean the unit thoroughly before storing.
- Store the dethatcher/scarifier in a dry, secure location, out of reach of children.
- The handle can be folded for compact storage.
6. Troubleshooting
If you encounter issues with your dethatcher/scarifier, refer to the table below for common problems and solutions.
| Problem | Possible Cause | Solution |
|---|---|---|
| Unit does not start | No power supply Safety switch not engaged Damaged power cord | Check power outlet and extension cord Ensure safety button is pressed before squeezing lever Inspect cord for damage; replace if necessary |
| Poor dethatching/scarifying performance | Incorrect height setting Worn or damaged blades Collection bag full | Adjust to a lower height setting Inspect and replace blades Empty collection bag |
| Excessive vibration | Damaged or unbalanced blades Loose components | Inspect and replace blades Check all fasteners and tighten as needed |
| Motor overheats | Overloading the unit Blocked ventilation | Reduce working load; operate at a slower pace Clean ventilation openings |
7. Specifications
| Feature | Specification |
|---|---|
| Brand | QSOSTNS |
| Model | 13INCH |
| Power Source | Electric |
| Motor | 15 Amp |
| Working Width | 13 Inches |
| Raking Height Adjustments | 4 Positions |
| Collection Bag Capacity | 58 QT |
| Product Dimensions (D x W x H) | 40.2" x 37.4" x 20.1" |
| UPC | 748305514852 |
| Manufacturer Model Number | 2025.4.2.1 |

Figure 7.1: Product Dimensions. This image provides a clear visual representation of the dethatcher's overall dimensions, including its length, width, and height.
8. Warranty and Support
QSOSTNS products are manufactured to high-quality standards. For warranty information or technical support, please refer to the documentation included with your purchase or contact the retailer/manufacturer directly.
Please retain your proof of purchase for any warranty claims.