
1. Introduction
Thank you for choosing the Veemoon MIG/MMA-160A 3-in-1 Semi-Automatic Welding Machine. This versatile and portable welding equipment is designed for both professionals and DIY enthusiasts, offering MIG (Gasless Flux-Cored) and MMA (Stick) welding capabilities. Featuring inverter technology and a digital display, this 110V unit provides efficient and stable welding performance for various applications.
This manual provides essential information for the safe and effective operation, setup, and maintenance of your welding machine. Please read it thoroughly before use and retain it for future reference.

Image 1.1: The Veemoon MIG/MMA-160A welding machine showcasing its portable design with a convenient carrying strap.
2. Safety Information
Welding operations involve significant risks. Always prioritize safety to prevent injury or damage. Adhere to all local and national safety regulations.
General Safety Precautions:
- Eye and Face Protection: Always wear a welding helmet with appropriate shade lenses to protect against arc flash and sparks.
- Body Protection: Wear flame-resistant clothing, heavy-duty gloves, and protective footwear. Avoid synthetic materials.
- Ventilation: Ensure adequate ventilation to remove welding fumes, which can be hazardous to health. Work in a well-ventilated area or use fume extraction equipment.
- Electrical Safety: Ensure the machine is properly grounded. Do not operate in wet conditions. Inspect cables for damage before each use. Never touch live electrical parts.
- Fire Prevention: Keep flammable materials away from the welding area. Have a fire extinguisher readily available. Sparks and hot metal can travel considerable distances.
- Work Area: Keep the work area clean and free of clutter. Ensure stable footing.
- Children and Bystanders: Keep unauthorized persons, especially children, away from the welding area.
- Machine Maintenance: Perform regular maintenance as described in this manual. Disconnect power before performing any maintenance or repairs.
3. Package Contents
Upon unpacking, please verify that all items listed below are present and undamaged. If any items are missing or damaged, contact your supplier immediately.
- 1 x Veemoon MIG/MMA-160A Welding Machine
- 1 x Ground Clamp (1.2m, 16mm², 300A)
- 1 x Electrode Holder (1.8m, 16mm², 200A)
- 1 x MIG Welding Torch (2m, 14AK)
- 1 x Wire Brush
- 1 x Welding Mask (basic)
- 1 x Shoulder Strap
- 1 x Roll of Flux-Cored Welding Wire
- 1 x User Manual (this document)
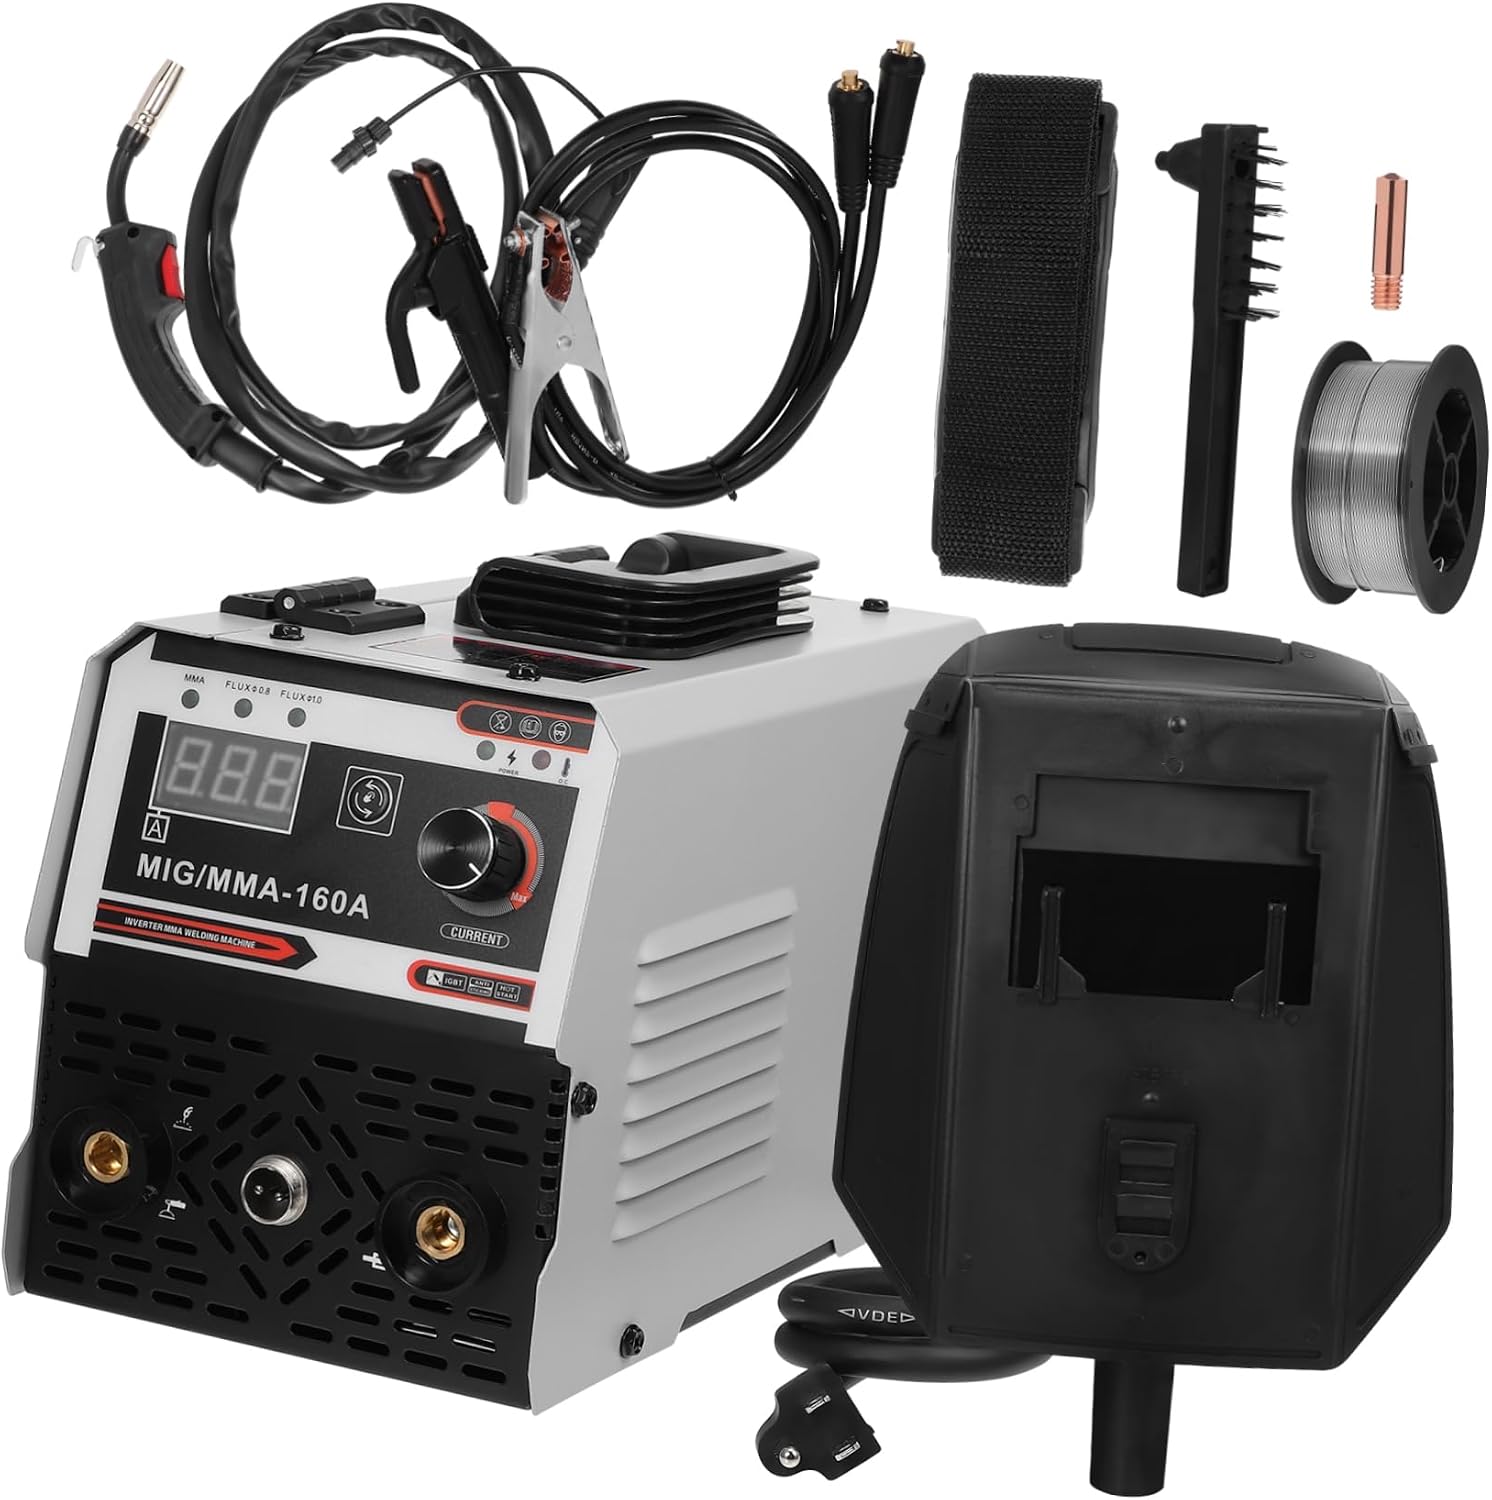
Image 3.1: Complete package contents of the Veemoon MIG/MMA-160A welding machine.
4. Product Overview and Controls
The Veemoon MIG/MMA-160A features a compact design with intuitive controls for ease of use.

Image 4.1: Front panel of the welding machine, highlighting user-friendly controls.
Key Components:
- Digital Display: Shows the welding current (Amperes).
- Mode Selection Buttons: Allows switching between MMA, MIG Flux 0.8mm, and MIG Flux 1.0mm modes.
- Current Adjustment Knob: Used to set the desired welding current (50-160A range).
- Output Terminals: Connections for the ground clamp and welding torch/electrode holder.
- Wire Feed Mechanism (inside): For MIG welding wire.

Image 4.2: The machine supports both MIG and MMA welding, offering dual functionality.
5. Setup
5.1 Power Connection
- Ensure the welding machine's power switch is in the OFF position.
- Connect the power cord to a standard 110V AC outlet. The machine requires a single-phase 110V input.
- Verify the outlet can provide sufficient current for welding operations.
5.2 Welding Wire Installation (MIG Gasless)
Follow these steps to install the flux-cored welding wire for MIG (Gasless) operation:

Image 5.1: Step-by-step guide for welding wire installation.
- Open the side panel of the welding machine.
- Locate the wire spool holder.
- Place the welding wire spool onto the holder, ensuring it rotates freely.
- Thread the wire through the guide tube.
- Ensure the wire passes through the drive roller mechanism.
- Close the drive roller tension arm, applying appropriate pressure to prevent slippage.
- Feed the wire into the MIG torch liner.
- Manually push the wire through the torch until it emerges from the nozzle.
- Close the side panel.
5.3 Torch and Clamp Connection
- Ground Clamp: Connect the ground clamp cable to the negative (-) output terminal on the front panel. Securely attach the ground clamp to the workpiece or a clean, bare metal part of the welding table.
- MIG Torch: Connect the MIG welding torch cable to the positive (+) output terminal. Ensure a secure connection.
- MMA Electrode Holder: For MMA welding, connect the electrode holder cable to the positive (+) output terminal and the ground clamp to the negative (-) output terminal.
6. Operating Instructions
6.1 Power On and Mode Selection
- Turn on the power switch located on the rear of the machine. The digital display will illuminate.
- Press the mode selection button to choose your desired welding process:
- MMA: For Stick welding.
- FLUX 0.8: For MIG Gasless welding with 0.8mm flux-cored wire.
- FLUX 1.0: For MIG Gasless welding with 1.0mm flux-cored wire.
- Adjust the current using the large knob on the front panel. The digital display will show the set amperage.
6.2 MIG (Gasless Flux-Cored) Welding
This machine supports gasless MIG welding, which uses flux-cored wire that produces its own shielding gas as it burns, eliminating the need for an external gas cylinder.
- Wire Diameter: Ensure the selected mode (FLUX 0.8 or FLUX 1.0) matches the wire diameter you are using.
- Current Setting: Adjust the current based on the material thickness and wire diameter. Start with recommended settings and fine-tune as needed.
- Technique: Maintain a consistent travel speed and stick-out (distance from contact tip to workpiece). Use a slight push or drag angle depending on the application.

Image 6.1: Example of MIG welding in progress.
6.3 MMA (Stick) Welding
MMA welding is suitable for a variety of metals and is often preferred for outdoor or windy conditions.
- Electrode Selection: Choose the appropriate electrode type and diameter for your material and application. The machine supports 1.6-3.2mm electrodes.
- Current Setting: Set the current according to the electrode manufacturer's recommendations and material thickness.
- Technique: Strike an arc by lightly touching and then quickly lifting the electrode from the workpiece. Maintain a consistent arc length and travel speed.

Image 6.2: Example of MMA (stick) welding in progress.
7. Maintenance
Regular maintenance ensures the longevity and optimal performance of your welding machine.
- Cleaning: Periodically clean the machine's exterior with a dry, soft cloth. Use compressed air to blow out dust and debris from the internal components, especially cooling vents. Ensure the machine is unplugged before cleaning.
- Cable Inspection: Regularly inspect all welding cables, ground clamp, electrode holder, and MIG torch for cuts, cracks, or loose connections. Replace damaged components immediately.
- MIG Torch Maintenance: Clean the MIG torch nozzle and contact tip regularly. Replace the contact tip if it becomes worn or clogged. Ensure the liner is free of obstructions.
- Storage: Store the welding machine in a clean, dry environment, away from excessive dust, moisture, and corrosive materials.
8. Troubleshooting
This section addresses common issues you might encounter. For problems not listed here, or if solutions do not resolve the issue, contact customer support.
| Problem | Possible Cause | Solution |
|---|---|---|
| Machine does not power on | No power supply; Faulty power cord; Internal fuse blown | Check power outlet and circuit breaker; Inspect power cord; Contact service for fuse replacement. |
| No welding arc (MMA) | Poor ground connection; Incorrect current setting; Wet or faulty electrode | Ensure ground clamp is on clean metal; Adjust current; Use dry, suitable electrodes. |
| No wire feed (MIG) | Wire tangled; Drive roller tension incorrect; Contact tip clogged; Liner obstructed | Check wire spool; Adjust drive roller tension; Clean/replace contact tip; Clear liner. |
| Poor weld quality | Incorrect current/voltage; Improper technique; Contaminated workpiece | Adjust settings; Practice technique; Clean workpiece thoroughly. |
| Overheating indicator on | Exceeded duty cycle; Blocked ventilation | Allow machine to cool down; Ensure clear ventilation paths. |
9. Specifications
Technical specifications for the Veemoon MIG/MMA-160A Welding Machine:
| Feature | Specification |
|---|---|
| Model | MIG/MMA-160A |
| Input Voltage | Single phase: 110V |
| Input Frequency | 50-60Hz |
| Rated Input Power Capacity | 5 kVA |
| Non-load Voltage | 44V |
| Real Current Output | 120A |
| Digital Display Range | 50-160A |
| Rated Duty Cycle | 60% |
| Efficiency | 85% |
| MIG Flux Wire Diameter | 0.8-1.0mm |
| MMA Electrode Diameter | 1.6-3.2mm |
| Protection Class of Case | IP21S |
| Class of Insulation | F |
| Quick Joint Size | 10-25mm |
| Dimensions (L x W x H) | 11.02 x 9.25 x 5.71 inches (28.00 x 23.50 x 14.50 cm) |
| Item Weight | 12.14 pounds |
| Material | Plastic, Iron, Aluminum |
10. Warranty and Support
Veemoon products are manufactured to high-quality standards. For information regarding warranty coverage, please refer to the documentation provided at the time of purchase or contact your retailer.
If you encounter any issues or require technical assistance, please contact the seller or manufacturer's customer support. When contacting support, please have your product model number (MIG/MMA-160A) and serial number (if applicable) ready.


