1. Important Safety Information
Read all instructions before use. Keep this manual for future reference.
- This product is designed for use exclusively with the PopBloom RL180 LED Aquarium Light. Do not attempt to install it on other lighting models.
- Ensure the aquarium light is unplugged from the power source before installation, removal, or maintenance of the shade.
- Handle the shade components carefully to prevent damage. Avoid dropping or bending the parts.
- Do not obstruct the ventilation openings of the light fixture with the shade or any other objects. Proper airflow is crucial for heat dissipation.
2. Product Overview
The PopBloom RL180 LED Aquarium Light Shade and Diffuser is an accessory designed to enhance your aquarium lighting setup. It effectively reduces light spillage outside the tank, focusing illumination directly into your marine reef coral environment. This also contributes to a cleaner, more organized aesthetic for your aquarium.
2.1 Package Contents
Please verify that all the following components are present in your package before proceeding with installation:
- 2x Fixed Slides (for front and back of the light fixture)
- 2x Snap-on Slides (for the side panels)

Image: The individual components of the RL180 Light Shade, including two longer fixed slides and two shorter snap-on side slides.
3. Setup and Installation
Follow these steps carefully to correctly assemble and install the light shade onto your PopBloom RL180 LED Aquarium Light.
- Step 1: Attach Fixed Slides. Identify the two longer fixed slides. Align the tabs on one fixed slide with the corresponding slots on one end of your PopBloom RL180 LED light fixture. Gently push until it snaps securely into place. Repeat this process for the second fixed slide on the opposite end of the light fixture.
- Step 2: Attach Snap-on Slides. Take one of the shorter snap-on side panels. Align its top and bottom edges with the grooves on the installed fixed slides. Apply gentle, even pressure and push firmly until it clicks securely into position.
- Step 3: Complete Assembly. Repeat Step 2 for the remaining snap-on side panel. Ensure all four pieces are securely attached and the shade forms a complete, stable enclosure around the light fixture.
- Step 4: Verify Fit. Once assembled, gently check that the entire shade is stable and does not obstruct any of the light's ventilation openings. The design ensures proper airflow when correctly installed.

Image: A visual guide depicting the four sequential steps for assembling the light shade onto the RL180 LED fixture.
Note: The shade is designed for a precise fit. Do not force components if they do not align easily. Re-check alignment before applying pressure.
4. Operating Instructions
The PopBloom RL180 LED Aquarium Light Shade is a passive accessory. Once correctly installed, it requires no further operational steps. The functionality and operation of your PopBloom RL180 LED Aquarium Light remain entirely independent of the shade.
- The primary function of the shade is to direct light downwards, minimizing glare and light spill into the surrounding room.
- It also provides a clean, integrated appearance for your light fixture.
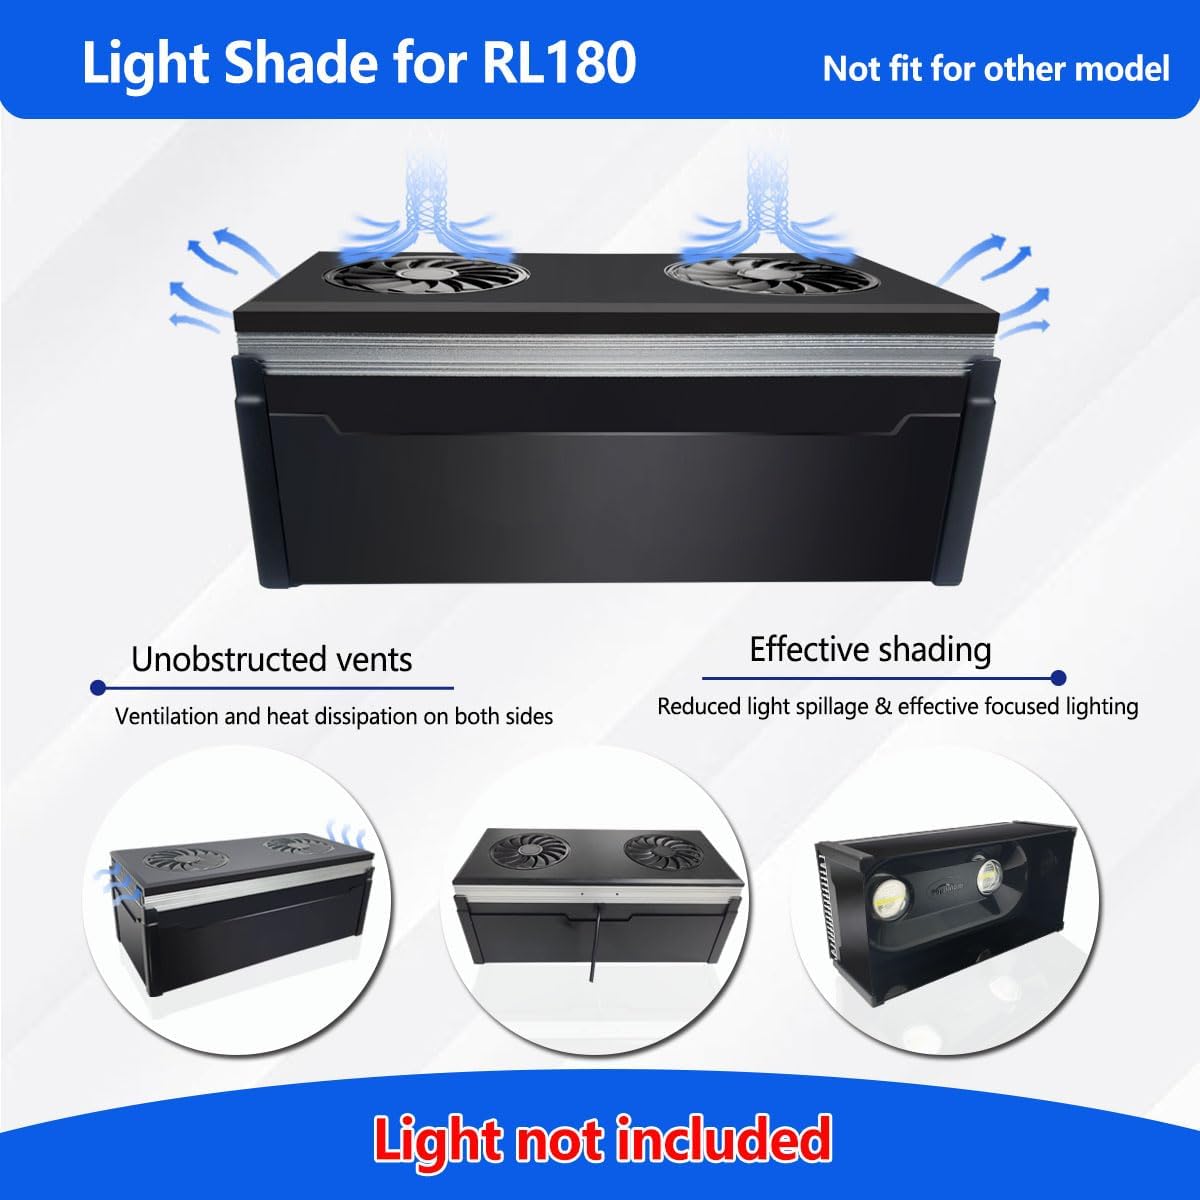
Image: An illustration of the RL180 light with the shade in place, demonstrating how it focuses light into the aquarium while maintaining clear pathways for heat dissipation.
5. Maintenance
Regular maintenance will help preserve the appearance and structural integrity of your light shade.
- Cleaning: Periodically wipe the exterior surfaces of the shade with a soft, lint-free, damp cloth. For stubborn marks, a mild, non-abrasive cleaner suitable for plastics can be used, followed by wiping with a clean, damp cloth. Avoid harsh chemicals, abrasive pads, or solvents, as these can damage the material.
- Inspection: Routinely check the shade for any signs of physical damage, cracks, or loose connections. Ensure all snap-on points remain secure.
- Removal: If temporary removal of the shade is necessary for deep cleaning of the light fixture or other maintenance, gently detach the snap-on side panels first, then carefully unclip the fixed slides. Avoid using excessive force during removal.
6. Troubleshooting
| Problem | Possible Cause | Solution |
|---|---|---|
| Shade does not fit securely or is loose. | Incorrect model of shade or improper alignment during installation. | Verify that you have the RL180 shade for the PopBloom RL180 light. Re-align all components carefully and apply gentle, even pressure until each piece snaps firmly into place. |
| Light fixture appears to be overheating after shade installation. | Ventilation openings on the light fixture are obstructed. | Immediately unplug the light. Inspect the shade installation to ensure it is not blocking any air vents on the light fixture. Remove any dust or debris that might be impeding airflow. The shade is designed to allow proper ventilation when installed correctly. |
| Shade components appear warped or damaged. | Exposure to excessive heat, direct sunlight, or physical impact. | Ensure the light fixture is operating within its normal temperature range. Avoid placing the aquarium or light in direct sunlight. If components are significantly damaged, replacement may be necessary. |
7. Specifications
- Model: PopBloom RL180 Shade
- Material: Acrylonitrile Butadiene Styrene (ABS)
- Compatibility: Exclusively designed for PopBloom RL180 LED Aquarium Light
- Approximate Dimensions (Assembled): 26.5 cm (Length) x 12.6 cm (Width) x 8.6 cm (Height)

Image: A detailed diagram illustrating the key dimensions of the light shade, including its length, width, and height measurements.
8. Warranty and Support
For specific warranty information regarding your PopBloom RL180 LED Aquarium Light Shade and Diffuser, please refer to the documentation provided with your original PopBloom RL180 LED Aquarium Light fixture. Accessory warranties may vary.
Manufacturer: Shenzhen PopBloom Electronic Technology Co., Ltd
For customer support, technical assistance, or to inquire about replacement parts, please visit the official PopBloom Store on Amazon or contact PopBloom customer service directly through their official channels.


