
1. Product Overview
This manual provides detailed instructions for the installation, setup, and operation of your Pyniro 7-inch Android 13 Car Stereo. Designed for compatible GMC Sierra Yukon and Chevy Silverado Tahoe models, this unit enhances your driving experience with advanced features and connectivity.
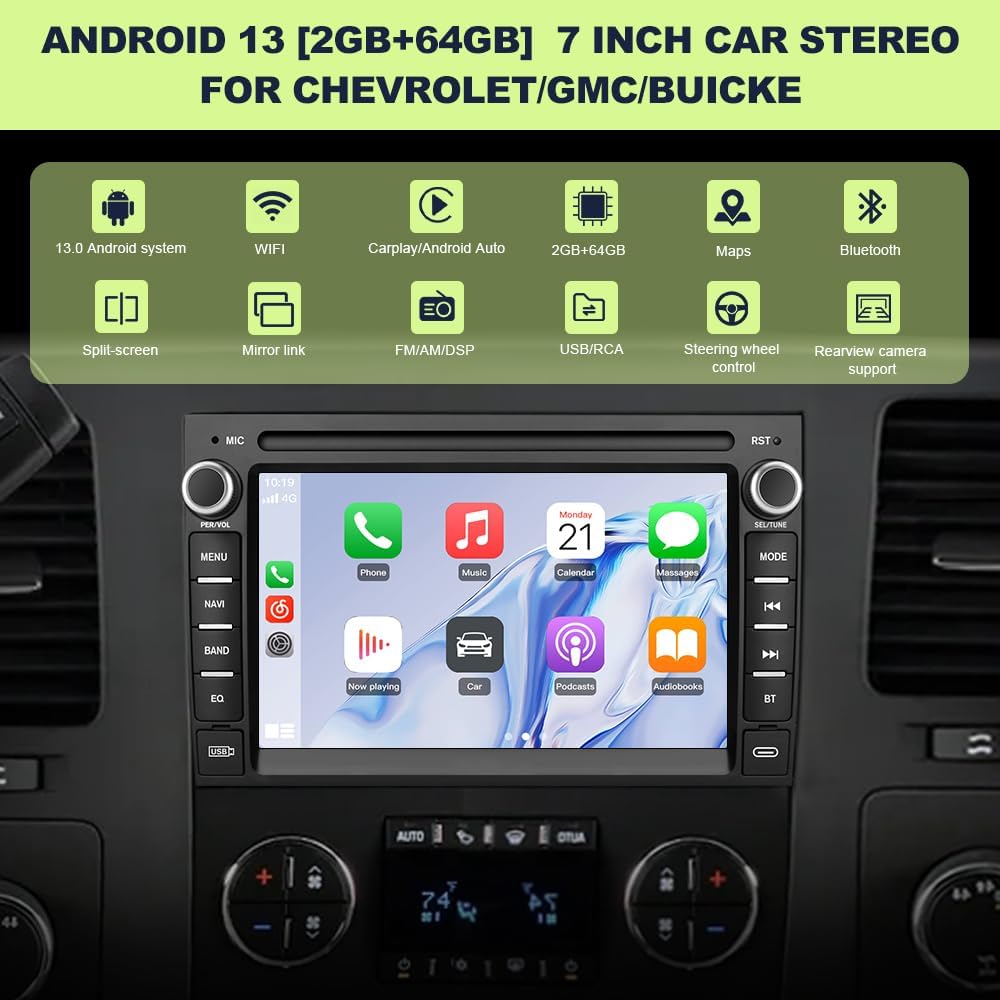
Image: Pyniro 7-inch Android 13 Car Stereo showcasing its main features like Android 13 system, Wi-Fi, CarPlay/Android Auto, 2GB+64GB memory, Maps, Bluetooth, Split-screen, Mirror link, FM/AM/DSP, USB/RCA, Steering wheel control, and Rearview camera support.
2. Key Features
- Android 13 Operating System: Equipped with Android 13, 2GB RAM, and 64GB ROM for secure, customizable, and compatible app usage.
- Online GPS Navigation: Features an external antenna for strong signal reception, supporting navigation apps like Google Maps and Waze via Wi-Fi, CarPlay, or Android Auto.
- Steering Wheel Control Compatibility: Retains original steering wheel control functionality for calls, track changes, and volume. Proper CANBUS connection is required for compatible vehicles.
- Versatile Multimedia Playback: Includes 2 USB ports, RCA inputs for subwoofer, speakers, and a rear camera. Supports FM/AM/RDS radio with 9 preset sound effects and manual equalizer adjustments.
- Rearview Camera Backup Assistance: Comes with a high-definition AHD 720P/CVBS rearview camera. The screen automatically displays a live feed with dynamic guidance lines when reversing. Compatible with original backup radar systems.
- Split-Screen Multitasking: The 7-inch IPS display supports split-screen mode, allowing simultaneous use of navigation and rearview camera display. Features HD resolution and a 60Hz refresh rate.
- 29 Pre-Installed Themes: Customize your car’s display with a diverse collection of built-in UI themes.
3. What's in the Box
The package includes all necessary components for installation and operation:
- Car Radio Unit
- User Manual
- Rear Camera
- Power Cable
- GPS Antenna
- USB Cable
- CANBUS Decoder (if applicable)
- RCA Cable
- Crowbar (for trim removal)
- Radio Antenna
- Reverse Kit
- Microphone

Image: A visual representation of all items included in the car stereo package, such as the main unit, user manual, various cables, and accessories.
4. Installation Guide
Follow these steps for a straightforward installation. Professional installation is recommended if you are unfamiliar with car audio systems.
4.1. Pre-Installation Check
- Ensure your vehicle is compatible with the unit (refer to Section 8).
- Gather all included components and tools.
- Disconnect the vehicle's battery before starting installation.
4.2. Removing the Old Radio
- Use the provided crowbar or appropriate tools to carefully remove the trim panels surrounding your existing car radio.
- Unscrew and detach the old radio unit from the dashboard.
- Disconnect all wiring harnesses and antenna cables from the old radio.
4.3. Connecting the New Stereo
- Connect the vehicle's wiring harnesses to the corresponding connectors on the new Pyniro stereo's power cable.
- Connect the GPS antenna. For optimal reception, mount it outside the glove compartment.
- Connect the radio antenna adapter.
- If your vehicle has CANBUS, ensure the power cable harness is properly connected to both the CANBUS module and the 8-pin port on the back of the radio.
- Connect the included rearview camera to the dedicated RCA port.
- Connect any additional USB or RCA cables as needed.

Image: Comparison showing the original car radio and the new Pyniro 7-inch Android 13 Car Stereo installed in a vehicle dashboard.

Image: A comprehensive cable diagram illustrating the various connections for the car stereo, including power, USB, camera, and CANBUS.
4.4. Reversing Camera Connection
Connect the rearview camera as follows:
- Connect the camera's power cable to the reversing camera's power supply.
- Connect the positive pole of the reverse light of the original car to the camera's positive input.
- Connect the negative pole of the reverse light of the original car to the camera's negative input.

Image: A diagram detailing the wiring connections for the reversing camera, including power and signal lines.
4.5. Finalizing Installation
- Carefully slide the new stereo unit into the dashboard opening.
- Secure the unit with screws.
- Reinstall all trim panels.
- Reconnect the vehicle's battery.
4.6. Installation Video
Video: An installation guide for the car stereo in GMC Sierra Yukon and Chevrolet Silverado vehicles, demonstrating the process of removing the old unit and connecting the new one.
5. Setup and Configuration
After installation, power on the unit and proceed with initial setup.
5.1. General Settings Overview
Video: A comprehensive product user manual video demonstrating various settings and features of the car stereo.
5.2. Language Settings
- Go to Settings > More Settings > Language & input > Language Settings.
- Select 'Add a language' and choose your preferred language.
5.3. Time Settings
- Go to Settings > More Settings > Date and time.
- Select 'Use GPS-provided time' for automatic time synchronization.
5.4. Screen Brightness Adjustment
- Go to Settings > Display.
- Adjust day and night brightness levels or enable 'Automatic Brightness Adjustment'.
5.5. Wi-Fi Connection
- Go to Settings > Network.
- Turn Wi-Fi 'On' and select your Wi-Fi network. Enter the password to connect.
- For subsequent connections, swipe down the screen and turn Wi-Fi on; it will connect automatically.
5.6. Touch Calibration
- Go to Settings > Factory Setup. Enter password '1234'.
- Select 'Touch Calibration' and follow the on-screen instructions to complete the touch learning.
- Alternatively, place five fingers spread out on the screen to activate the five-point touch calibration interface.
5.7. Button Settings (Glass Screen Radio)
- Go to Settings > Factory Setup. Enter password '1234'.
- Select 'Touch Button Learning' and follow the instructions to assign functions to the touch buttons.
5.8. Button Settings (Radio with Physical Buttons)
- Go to Settings > Factory Setup. Enter password '1234'.
- Select 'Knob Panel Button Learning' and follow the instructions to assign functions to the physical buttons and knobs.
5.9. Steering Wheel Control Learning
- Go to Settings > Factory Setup. Enter password '1234'.
- Select 'Party Control Learning' (Steering Wheel Control Learning).
- Press and hold the corresponding button on your steering wheel, then select the function to learn on the screen.
5.10. Reverse Camera Format Selection
- Go to Settings > Factory Setup. Enter password '1234'.
- Select 'Backcar Source Settings' and choose the appropriate format (e.g., CVBS, AHD 720P).
5.11. Protocol Settings
- Go to Settings > Factory Setup. Enter password '1234'.
- Select 'Can Settings' and configure the brand, model, year, and protocol according to your vehicle.
5.12. Theme Settings
- Long press the bottom of the main screen to enter the theme selection page.
- Swipe left or right to browse and select different themes.
5.13. Radio Settings
- From the main menu, tap the 'Radio' icon.
- Tune to FM/AM/RDS stations and save your favorite presets.
5.14. EQ Settings
- From the main menu, tap 'Audio Settings' or 'EQ'.
- Adjust the equalizer settings or select from preset sound effects (Jazz, Pop, Classical, etc.).
- Configure sound field settings for optimal audio distribution.
5.15. Bluetooth Settings
- Enter the radio's Bluetooth interface.
- Turn on Bluetooth on your phone, find the radio's Bluetooth name ('Car BT'), select it, and complete the pairing authorization.
- You can make calls and stream music after successful connection.
5.16. CarPlay Settings
- Open the CPLink software on the radio.
- Go to the Bluetooth interface on your iPhone, establish the Bluetooth connection between the two devices, and complete the authorization.
- You can use voice assistant and online navigation through CarPlay.
Video: Instructions on how to connect wireless CarPlay to the car stereo, including Bluetooth and Wi-Fi pairing steps.
5.17. Android Auto Settings
- Open the Android Auto software on the radio.
- Go to the Bluetooth interface on your Android phone, establish the Bluetooth connection between the two devices, and complete the authorization.
- You can use voice assistant and online navigation through Android Auto.
Video: Instructions on how to connect wireless Android Auto to the car stereo, detailing the Bluetooth pairing process.
5.18. Speed Unit Switch
- Tap the speed unit on the main screen to switch between kilometers per hour (km/h) and miles per hour (mph).
5.19. Clear Memory
- Swipe down from the top of the screen to access quick settings.
- Tap 'System Optimize' or 'Clear memory' to optimize performance.
6. Operating Instructions
Maximize your car stereo's potential with these operational guidelines.
6.1. Wireless CarPlay and Android Auto
- Once connected, access your phone's apps, navigation, music, and calls directly from the stereo display.
- Use voice commands for hands-free operation.

Image: Display of wireless CarPlay and Android Auto interfaces on the car stereo, demonstrating app integration and voice command functionality.
6.2. GPS Navigation
- Open your preferred navigation app (e.g., Google Maps, Waze) from the main menu or via CarPlay/Android Auto.
- Enter your destination for turn-by-turn directions and real-time traffic updates.

Image: The car stereo screen showing a GPS navigation map, with an inset image of the external GPS antenna for improved signal.
6.3. Multimedia Playback
- Connect USB devices to play audio or video files.
- Stream music via Bluetooth from your smartphone.
- Access FM/AM/RDS radio stations.
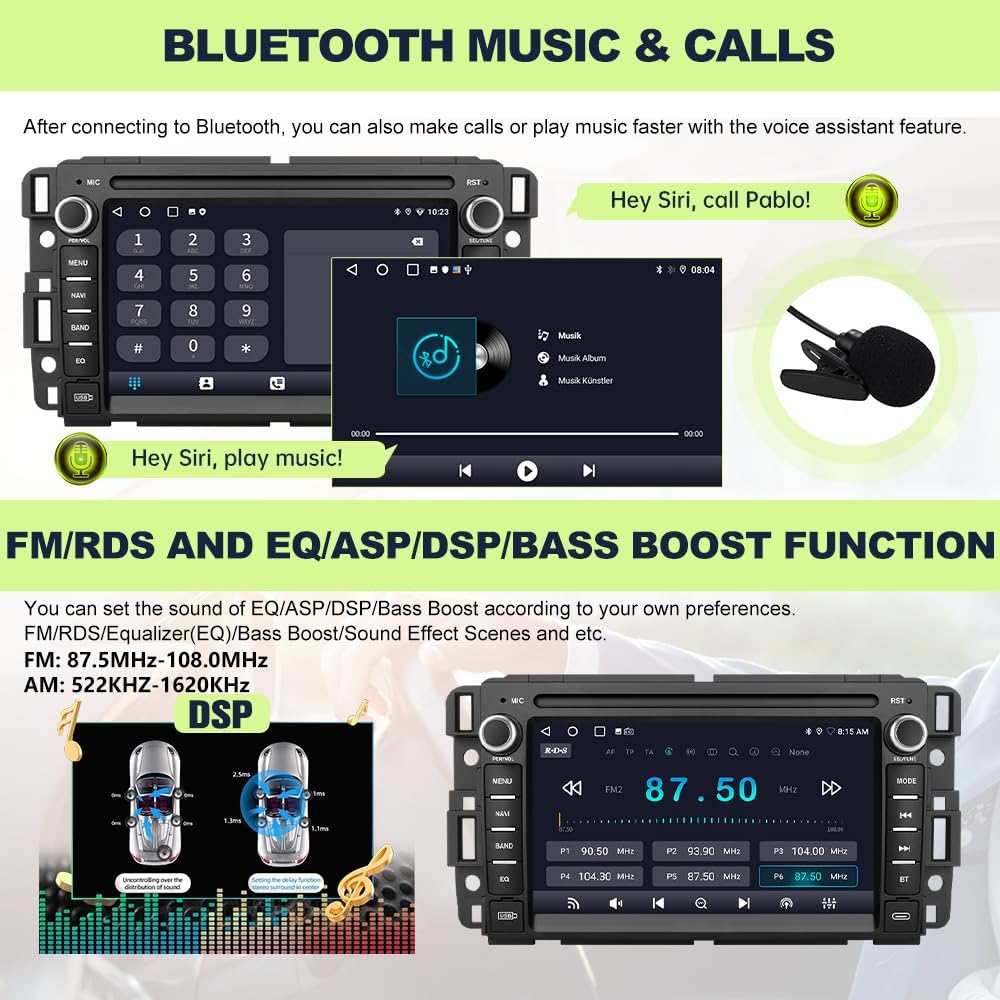
Image: The car stereo displaying its Bluetooth music interface and FM/RDS radio settings, highlighting sound customization options.
6.4. Split-Screen Multitasking
- Activate split-screen mode to run two applications simultaneously, such as navigation and the rearview camera feed.
6.5. Official Product Video
Video: An official product video showcasing the Pyniro car stereo radio for Chevy Silverado Tahoe and GMC Sierra Yukon, highlighting its features and user interface.
6.6. Radio Upgrade Video
Video: A video demonstrating the radio upgrade process for Chevy Silverado Tahoe and GMC Sierra Yukon, showcasing the new unit's features and ease of installation.
7. Maintenance
- Cleaning: Use a soft, dry cloth to clean the screen and unit. Avoid abrasive cleaners or solvents.
- Software Updates: Periodically check for software updates via Wi-Fi to ensure optimal performance and access to new features.
- General Care: Avoid exposing the unit to extreme temperatures or direct sunlight for prolonged periods.
8. Troubleshooting
- Steering Wheel Controls Not Working: Ensure the CANBUS connection is properly made, especially if your vehicle requires it. Refer to Section 5.9 for 'Steering Wheel Control Learning'.
- No Sound: Check all speaker connections and RCA inputs. Verify EQ settings are not set to mute or extremely low levels.
- GPS Signal Issues: Ensure the external GPS antenna is mounted in an optimal location, such as outside the glove compartment, for clear signal reception.
- Bluetooth/CarPlay/Android Auto Connectivity Issues: Ensure Bluetooth and Wi-Fi are enabled on both the stereo and your phone. Follow the pairing instructions in Sections 5.15-5.17 carefully.
- Screen Freezing/Unresponsive: Try clearing the memory (Section 5.19) or performing a soft reset (consult the user manual for specific reset procedures).
9. Specifications
| Feature | Detail |
|---|---|
| Brand | Pyniro |
| Screen Size | 7 Inches |
| Operating System | Android 13 |
| Memory Storage Capacity | 64 GB |
| RAM | 2 GB |
| Connectivity Technology | Bluetooth, Wi-Fi |
| Special Features | Bluetooth, Touchscreen, GPS, CarPlay, Android Auto, Split-Screen, Rear Camera Support |
| Map Type | Online map |
| Display Type | LCD with IPS |
| Item Weight | 1.53 Kilograms |
| UPC | 789534192435 |
10. Compatible Vehicle Models
This car stereo is compatible with various models. Please verify your vehicle's specific year and trim before installation.
For GMC:
- Acadia (Denali) (2007-2012)
- Savana (2008-2013)
- Sierra (Denali) (2007-2014)
- Yukon (Denali) (2007-2014)
For Chevrolet:
- Silverado 1500HD/2500HD/3500HD (2007-2014) (Second Generation) - Note: Not fit 07 Silverado Classic
- Tahoe (2007-2014) (Third Generation)
- Avalanche (2007-2011) (GMT900)
- Express Van (2008-2011)
- Equinox (2005-2009) (First Generation)
- HHR (SS/LT/Panel/LS) (2006-2011)
- Monte Carlo (2006-2007) (Seventh Generation)
- Suburban (2007-2014) (Tenth Generation)
- Traverse (2009-2012)
- Impala (2006-2012) (Ninth Generation)
For Buick:
- Enclave (2008-2012)
For Hummer:
- H2 (2008-2009)
Important Notes:
- If your car has a factory original Onstar system, it is not compatible.
- This radio does not have a CD slot and no AM radio.

Image: A list of compatible GMC, Chevrolet, Buick, and Hummer vehicle models and years for the car stereo.
11. Warranty and Support
Your Pyniro car stereo comes with a 2-year warranty.
Customer Support:
For any inquiries or assistance, please contact our online customer support:
Email: radio-servicio@hotmail.com
We provide lifetime after-sales support to ensure you have access to assistance whenever needed.

Image: Contact information for customer support, including an email address and a QR code.