1. Introduction
This manual provides detailed instructions for the installation, operation, and maintenance of your FINYQBET Android 9-inch Car Stereo. This system is designed for VW/Volkswagen Polo 5 models manufactured between 2009 and 2020, offering advanced multimedia and navigation features. Please read this manual thoroughly before installation and use to ensure proper function and safety.
Compatibility Note: Ensure your vehicle's console design matches the product images for proper fitment. If your car has an original factory amplifier, an additional CANBUS module may be required for correct audio functionality.
2. Safety Information
- Professional installation is recommended to avoid damage to the unit or vehicle.
- Do not operate the device in a way that distracts you from driving. Always prioritize road safety.
- Avoid exposing the unit to extreme temperatures, direct sunlight for prolonged periods, or excessive moisture.
- Do not attempt to disassemble or modify the unit. This may void the warranty and cause damage.
3. Package Contents
Verify that all items are present in the package:
- 1 × Android 9-inch Head Unit
- 1 × Installation Harness
- 1 × AHD Camera with Wiring
- 1 × User Manual (Spanish, refer to this English version for clarity)
- 1 × Installation Kit
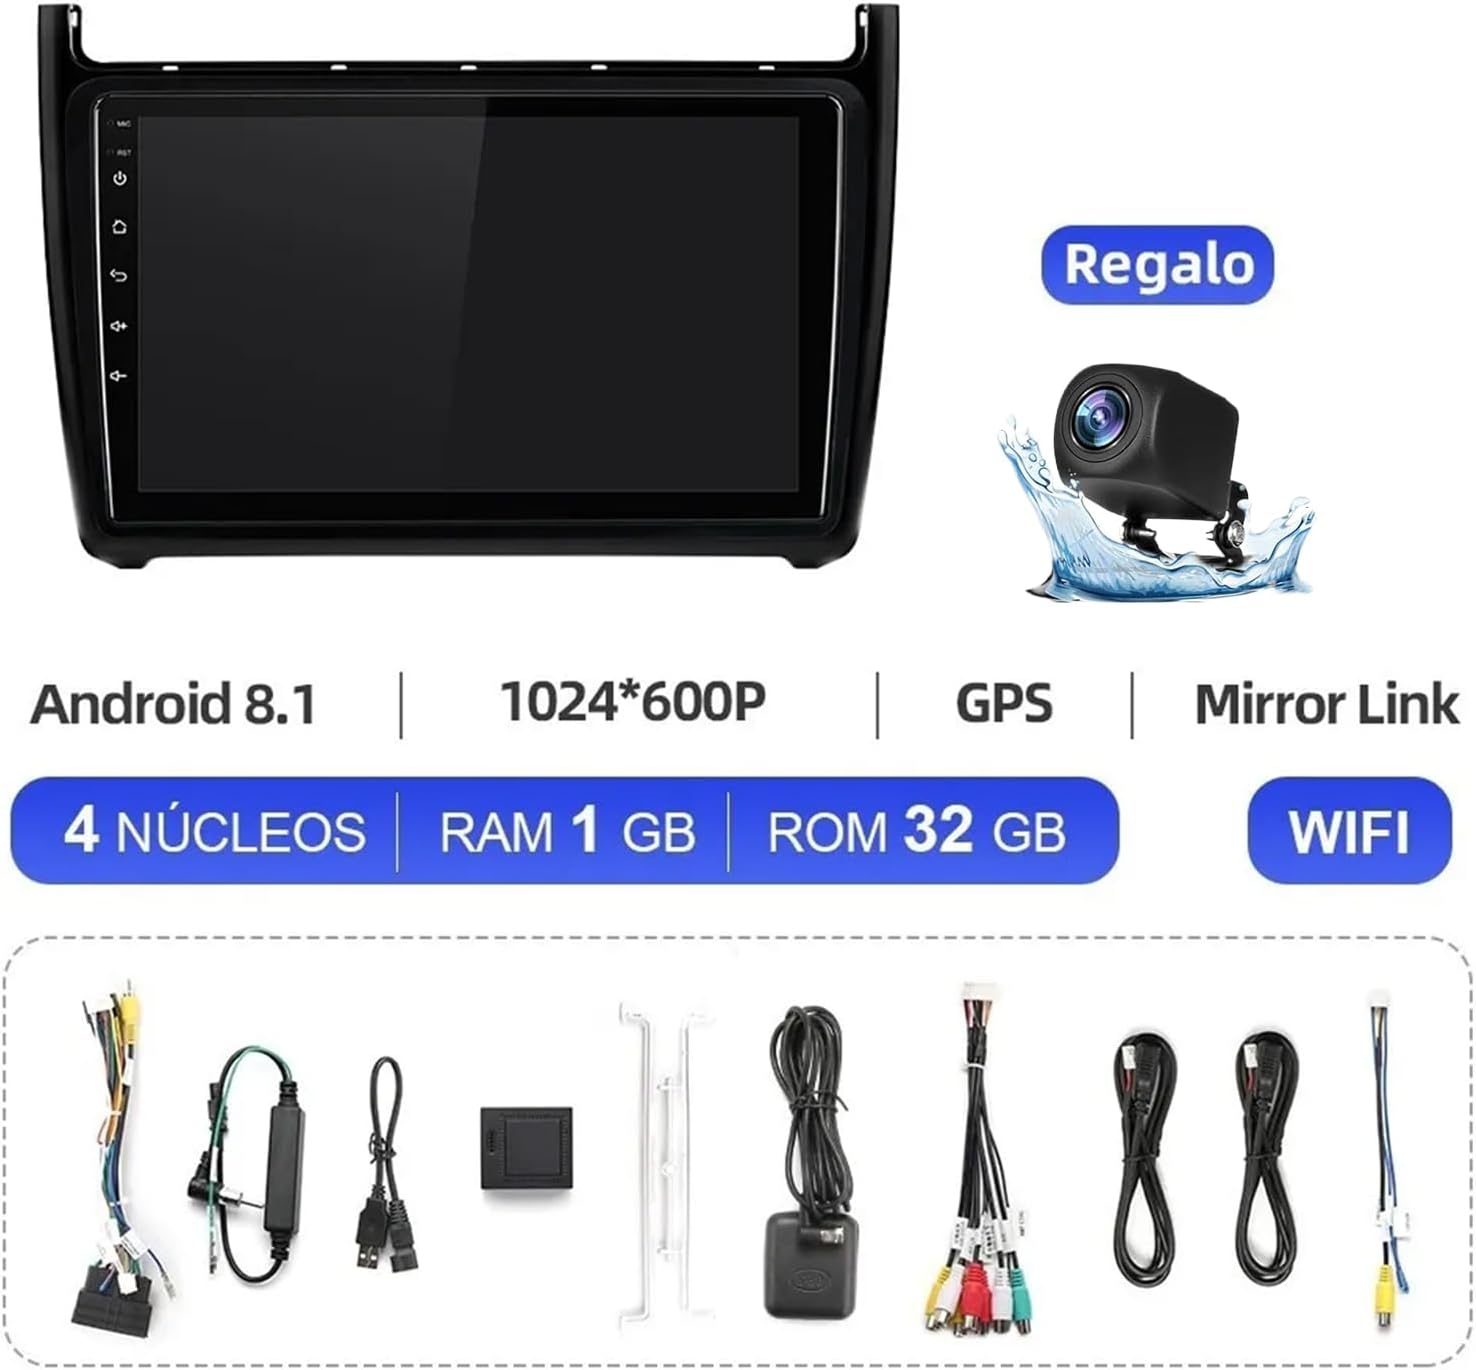
Image: The FINYQBET Android Stereo unit along with its various wiring harnesses and the included AHD camera.
4. Setup and Installation
The FINYQBET Android Stereo is designed for a plug-and-play installation in compatible VW Polo 5 models. Special cables are provided to simplify the process.
- Preparation: Ensure the vehicle's ignition is off and the battery is disconnected before starting installation.
- Remove Original Unit: Carefully remove the existing car stereo and trim panels.
- Connect Wiring: Connect the provided wiring harness to the vehicle's existing connectors and to the new Android stereo. Ensure all connections are secure.
- AHD Camera Installation: Install the AHD rear camera in the desired location (e.g., near the license plate) and route its wiring to the head unit. Connect the camera's video output to the designated input on the stereo.
- Test Connections: Before fully reassembling, reconnect the battery and briefly power on the unit to test basic functions (power, audio, display).
- Secure Unit: Mount the Android stereo securely into the dashboard opening and reattach all trim panels.
Important: If your vehicle has a factory-installed amplifier, a separate CANBUS module (not included) might be necessary to ensure proper sound output. Consult a professional if you are unsure.

Image: Comparison showing the original VW Polo 5 dashboard on the left and the dashboard with the FINYQBET Android Stereo installed on the right, highlighting the seamless integration.
5. Operating Instructions
5.1. Basic Operations
- Power On/Off: Press the power button on the unit or use the vehicle's ignition.
- Volume Control: Adjust volume using the physical knobs/buttons or the touchscreen interface.
- Home Screen: Navigate to the main menu to access various applications and settings.
5.2. CarPlay, Android Auto, and MirrorLink
The unit supports CarPlay, Android Auto, and MirrorLink for seamless smartphone integration. Connect your smartphone via a USB cable to access navigation, music, messages, and more directly on the stereo's display.
- CarPlay: For iPhone users, connect via USB. The CarPlay interface will appear, allowing access to Apple Maps, Apple Music, Messages, and other compatible apps.
- Android Auto: For Android users, connect via USB. The Android Auto interface will launch, providing access to Google Maps, Spotify, calls, and more.
- MirrorLink: This feature allows you to mirror your smartphone's screen onto the car stereo display. Connect your phone via USB and follow the on-screen prompts to activate MirrorLink.

Image: A split image showing the CarPlay interface on the left and the Android Auto interface on the right, both displayed on the car stereo screen, with icons for various applications.
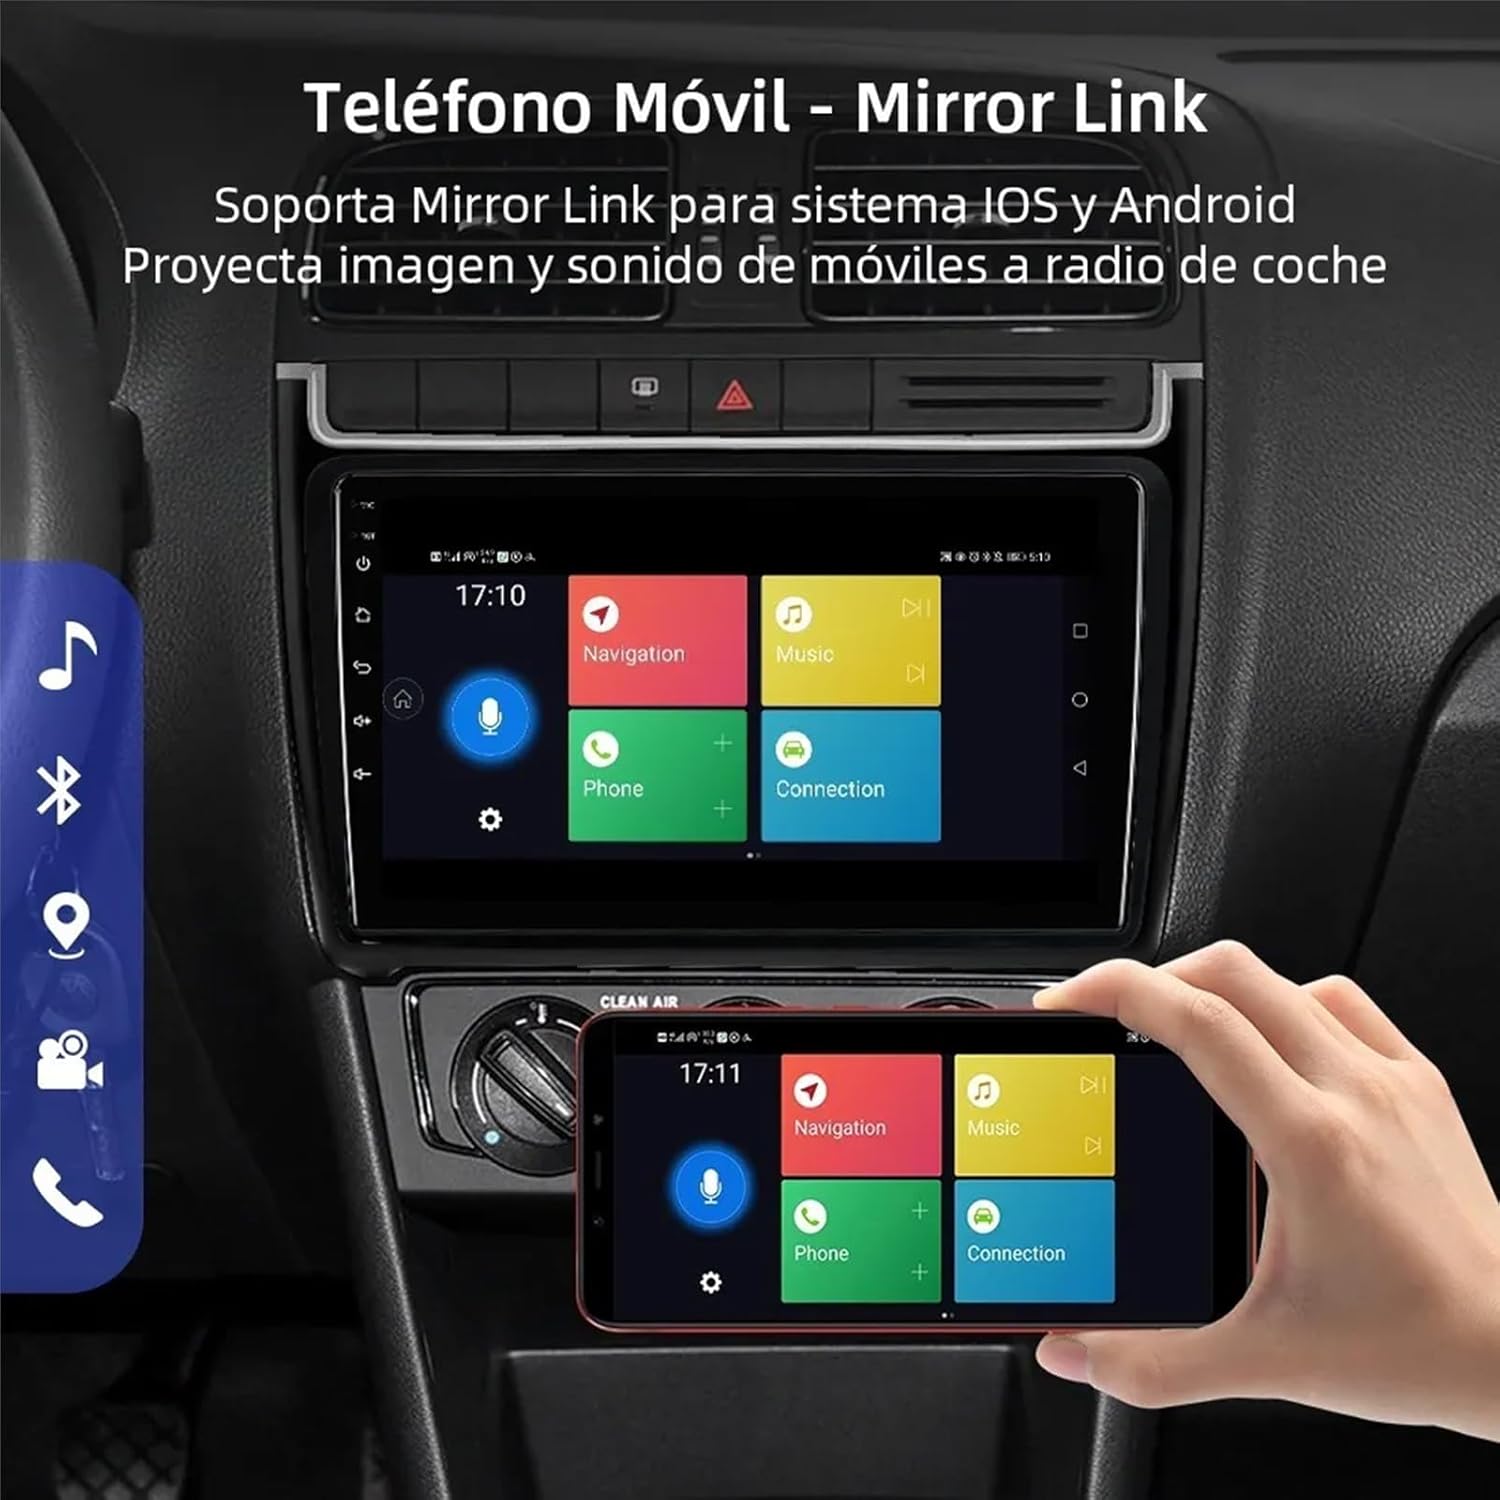
Image: The MirrorLink function in action, showing a smartphone's screen content mirrored onto the car stereo display, with navigation and music options visible.
5.3. Navigation (GPS)
The unit features integrated GPS, supporting both online and offline navigation applications. You can use pre-installed maps or download your preferred navigation apps from the app store when connected to Wi-Fi.
- Using GPS: Access the navigation app from the main menu. Enter your destination to receive turn-by-turn directions.
- Map Updates: Ensure your maps are up-to-date for accurate navigation. Updates can typically be performed via Wi-Fi.

Image: The car stereo displaying a GPS navigation map with a route highlighted, showing estimated time of arrival and distance remaining.
5.4. Bluetooth Connectivity
The built-in Bluetooth 4.0 module allows for hands-free calling and wireless music streaming.
- Pairing: Go to the Bluetooth settings on the stereo and enable Bluetooth. On your smartphone, search for available devices and select the stereo's name (e.g., "CAR-BT_D4A1"). Enter the PIN (usually 0000) if prompted.
- Hands-Free Calling: Once paired, you can make and receive calls directly through the stereo, using its microphone and speakers. Access your phonebook and call history from the stereo interface.
- Music Streaming: Play audio from your smartphone wirelessly through the car's speakers.

Image: A graphical representation of the Bluetooth features, including call history, music playback, contact book, Bluetooth device list, phone buttons, and settings.
5.5. Radio (FM/RDS)
Tune into your favorite FM radio stations. The RDS (Radio Data System) feature displays station information, such as station name and song title, where available.
- Tuning: Use the scan function to automatically find stations or manually tune to a specific frequency.
- Presets: Save your preferred stations as presets for quick access.
5.6. WiFi and Internet Connectivity
Connect the stereo to a Wi-Fi network (e.g., from a mobile hotspot) to access online features, download apps, stream content, and browse the internet.
- Connecting to Wi-Fi: Go to the Wi-Fi settings, select your desired network, and enter the password.
- App Usage: Once connected, you can use pre-installed apps like YouTube or download new applications from the app store.

Image: The car stereo display showing various applications like YouTube, Google, Netflix, and Spotify, indicating wireless internet connectivity and app support.
5.7. Rear Camera (AHD)
The included AHD rear camera provides a clear view of the area behind your vehicle, automatically displaying on the stereo screen when reverse gear is engaged. It features night vision, a wide-angle lens, and water resistance.
- Automatic Display: When the vehicle is shifted into reverse, the camera feed will automatically appear on the stereo screen.
- Parking Guidelines: Dynamic parking guidelines assist in safe maneuvering.
5.8. Steering Wheel Controls
The unit supports learning functions for your vehicle's original steering wheel controls, allowing you to manage volume, calls, and tracks without distraction.
- Configuration: Access the steering wheel control settings in the stereo's menu. Follow the on-screen instructions to assign functions to your vehicle's steering wheel buttons.
- Note: If your stereo does not have CANBUS, manual configuration of the steering wheel controls is necessary.

Image: The top part shows a steering wheel with control buttons, indicating support for learning these controls. The bottom part illustrates the view from a rear camera with parking guidelines on the car stereo screen.
6. Maintenance
- Screen Cleaning: Use a soft, lint-free cloth to gently wipe the touchscreen. For stubborn smudges, slightly dampen the cloth with water or a screen-safe cleaner. Avoid harsh chemicals.
- General Care: Keep the unit free from dust and debris. Ensure proper ventilation around the unit to prevent overheating.
- Software Updates: Periodically check for software updates to ensure optimal performance and access to new features.
7. Troubleshooting
If you encounter issues with your FINYQBET Android Car Stereo, refer to the following common problems and solutions:
| Problem | Possible Cause | Solution |
|---|---|---|
| No Power | Loose wiring, blown fuse, incorrect power connection. | Check all power connections. Inspect vehicle fuses. Ensure proper installation. |
| No Sound | Volume too low, incorrect audio source, speaker wiring issues, CANBUS module needed. | Increase volume. Select correct audio source. Verify speaker connections. If applicable, install CANBUS module. |
| GPS Not Working | No GPS signal, outdated maps, GPS antenna not connected. | Ensure GPS antenna is properly connected and has a clear view of the sky. Update maps if necessary. |
| Bluetooth Connection Issues | Device not paired, Bluetooth disabled, interference. | Ensure Bluetooth is enabled on both devices. Re-pair the device. Try restarting both devices. |
| Touchscreen Unresponsive | Software glitch, physical damage. | Restart the unit. If the problem persists, contact customer support. |
8. Specifications
Key technical specifications of the FINYQBET Android 9-inch Car Stereo:
| Feature | Detail |
|---|---|
| Brand | FINYQBET |
| Model Name | FINYQBET Estéreo Android |
| Display Size | 9 Inches |
| Display Type | LCD with IPS Technology |
| Special Features | CarPlay, Android Auto, MirrorLink |
| Memory Storage Capacity | 32 GB |
| Connectivity | Bluetooth, WiFi |
| Human Interface Input | Touchscreen |
| Mounting Type | Dashboard Mount |
| Dimensions | 33.9 x 25.7 x 14.2 cm; 1.52 kg |
9. Warranty and Support
For warranty information, technical support, or any questions not covered in this manual, please contact the seller or manufacturer directly. Keep your purchase receipt as proof of purchase for warranty claims.


