Introduction
This manual provides detailed instructions for the setup, operation, and maintenance of your Lancoon Digital Alarm Clock (Model LK-AD31). This multifunctional device features an RGB color display, voice control, voice recording for personalized alarms, adjustable backlight, and 12/24-hour time format. Please read this manual thoroughly before use to ensure proper functionality and to maximize your product experience.

Image: Front view of the Lancoon Digital Alarm Clock displaying 12:00 AM with colorful digits.
Setup
Package Contents
- 1 x Lancoon Digital Alarm Clock
- 1 x Charging Cable (USB power adapter not included)
- 1 x User Manual
Power Connection
- Connect the provided charging cable to the clock's power input port.
- Plug the other end of the charging cable into a standard USB power adapter (not included) or a powered USB port.
- The clock display will illuminate, indicating it is receiving power.
Note: For the power-outage memory mode to function, the clock requires batteries (not included). Insert 3 AAA batteries into the battery compartment located on the back of the clock. These batteries maintain time settings during power interruptions but do not power the main display continuously.
Operating Instructions
Setting Time and Date
Refer to the specific buttons on your device (usually labeled 'SET' or 'MODE') to enter time setting mode. Use '+' and '-' buttons to adjust hours, minutes, and date. Press the 'SET' or 'MODE' button again to confirm each setting.
12/24 Hour Format
Press the designated button (often 'UP' or '12/24H') to switch between 12-hour and 24-hour time formats. In 12-hour format, 'AM' or 'PM' indicators will be displayed.
Setting Alarms
The clock supports two independent alarms. Press the 'ALARM' button to cycle through Alarm 1, Alarm 2, and alarm off. When an alarm is selected, use the 'SET' button to adjust the alarm time and the '+' and '-' buttons to set the desired hour and minute. Confirm settings by pressing 'SET' again.
Voice Recording for Alarms
To personalize your alarm sound, the clock allows for a 30-second voice recording. Long-press the dedicated 'RECORD' button (often indicated by a microphone icon) to begin recording. Speak clearly into the microphone. Release the button to stop recording. This recording will replace the standard alarm tone for the active alarm.

Image: The alarm clock displaying 12:00, highlighting the voice recording feature with a microphone icon and text indicating a 30-second recording capability.
RGB Color Display Customization
The clock features an RGB color display with multiple color options. Tap the 'TOUCH' panel located on the top of the clock to cycle through 6 static colors and 3 dynamic RGB color cycles. This allows for visual customization of the time display.

Image: The alarm clock demonstrating different RGB color settings for the time display, including monochrome and color-changing modes.
Adjusting Display Brightness
The display brightness can be adjusted to 4 levels. Press the designated brightness control button (often labeled with a sun icon or integrated with the 'TOUCH' panel) to cycle through the brightness settings: Level 1 (lowest) to Level 4 (highest). This allows for comfortable viewing in various lighting conditions.
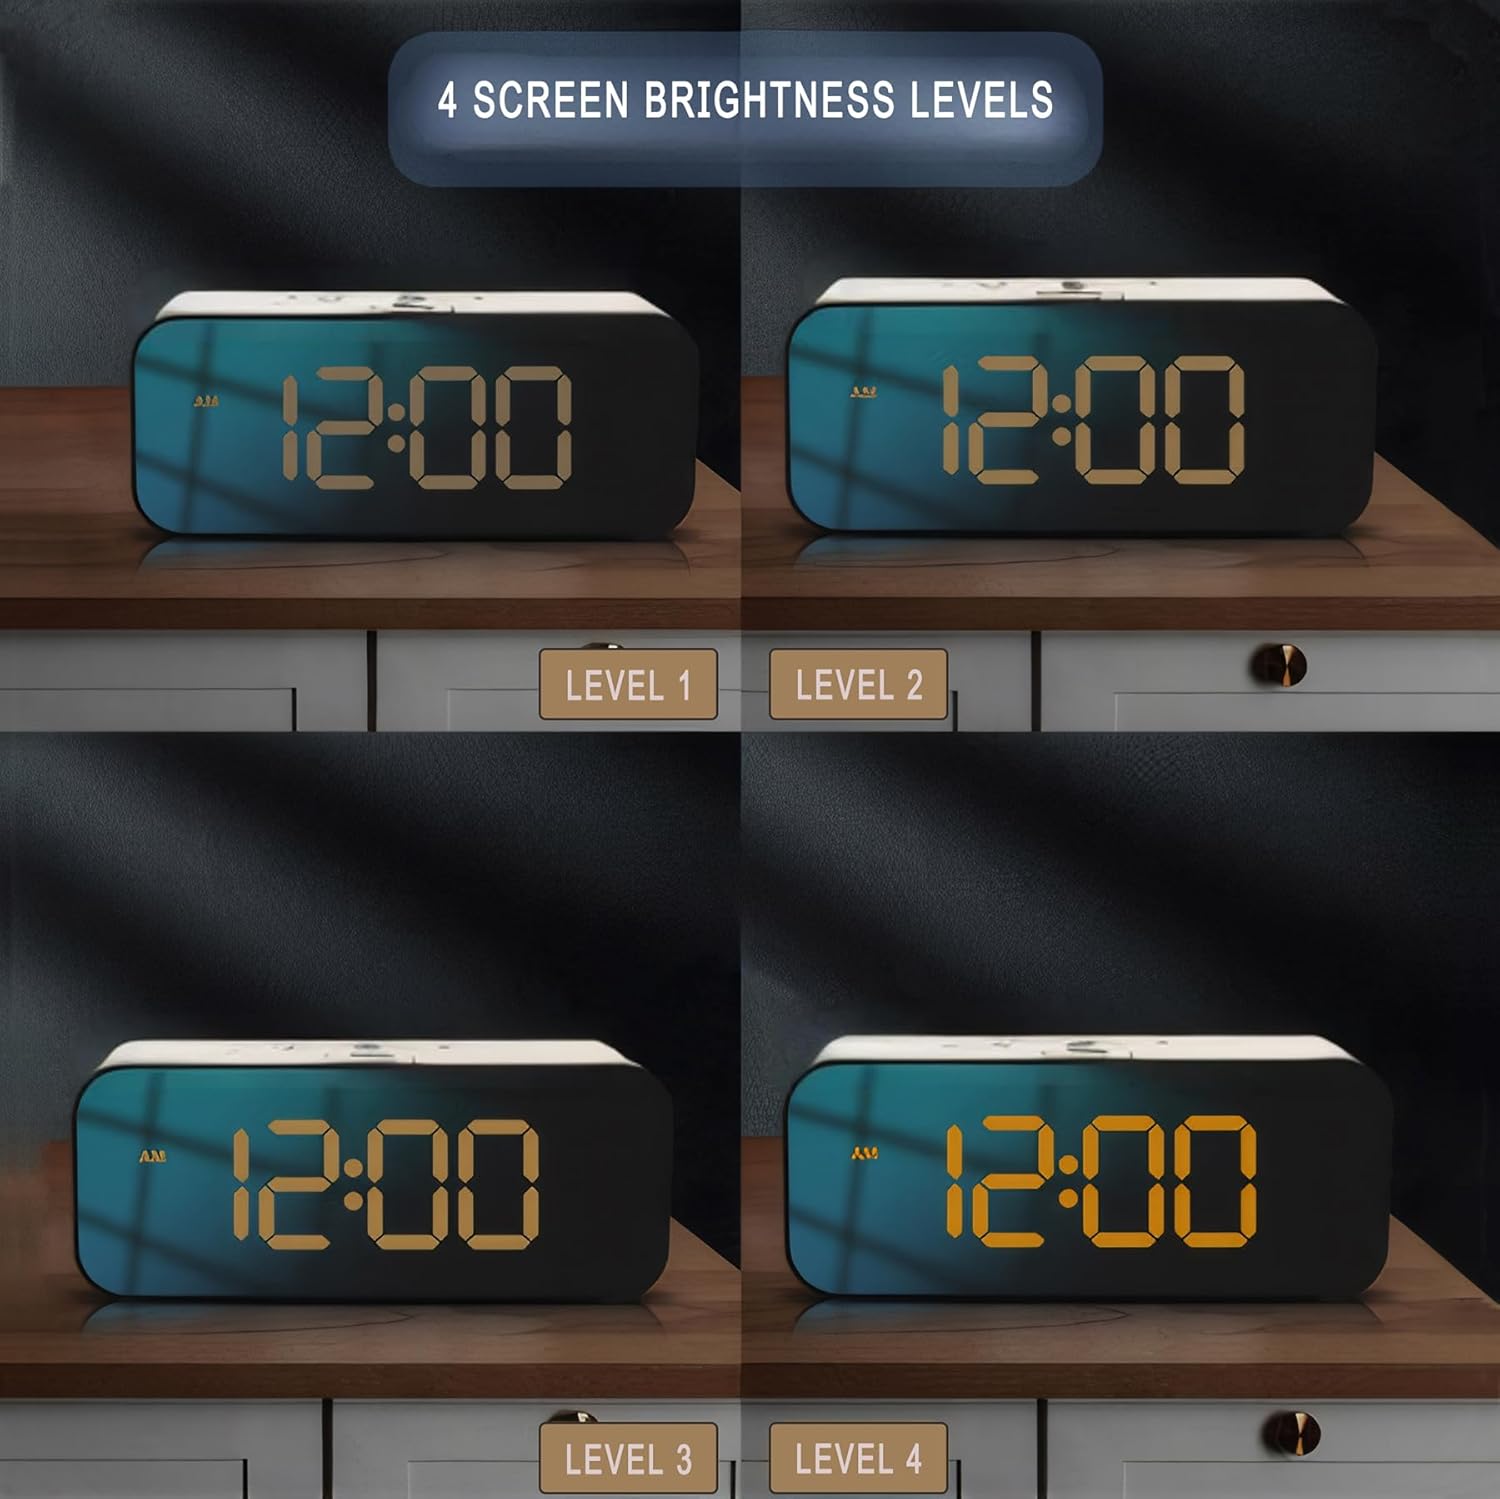
Image: Four panels illustrating the alarm clock's display at different brightness levels, from Level 1 (dimmest) to Level 4 (brightest).
Snooze Function
When an alarm sounds, press the 'SNOOZE' button (typically a large button on top) to activate the snooze function. This will temporarily silence the alarm for 5 minutes, after which it will sound again. You can repeat this process as needed.

Image: A hand reaching to tap the top of the alarm clock, indicating the activation of the snooze mode.
Voice Control Power-Saving Mode
When operating on battery power (batteries not included), the clock enters a power-saving mode where the display turns off after 20 seconds of inactivity. To reactivate the display, make a sound of 90 decibels or higher (e.g., clapping) or tap the surface the clock is resting on. The display will illuminate for 8 seconds before turning off again. When connected to external power, the display remains continuously on.

Image: The alarm clock with a graphic illustrating sound levels, indicating that a 90dB sound can activate the display.
Power-Outage Memory Mode
If the clock is equipped with backup batteries (not included), it will retain its time and alarm settings during a power outage. The main display will turn off to conserve battery power, but the internal clock will continue to run. Once external power is restored, the display will reactivate, showing the correct time without requiring re-setting.

Image: A sequence of three clock displays showing the time before a power failure, the blank screen during a power failure, and the correct time displayed after power is restored.
Maintenance
- Cleaning: Use a soft, dry cloth to clean the clock's surface. Avoid abrasive cleaners or solvents, as they may damage the finish.
- Placement: Place the clock on a stable, flat surface away from direct sunlight, excessive heat, or moisture.
- Battery Replacement: If using backup batteries, replace them annually or when the power-outage memory function becomes unreliable.
Troubleshooting
- Display is blank:
- Ensure the clock is properly connected to a power source.
- If running on battery, make a sound or tap the clock to activate the display from power-saving mode.
- Check if backup batteries are depleted if the clock is not retaining time during power outages. - Alarm is not sounding:
- Verify that the alarm is enabled and set to the correct time.
- Check the volume setting for the alarm (if applicable).
- Ensure a voice recording is properly saved if using a custom alarm sound. - Voice recording not working:
- Ensure you are long-pressing the 'RECORD' button for the entire duration of your message.
- Speak clearly and close enough to the microphone. - Buttons are unresponsive:
- Disconnect and reconnect the power to reset the device.
- Ensure the clock is not in a locked mode (refer to specific button functions in the full manual if available).
Specifications
| Brand | Lancoon |
| Model Number | LK-AD31 |
| Color | White |
| Display Type | LED |
| Material | Acrylonitrile Butadiene Styrene (ABS) |
| Product Dimensions | 2.48"W x 1.88"H |
| Item Weight | 0.28 Kilograms |
| Power Source | Corded Electric (USB cable included, adapter not included) |
| Backup Batteries | Not included (requires 3x AAA for memory function) |
| Features | Alarm, Auto Half-Light Mode, Large Display, Snooze, Sound Recordings, RGB Color Display, Voice Control |
| Included Components | 1*Alarm clock, 1*Charging cable, 1*Manual |
Warranty Information
Lancoon products are manufactured with quality and care. This product comes with a standard manufacturer's warranty against defects in materials and workmanship. Please retain your proof of purchase for warranty claims. Specific warranty terms and duration may vary by region. For detailed warranty information, please refer to the documentation included with your purchase or contact customer support.
Customer Support
If you have any questions, encounter issues, or require assistance with your Lancoon Digital Alarm Clock, please contact our customer support team. You can typically find contact information on our official website or through the retailer where you purchased the product.
For online support, visit: Lancoon Store on Amazon