1. Introduction
This manual provides instructions for the installation, operation, and maintenance of the Eopzol Replacement 105-1842 Rear Discharge Mulch Plug. This component is designed to convert your compatible Toro Lawn Boy lawn mower into a mulching mower, allowing grass clippings to be finely cut and returned to the lawn as natural fertilizer.
2. Compatibility
The Eopzol 105-1842 Rear Discharge Mulch Plug is a direct replacement for Toro part number 105-1842. It is compatible with the following Toro Lawn Boy lawn mower models:
- 10654, 10655, 10656
- 20001, 20003, 20005, 20007, 20008, 20009, 20012, 20013, 20014, 20016, 20017, 20018, 20019
- 20031, 20041, 20047, 20049, 20051
- 20070, 20079
- 20655, 20656
Always verify your mower's model number before installation to ensure proper fit and function.
3. Setup and Installation
Before beginning installation, ensure the lawn mower engine is off and the spark plug wire is disconnected to prevent accidental starting. Wear appropriate safety gear, including gloves.
- Prepare the Mower: Park the lawn mower on a flat, stable surface. Disconnect the spark plug wire and engage the parking brake if applicable.
- Locate the Discharge Opening: Identify the rear discharge opening on your lawn mower deck. This is typically where grass clippings are expelled when not mulching.
- Remove Existing Components (if any): If your mower currently has a rear discharge chute or another mulching attachment, remove it according to your mower's original instruction manual.
- Insert the Mulch Plug: Align the Eopzol 105-1842 mulch plug with the rear discharge opening. The plug is designed to fit snugly into this opening.
-

Image 1: Side view of the Eopzol 105-1842 Rear Discharge Mulch Plug, showing its curved design for fitting into the mower deck.
- Secure the Plug: Gently push the mulch plug into place until it is fully seated. Ensure there are no gaps around the edges where clippings could escape. Some models may have clips or pins to secure the plug; refer to your mower's manual for specific securing mechanisms.
-

Image 2: Angled view of the Eopzol 105-1842 Rear Discharge Mulch Plug, highlighting the ribbed top surface for secure fitment.
- Verify Fit: Once installed, check that the mulch plug is securely in place and does not interfere with any moving parts of the mower.
-
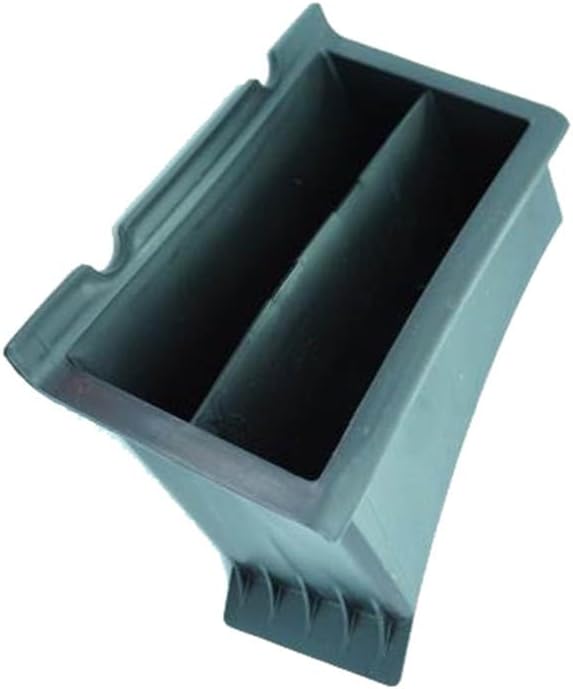
Image 3: Top-down view of the Eopzol 105-1842 Rear Discharge Mulch Plug, showing the internal structure designed to block the discharge opening.
- Reconnect Spark Plug: Reconnect the spark plug wire before operating the mower.
4. Operating with the Mulch Plug
With the mulch plug installed, your lawn mower will now operate in mulching mode. This means grass clippings will be retained under the mower deck, cut into smaller pieces, and then dispersed back into the lawn.
Tips for Effective Mulching:
- Cut Frequently: For best results, mow regularly, removing no more than one-third of the grass blade length at a time.
- Dry Grass: Mow when the grass is dry. Wet grass can clump and lead to uneven mulching.
- Sharp Blade: Ensure your mower blade is sharp. A sharp blade cuts grass cleanly, which is essential for effective mulching.
- Engine Speed: Operate the mower at full throttle to ensure maximum blade speed for optimal cutting and mulching performance.
- Overlap Passes: Overlap your mowing passes slightly to ensure even coverage and prevent missed strips.
5. Maintenance
Regular maintenance of your mulch plug ensures its longevity and effective performance.
- Cleaning: After each use, especially when mulching wet grass, remove the mulch plug and clean any accumulated grass clippings from its surfaces and the mower's discharge area. This prevents buildup that can hinder performance or cause corrosion.
- Inspection: Periodically inspect the mulch plug for any signs of wear, cracks, or damage. A damaged plug may not fit correctly or perform effectively.
- Storage: Store the mulch plug in a clean, dry place when not in use or during off-season storage.
6. Troubleshooting
Common Issues and Solutions:
- Poor Mulching Performance / Large Clippings:
- Ensure the mulch plug is fully and correctly seated in the discharge opening.
- Check if the mower blade is sharp. Dull blades tear grass instead of cutting it cleanly.
- Avoid mowing excessively tall or wet grass.
- Reduce mowing speed to allow the blade more time to cut clippings.
- Mulch Plug Does Not Fit:
- Double-check your mower's model number against the compatibility list in Section 2.
- Ensure no debris is obstructing the discharge opening.
- Verify the plug is oriented correctly.
- Grass Clippings Escaping Around Plug:
- Ensure the mulch plug is fully inserted and seated flush against the mower deck.
- Inspect the plug for any damage or warping that might prevent a tight seal.
7. Specifications
| Attribute | Detail |
|---|---|
| Part Number Replaced | 105-1842 |
| Manufacturer | Eopzol |
| Product Dimensions | 1 x 1 x 1 inches (Approximate) |
| Item Model Number | EG16478 |
| ASIN | B0F32R7FWP |
8. Warranty and Support
Eopzol provides a 30-day Money-back guarantee and an 18-Month Worry-free Warranty for this product. If you encounter any issues or have questions regarding compatibility or performance, please contact Eopzol customer support. When contacting support, it is helpful to have your mower's model and serial number readily available.
For further assistance, refer to the contact information provided with your purchase or visit the official Eopzol website.