1. Introduction
This manual provides essential information for the safe and effective operation of your Nitehop ZQ01326 200W Dual Eye Retro Par Stage Light. Please read this manual thoroughly before use and retain it for future reference.
The Nitehop ZQ01326 is a high-efficiency stage lighting fixture featuring a dual light source hybrid system with 6x30W COB warm white LEDs and 102 RGB LEDs. It offers a wide range of lighting effects, including 30 professional presets and sound-activated modes, suitable for various event environments.
2. Safety Instructions
Observe the following safety precautions to prevent electric shock, fire, or injury.
- Power Supply: Connect the unit only to a grounded power outlet with the specified voltage.
- Ventilation: Ensure adequate ventilation. Do not block ventilation openings.
- Moisture: Do not expose the unit to rain or moisture. Avoid using in damp or wet locations.
- Heat: Keep the unit away from heat sources. Do not operate in temperatures exceeding 40°C (104°F).
- Servicing: Refer all servicing to qualified personnel. Do not attempt to repair the unit yourself.
- Mounting: Always secure the fixture with a safety cable when mounting overhead.
- Direct Eye Exposure: Avoid direct eye exposure to the light source.
3. Product Overview
3.1 Components
The Nitehop ZQ01326 features a robust metal casing designed for durability and efficient heat dissipation. Key components include:
- COB Spotlights: 6x30W warm white COB LEDs for powerful illumination.
- RGB LED Ring: 102 RGB LEDs forming a dynamic ring around the COB lights for additional effects.
- Control Panel: A 4-digit LED display with MENU, UP, DOWN, and ENTER buttons for mode selection and parameter adjustment.
- DMX In/Out: 3-pin XLR connectors for DMX512 control.
- Power In/Out: PowerCON compatible connectors for power daisy-chaining.
- Mounting Bracket: Adjustable bracket for floor mounting or truss attachment.
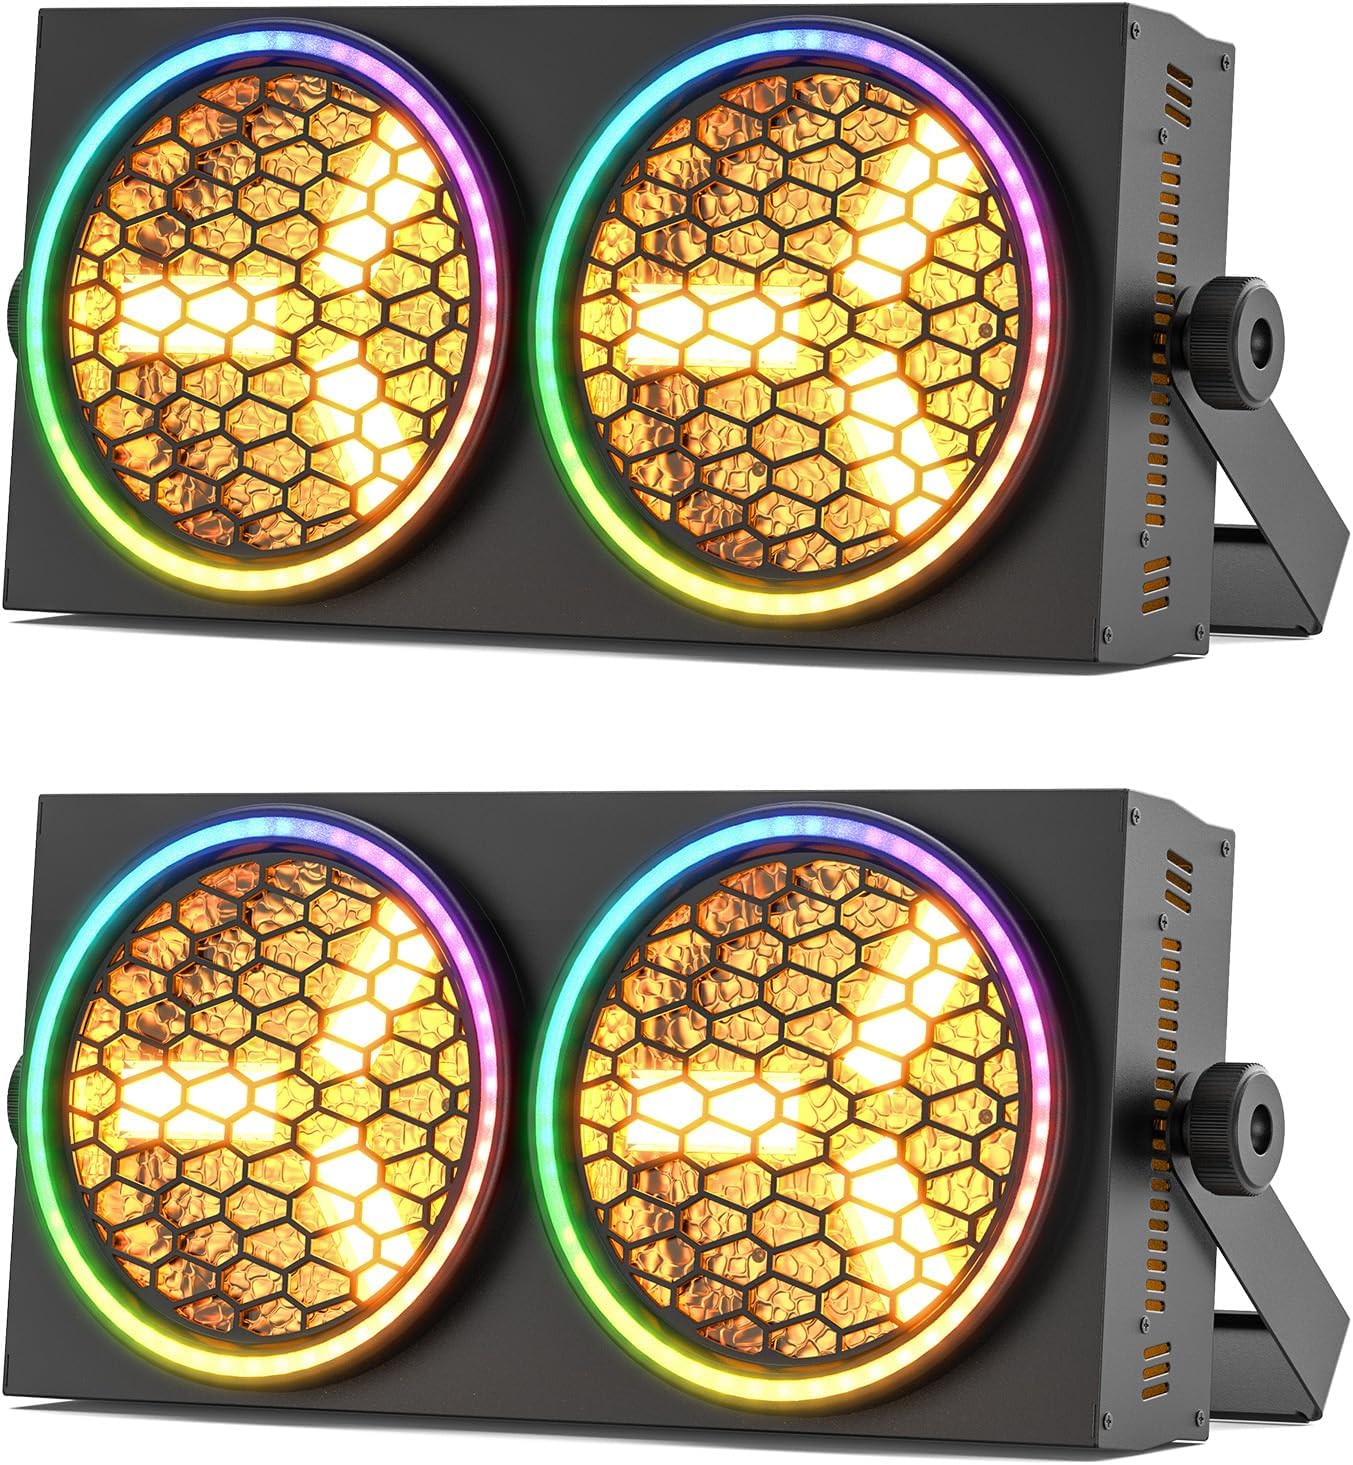
Figure 3.1: Front view of the Nitehop ZQ01326 Dual Eye Retro Par Stage Light.
3.2 Features
- Dual Light Source: Combines 6x30W COB warm white LEDs and 102 RGB LEDs for versatile lighting.
- 30+1 Lighting Programs: Includes 30 professional presets and strobe pulse effects (1-20Hz).
- Sound-Activated Modes: Adjustable microphone sensitivity for music synchronization.
- DMX512/RDM Control: 8/13 channel options with RDM protocol for advanced control.
- Master/Slave Functionality: Synchronize multiple units for coordinated lighting displays.
- Wide Beam Angle: 120° beam angle for broad coverage.
- Adjustable Color Temperature: 2800K-6500K for warm to cool white light.
- Long Lifespan: 60,000 hours LED lifespan.

Figure 3.2: Key features of the Nitehop ZQ01326 stage light.

Figure 3.3: Detailed view of COB spotlights and RGB LED ring.

Figure 3.4: Wide beam angle and adjustable color temperature.
4. Setup
4.1 Unpacking
Carefully unpack the fixture and check for any damage during transit. The package should contain:
- Nitehop ZQ01326 Stage Light Unit
- Power Cord
- Handle/Mounting Bracket
- Screws + Washers (for bracket attachment)
- Instruction Manual (this document)

Figure 4.1: Contents of the Nitehop ZQ01326 package.
4.2 Mounting
The fixture can be mounted in various positions (floor, truss, wall) using the adjustable mounting bracket. Always ensure the mounting surface or truss is capable of supporting the weight of the fixture and any additional equipment.
- Attach the handle/mounting bracket to the sides of the fixture using the provided screws and washers.
- Securely fasten the fixture to a truss or other support structure using appropriate clamps (not included) and a safety cable.
- Adjust the angle of the fixture as needed.
4.3 Power Connection
Connect the provided power cord to the POWER IN connector on the rear of the fixture and then to a suitable grounded power outlet. Multiple units can be daisy-chained using the POWER OUT connector for convenience, ensuring the total current draw does not exceed the circuit's capacity.
4.4 DMX Connection (Optional)
For DMX control, connect a DMX controller to the DMX IN port of the first fixture using a 3-pin XLR cable. Connect the DMX OUT of the first fixture to the DMX IN of the next fixture in the chain. Terminate the last fixture in the DMX chain with a 120 Ohm DMX terminator (not included) for reliable signal transmission.

Figure 4.2: Rear panel connections and controls.
5. Operating Modes
The Nitehop ZQ01326 can be operated in several modes, controlled via the rear panel display or an external DMX controller.
5.1 Control Panel Navigation
Use the following buttons on the rear panel to navigate the menu and adjust settings:
- MENU: Cycles through main menu options.
- UP: Increases parameter values or navigates up.
- DOWN: Decreases parameter values or navigates down.
- ENTER: Confirms selection or enters a submenu.
5.2 DMX Mode
In DMX mode, the fixture is controlled by an external DMX512 controller. Set the DMX address using the control panel. The fixture supports 8 or 13 DMX channels, allowing for individual control of COB intensity, RGB ring colors, strobe, and various effects.
- Press MENU until "Addr" or "DMXA" appears.
- Use UP/DOWN to set the desired DMX start address.
- Press ENTER to confirm.
- Refer to the DMX Channel Chart (not provided in source, but would be here in a full manual) for specific channel functions.

Figure 5.1: DMX control setup for multiple units.
5.3 Auto Mode
The fixture can run pre-programmed lighting sequences automatically.
- Press MENU until "Auto" or "Prog" appears.
- Use UP/DOWN to select from the 30+1 built-in programs.
- Press ENTER to activate the selected program.

Figure 5.2: Examples of 30+1 lighting programs.
5.4 Sound-Activated Mode
In this mode, the light reacts to ambient sound via its built-in microphone.
- Press MENU until "Soun" or "MIC" appears.
- Use UP/DOWN to adjust microphone sensitivity (if available).
- Press ENTER to activate sound-activated mode.
5.5 Master/Slave Mode
Connect multiple fixtures via DMX cables. Set one fixture as the "Master" and the others as "Slave" units. The slave units will mirror the master's operation.
- Master Unit: Set to Auto or Sound-Activated mode.
- Slave Units: Press MENU until "SLAV" appears. Press ENTER to confirm.
5.6 Dimming Control
The fixture supports 0-100% smooth linear dimming for both COB and RGB LEDs, allowing for precise control over light intensity.

Figure 5.3: Smooth dimming capabilities.
6. Maintenance
Regular maintenance ensures optimal performance and extends the lifespan of your fixture.
6.1 Cleaning
- Disconnect power before cleaning.
- Use a soft, lint-free cloth to wipe the exterior casing.
- Clean the lenses periodically with a soft cloth and a mild glass cleaner to maintain light output.
- Ensure ventilation openings are free from dust and debris.
6.2 Storage
When not in use, store the fixture in a dry, dust-free environment, preferably in its original packaging or a protective case.

Figure 6.1: The cooling system helps maintain the fixture's lifespan.
7. Troubleshooting
If you encounter issues, refer to the following table for common problems and solutions.
| Problem | Possible Cause | Solution |
|---|---|---|
| No power | Power cord not connected; no power from outlet; blown fuse. | Check power connections; test outlet; replace fuse if necessary. |
| No DMX control | Incorrect DMX address; faulty DMX cable; no terminator; DMX controller issue. | Verify DMX address; check cables; add terminator; test controller. |
| Light output is dim or inconsistent | Dimmer setting too low; dirty lens; overheating. | Adjust dimmer; clean lens; ensure proper ventilation. |
| Sound-activated mode not working | Microphone sensitivity too low; no sound input. | Increase MIC sensitivity; ensure sound is present. |
If the problem persists, contact customer support.
8. Specifications
| Parameter | Detail |
|---|---|
| Model Number | ZQ01326 |
| Brand | Nitehop |
| Power Source | Corded Electric |
| Light Source Type | LED (6x30W COB, 102 RGB LEDs) |
| Wattage | 200 Watts |
| Beam Angle | 120 Degrees |
| Color Temperature | 2800K-6500K |
| Control Modes | DMX512 (8/13 channels), Auto, Sound-Activated, Master/Slave |
| Material | Metal |
| Finish Type | Painted |
| Product Dimensions (L x W x H) | 18.08" x 10.61" x 7.07" (45.92cm x 26.95cm x 17.96cm) |
| Item Weight | 8.82 pounds (4.0 kg) |
| Lifespan | 60,000 Hours |

Figure 8.1: Product dimensions and weight.
9. Warranty and Support
Nitehop products are designed for reliability and performance. For warranty information, please refer to the terms and conditions provided at the time of purchase or contact your retailer. Keep your proof of purchase for warranty claims.
For technical support, troubleshooting assistance, or service inquiries, please contact Nitehop customer service through the official website or your purchase platform.