HOOBRO WT74DBJ01 Floating shelves
HOOBRO Gaming Floating Shelves with LED Lights User Manual
Brand: HOOBRO | Model: WT74DBJ01 Floating shelves
1. Introduction
This manual provides comprehensive instructions for the assembly, operation, and maintenance of your HOOBRO Gaming Floating Shelves with LED Lights. Designed for versatile storage and display, this wall-mounted shelf features integrated LED lighting and practical S-hooks to enhance your space.

Figure 1: HOOBRO Gaming Floating Shelf with LED Lights. This image shows the black floating shelf mounted on a wall, illuminated by blue LED lights, and displaying various items such as gaming consoles, action figures, and decorative plants. Six S-hooks are visible on the hanging rod below the shelf.
Please read this manual thoroughly before beginning assembly or operation to ensure safe and correct usage. Keep this manual for future reference.
2. Safety Instructions
- Wall Mounting: Ensure the shelf is securely mounted to a sturdy wall using appropriate hardware for your wall type. Improper installation can lead to the shelf falling and causing injury or damage.
- Weight Capacity: Do not exceed the maximum weight capacity of 22 lbs (10 kg) for the entire shelf. Distribute weight evenly across the shelves.
- Electrical Safety: The LED light strip operates via a USB power cord. Use only a compatible USB power source (e.g., a standard USB wall adapter, not included). Do not expose the LED strip or power cord to water or excessive moisture.
- Children and Pets: Keep small parts and packaging materials away from children and pets during assembly to prevent choking hazards.
- Sharp Edges: Handle components carefully during assembly to avoid cuts or scrapes.
- Ventilation: Ensure adequate ventilation around the LED light strip to prevent overheating.
3. Package Contents
Before assembly, verify that all components listed below are present and undamaged. If any parts are missing or damaged, please contact HOOBRO customer service.
- Pre-drilled Particleboard Shelf Panels
- Industrial-style Metal Pipes (Frame Components)
- LED Light Strip with 4.9-foot USB Power Cord
- Remote Control for LED Lights
- 6 x S-Hooks
- Assembly Hardware (Screws, Wall Anchors, etc.)
- Instruction Manual
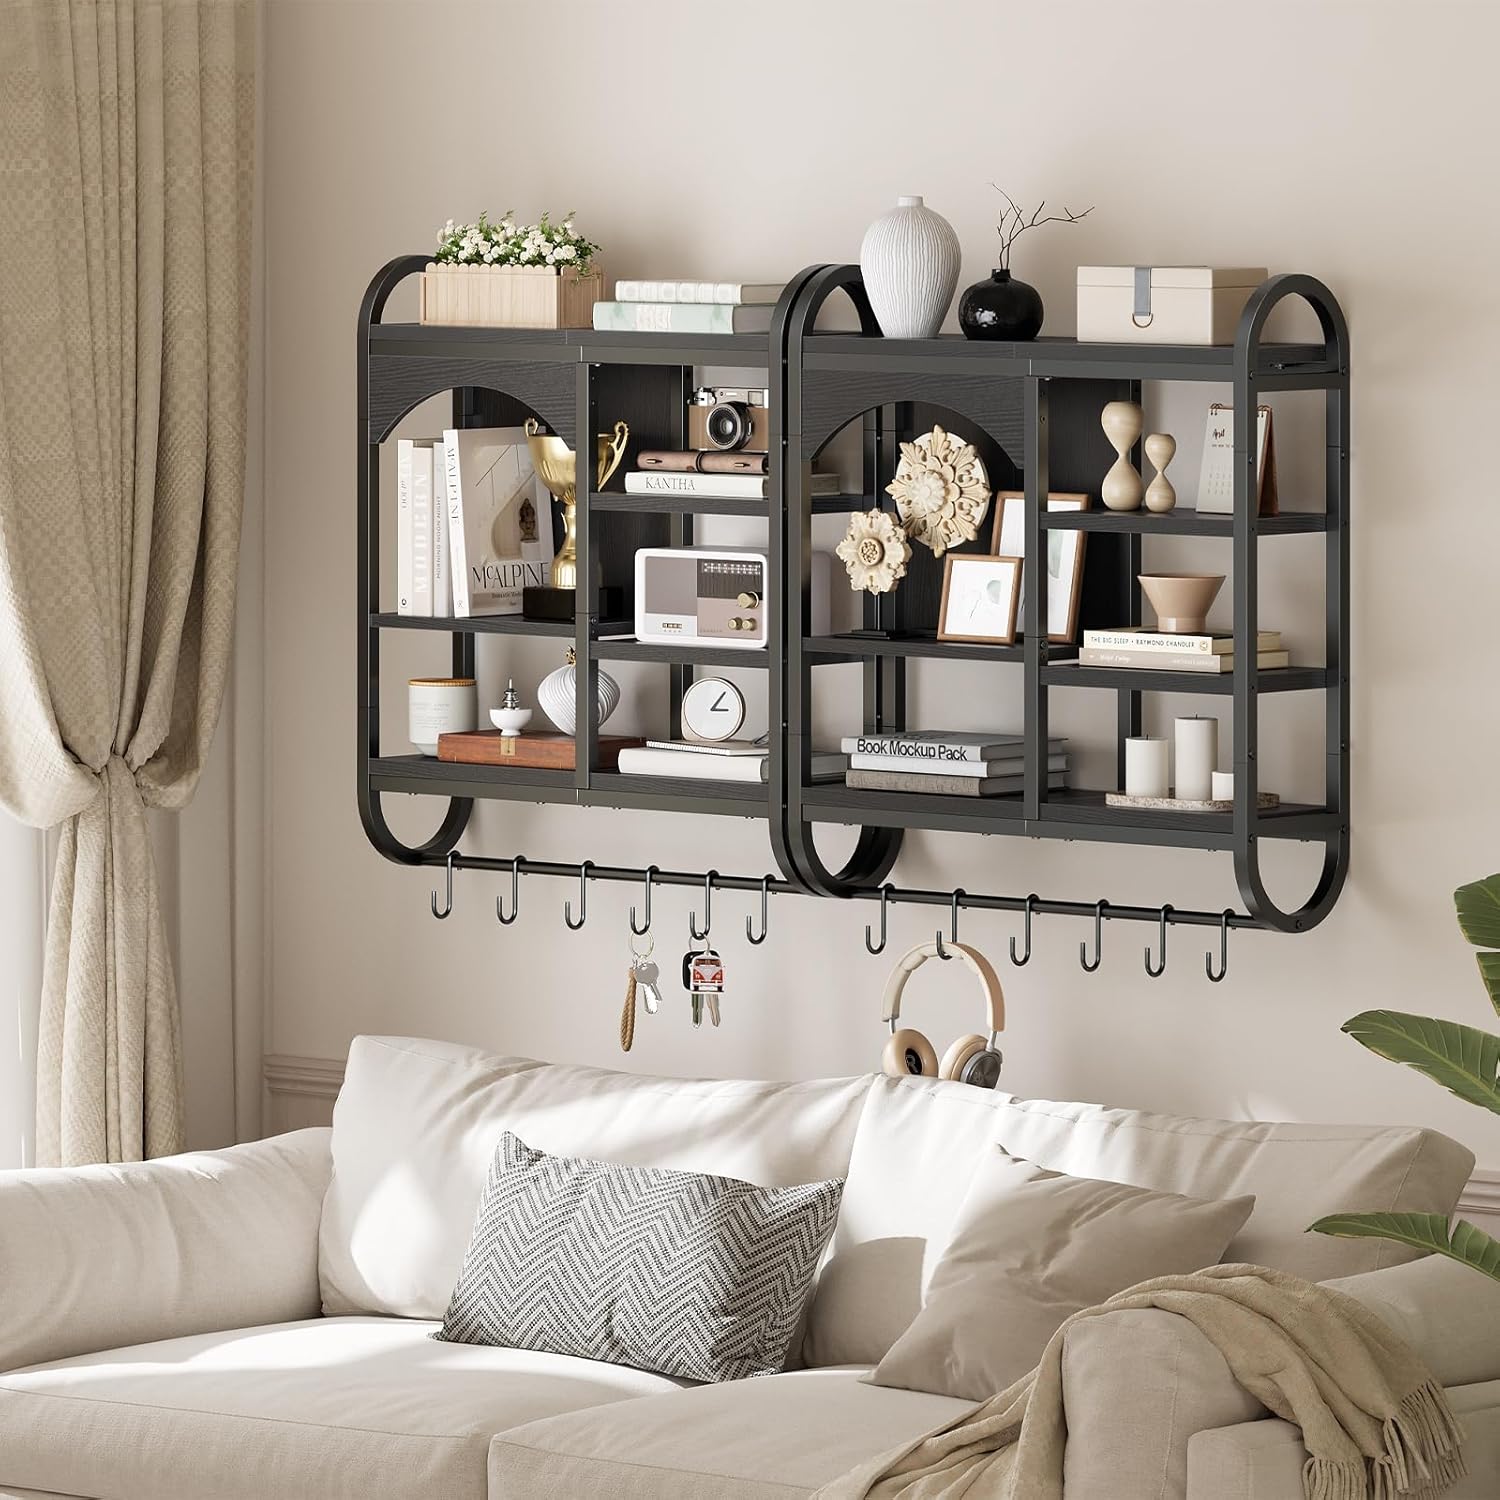
Figure 2: Key components of the HOOBRO Floating Shelf. This image highlights the premium engineered wood, the sturdy metal frame, the included S-hooks, and the USB port for the LED light strip.
4. Setup and Assembly
Follow these steps carefully for proper assembly and installation.
4.1 Tools Required (Not Included)
- Phillips Head Screwdriver
- Drill (for wall mounting)
- Level
- Pencil
- Hammer (for wall anchors)
4.2 Assembly Steps
- Unpack and Identify Parts: Lay out all components on a clean, soft surface to prevent scratches. Refer to the parts list in Section 3.
- Assemble Shelf Structure: Attach the particleboard shelf panels to the metal frame components using the provided screws. Ensure all connections are secure but do not overtighten until the entire structure is assembled.
- Prepare for Wall Mounting: Choose a suitable location on your wall. Use a level to mark the positions for the four keyholes on the back of the shelf.
- Drill Pilot Holes: Drill pilot holes at the marked locations. Insert wall anchors if necessary, depending on your wall material.
- Mount the Shelf: Secure the shelf to the wall using the appropriate screws, ensuring it is level and firmly attached.
- Install LED Light Strip: Carefully peel the adhesive backing from the LED light strip and attach it to the designated area within the arched compartment of the shelf. Ensure the strip is flush and secure.
- Connect Power: Plug the USB power cord of the LED light strip into a compatible USB power source.
- Attach S-Hooks: Place the 6 S-hooks onto the hanging rod at the bottom of the shelf.

Figure 3: Shelf Dimensions. This diagram illustrates the overall dimensions of the floating shelf, including length (28.5 inches), width (7.9 inches), and height (31.5 inches), along with internal shelf measurements.
Video 1: HOOBRO Floating Shelves Overview. This video provides a brief visual overview of the HOOBRO floating shelf, showcasing its features and potential uses in various settings.
5. Operating Instructions
5.1 LED Light Strip Operation
The LED light strip is controlled by the included remote control.
- Power On/Off: Press the Power button on the remote to turn the lights on or off.
- Color Selection: Use the color buttons on the remote to select from multiple available colors.
- Mode Selection: Cycle through various lighting modes (e.g., flash, fade, strobe) using the Mode buttons.
- Brightness Adjustment: Use the Brightness Up/Down buttons to adjust the intensity of the lights.

Figure 4: LED Light Control. This image displays the floating shelf with its LED lights illuminated, alongside the remote control used to manage colors, modes, and brightness.
5.2 S-Hooks Usage
The six movable S-hooks can be used to hang various small items such as keys, headphones, cables, or other accessories, maximizing the storage utility of the shelf.

Figure 5: Versatile Storage with S-Hooks. This image illustrates the floating shelf holding books, decorative items, and gaming gear, with the S-hooks below used for hanging headphones and other small accessories.
6. Maintenance
- Cleaning: Wipe the shelf surfaces with a soft, damp cloth. Avoid using harsh chemicals, abrasive cleaners, or excessive moisture, as these can damage the finish.
- Dusting: Regularly dust the shelf and LED strip to maintain optimal appearance and light output.
- Hardware Check: Periodically check all screws and wall mounting hardware to ensure they remain tight and secure. Retighten if necessary.
- LED Care: Do not attempt to disassemble or repair the LED light strip. If it malfunctions, contact customer support.
7. Troubleshooting
| Problem | Possible Cause | Solution |
|---|---|---|
| LED lights do not turn on. |
|
|
| Shelf feels unstable or wobbly. |
|
|
| Missing parts during unboxing. |
|
|
8. Specifications
| Feature | Detail |
|---|---|
| Brand | HOOBRO |
| Model Name | WT74DBJ01 Floating shelves |
| Product Dimensions (L x W x H) | 28.5" x 7.9" x 31.5" (72.5 cm x 20 cm x 80 cm) |
| Item Weight | 16.7 Pounds (7.57 kg) |
| Maximum Weight Capacity | 22 lbs (10 kg) |
| Material | High-quality Particleboard, Industrial-style Metal Pipes |
| Number of Shelves | 5 (multiple partitions) |
| LED Light Strip | Multi-color, multiple modes, adjustable brightness, 4.9-foot USB power cord |
| Included Accessories | 6 S-Hooks, LED Remote Control |
9. Warranty and Support
For warranty information or technical support, please contact HOOBRO customer service directly. Keep your purchase receipt or order number handy as proof of purchase.
HOOBRO Customer Service: Refer to the contact information provided with your product packaging or visit the official HOOBRO website for support details.
Related Documents - WT74DBJ01 Floating shelves
 |
Beneouya BY1001 Floating Shelf Installation Guide This is the official instruction manual for the Beneouya BY1001 floating shelf. It provides detailed steps, safety guidelines, and a list of required tools and supplied parts for easy installation of your new wall-mounted wooden shelves. |
 |
Floating Shelves Instruction Manual and Warranty Information This document provides instructions for installing floating shelves and details the two-year limited warranty provided by the manufacturer. It includes a parts list, step-by-step installation guides, and important safety warnings. |
 |
Floating Shelf Assembly Instructions Step-by-step guide for assembling and installing floating shelves, including hardware identification and installation steps. |
 |
YEMNMFH Wood Floating Wall Shelves Installation Manual Installation guide for YEMNMFH Wood Floating Wall Shelves Set of 2, featuring edge design for wall storage in various rooms. |
 |
SENJIE Wall Shelves Installation Guide - Easy Assembly Instructions Detailed installation guide for SENJIE Wall Shelves. This document provides a comprehensive overview of package contents and step-by-step assembly instructions for mounting the rustic wood shelves with an integrated wire storage basket. Perfect for organizing bathrooms, kitchens, bedrooms, and living rooms. |
 |
LUPWNEKA Floating Shelves Installation Guide Step-by-step assembly and installation instructions for the LUPWNEKA floating shelves with hooks. Includes parts list, hardware details, and mounting procedures for a secure wall attachment. |
Ask a question about this manual
Ask about setup, troubleshooting, compatibility, parts, safety, or missing instructions. Manuals+ will review the question and use this page’s manual context to help answer it.