
1. Introduction
This manual provides essential information for the installation, operation, and maintenance of your new Generic Carburetor, designed as a direct replacement for the Troy Bilt Model 15006 Junior Tiller. Proper installation and care will ensure optimal performance and longevity of your equipment.
Key Features:
- Precision OEM Replacement - Exact fit for Model 15006 with factory specifications.
- Durable Aluminum Construction - Resists corrosion and extends service life.
- Easy Installation - No modifications needed for quick replacement.
- Smooth Engine Operation - Reduces vibration and ensures consistent power.
2. Safety Information
Always prioritize safety when working with fuel systems and power equipment. Failure to follow these safety guidelines may result in serious injury or damage to property.
- Ensure the engine is off and cool before beginning any work.
- Disconnect the spark plug wire to prevent accidental starting.
- Work in a well-ventilated area to avoid inhaling fuel fumes.
- Wear appropriate personal protective equipment (PPE), including safety glasses and gloves.
- Keep open flames, sparks, and other ignition sources away from fuel.
- Dispose of old fuel and parts responsibly according to local regulations.
- If you are unsure about any step, consult a qualified service technician.
3. Package Contents
Verify that all components are present and undamaged upon opening the package:
- 1 x Generic Carburetor (compatible with Troy Bilt Model 15006 Junior Tiller)
- 1 x Mounting Gasket

Image: The Generic Carburetor, shown with the included mounting gasket. This is the primary component for replacing the original carburetor on your Troy Bilt Model 15006 Junior Tiller.
4. Setup and Installation
This carburetor is designed for easy replacement. However, if you are not familiar with small engine repair, it is recommended to seek professional assistance.
Required Tools (Not Included):
- Socket wrench set
- Screwdriver set
- Pliers
- Fuel line clamps
- Clean rags
Installation Steps:
- Prepare the Tiller: Ensure the tiller is on a stable, level surface. Turn off the engine and allow it to cool completely. Disconnect the spark plug wire.
- Drain Fuel: Place a suitable container under the fuel tank and drain all fuel. Disconnect the fuel line from the carburetor, using clamps to prevent spills.
- Remove Air Filter Assembly: Carefully remove the air filter housing and air filter to gain access to the carburetor.
- Disconnect Linkages: Note the position of all throttle and choke linkages connected to the old carburetor. Disconnect them carefully. Taking photos before removal can be helpful.
- Remove Old Carburetor: Loosen and remove the mounting bolts that secure the carburetor to the engine. Carefully detach the old carburetor and remove any old gaskets.
- Clean Mounting Surface: Thoroughly clean the engine's mounting surface to ensure a proper seal with the new gasket.
- Install New Carburetor: Place the new mounting gasket onto the engine's mounting studs. Position the new Generic Carburetor onto the studs, ensuring the gasket is properly aligned.
- Secure Carburetor: Reinstall the mounting bolts and tighten them evenly to secure the carburetor. Do not overtighten.
- Reconnect Linkages and Fuel Line: Reattach all throttle and choke linkages to their correct positions. Reconnect the fuel line, ensuring it is securely clamped.
- Reinstall Air Filter Assembly: Reattach the air filter and its housing.
- Refill Fuel and Test: Refill the fuel tank with fresh, appropriate fuel. Reconnect the spark plug wire. Start the engine and check for leaks or abnormal operation.
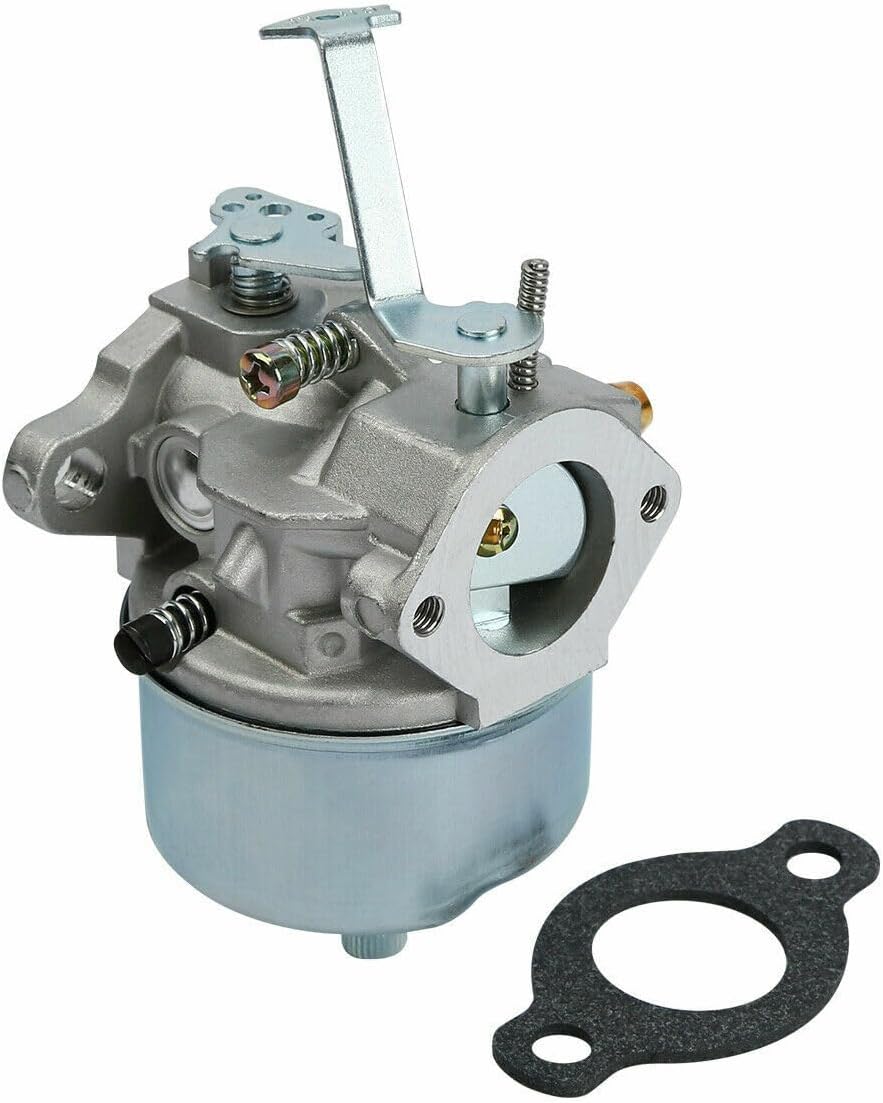
Image: Side view of the carburetor, highlighting the mounting holes and fuel inlet. Ensure these align correctly with the engine during installation.

Image: Bottom view of the carburetor, showing the fuel bowl. This component holds a small reservoir of fuel for the engine.
5. Operating Principles
The carburetor is a crucial component of your tiller's fuel system, responsible for mixing air and fuel in the correct ratio for combustion. It atomizes fuel into a fine mist and mixes it with air before sending it to the engine's combustion chamber. The throttle and choke controls on your tiller directly manipulate the carburetor to regulate engine speed and aid in cold starting.
This replacement carburetor is pre-tuned for optimal performance with the Troy Bilt Model 15006 Junior Tiller and typically requires no further adjustments after installation.
6. Maintenance
Regular maintenance of your carburetor and fuel system will extend the life of your tiller and ensure reliable operation.
- Fuel Quality: Always use fresh, clean fuel. Stale or contaminated fuel is a primary cause of carburetor issues. Consider using a fuel stabilizer if the tiller will be stored for extended periods.
- Fuel Filter: Regularly inspect and replace the fuel filter (if equipped) to prevent debris from reaching the carburetor.
- Air Filter: Keep the air filter clean and replace it as recommended by your tiller's original manual. A dirty air filter can cause the engine to run rich and affect carburetor performance.
- External Cleaning: Periodically clean the exterior of the carburetor to remove dirt and grime. Avoid spraying water directly into the carburetor's openings.
- Storage: Before long-term storage, either run the engine until it runs out of fuel or drain the fuel tank and carburetor bowl to prevent fuel degradation and gumming.
7. Troubleshooting
Refer to the table below for common issues and potential solutions related to carburetor performance. Always ensure basic checks (fuel level, spark plug, air filter) are performed first.
| Problem | Possible Cause | Solution |
|---|---|---|
| Engine won't start | No fuel reaching carburetor; clogged fuel line/filter; incorrect choke setting. | Check fuel level and fuel filter. Ensure choke is set correctly for starting. Verify fuel line is not pinched. |
| Engine runs rough/stalls | Stale fuel; dirty air filter; minor carburetor obstruction. | Drain old fuel and refill with fresh fuel. Clean/replace air filter. If issues persist, professional cleaning may be needed. |
| Engine lacks power | Dirty air filter; fuel delivery issue; engine overload. | Clean/replace air filter. Check fuel flow. Ensure tiller is not being overloaded. |
| Fuel leaks from carburetor | Loose connections; damaged gasket; float needle issue. | Check all fuel line connections and mounting bolts for tightness. Inspect gasket for damage. If leak persists, internal carburetor issue may require professional repair or replacement. |
8. Specifications
Detailed specifications for the Generic Carburetor:
| Feature | Detail |
|---|---|
| Manufacturer | Generic |
| Brand | Generic |
| Compatible Model | Troy Bilt Model 15006 Junior Tiller |
| Item Weight | Approximately 1 pound |
| Product Dimensions | Approximately 1 x 1 x 1 inches (packaging dimensions) |
| Country of Origin | China |
| Manufacturer Part Number | 1 |
| ASIN | B0F311L7CX |
9. Warranty and Support
This Generic Carburetor is typically covered by the standard return and replacement policies of the retailer from which it was purchased. For specific warranty details or technical support, please refer to the documentation provided by your retailer or contact the seller directly.
For general inquiries regarding the Troy Bilt Model 15006 Junior Tiller, please consult the original tiller's instruction manual or the manufacturer's official support channels.


