1. Introduction
This user manual provides comprehensive instructions for the Ignition Coil Module, a high-quality replacement part designed for specific Craftsman R105 Riding Mower models. It is crucial to read this manual thoroughly before installation and operation to ensure proper function, safety, and longevity of the module. This module is engineered for high precision, low noise, and high temperature resistance, offering a durable solution for your mower's ignition system.
Please note that this is a replacement part and not a genuine OEM component. Always verify the item's appearance and size against your original part before installation, as model numbers are for reference only and adjustments may be needed for proper fitment in some cases.
2. Product Overview
The Ignition Coil Module is a critical component in a riding mower's engine, responsible for transforming the battery's low voltage into the high voltage required to create a spark at the spark plug. This spark ignites the fuel-air mixture, allowing the engine to run. A properly functioning ignition coil is essential for reliable engine starting and smooth operation.
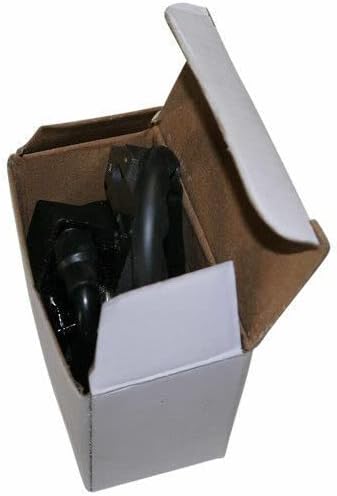
This image shows the Ignition Coil Module securely packaged in a small, open cardboard box, ready for installation.
Key Features:
- Direct replacement for Ignition Coil Module in Craftsman R105 Riding Mower models CMXGRAM7368327 and CMXGRAM211303.
- High precision manufacturing for reliable performance.
- Designed for low noise operation.
- Constructed with high temperature-resistant materials for durability.
- Durable construction for extended service life.
3. Setup and Installation
Safety First: Always disconnect the spark plug wire and the battery before performing any maintenance or installation on your riding mower to prevent accidental starting and electrical shock.
Pre-Installation Checklist:
- Ensure the mower is turned off and the engine is cool.
- Gather necessary tools (e.g., wrenches, screwdrivers).
- Compare the new ignition coil module with the old one to confirm compatibility and fit.
Installation Steps:
- Locate the Old Ignition Coil: Refer to your mower's service manual for the exact location of the ignition coil. It is typically mounted near the flywheel.
- Disconnect Wires: Carefully disconnect all electrical wires connected to the old ignition coil. Note their positions for correct re-connection.
- Remove Old Coil: Unscrew and remove the bolts or fasteners holding the old ignition coil in place. Carefully remove the old coil.
- Install New Coil: Position the new Ignition Coil Module in the same location as the old one. Ensure proper alignment with the flywheel.
- Secure New Coil: Fasten the new coil using the original bolts or appropriate new hardware. Ensure it is securely mounted but do not overtighten.
- Reconnect Wires: Reconnect all electrical wires to the new ignition coil module, ensuring they are firmly attached and in their correct positions.
- Final Checks: Double-check all connections and ensure no tools or debris are left near the engine. Reconnect the spark plug wire and battery.
4. Operating Principles
Once installed, the Ignition Coil Module operates automatically as part of your mower's engine system. When the engine is cranked, the module receives a low voltage signal from the battery. Inside the coil, this low voltage is rapidly transformed into a high voltage pulse. This high voltage is then sent to the spark plug, creating a powerful spark that ignites the fuel-air mixture in the engine's cylinder, initiating combustion and allowing the engine to run. Proper operation of this module ensures consistent and efficient engine performance.
5. Maintenance
The Ignition Coil Module is designed for durability and requires minimal routine maintenance. However, periodic inspection can help ensure its continued performance.
Routine Maintenance:
- Visual Inspection: Periodically inspect the module and its wiring for any signs of physical damage, corrosion, or loose connections.
- Connection Integrity: Ensure all electrical connections to the coil are clean, tight, and free from rust or debris.
Cleaning:
If the module becomes dirty, gently wipe it with a clean, dry cloth. Avoid using harsh chemicals or abrasive materials that could damage the housing or electrical components.
6. Troubleshooting
If your mower experiences ignition-related issues, the following table provides common problems and potential solutions related to the ignition coil module.
| Problem | Possible Cause | Solution |
|---|---|---|
| Mower won't start or starts with difficulty. | Faulty ignition coil module. | Test the ignition coil for proper spark. If no spark or weak spark, replace the module. |
| Engine misfires or runs rough. | Intermittent coil failure or loose connections. | Check all electrical connections to the coil. If connections are secure, consider replacing the coil. |
| No spark at the spark plug. | Completely failed ignition coil module. | Confirm spark plug is good. If still no spark, replace the ignition coil module. |
| Engine stalls frequently. | Coil overheating or intermittent failure. | Allow engine to cool. If problem persists, replace the coil. |
Note: Always consult a qualified technician if you are unsure about performing any repairs or diagnostics.
7. Specifications
| Specification | Detail |
|---|---|
| Manufacturer | Nvduq_Parts |
| Brand | Generic |
| Item Model Number | nvduq2803-06160 |
| Manufacturer Part Number | DUA-PARTS-CSP-PL-29032025-06160 |
| ASIN | B0F2ZXDXRS |
| Date First Available | March 30, 2025 |
8. Warranty and Support
As this is a replacement part, specific warranty terms may vary. Generally, replacement parts are covered by a limited warranty against manufacturing defects. For detailed warranty information, please refer to the seller's policy at the time of purchase.
Return Policy: This product is eligible for a refund or replacement within 30 days of purchase, subject to the seller's return policy.
For technical support, installation assistance, or inquiries regarding compatibility, please contact the seller directly through the platform where the purchase was made. Provide your order details and the product's model number (nvduq2803-06160) for faster service.