DUA-PARTS-CSP-PL-29032025-03336
Ignition Coil Module Instruction Manual
Brand: Generic | Model: DUA-PARTS-CSP-PL-29032025-03336
1. Introduction
This manual provides essential information for the installation, operation, and maintenance of your new Generic Ignition Coil Module. This replacement part is designed for Champion 100331 and 100217 Generator 3650W models. Please read this manual thoroughly before attempting any installation or operation to ensure proper function and safety.
The Ignition Coil Module is a high-precision component, engineered for low noise and high temperature resistance, ensuring durability and reliable performance. While this is a replacement part, it is not a genuine Champion product. Always verify the item's appearance and size against your original part before installation.
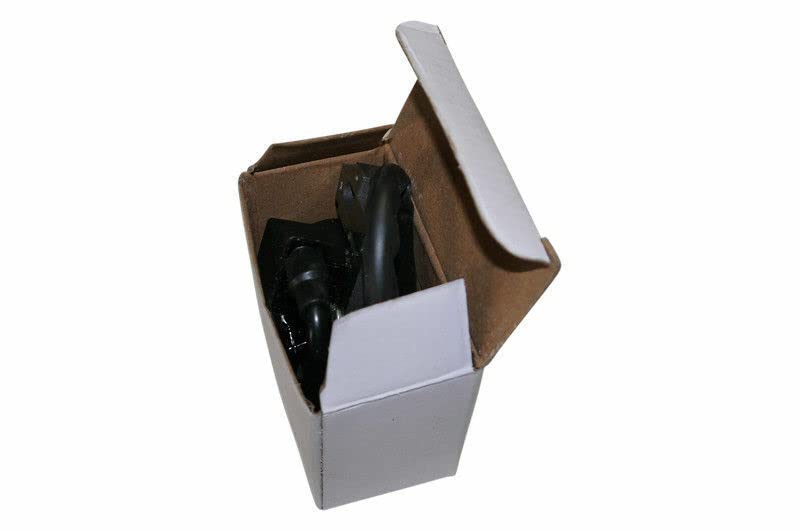
Figure 1: The Ignition Coil Module as received in its packaging box. The module is black and appears to be made of durable materials, partially visible within a white and brown cardboard box.
2. Safety Information
Always observe the following safety precautions:
- Ensure the generator is turned off and cooled down before attempting any installation or maintenance.
- Disconnect the spark plug wire to prevent accidental starting.
- Wear appropriate personal protective equipment (PPE), such as gloves and eye protection.
- If you are unsure about any step, consult a qualified technician.
- Keep children and pets away from the work area.
3. Setup and Installation
This section outlines the general steps for replacing an ignition coil module. Specific adjustments may be needed for certain generator models.
- Preparation: Ensure the generator is completely off and cool. Disconnect the spark plug wire.
- Locate the Old Module: Identify the existing ignition coil module on your Champion 100331 or 100217 Generator 3650W. It is typically located near the flywheel.
- Disconnect Wiring: Carefully disconnect any electrical wires connected to the old ignition coil module. Note their positions for re-connection.
- Remove Old Module: Unscrew and remove the bolts securing the old module to the engine block. Gently detach the module.
- Install New Module: Position the new Generic Ignition Coil Module in place. Ensure it aligns correctly with the mounting holes.
- Secure New Module: Fasten the new module with the appropriate bolts. Ensure it is securely mounted but do not overtighten.
- Connect Wiring: Reconnect all electrical wires to the new module, ensuring they are properly seated.
- Set Air Gap (Crucial Step): A proper air gap between the ignition coil and the flywheel magnet is critical for correct spark timing. Use a feeler gauge (typically 0.008-0.012 inches or as specified by your generator's manual) to set this gap. Loosen the mounting bolts slightly, insert the feeler gauge between the coil and the flywheel magnet, push the coil against the magnet, then tighten the bolts. Remove the feeler gauge.
- Final Check: Double-check all connections and ensure no tools or debris are left near moving parts.
4. Operating Considerations
Once the ignition coil module is installed, the generator should be ready for operation. Always refer to your generator's main operating manual for starting procedures and general usage guidelines.
- Ensure the fuel tank is adequately filled and the fuel valve is open.
- Check the oil level before each use.
- Follow the manufacturer's instructions for choking and starting the engine.
- If the generator does not start after several attempts, refer to the troubleshooting section.
5. Maintenance
Regular maintenance ensures the longevity and optimal performance of your ignition coil module and generator.
- Cleanliness: Keep the ignition coil module and surrounding area clean and free of dirt, debris, and oil buildup.
- Connections: Periodically check electrical connections for tightness and corrosion. Clean as necessary.
- Air Gap: If experiencing ignition issues, re-check the air gap between the coil and flywheel magnet.
- Spark Plug: Ensure the spark plug is in good condition and properly gapped, as a faulty spark plug can mimic ignition coil issues.
6. Troubleshooting
If you encounter issues after installing the ignition coil module, consider the following common problems and solutions:
| Problem | Possible Cause | Solution |
|---|---|---|
| Generator does not start or has weak spark. | Incorrect air gap setting. Loose or corroded wiring connections. Faulty spark plug. Incorrect module for generator model. | Re-set air gap (refer to Section 3). Check and secure all electrical connections. Clean any corrosion. Inspect and replace spark plug if necessary. Verify module compatibility with your generator model (Champion 100331, 100217, 3650W). |
| Engine misfires or runs rough. | Improper air gap. Contaminated fuel. Carburetor issues (unrelated to coil). | Check and adjust air gap. Drain old fuel and refill with fresh fuel. Consult generator manual for carburetor troubleshooting. |
| No spark at all. | Kill switch engaged. Short circuit in wiring. Completely failed ignition coil module. | Ensure kill switch is in the "Run" position. Inspect wiring for damage or shorts. If all other checks fail, the module may be defective and require replacement. |
7. Specifications
- Product Type: Replacement Ignition Coil Module
- Brand: Generic
- Model Number: DUA-PARTS-CSP-PL-29032025-03336
- Compatible Generator Models: Champion 100331, 100217 Generator 3650W
- Manufacturer: Nvduq_Parts
- ASIN: B0F2YPLTX9
- Key Features: High precision, low noise, high temperature-resistance, durable construction.
8. Warranty and Support
As a replacement part, specific warranty details may vary. Please refer to the seller's return policy for information regarding returns or exchanges. For technical support or further inquiries, please contact the seller directly through the platform where the purchase was made.
Seller: Wickoff
Return Policy: 30 days (as per Amazon Buy Box information)
For additional assistance, you may also refer to the original Champion generator manual for specific component locations and detailed repair procedures.
Ask a question about this manual
Ask about setup, troubleshooting, compatibility, parts, safety, or missing instructions. Manuals+ will review the question and use this page’s manual context to help answer it.