1. Introduction
This manual provides comprehensive instructions for the operation and maintenance of your arungo 128GB Digital Voice Recorder, Model ZD70. Please read this manual thoroughly before using the device to ensure proper functionality and to maximize your user experience.
2. Package Contents
Verify that all items listed below are included in your package:
- 1x arungo Digital Voice Recorder (Model ZD70)
- 1x 128GB TF Card (pre-installed)
- 1x Earphones
- 1x Type-C Charging Cable
- 1x User Manual (this document)
3. Product Overview
Familiarize yourself with the components and controls of your digital voice recorder.
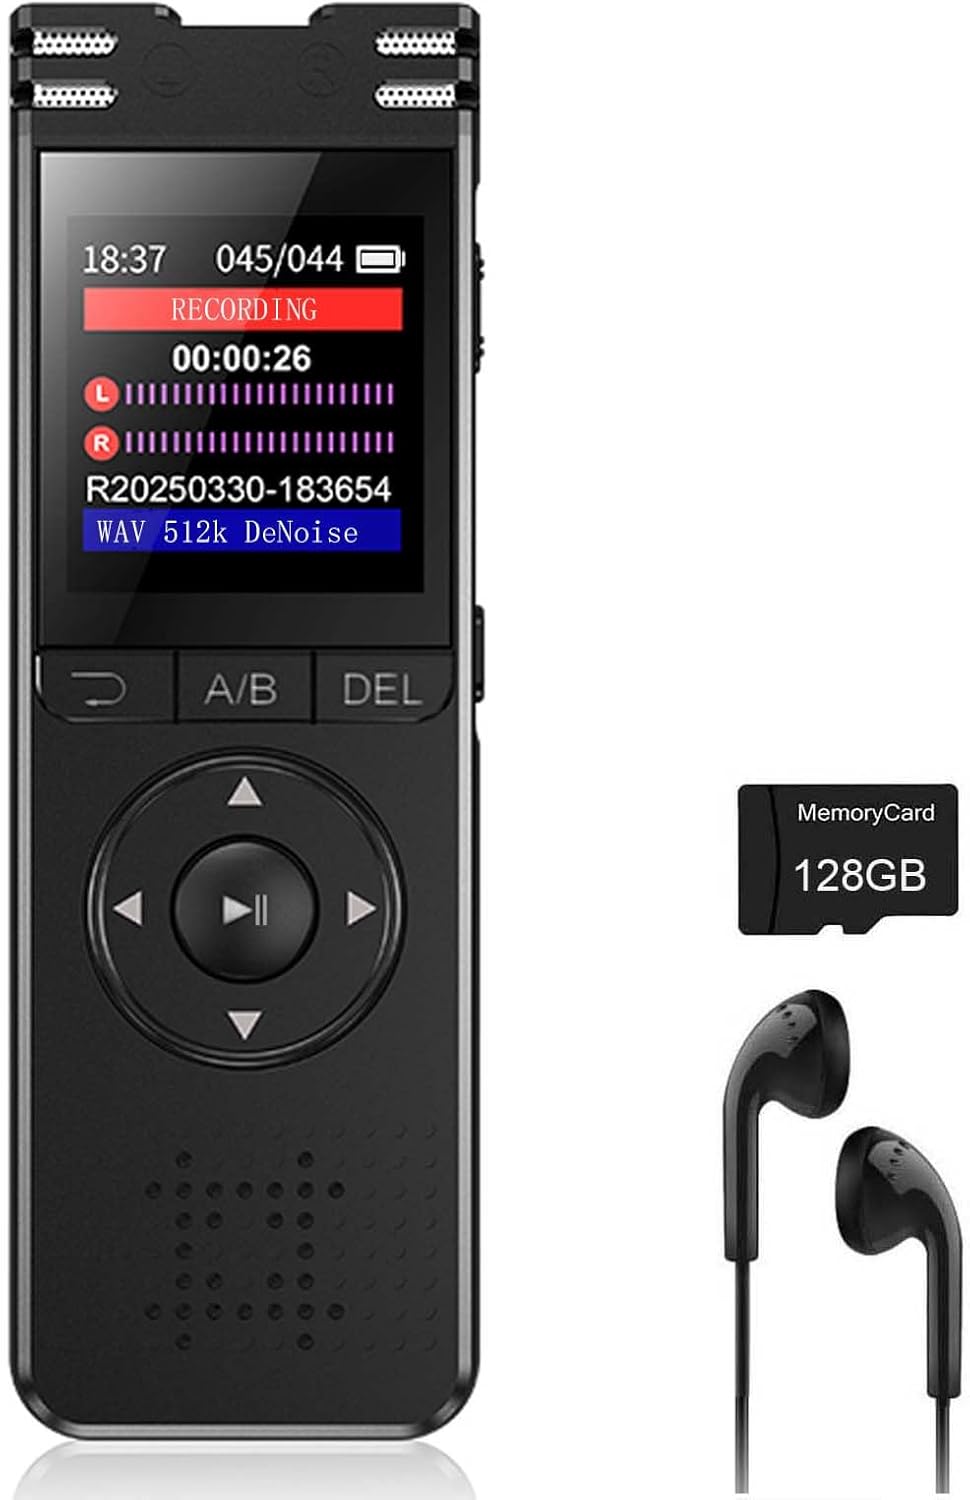
Figure 3.1: arungo ZD70 Digital Voice Recorder and accessories.

Figure 3.2: Front and side view of the arungo ZD70 with labeled controls.
- MIC: Built-in microphones for audio input.
- TF-Card Slot: Slot for the microSD card (128GB card pre-installed).
- Return: Button to go back to the previous menu or screen.
- A/B: Button for A-B repeat function during playback.
- DEL: Delete button for files.
- Left/Right: Navigation buttons.
- Play & Pause / OK: Multifunction button for playback control and menu selection.
- Down: Navigation button.
- Speaker: Built-in speaker for audio playback.
- Rec/Save Switch: Slide switch to initiate recording (Push UP) or save (Push DOWN).
- Type-C Port: For charging and data transfer.
- Power Button: To turn the device on or off.
4. Setup
4.1. Charging the Device
Before first use, fully charge the voice recorder. Connect the supplied Type-C charging cable to the device's Type-C port and the other end to a USB power adapter (not included) or a computer's USB port. The battery indicator on the screen will show charging status.
4.2. Memory Card Installation
The arungo ZD70 comes with a 128GB TF card pre-installed. If you need to replace or access the card, locate the TF-Card Slot on the side of the device. Gently push the card to eject it, or insert a new card until it clicks into place.
5. Basic Operation
5.1. Power On/Off
- To Power On: Press and hold the Power Button until the screen illuminates.
- To Power Off: Press and hold the Power Button until the screen turns off.
5.2. Recording Audio
The device features a one-button recording function.
- Ensure the device is powered on.
- Slide the Rec/Save Switch UP to the "Recording" position. The device will immediately begin recording, and the screen will display the recording status.
- To pause recording, press the Play & Pause / OK button. Press it again to resume.
- To stop recording and save the file, slide the Rec/Save Switch DOWN to the "Save" position. The recording will be saved automatically with a time-stamp.

Figure 5.1: One-button recording and saving operation.
5.3. Playback
- From the main menu, navigate to the "Recordings" or "Files" section using the navigation buttons.
- Select the desired audio file using the Up/Down buttons and press the Play & Pause / OK button to start playback.
- During playback, use the Left/Right buttons to fast forward or rewind.
- Press the Play & Pause / OK button to pause or resume playback.
6. Advanced Features
6.1. Smart Voice Activation (VOR)
This feature allows the recorder to automatically start recording when sound is detected and pause when silence occurs, conserving storage space and battery life.
- To enable/disable Voice Activated Recording, navigate to the settings menu and locate the VOR option.
- Adjust the sensitivity level as needed. Higher sensitivity will trigger recording with softer sounds.
6.2. A-B Repeat Function
The A-B repeat function allows you to loop a specific segment of an audio file during playback.
- During playback, press the A/B button once to set point A (start of the loop).
- Press the A/B button again to set point B (end of the loop). The device will then continuously play the segment between A and B.
- Press the A/B button a third time to exit A-B repeat mode.

Figure 6.1: A-B Repeat function for focused listening.
6.3. Playback Speed Control
Adjust the playback speed of audio files to suit your listening needs. This feature is useful for transcribing lectures or speeding through less critical parts of a recording.
- During playback, access the playback options menu (refer to your device's on-screen interface for specific navigation).
- Select "Speed Control" and use the navigation buttons to increase or decrease the playback speed.
6.4. Password Protection
Secure your recordings and device settings with a password.
- Navigate to the "Settings" menu and find the "Password Lock" or "Security" option.
- Follow the on-screen prompts to set a new password. Remember your password, as there may not be a recovery option.

Figure 6.2: Password protection feature for securing your device.
6.5. Time-Stamped Files
All recordings are automatically named with the exact date and time of creation, making it easy to locate specific files.
6.6. MP3 Player Functionality
The device can also function as an MP3 player. Transfer MP3 or WAV audio files to the device's storage, and access them through the "Music" or "Files" menu for playback.
7. File Management
7.1. Transferring Files to a Computer (Type-C)
Connect the voice recorder to your computer using the supplied Type-C cable. The device will appear as a removable storage device. You can then drag and drop recorded files to your computer or transfer music files to the recorder.
7.2. OTG Connection (On-The-Go)
The device supports OTG connection, allowing direct file transfer to compatible Android smartphones or tablets using an OTG adapter (not included).

Figure 7.1: OTG connection for convenient file management with a smartphone.
7.3. Deleting Files
To delete a recording:
- Navigate to the file you wish to delete.
- Press the DEL button.
- Confirm the deletion when prompted.
8. Maintenance
- Keep the device dry. Avoid exposure to moisture or liquids.
- Do not expose the device to extreme temperatures.
- Clean the device with a soft, dry cloth. Do not use abrasive cleaners or solvents.
- Avoid dropping or subjecting the device to strong impacts.
- Regularly back up important recordings to a computer or other storage device.
9. Troubleshooting
| Problem | Possible Solution |
|---|---|
| Device does not power on. | Ensure the battery is charged. Connect to a power source using the Type-C cable. |
| Cannot record. | Check if the Rec/Save switch is in the "Recording" position. Verify that there is sufficient storage space on the TF card. |
| Poor audio quality. | Ensure microphones are not obstructed. Record in a quieter environment. Adjust microphone gain settings if available. |
| Device not recognized by computer. | Try a different USB port or cable. Ensure the device is powered on when connected. |
| Forgot password. | Refer to the device's on-screen options for password reset or contact customer support. |
10. Specifications
| Feature | Detail |
|---|---|
| Model | ZD70 |
| Memory Storage Capacity | 128 GB (TF Card included) |
| Recording Formats | MP3 Audio, WAV |
| Recording Quality | Up to 1536kbps HD |
| Microphone | Built-In Dual High Sensitivity Microphones |
| Noise Reduction | Advanced PCM Noise Cancellation |
| Battery | 1 Nonstandard Battery (included) |
| Continuous Recording Time | Up to 50 hours |
| Screen Size | 1.44 Inches |
| Product Dimensions | 4.13"D x 0.49"W x 1.37"H |
| Item Weight | 6.7 ounces |
| Headphones Jack | 3.5 millimeters |
| Compatible Devices | Earphone |
11. Warranty and Support
For any usage issues or technical support, please contact arungo customer service. You can send a message via the Amazon seller message box or use the after-sales email provided with your purchase. Responses are typically provided within 24 hours.
Please retain your proof of purchase for warranty claims.


