1. Introduction
This manual provides essential information for the installation, operation, and maintenance of your YSVQHHDV TD.MT9612.795 TV Motherboard. This motherboard is designed to replace faulty units in compatible televisions, restoring full functionality and extending the lifespan of your device. It addresses common display issues and aims to improve overall TV performance.
2. Product Overview
The TD.MT9612.795 TV Motherboard is a critical component for your television's display and processing functions. This specific variant is identified as '4P 1T'.

Figure 2.1: Front view of the YSVQHHDV TD.MT9612.795 TV Motherboard, highlighting key connectors and the heat sink.
Key Features:
- Display Fault Resolution: Capable of resolving display problems such as blurred screen, black screen, flickering, vertical lines, and color shifts.
- Cost-Effective Repair: Offers a solution to repair a TV with a damaged motherboard, avoiding the expense of replacing the entire unit.
- Extended Lifespan: Replacing a faulty motherboard can prevent further damage to other TV components and prolong the overall life of the television.
- Improved Performance: May lead to enhanced image processing and faster response times, contributing to a better viewing experience.
3. Setup and Installation
Important Safety Notice: Before attempting any installation, ensure the television is completely disconnected from the power source. Working with electronic components requires caution. If you are not confident in your ability to perform this installation, seek assistance from a qualified technician.
Installation Steps:
- Preparation: Lay the TV screen-down on a soft, clean surface to prevent scratches. Remove the back panel of the television to access the internal components.
- Locate Old Motherboard: Identify the existing motherboard. Note the location and orientation of all connected cables and screws. It is recommended to take photos for reference.
- Disconnect Cables: Carefully disconnect all cables from the old motherboard. These typically include power cables, ribbon cables for the display panel, and various input/output connectors.
- Remove Old Motherboard: Unscrew and gently remove the old motherboard from the TV chassis.
- Install New Motherboard: Position the new YSVQHHDV TD.MT9612.795 motherboard into the chassis, ensuring it aligns with the screw holes. Secure it with the appropriate screws.
- Reconnect Cables: Reconnect all cables to the new motherboard. Refer to your photos taken in step 2. Ensure all connections are firm and correctly oriented. Pay close attention to the ribbon cables, as improper connection can cause display issues.

Figure 3.1: Front view of the motherboard with yellow arrows indicating common connection points for ribbon cables and other peripherals.
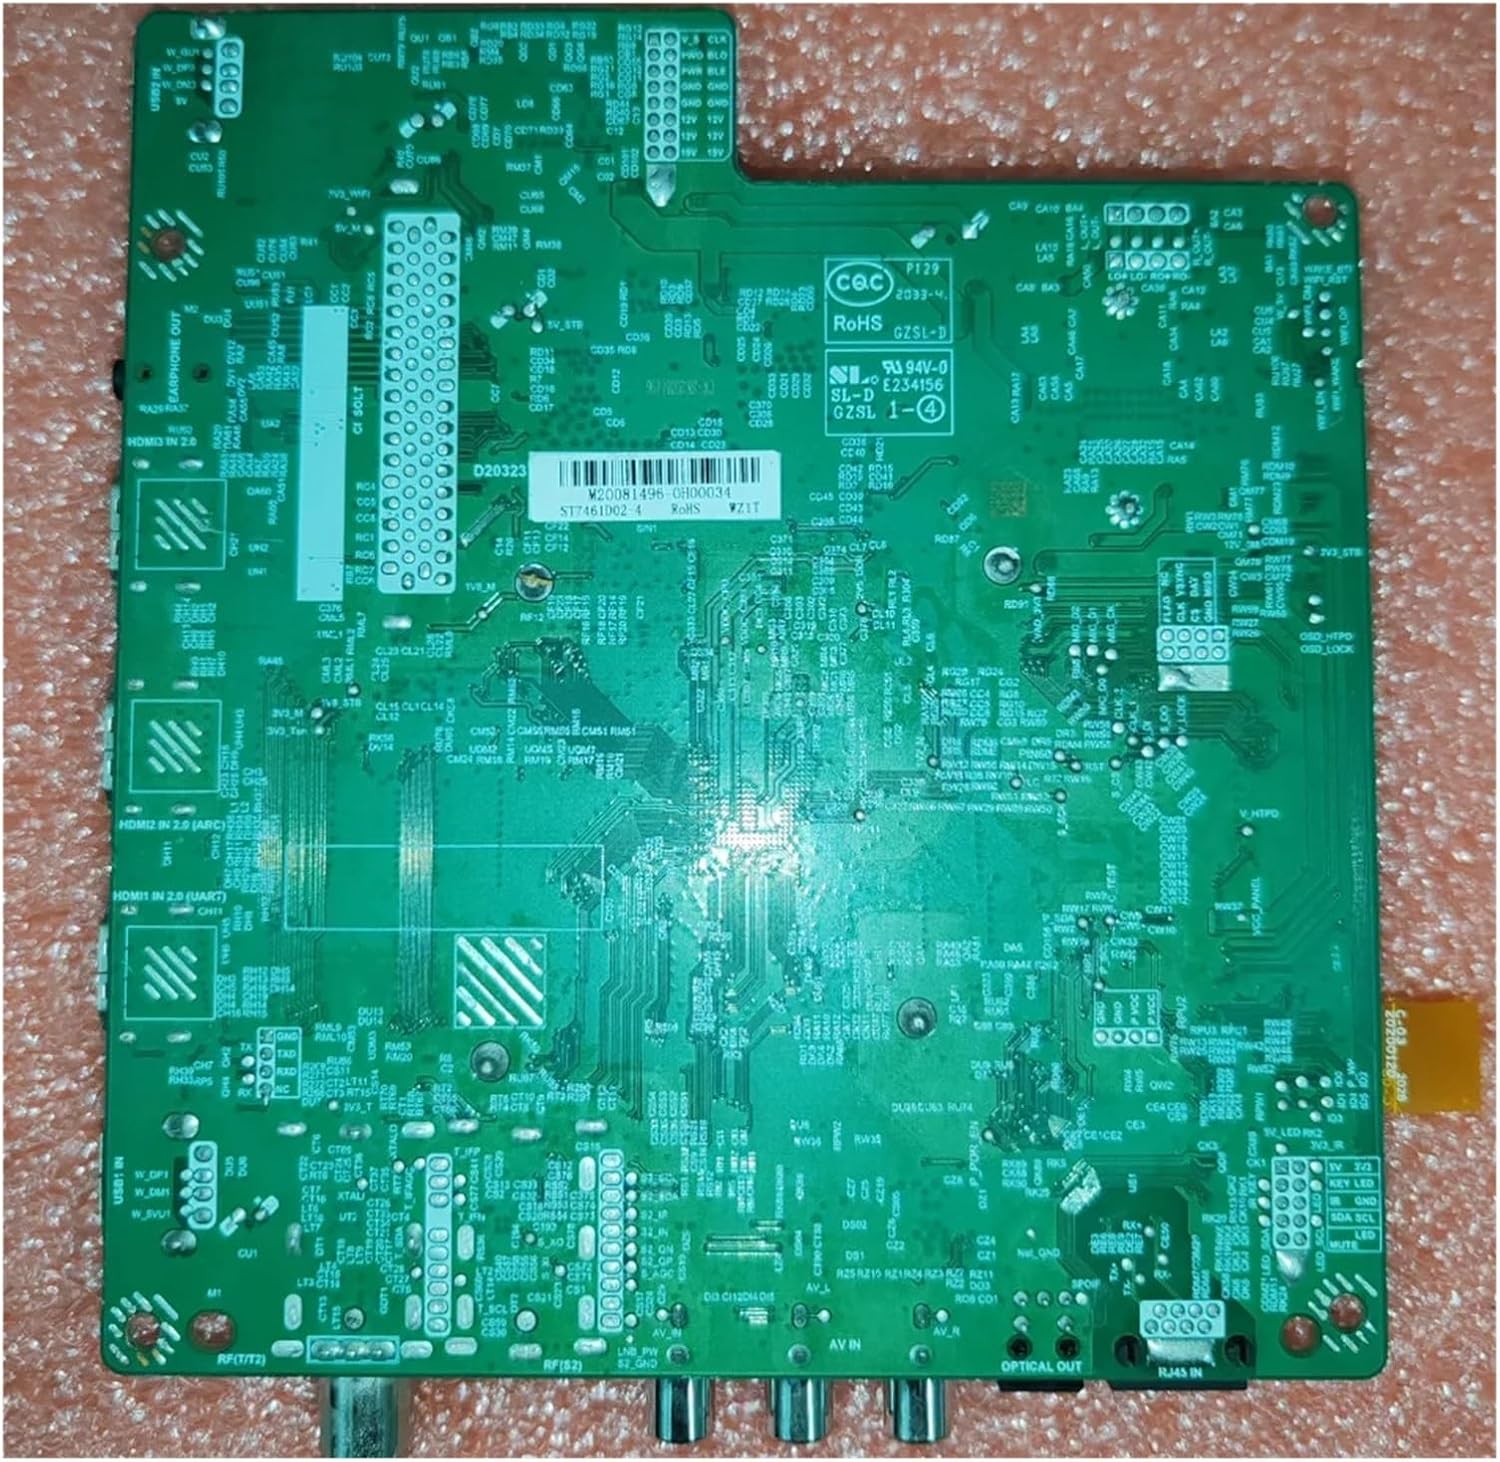
Figure 3.2: Back view of the YSVQHHDV TD.MT9612.795 TV Motherboard, showing solder points and circuit traces.
- Final Checks: Double-check all connections for security and correctness. Ensure no loose screws or tools are left inside the TV.
- Test: Before reattaching the back panel, connect the TV to power and perform a brief test to ensure it powers on and displays an image correctly.
- Reassemble: If the test is successful, reattach the TV's back panel.
4. Operating Instructions
The YSVQHHDV TD.MT9612.795 TV Motherboard functions as the central processing unit for your television. Once correctly installed, its operation is integrated with the TV's existing software and hardware. There are no direct user controls on the motherboard itself.
Upon successful installation, the TV should power on and function as normal, allowing you to access all standard TV features such as channel tuning, input selection, and smart TV functionalities (if applicable to your TV model).
5. Maintenance
Proper maintenance can help ensure the longevity of your TV and its components, including the motherboard.
General Maintenance Tips:
- Dust Prevention: Keep the TV's ventilation openings clear of dust and debris. Dust accumulation can lead to overheating, which can damage electronic components.
- Ventilation: Ensure adequate airflow around the TV. Do not block vents or place the TV in an enclosed space without proper ventilation.
- Temperature Control: Avoid exposing the TV to extreme temperatures or rapid temperature changes.
- Professional Cleaning: For internal cleaning, especially around sensitive components like the motherboard, it is recommended to consult a professional technician.
6. Troubleshooting
If you encounter issues after installing the new motherboard, refer to the following troubleshooting steps:
Common Issues and Solutions:
- No Power / TV Does Not Turn On:
- Verify the power cable is securely connected to both the TV and the wall outlet.
- Check the internal power connections to the motherboard.
- Ensure the power supply unit (PSU) of the TV is functional.
- No Picture / Black Screen:
- Confirm all ribbon cables connecting the motherboard to the display panel are correctly seated and not damaged.
- Check the input source selection on your TV.
- Ensure the backlight unit of the TV is working.
- Blurred Screen, Flickering, Vertical Lines, or Color Shifts:
- These symptoms often indicate an issue with the display panel connection. Re-seat the ribbon cables carefully.
- Inspect the ribbon cables for any kinks or damage.
- Ensure the display panel itself is not damaged.
- No Audio:
- Check speaker connections to the motherboard.
- Verify audio settings in the TV menu.
If these steps do not resolve the issue, it may indicate a problem with another component of the TV or a more complex issue with the motherboard itself. Professional diagnosis is recommended.
7. Specifications
| Feature | Detail |
|---|---|
| Model Number | TD.MT9612.795 |
| Variant | 4P 1T |
| Brand | YSVQHHDV |
| ASIN | B0F2TN8B92 |
| Package Dimensions | 1.18 x 0.79 x 0.39 inches |
| Item Weight | 1.76 ounces |
| Manufacturer | congyili |
| Date First Available | March 28, 2025 |
8. Warranty and Support
This product is subject to a return policy that allows for refund or replacement within 30 days of purchase. For specific warranty details, please refer to the terms provided by your retailer or contact the seller directly.
For technical support or further inquiries, please contact the seller or manufacturer through the platform where the product was purchased. Provide your product model number (TD.MT9612.795) and ASIN (B0F2TN8B92) for faster assistance.