1. Introduction
This manual provides essential instructions for the installation, maintenance, and troubleshooting of the KNVZNWFF Lidar Ranging Motor. This component is designed as a direct replacement part for compatible Roborock robotic vacuum cleaner models, specifically the S7, T7, T7S, and S7 MaxV series. Proper installation and care will ensure the continued efficient operation of your vacuum cleaner's navigation system.
2. Product Overview
The Lidar Ranging Motor is a critical component responsible for the laser navigation system in your robotic vacuum cleaner. It enables the vacuum to accurately map its surroundings, detect obstacles, and plan efficient cleaning routes. Replacing a faulty motor can restore your vacuum's navigation capabilities and overall cleaning performance.
Key Features:
- Improved Cleaning Efficiency: A functional motor ensures accurate navigation, allowing the vacuum to complete cleaning tasks faster and more effectively.
- Stable Equipment Operation: Replacing an aging or faulty motor reduces vibrations and operational abnormalities, contributing to smoother vacuum cleaner performance.
- Reduced Energy Consumption: An efficient motor operates optimally, potentially reducing energy consumption compared to a failing unit.
- Reduced Noise Interference: A smoothly running motor helps minimize the operational noise of the vacuum cleaner, contributing to a quieter environment.
3. Setup and Installation
This section outlines the general steps for replacing the Lidar Ranging Motor. It is recommended to consult your specific Roborock vacuum cleaner's service manual or a qualified technician for detailed disassembly and reassembly instructions.
- Preparation:
- Ensure the vacuum cleaner is powered off and disconnected from its charging base.
- Gather necessary tools, which may include screwdrivers (Phillips head), pry tools, and a clean workspace.
- Accessing the Lidar Unit:
- Carefully remove the top cover or access panel of your Roborock vacuum cleaner to expose the Lidar module. This usually involves unscrewing several screws.
- Disconnect any cables connected to the Lidar module.
- Removing the Old Motor:
- Once the Lidar module is accessible, locate the ranging motor within the assembly. It is typically connected via a drive belt and a circuit board.
- Carefully detach the drive belt from the motor pulley.
- Unscrew and remove the old motor from its housing. Note the orientation and connections.

Figure 3.1: Top view of the Lidar ranging motor assembly, showing the orange cover, drive belt, and motor housing.

Figure 3.2: Two views of the Lidar ranging motor assembly, showing the external cover and internal circuit board.
- Installing the New Motor:
- Position the new KNVZNWFF Lidar Ranging Motor into the housing, ensuring it aligns correctly with the mounting points.
- Secure the new motor with the screws previously removed.
- Carefully reattach the drive belt to the motor pulley and the Lidar sensor mechanism. Ensure the belt is properly tensioned and seated.
- Reconnect any electrical connectors to the circuit board.
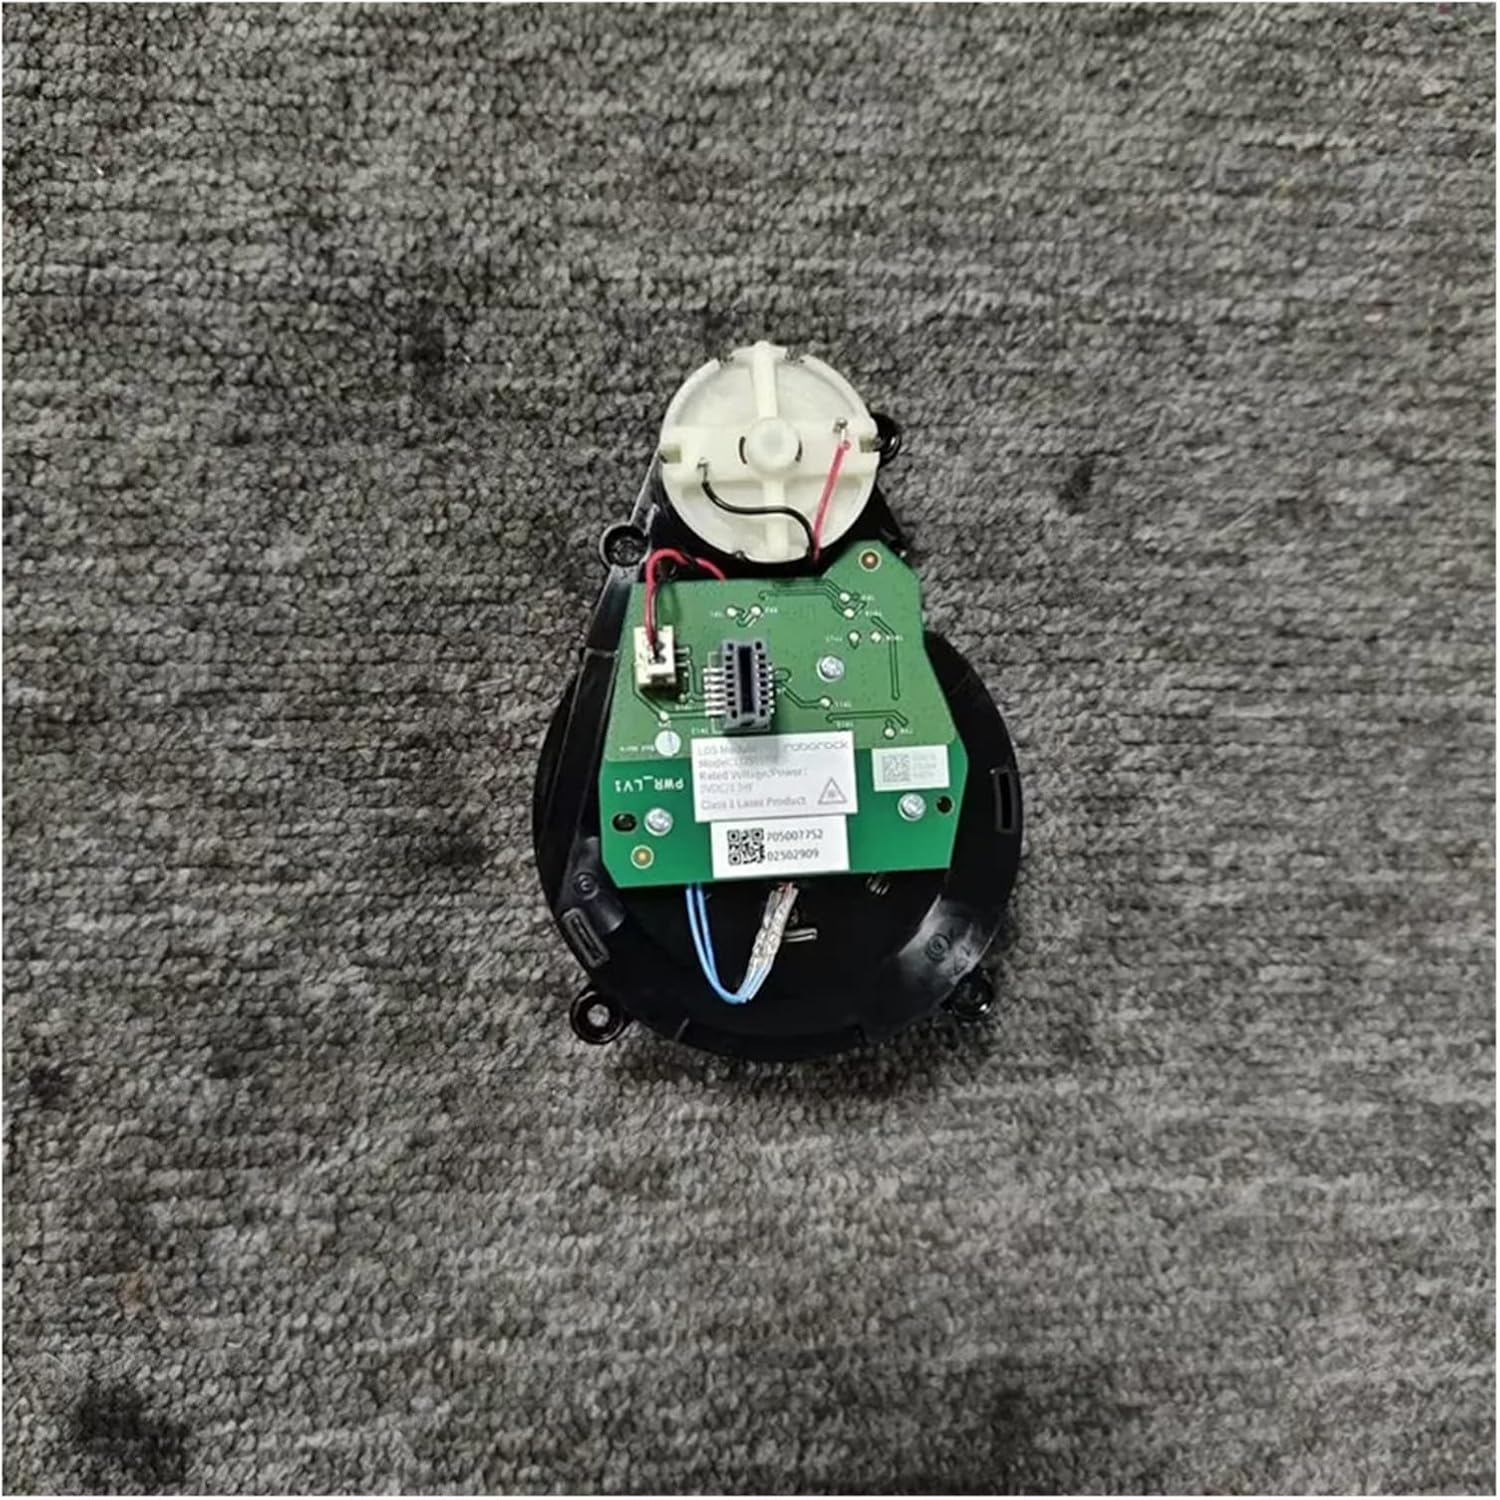
Figure 3.3: Close-up view of the Lidar ranging motor's circuit board.

Figure 3.4: Side view of the Lidar ranging motor, showing the laser head opening.

Figure 3.5: Top-down view of the Lidar ranging motor with its protective cover.
- Reassembly and Testing:
- Carefully reassemble the vacuum cleaner's covers and panels, ensuring all screws are tightened.
- Place the vacuum cleaner on its charging base and power it on.
- Initiate a cleaning cycle to verify that the Lidar unit rotates correctly and the vacuum navigates without errors.
4. Operating Instructions
Once the KNVZNWFF Lidar Ranging Motor is correctly installed, its operation is integrated into the robotic vacuum cleaner's existing system. The motor will automatically activate and rotate the Lidar sensor when the vacuum cleaner is performing navigation, mapping, or cleaning tasks. No direct user interaction with the motor itself is required after installation.
5. Maintenance
To ensure the longevity and optimal performance of your Lidar Ranging Motor and the overall vacuum cleaner, regular maintenance is recommended:
- Regular Cleaning: It is recommended to clean the Lidar sensor window and the surrounding area of the Lidar module every 1-2 weeks. Dust and debris can obstruct the laser, affecting navigation accuracy. Use a soft, dry cloth for cleaning.
- Belt Inspection: Periodically inspect the drive belt for any signs of wear, cracking, or looseness. A worn belt can lead to inconsistent Lidar rotation.
- Component Replacement: As a general guideline for vacuum cleaner parts, consider replacing components like the Lidar ranging motor if significant performance degradation or error messages persist despite cleaning and troubleshooting.
6. Troubleshooting
If your Roborock vacuum cleaner exhibits navigation issues or error messages after replacing the Lidar Ranging Motor, consider the following:
Common Fault Scenarios:
- Unable to rotate after multiple restarts, displaying fault 1: This indicates the Lidar motor is not functioning or is obstructed.
- After a short period of work, fault 1 is displayed and then the rotation stops: This suggests intermittent motor failure or a power supply issue to the motor.

Figure 6.1: Illustration of a Lidar motor fault scenario.
Troubleshooting Steps:
- Check Connections: Ensure all electrical connectors to the Lidar module and motor are securely seated.
- Inspect Drive Belt: Verify that the drive belt is properly installed, not loose, and free from damage.
- Clear Obstructions: Ensure there are no physical obstructions preventing the Lidar turret from rotating freely.
- Restart Vacuum: Perform a full power cycle of the vacuum cleaner (turn off, wait 30 seconds, turn on).
- Factory Reset (if applicable): Consult your Roborock manual for instructions on performing a factory reset, which can sometimes resolve software-related issues.
- Contact Support: If the issue persists, contact the seller or a qualified service technician for further assistance.
7. Specifications
| Attribute | Value |
|---|---|
| Brand | KNVZNWFF |
| Model Name | Hei man ba |
| Compatible Models | Roborock S7, T7, T7S, S7 MaxV |
| Product Dimensions | 5"L x 5"W x 3"H |
| Item Weight | 1.76 ounces (50 Grams) |
| Voltage | 110 Volts |
| Item Package Quantity | 1 |
8. Warranty and Support
For specific warranty information regarding your KNVZNWFF Lidar Ranging Motor, please refer to the documentation provided at the time of purchase or contact the seller directly. If you encounter any issues that cannot be resolved using the troubleshooting steps in this manual, please reach out to the seller for technical support and assistance.